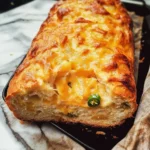
Ingredients
- Warm Water (105°F – 115°F / 40°C – 46°C): 1 ½ cups (360ml). The temperature is crucial! Too cold, and the yeast won’t activate properly. Too hot, and you’ll kill the yeast. Use a thermometer if you’re unsure – it should feel comfortably warm, like a baby’s bath.
- Active Dry Yeast: 2 ¼ teaspoons (7g) – equivalent to one standard packet. Ensure your yeast is fresh and not expired for the best rise. If using instant yeast, you can typically skip the initial proofing step and mix it directly with the dry ingredients, though proofing active dry yeast gives you confidence it’s working.
- Granulated Sugar: 1 tablespoon (12g). This provides food for the yeast, helping it activate and enhancing the bread’s flavor and browning.
- All-Purpose Flour: 3 ½ to 4 cups (440g – 500g), plus more for dusting. Start with 3 ½ cups; you may need a bit more depending on humidity and your specific flour. All-purpose flour provides a good balance of tenderness and structure. You can substitute bread flour for a chewier texture, but you might need slightly less flour overall.
- Salt: 1 ½ teaspoons (9g). Salt is essential for flavor balance and also helps control yeast activity and strengthen gluten structure. Don’t skip it! Use fine sea salt or regular table salt.
- Unsalted Butter: ¼ cup (4 tablespoons or 57g), melted and slightly cooled. Butter adds richness, flavor, and tenderness to the crumb. Melting it ensures even distribution. Let it cool slightly so it doesn’t cook the yeast or eggs (if using variations with eggs).
- Sharp Cheddar Cheese: 1 ½ cups (about 6 oz or 170g), shredded or cubed. Sharp or extra-sharp cheddar provides the best flavor punch against the bread and jalapeños. Shredding it yourself from a block generally yields better melting results than pre-shredded cheese (which often contains anti-caking agents). Cubing gives distinct pockets of cheese. You can use a mix! Reserve a little for sprinkling on top if desired.
- Jalapeños: 2-3 medium fresh jalapeños, finely diced. This equates to roughly ½ to ¾ cup diced. Adjust the amount based on your heat preference. Crucially, decide if you want to include the seeds and membranes – this is where most of the heat resides. Remove them for milder spice, leave some or all in for more kick. You can also use pickled jalapeños (pat them very dry first!), which offer a tangier, slightly less intense heat. Wear gloves when handling fresh jalapeños to avoid skin irritation.
Optional:
- Egg Wash (for crust): 1 large egg beaten with 1 tablespoon of water or milk. Brushing this on before baking gives a shinier, deeper golden crust.
- Coarse Sea Salt: For sprinkling on top before baking, adds texture and flavor pops.
Having everything measured and ready (mise en place) makes the baking process smoother and more enjoyable.
Instructions
Step 1: Activate the Yeast (Proofing)
- In a large mixing bowl (or the bowl of your stand mixer), combine the warm water, granulated sugar, and active dry yeast.
- Give it a gentle stir.
- Let the mixture stand for 5-10 minutes. You should see it become foamy or bubbly on the surface. This indicates the yeast is alive and active.
- If the mixture doesn’t foam: Your yeast might be old, or the water temperature was off. Discard the mixture and start again with fresh yeast and properly temperatured water. This step is crucial for active dry yeast. (If using instant yeast, you can often mix it with the flour and salt, then add the warm water and melted butter).
Step 2: Combine Ingredients & Form the Dough
- Once the yeast is foamy, add the melted (and slightly cooled) butter to the bowl.
- Add the salt and 3 ½ cups (440g) of the all-purpose flour.
- Using a Stand Mixer: Attach the dough hook. Mix on low speed until the ingredients start to come together into a shaggy dough.
- Mixing by Hand: Use a sturdy wooden spoon or spatula to mix the ingredients until a shaggy dough forms. It will be sticky initially.
Step 3: Knead the Dough
- Kneading develops the gluten, which gives the bread its structure and chewy texture.
- Using a Stand Mixer: Increase the speed to medium-low. Knead the dough for 7-10 minutes. The dough should become smooth, elastic, and pull away from the sides of the bowl. If the dough seems excessively sticky after a few minutes, add more flour, 1 tablespoon at a time, until it’s manageable but still slightly tacky. Avoid adding too much flour, as this can make the bread dense.
- Kneading by Hand: Turn the shaggy dough out onto a lightly floured surface. Knead by hand for 10-15 minutes. To knead, fold the dough over onto itself, then push it down and away from you with the heel of your hand. Rotate the dough a quarter turn and repeat. Continue this fold-push-turn motion. The dough will start sticky but will become smoother and more elastic as you work. Add minimal flour to the surface only as needed to prevent sticking. The dough is ready when it’s smooth, elastic, and springs back slowly when poked gently. You should be able to stretch a small piece thin enough to see light through it without it tearing immediately (the “windowpane test”).
Step 4: First Rise (Bulk Fermentation)
- Lightly grease a large, clean bowl with oil or cooking spray.
- Shape the kneaded dough into a smooth ball. Place the dough ball into the greased bowl, turning it once to coat the entire surface lightly with oil. This prevents it from drying out.
- Cover the bowl tightly with plastic wrap or a clean kitchen towel.
- Place the bowl in a warm, draft-free spot to rise. Ideal temperature is around 75°F – 85°F (24°C – 29°C). (A slightly warmed oven – turned off! – or on top of the refrigerator can work).
- Let the dough rise for 1 to 1.5 hours, or until it has doubled in size. The exact time will depend on the ambient temperature and yeast activity. To check if it’s ready, gently poke two fingers into the dough – if the indentation remains or springs back very slowly, it’s ready.
Step 5: Incorporate Cheese & Jalapeños and Shape the Loaf
- Once doubled, gently punch down the center of the dough to release the trapped gases.
- Turn the dough out onto a lightly floured surface.
- Gently press or roll the dough into a rectangle, roughly 9×12 inches (or sized appropriately for your loaf pan).
- Sprinkle about two-thirds of the shredded/cubed cheddar cheese and two-thirds of the diced jalapeños evenly over the surface of the rectangle, leaving a small border along one long edge.
- Starting from the long edge opposite the clean border, tightly roll the dough up into a log, like a jelly roll. Pinch the seam firmly to seal it. Pinch the ends closed as well.
- You can either place this log seam-side down into a lightly greased 9×5 inch loaf pan OR shape it into a freeform oval or round loaf (boule) and place it on a baking sheet lined with parchment paper.
- Optional: Sprinkle the remaining cheese and jalapeños over the top of the loaf for a more decorated crust.
Step 6: Second Rise (Proofing)
- Cover the shaped loaf loosely with greased plastic wrap or a clean kitchen towel. Don’t cover too tightly, as it needs room to expand.
- Let the loaf rise again in a warm, draft-free place for 45 minutes to 1 hour, or until it has puffed up noticeably and looks airy. It may not fully double this time, but it should increase in size by about 50-75%. Don’t overproof, as this can lead to a collapsed loaf during baking. A gentle poke should leave a slight indentation that slowly springs back.
Step 7: Prepare for Baking & Bake
- About 20-30 minutes before the second rise is complete, preheat your oven to 375°F (190°C). Position an oven rack in the center.
- Optional Egg Wash: If desired, gently brush the top of the risen loaf with the prepared egg wash (1 egg beaten with 1 tbsp water/milk). This enhances browning and shine. Be gentle so you don’t deflate the loaf. Sprinkle with coarse salt now if using.
- Optional Scoring: If making a freeform loaf, you can make a few shallow slashes (about ¼ to ½ inch deep) across the top with a very sharp knife or baker’s lame just before baking. This allows steam to escape in a controlled way and can create an attractive pattern. It’s less necessary for a loaf baked in a pan.
- Carefully place the loaf pan or baking sheet into the preheated oven.
- Bake for 35 to 45 minutes. The bread should be beautifully golden brown on top and sound hollow when tapped gently on the bottom (carefully remove from pan to test if needed).
- The most accurate way to check for doneness is with an instant-read thermometer: Inserted into the center of the loaf (avoiding large cheese pockets), it should register between 190°F and 200°F (88°C – 93°C).
- If the crust is browning too quickly before the center is cooked, you can loosely tent the loaf with aluminum foil for the remaining baking time.
Step 8: Cool Completely
- Immediately remove the bread from the loaf pan (if used) and transfer it to a wire cooling rack.
- This step is crucial! Let the bread cool completely, or at least for 1-2 hours, before slicing. Hot bread is still setting its structure internally. Slicing too soon can result in a gummy texture and may cause the loaf to collapse slightly. Resist the temptation! The wait will be worth it.
Step 9: Slice and Enjoy!
- Once cooled, use a serrated bread knife to slice the Cheddar Jalapeño Bread. Serve as desired (ideas below!).
Nutrition
- Serving Size: one normal portion
- Calories: 220 - 280 calories