

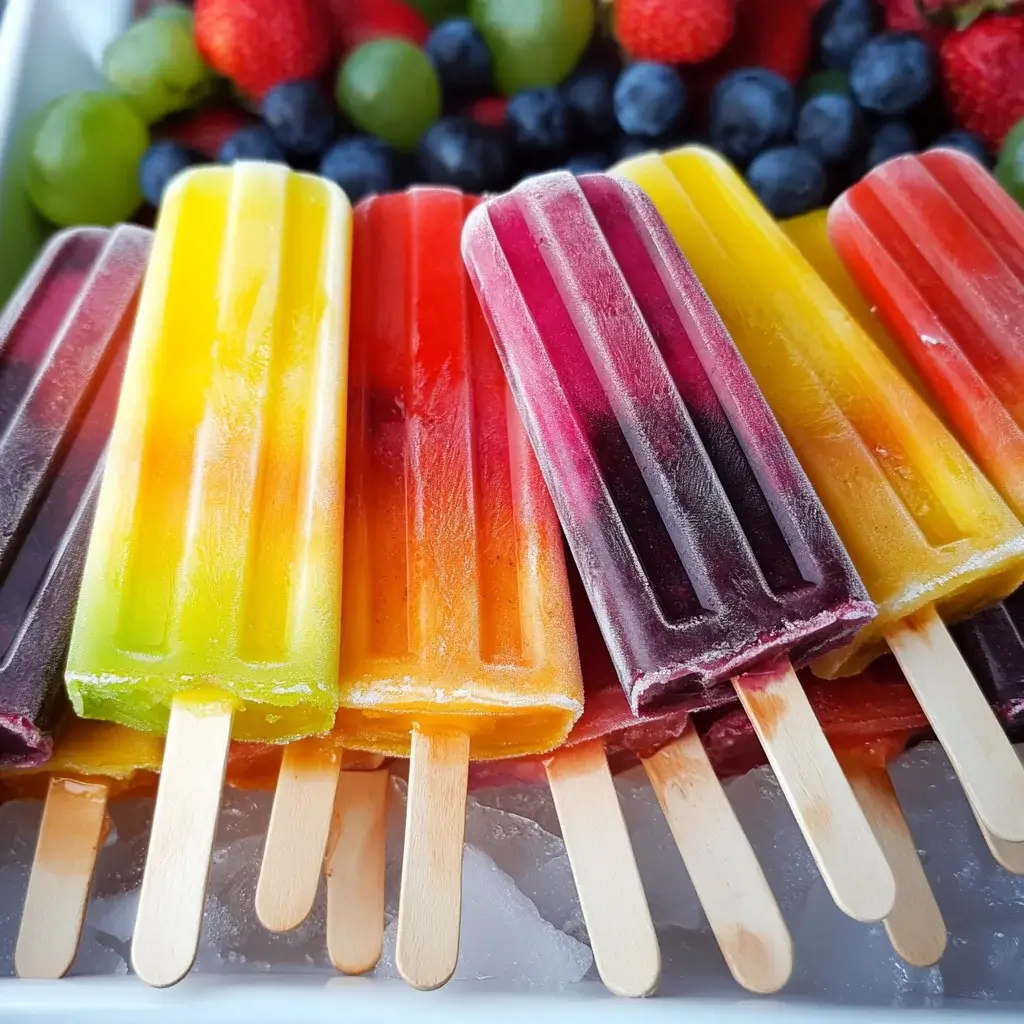
Summer in our household is synonymous with two things: sunshine and popsicles! And not just any popsicles, but vibrant, homemade Rainbow Popsicles. There’s something truly magical about layers of naturally flavored fruit purees frozen into a beautiful, colorful treat. Last weekend, with temperatures soaring, my kids were clamoring for something to cool them down. Instead of reaching for store-bought sugary ice pops, we decided to embark on a fun afternoon project – creating our own Rainbow Popsicles. The kitchen transformed into a vibrant laboratory as we blended fruits of every hue: strawberries, oranges, pineapples, kiwis, blueberries, and blackberries. The aroma alone was intoxicating, a promise of the refreshing delight to come. The best part? Watching their eyes widen with each layer we poured into the molds, anticipation building with every color added. The final result was nothing short of spectacular. These weren’t just popsicles; they were edible works of art. The taste was even better – naturally sweet, intensely fruity, and utterly refreshing. My usually picky eaters devoured them in minutes, leaving behind sticky smiles and requests for more. If you’re looking for a healthy, fun, and visually stunning summer treat, look no further. These Rainbow Popsicles are guaranteed to be a hit with kids and adults alike, and the best part is, they are incredibly easy to make! Let’s dive into the recipe and discover how to create your own rainbow of deliciousness.
Ingredients: Your Palette of Fruity Colors
Creating rainbow popsicles is all about layering different colored fruit purees. The beauty of this recipe is its versatility – you can use almost any fruit you love to create your own rainbow. Here’s a guide to the fruits and ingredients you’ll need to achieve that vibrant rainbow effect, along with some suggested quantities. Remember, these are just guidelines, feel free to adjust based on your preferences and the size of your popsicle molds.
For the Red Layer:
- Strawberries: 2 cups, fresh or frozen (if frozen, thaw slightly) – Strawberries provide a classic, sweet red layer. Their natural sweetness and vibrant color make them a perfect base.
- Raspberries: 1 cup, fresh or frozen (optional, for a deeper red and slightly tart flavor) – Raspberries can enhance the red color and add a lovely tartness that balances the sweetness.
- Water or Juice: ¼ cup (apple juice, white grape juice, or water) – To help blend the fruit into a smooth puree. Juice will add a touch more sweetness and flavor, while water keeps the flavor purely fruit-focused.
- Sweetener (Optional): 1-2 tablespoons honey, maple syrup, or agave nectar (adjust to taste, or omit for naturally sweet popsicles) – Depending on the sweetness of your strawberries and raspberries, you might want to add a touch of sweetener. Start with less and add more to taste.
For the Orange Layer:
- Oranges: 2 large oranges, peeled and segmented (about 1 ½ cups orange segments) – Fresh oranges provide a bright, citrusy orange layer. Choose juicy oranges for the best flavor.
- Mango: 1 cup, diced, fresh or frozen (if frozen, thaw slightly) – Mango adds a tropical sweetness and a beautiful orange hue. It also provides a creamy texture to the popsicle.
- Carrot Juice (Optional): ¼ cup (for a deeper orange color and added nutrients) – Carrot juice can enhance the orange color and add a subtle earthy sweetness and extra vitamins.
- Water or Orange Juice: ¼ cup (to help blend) – Similar to the red layer, use water or orange juice to adjust the consistency for blending.
For the Yellow Layer:
- Pineapple: 2 cups, diced, fresh or canned (if canned, drain well) – Pineapple offers a tangy and sweet tropical flavor and a vibrant yellow color. Fresh pineapple is best, but canned works in a pinch.
- Peach or Nectarine: 1 cup, diced, ripe (optional, for a softer yellow and added sweetness) – Peach or nectarine can soften the yellow color slightly and add a delicate sweetness and flavor.
- Lemon Juice: 1 tablespoon (to brighten the flavor and prevent browning) – Lemon juice enhances the pineapple flavor and keeps the yellow layer bright and vibrant.
- Water or Pineapple Juice: ¼ cup (to help blend) – Use water or pineapple juice to adjust the consistency for blending.
For the Green Layer:
- Kiwi: 2-3 kiwis, peeled and sliced (about 1 ½ cups kiwi slices) – Kiwi provides a vibrant green color and a slightly tart and refreshing flavor.
- Green Grapes: 1 cup, seedless green grapes – Green grapes enhance the green color and add sweetness and juiciness.
- Spinach or Kale (Optional): ½ cup, packed (for added nutrients, taste is masked by the fruit) – For a hidden boost of greens, spinach or kale can be added without significantly altering the flavor or color, especially when combined with kiwi and grapes.
- Water or Apple Juice: ¼ cup (to help blend) – Use water or apple juice to adjust the consistency for blending.
For the Blue/Purple Layer:
- Blueberries: 2 cups, fresh or frozen (if frozen, no need to thaw) – Blueberries are essential for the blue/purple layer. Frozen blueberries work perfectly and can even thicken the puree slightly.
- Blackberries: 1 cup, fresh or frozen (optional, for a deeper purple color) – Blackberries deepen the purple hue and add a slightly tart and complex flavor.
- Purple Grapes: 1 cup, seedless purple grapes (optional, to enhance the purple color and sweetness) – Purple grapes can further enhance the purple color and add natural sweetness.
- Water or Grape Juice: ¼ cup (to help blend) – Use water or grape juice to adjust the consistency for blending.
Equipment:
- Popsicle Molds: Choose molds made of silicone or plastic. Silicone molds are generally easier to demold. You’ll need molds to make approximately 6-8 popsicles, depending on their size.
- Blender or Food Processor: To create smooth fruit purees. A high-speed blender will give you the smoothest results, but a regular blender or food processor will also work.
- Measuring Cups and Spoons: For accurate ingredient measurements.
- Spoons or Small Ladle: For layering the purees into the popsicle molds.
- Freezer: To freeze the popsicles.
- Popsicle Sticks: Wooden or reusable popsicle sticks.
Remember to choose ripe, flavorful fruits for the best tasting popsicles. Organic fruits are always a great option if available. Don’t be afraid to experiment with different fruit combinations within each color category to find your favorite flavor profiles! The ingredients list is just the starting point – let your creativity flow and customize your rainbow popsicles to your liking.
Instructions: Crafting Your Rainbow Layer by Layer
Making Rainbow Popsicles is a simple process, but it does require a bit of patience as you need to freeze each layer before adding the next. This layering technique is what creates the beautiful rainbow effect. Here’s a step-by-step guide to help you create your own stunning and delicious Rainbow Popsicles.
Step 1: Prepare Your Fruit Purees (One Color at a Time)
- Choose your first color: Start with red, as it’s often the bottom layer in a rainbow. Gather the ingredients for your red layer (strawberries, raspberries, water/juice, sweetener if using).
- Blend the ingredients: Place all the red layer ingredients into your blender or food processor. Blend until completely smooth. Taste and adjust sweetness if needed. If the puree is too thick, add a little more water or juice, one tablespoon at a time, until it reaches a pourable consistency, similar to a thick smoothie.
- Repeat for each color: Wash your blender thoroughly between each color to prevent colors from mixing and ensure vibrant, distinct layers. Follow the same blending process for the orange, yellow, green, and blue/purple layers, one color at a time. Remember to taste and adjust sweetness or consistency for each layer as needed.
Step 2: Layering the Popsicles
- Start with the first color: Pour the first color puree (red in this case) into your popsicle molds, filling each mold about ¼ to ⅓ full. Be careful not to overfill, as you need to leave room for subsequent layers.
- Freeze the first layer: Place the popsicle molds in the freezer. It’s crucial to freeze each layer completely before adding the next to prevent colors from bleeding into each other and to create distinct layers. Freeze for at least 1-2 hours, or until the first layer is solid. To check if it’s frozen enough, gently touch the surface – it should be firm to the touch and not liquidy.
- Add the second layer: Once the first layer is frozen solid, remove the molds from the freezer. Carefully pour the second color puree (orange) over the frozen red layer. Again, fill each mold about ¼ to ⅓ full, leaving room for the remaining layers.
- Freeze the second layer: Return the molds to the freezer and freeze for another 1-2 hours, or until the orange layer is solid.
- Continue layering and freezing: Repeat the layering and freezing process for each remaining color – yellow, green, and blue/purple. Make sure each layer is fully frozen before adding the next. This step is key to achieving distinct and beautiful rainbow layers.
Step 3: Insert Popsicle Sticks
- Insert sticks after the second or third layer is frozen: The best time to insert popsicle sticks is when the second or third layer is partially frozen but still slightly soft. This will ensure the sticks stay upright and centered. If you insert them too early, they might fall to the side as the popsicles freeze. If you insert them too late (when fully frozen), it might be difficult to push them in.
- Gently push sticks into the center: Carefully insert a popsicle stick into the center of each popsicle, pushing it down through the frozen layers. Ensure the stick is inserted deep enough to be secure but not so deep that it pokes through the bottom of the mold.
Step 4: Final Freeze and Demolding
- Final freeze: Once all layers are added and popsicle sticks are inserted, return the molds to the freezer for a final freeze. Freeze for at least 4-6 hours, or preferably overnight, to ensure the popsicles are completely frozen solid and easy to demold.
- Demolding: To demold the popsicles, run the popsicle molds under lukewarm water for a few seconds, just until the popsicles loosen from the molds. Be careful not to run them under water for too long, or they will start to melt. Gently wiggle and pull the popsicle sticks to remove the popsicles from the molds. Silicone molds are generally easier to demold than plastic molds.
- Serve and enjoy! Your vibrant and refreshing Rainbow Popsicles are ready to be enjoyed! Serve them immediately for the best taste and texture.
Tips for Success:
- Patience is key: The layering process takes time due to the freezing between each layer. Plan ahead and start making your popsicles a day in advance if needed.
- Freeze layers completely: Ensure each layer is fully frozen before adding the next. This is crucial for preventing colors from mixing and creating distinct rainbow layers.
- Don’t overfill the molds: Leave some space at the top of the molds for expansion during freezing and for adding subsequent layers.
- Use a level freezer surface: Make sure your freezer surface is level to ensure the layers freeze evenly and horizontally.
- Adjust sweetness to your liking: Taste each puree before layering and adjust the sweetness as needed based on your preference and the sweetness of the fruits.
With a little patience and these detailed instructions, you’ll be creating beautiful and delicious Rainbow Popsicles that are sure to impress and delight everyone! Enjoy the process of building your rainbow, layer by colorful layer.
Nutrition Facts: Wholesome and Refreshing Treat
Rainbow Popsicles made with natural fruits are not only a delicious and visually appealing treat but also a relatively healthy option, especially compared to store-bought sugary ice pops. Here’s a general overview of the nutrition facts for one Rainbow Popsicle, based on the ingredients listed above. Please note that these are estimates and can vary depending on the specific fruits used, the addition of sweeteners, and the size of your popsicle molds.
Serving Size: 1 Rainbow Popsicle
Approximate Servings per Recipe: 6-8 popsicles (depending on mold size)
Estimated Nutrition Facts per Serving (per popsicle):
- Calories: 80-120 calories – This range depends largely on the sweetness of the fruits and the amount of added sweetener, if any. Using naturally sweet fruits and minimizing added sweeteners will keep the calorie count lower.
- Sugar: 15-25 grams – Most of the sugar comes from the natural sugars in fruits. Added sweeteners will increase the sugar content. While this may seem high, it’s naturally occurring sugar from whole fruits, which is different from added refined sugars.
- Fat: 0-1 gram – Fruit is naturally very low in fat.
- Saturated Fat: 0 grams
- Cholesterol: 0 mg
- Sodium: 5-15 mg – Naturally occurring sodium in fruits is very low.
- Carbohydrates: 20-30 grams – Primarily from the natural sugars and fiber in fruits.
- Fiber: 2-4 grams – Fruits are a good source of dietary fiber, which is beneficial for digestion and helps to regulate blood sugar levels.
- Protein: <1 gram – Fruit is not a significant source of protein.
- Vitamin C: High – Fruits like strawberries, oranges, kiwi, and blueberries are excellent sources of Vitamin C, an important antioxidant and immune booster.
- Vitamin A: Varies depending on fruits – Fruits like mango and carrot juice contribute Vitamin A, important for vision and immune function.
- Other Vitamins and Minerals: Varies depending on fruits – Rainbow Popsicles also provide other vitamins and minerals found in the fruits used, such as potassium, folate, and antioxidants like anthocyanins (in blueberries and blackberries).
Key Nutritional Benefits:
- Made with Real Fruit: Provides natural vitamins, minerals, and fiber from whole fruits.
- Hydrating: Popsicles are a great way to stay hydrated, especially during hot summer months.
- Lower in Added Sugar (compared to store-bought): You control the amount of added sweetener, or can even omit it entirely, making them a healthier alternative to many commercial popsicles.
- Good Source of Vitamins and Antioxidants: Contributes to your daily intake of essential vitamins and antioxidants, supporting overall health and well-being.
- Fun way to eat fruit: Especially great for kids who might be picky eaters, making fruits more appealing and enjoyable.
Important Note: While Rainbow Popsicles are a healthier treat option, moderation is still key, as they do contain natural sugars from fruits. Enjoy them as a refreshing and nutritious treat as part of a balanced diet. For those watching their sugar intake, consider using less sweet fruits, minimizing added sweeteners, or using sugar-free sweeteners in moderation.
Preparation Time: Planning for Rainbow Perfection
Making Rainbow Popsicles is not a lengthy process in terms of active preparation time, but it does require significant freezing time between each layer. Here’s a breakdown of the estimated preparation time:
Active Preparation Time:
- Fruit Prep (washing, peeling, chopping): 20-30 minutes (depending on your fruit choices and chopping speed).
- Blending each layer (5-6 layers): 15-20 minutes (approximately 3-4 minutes per layer, including washing the blender between colors).
- Layering into molds: 10-15 minutes (pouring each layer, allowing for some spillage and cleanup).
- Inserting popsicle sticks: 5 minutes.
- Demolding: 5 minutes.
Total Active Preparation Time: Approximately 55-75 minutes.
Freezing Time:
- Freezing time per layer (5-6 layers): 1-2 hours per layer.
- Total Layer Freezing Time: Approximately 5-12 hours (depending on freezer temperature and layer thickness).
- Final Freeze (after all layers and sticks are in): 4-6 hours, or preferably overnight.
Total Freezing Time: Approximately 9-18 hours (minimum, ideally overnight or longer for best results).
Total Recipe Time (Active + Freezing): Approximately 10-20 hours.
Planning Ahead is Key:
As you can see, the majority of the time is spent freezing. Therefore, planning ahead is essential when making Rainbow Popsicles. It’s best to start making them at least a day before you plan to serve them.
Timeline Suggestions:
- Day 1 (Morning/Afternoon):
- Prepare all fruit purees.
- Pour the first 2-3 layers and freeze between each layer.
- Insert popsicle sticks after the second or third layer is partially frozen.
- Day 1 (Evening/Overnight):
- Continue layering and freezing if you haven’t finished all layers.
- Allow popsicles to freeze completely overnight.
- Day 2 (or later):
- Demold and serve your Rainbow Popsicles!
Tips to Speed Up Preparation:
- Use frozen fruits: Frozen fruits are already prepped and can save you time on washing and chopping. They also help thicken the purees.
- Prep fruits in advance: If using fresh fruits, wash, peel, and chop them ahead of time and store them in the refrigerator until ready to blend.
- Work in batches: You can prepare all the fruit purees in advance and store them in the refrigerator in airtight containers until you are ready to layer them. This will streamline the layering process.
- Efficient blending: Use a high-speed blender if you have one to quickly create smooth purees.
While the total time might seem long, remember that most of it is passive freezing time. The actual hands-on time is relatively short and enjoyable, especially if you involve kids in the process. The reward of vibrant, homemade Rainbow Popsicles is well worth the wait!
How to Serve Rainbow Popsicles: Elevating the Experience
Rainbow Popsicles are delightful on their own, but there are several ways to serve them to elevate the experience and make them even more special. Here are some ideas for serving and presentation:
Simple and Classic:
- Serve straight from the freezer: The most straightforward and refreshing way is to simply serve them directly from the freezer. They are perfect for a hot day, a quick afternoon treat, or after-dinner dessert.
- On a popsicle stand: Use a popsicle stand or holder to present them nicely, especially for parties or gatherings. This also helps prevent sticky drips.
Elevated Presentation:
- Garnish with fresh fruit: Arrange a few fresh berries, sliced kiwi, or orange segments around the popsicles on a plate for a beautiful and colorful presentation that complements the rainbow theme.
- Drizzle with melted chocolate or white chocolate: For a more indulgent treat, drizzle melted dark chocolate, milk chocolate, or white chocolate over the popsicles just before serving. The chocolate will harden quickly on the cold popsicles, adding a delightful texture and flavor contrast.
- Sprinkle with chopped nuts or sprinkles: Before the chocolate drizzle hardens (if using), or even on their own, sprinkle chopped nuts (like almonds, pistachios, or pecans), shredded coconut, or colorful sprinkles for added texture, flavor, and visual appeal.
- Serve with a dipping sauce: Offer a side of yogurt dip, fruit sauce (like a berry compote or mango puree), or even a light cream cheese dip for dipping the popsicles. This adds another layer of flavor and fun.
For Parties and Gatherings:
- Rainbow Popsicle Bar: Set up a DIY Rainbow Popsicle bar where guests can customize their popsicles with various toppings like chocolate drizzles, sprinkles, chopped nuts, shredded coconut, and fresh fruit.
- Themed party: Incorporate Rainbow Popsicles into a rainbow-themed party, a summer party, or a kids’ birthday party. They are naturally festive and colorful.
- Pair with other summer treats: Serve alongside other refreshing summer desserts like fruit salad, watermelon slices, or lemonade for a complete summer dessert spread.
Kid-Friendly Serving Ideas:
- Fun popsicle sticks: Use popsicle sticks with fun shapes or colors to make them extra appealing to kids.
- Edible glitter (for kids’ parties): A sprinkle of edible glitter can add a touch of magic and sparkle, especially for kids’ parties.
- Serve in fun cups or bowls: Present popsicles in colorful cups or bowls to make them even more enticing for children.
Serving Tips:
- Serve immediately: Rainbow Popsicles are best enjoyed immediately after demolding for optimal texture and to prevent excessive melting, especially on a hot day.
- Keep them cold: If serving outdoors, keep the popsicles in a cooler or on ice to prevent them from melting too quickly.
- Napkins are essential: Provide plenty of napkins, as popsicles can get a bit messy, especially for kids.
No matter how you choose to serve them, Rainbow Popsicles are guaranteed to bring smiles and refreshment. Their vibrant colors and delicious fruity flavors make them a perfect treat for any occasion, from casual family moments to special celebrations.
Additional Tips for Rainbow Popsicle Perfection
Making Rainbow Popsicles is a fun and rewarding experience, and with a few extra tips, you can ensure your popsicles turn out perfect every time. Here are five additional tips to help you achieve Rainbow Popsicle perfection:
- Use Ripe and Flavorful Fruits: The quality of your fruits directly impacts the flavor of your popsicles. Choose ripe, in-season fruits for the best taste. Ripe fruits are naturally sweeter and more flavorful, reducing the need for added sweeteners. Taste your fruits before blending and adjust sweetness accordingly.
- Adjust Consistency for Layering: The consistency of each fruit puree is important for creating distinct layers. Each puree should be pourable but not too thin or watery. If a puree is too thick, add a tablespoon or two of water or juice at a time until it reaches the desired consistency. If it’s too thin, you can add a little more fruit or a spoonful of yogurt to thicken it slightly. A slightly thicker consistency will help prevent colors from bleeding into each other.
- Prevent Ice Crystals: To minimize ice crystals and create smoother popsicles, consider adding a touch of fat or sugar to each layer. The natural sugars in fruit help, but a small amount of honey, maple syrup, or even a tablespoon of coconut milk or yogurt per layer can further improve texture. Avoid over-blending, as over-blending can incorporate too much air and lead to icier popsicles.
- Get Creative with Fruit Combinations: Don’t be afraid to experiment with different fruit combinations within each color category. For example, for the red layer, you could use a mix of strawberries, watermelon, and cherries. For the green layer, try blending kiwi with honeydew melon and green apple. Explore different flavor profiles and find your favorite combinations. You can also add herbs like mint or basil to certain layers for a more sophisticated flavor.
- Make Dairy-Free or Vegan Rainbow Popsicles: Rainbow Popsicles are naturally dairy-free and vegan if you use water or fruit juice to blend the purees and avoid adding dairy products. Ensure any sweetener you use (if any) is also vegan (e.g., maple syrup, agave nectar, or simply omit sweetener). For a creamier texture in dairy-free popsicles, you can add a tablespoon of coconut cream or a dairy-free yogurt alternative to each layer.
By keeping these tips in mind, you can elevate your Rainbow Popsicle game and create even more delicious, vibrant, and satisfying frozen treats. Experiment, have fun, and enjoy the process of creating your own rainbow of flavors!
FAQ: Your Rainbow Popsicle Questions Answered
Do you have questions about making Rainbow Popsicles? Here are answers to some frequently asked questions to help you troubleshoot and create perfect popsicles every time:
Q1: Can I use different fruits for the rainbow layers?
A: Absolutely! The recipe is very versatile. You can use any fruits you like within each color category. For example, for red, you could use watermelon, cherries, or cranberries. For orange, try cantaloupe or papaya. For yellow, consider banana or yellow pear. For green, green apple or honeydew melon are great options. For blue/purple, you can use blackberries, purple grapes, or even plum. Be creative and use fruits that are in season and that you enjoy.
Q2: How do I prevent the colors from bleeding together?
A: The key to preventing color bleeding is to ensure each layer is fully frozen before adding the next layer. Freeze each layer for at least 1-2 hours, or until it’s solid to the touch. Also, avoid pouring the next layer directly onto the still-soft previous layer. Pour gently and slowly over a spoon or the side of the mold to minimize disturbance. A slightly thicker consistency for each puree can also help prevent bleeding.
Q3: My popsicles are too icy. How can I make them smoother?
A: Icy popsicles are often caused by too much water content. To make smoother popsicles:
* Use ripe fruits: Ripe fruits have more natural sugars, which help create a smoother texture.
* Add a touch of fat: A small amount of coconut milk, yogurt, or even avocado (in the green layer, it won’t affect the flavor) can help create a creamier texture.
* Add a little sugar or sweetener: Sugar lowers the freezing point of water, which can result in smoother popsicles. A small amount of honey, maple syrup, or agave nectar can help.
* Avoid over-blending: Over-blending can incorporate air and lead to icier popsicles. Blend just until smooth.
Q4: How long do Rainbow Popsicles last in the freezer?
A: Rainbow Popsicles will last in the freezer for up to 2-3 months when stored properly. To prevent freezer burn and maintain their quality, store them in an airtight container or wrap each popsicle individually in plastic wrap or reusable popsicle bags after they are fully frozen and demolded.
Q5: Can I make these popsicles without added sugar?
A: Yes, you can definitely make Rainbow Popsicles without added sugar. Many fruits are naturally sweet enough to create delicious popsicles without any extra sweetener. Taste your fruit purees before layering and see if they are sweet enough for your liking. If you prefer a sweeter popsicle and want to avoid refined sugar, you can use natural sweeteners like honey, maple syrup, agave nectar, or stevia in moderation. Using very ripe fruits will also maximize natural sweetness.
We hope these FAQs address your questions and help you confidently create your own batch of stunning and delicious Rainbow Popsicles. Happy popsicle making!
Print
Rainbow Popsicles recipe
Ingredients
For the Red Layer:
- Strawberries: 2 cups, fresh or frozen (if frozen, thaw slightly) – Strawberries provide a classic, sweet red layer. Their natural sweetness and vibrant color make them a perfect base.
- Raspberries: 1 cup, fresh or frozen (optional, for a deeper red and slightly tart flavor) – Raspberries can enhance the red color and add a lovely tartness that balances the sweetness.
- Water or Juice: ¼ cup (apple juice, white grape juice, or water) – To help blend the fruit into a smooth puree. Juice will add a touch more sweetness and flavor, while water keeps the flavor purely fruit-focused.
- Sweetener (Optional): 1-2 tablespoons honey, maple syrup, or agave nectar (adjust to taste, or omit for naturally sweet popsicles) – Depending on the sweetness of your strawberries and raspberries, you might want to add a touch of sweetener. Start with less and add more to taste.
For the Orange Layer:
- Oranges: 2 large oranges, peeled and segmented (about 1 ½ cups orange segments) – Fresh oranges provide a bright, citrusy orange layer. Choose juicy oranges for the best flavor.
- Mango: 1 cup, diced, fresh or frozen (if frozen, thaw slightly) – Mango adds a tropical sweetness and a beautiful orange hue. It also provides a creamy texture to the popsicle.
- Carrot Juice (Optional): ¼ cup (for a deeper orange color and added nutrients) – Carrot juice can enhance the orange color and add a subtle earthy sweetness and extra vitamins.
- Water or Orange Juice: ¼ cup (to help blend) – Similar to the red layer, use water or orange juice to adjust the consistency for blending.
For the Yellow Layer:
- Pineapple: 2 cups, diced, fresh or canned (if canned, drain well) – Pineapple offers a tangy and sweet tropical flavor and a vibrant yellow color. Fresh pineapple is best, but canned works in a pinch.
- Peach or Nectarine: 1 cup, diced, ripe (optional, for a softer yellow and added sweetness) – Peach or nectarine can soften the yellow color slightly and add a delicate sweetness and flavor.
- Lemon Juice: 1 tablespoon (to brighten the flavor and prevent browning) – Lemon juice enhances the pineapple flavor and keeps the yellow layer bright and vibrant.
- Water or Pineapple Juice: ¼ cup (to help blend) – Use water or pineapple juice to adjust the consistency for blending.
For the Green Layer:
- Kiwi: 2-3 kiwis, peeled and sliced (about 1 ½ cups kiwi slices) – Kiwi provides a vibrant green color and a slightly tart and refreshing flavor.
- Green Grapes: 1 cup, seedless green grapes – Green grapes enhance the green color and add sweetness and juiciness.
- Spinach or Kale (Optional): ½ cup, packed (for added nutrients, taste is masked by the fruit) – For a hidden boost of greens, spinach or kale can be added without significantly altering the flavor or color, especially when combined with kiwi and grapes.
- Water or Apple Juice: ¼ cup (to help blend) – Use water or apple juice to adjust the consistency for blending.
For the Blue/Purple Layer:
- Blueberries: 2 cups, fresh or frozen (if frozen, no need to thaw) – Blueberries are essential for the blue/purple layer. Frozen blueberries work perfectly and can even thicken the puree slightly.
- Blackberries: 1 cup, fresh or frozen (optional, for a deeper purple color) – Blackberries deepen the purple hue and add a slightly tart and complex flavor.
- Purple Grapes: 1 cup, seedless purple grapes (optional, to enhance the purple color and sweetness) – Purple grapes can further enhance the purple color and add natural sweetness.
- Water or Grape Juice: ¼ cup (to help blend) – Use water or grape juice to adjust the consistency for blending.
Instructions
Step 1: Prepare Your Fruit Purees (One Color at a Time)
- Choose your first color: Start with red, as it’s often the bottom layer in a rainbow. Gather the ingredients for your red layer (strawberries, raspberries, water/juice, sweetener if using).
- Blend the ingredients: Place all the red layer ingredients into your blender or food processor. Blend until completely smooth. Taste and adjust sweetness if needed. If the puree is too thick, add a little more water or juice, one tablespoon at a time, until it reaches a pourable consistency, similar to a thick smoothie.
- Repeat for each color: Wash your blender thoroughly between each color to prevent colors from mixing and ensure vibrant, distinct layers. Follow the same blending process for the orange, yellow, green, and blue/purple layers, one color at a time. Remember to taste and adjust sweetness or consistency for each layer as needed.
Step 2: Layering the Popsicles
- Start with the first color: Pour the first color puree (red in this case) into your popsicle molds, filling each mold about ¼ to ⅓ full. Be careful not to overfill, as you need to leave room for subsequent layers.
- Freeze the first layer: Place the popsicle molds in the freezer. It’s crucial to freeze each layer completely before adding the next to prevent colors from bleeding into each other and to create distinct layers. Freeze for at least 1-2 hours, or until the first layer is solid. To check if it’s frozen enough, gently touch the surface – it should be firm to the touch and not liquidy.
- Add the second layer: Once the first layer is frozen solid, remove the molds from the freezer. Carefully pour the second color puree (orange) over the frozen red layer. Again, fill each mold about ¼ to ⅓ full, leaving room for the remaining layers.
- Freeze the second layer: Return the molds to the freezer and freeze for another 1-2 hours, or until the orange layer is solid.
- Continue layering and freezing: Repeat the layering and freezing process for each remaining color – yellow, green, and blue/purple. Make sure each layer is fully frozen before adding the next. This step is key to achieving distinct and beautiful rainbow layers.
Step 3: Insert Popsicle Sticks
- Insert sticks after the second or third layer is frozen: The best time to insert popsicle sticks is when the second or third layer is partially frozen but still slightly soft. This will ensure the sticks stay upright and centered. If you insert them too early, they might fall to the side as the popsicles freeze. If you insert them too late (when fully frozen), it might be difficult to push them in.
- Gently push sticks into the center: Carefully insert a popsicle stick into the center of each popsicle, pushing it down through the frozen layers. Ensure the stick is inserted deep enough to be secure but not so deep that it pokes through the bottom of the mold.
Step 4: Final Freeze and Demolding
- Final freeze: Once all layers are added and popsicle sticks are inserted, return the molds to the freezer for a final freeze. Freeze for at least 4-6 hours, or preferably overnight, to ensure the popsicles are completely frozen solid and easy to demold.
- Demolding: To demold the popsicles, run the popsicle molds under lukewarm water for a few seconds, just until the popsicles loosen from the molds. Be careful not to run them under water for too long, or they will start to melt. Gently wiggle and pull the popsicle sticks to remove the popsicles from the molds. Silicone molds are generally easier to demold than plastic molds.
- Serve and enjoy! Your vibrant and refreshing Rainbow Popsicles are ready to be enjoyed! Serve them immediately for the best taste and texture.
Nutrition
- Serving Size: one normal portion
- Calories: 80-120
- Sugar: 15-25 grams
- Sodium: 5-15 mg
- Fat: 0-1 gram
- Carbohydrates: 20-30 grams
- Fiber: 2-4 grams
- Protein: 1 gram


