

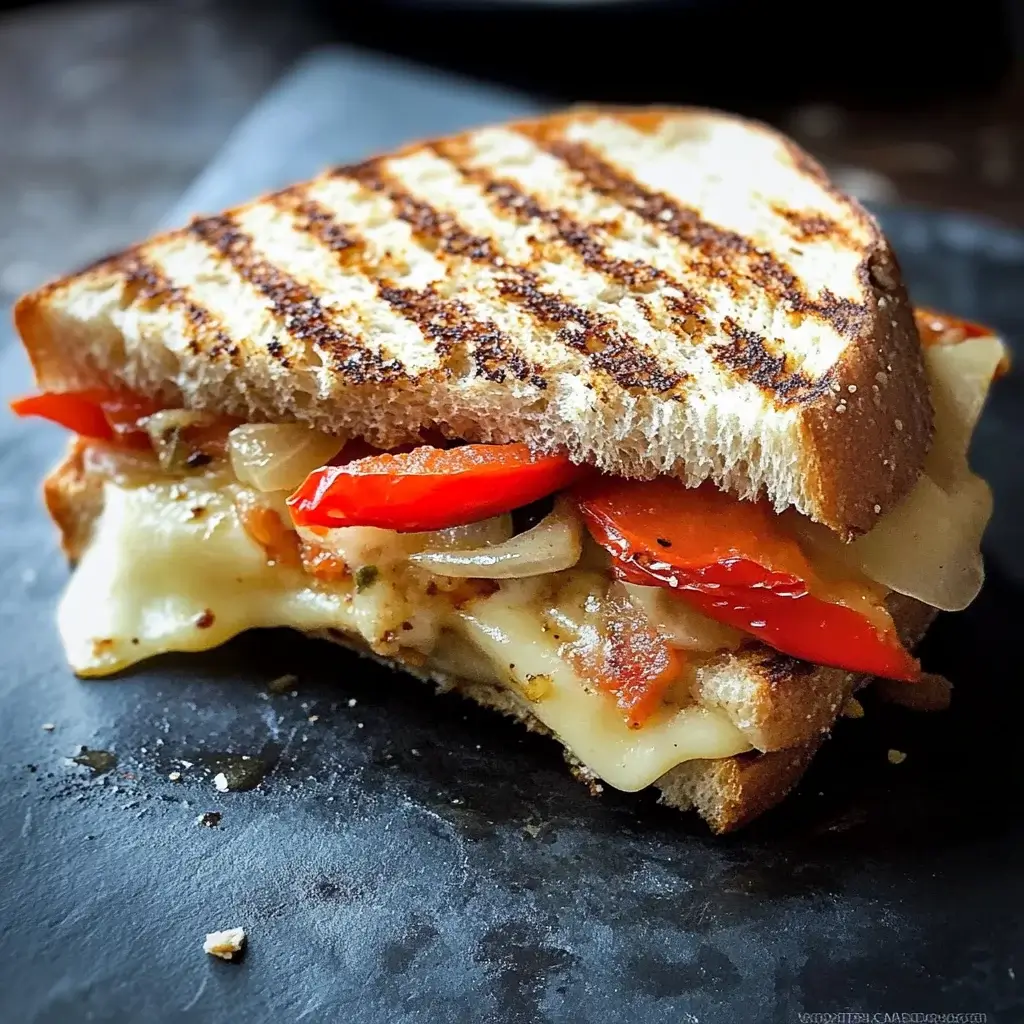
t’s funny how some of the simplest recipes can become absolute staples in your household. This Italian Gluten-Free Panini with Roasted Red Peppers is one of those for us. Initially, I was looking for a quick and satisfying lunch option that was also gluten-free for my sister who has celiac disease. We’ve tried countless gluten-free breads, some better than others, but finding one that actually tastes good toasted in a panini press? That felt like searching for a unicorn. However, this recipe, using a good quality gluten-free bread, absolutely nailed it. The combination of sweet roasted red peppers, creamy mozzarella, salty prosciutto, and fragrant pesto just sings together. The first time I made these, the whole family devoured them – gluten-free or not, everyone was impressed. Even my picky teenager, who usually shuns anything remotely vegetable-like, was asking for seconds. Now, it’s a regular on our lunch rotation, and I often make a batch of roasted red peppers on the weekend just to have them ready for these paninis during the week. It’s become a testament to how delicious and versatile gluten-free cooking can be, proving that you don’t have to compromise on flavor or texture when catering to dietary needs.
Ingredients for Italian Gluten-Free Panini Sandwich With Roasted Red Peppers
To create these delectable Italian Gluten-Free Panini Sandwiches with Roasted Red Peppers, you’ll need a selection of fresh, flavorful ingredients that work together to build a symphony of taste and texture. Each component plays a crucial role in the final outcome, so choosing quality ingredients is key. Here’s a comprehensive list of what you’ll need:
- For the Roasted Red Peppers:
- 3 large red bell peppers: Choose peppers that are firm, brightly colored, and free from blemishes. Red bell peppers are naturally sweeter than other colors, making them ideal for roasting and bringing a vibrant flavor to the panini. They are also packed with Vitamin C and antioxidants, adding a healthy boost to your meal.
- 2 tablespoons olive oil: Extra virgin olive oil is recommended for its rich flavor and health benefits. It helps the peppers roast beautifully, preventing them from drying out and enhancing their natural sweetness. Olive oil also contributes healthy fats to the recipe.
- 1/2 teaspoon dried oregano: Oregano adds a classic Italian herb flavor that complements the sweetness of the red peppers perfectly. Dried oregano is convenient and readily available, but you can also use fresh oregano if you have it on hand (about 1 tablespoon chopped fresh oregano).
- 1/4 teaspoon salt: Salt is essential for enhancing the flavors of the peppers. Use sea salt or kosher salt for the best taste.
- 1/4 teaspoon black pepper: Freshly ground black pepper adds a subtle warmth and spice that balances the sweetness of the peppers and the herbaceousness of the oregano.
- For the Panini:
- 6 slices gluten-free panini bread: The foundation of any great panini is the bread. Look for a good quality gluten-free panini bread that is sturdy enough to hold the fillings and toast well without becoming crumbly. There are many excellent gluten-free bread brands available now, some specifically designed for panini or grilling. Consider trying brands like Schar Artisan Baker Multigrain Ciabatta Rolls (sliced), Canyon Bakehouse Gluten-Free Heritage Style Bread (sliced), or Little Northern Bakehouse Wide Slice Bread. Pre-sliced bread is convenient, but you can also use a gluten-free baguette or loaf and slice it yourself into panini-sized portions, about ½ inch thick. Ensure the slices are roughly the same size and shape for even cooking in the panini press.
- 6 tablespoons pesto: Pesto adds a burst of fresh, herbaceous, and garlicky flavor that is quintessentially Italian. You can use store-bought pesto for convenience, or make your own homemade pesto for an even more vibrant and authentic taste. Classic basil pesto is delicious, but you can also experiment with other pesto variations like sun-dried tomato pesto or roasted red pepper pesto for an extra layer of flavor complexity. Ensure your pesto is also gluten-free, as some commercially prepared pestos may contain gluten-based thickeners or fillers.
- 6 slices mozzarella cheese: Fresh mozzarella, also known as mozzarella di bufala or fior di latte, is the best choice for this panini. It has a milky, delicate flavor and a wonderfully melty texture when heated. Look for mozzarella that is packed in water or whey. If fresh mozzarella is unavailable, you can use part-skim mozzarella cheese, but the flavor and texture will be slightly different. Slice the mozzarella into slices that are about ¼ inch thick and roughly the same size as your bread slices.
- 6 slices prosciutto (optional, but highly recommended): Prosciutto adds a salty, savory, and slightly sweet element to the panini that complements the other flavors beautifully. It provides a wonderful contrast to the creamy mozzarella and sweet roasted red peppers. Prosciutto is a dry-cured ham from Italy, known for its delicate texture and rich flavor. If you are vegetarian or prefer to omit prosciutto, you can substitute it with other savory ingredients like grilled eggplant, marinated artichoke hearts, or sun-dried tomatoes for a similar depth of flavor. Ensure the prosciutto is thinly sliced for easy layering in the panini.
- Optional: Balsamic glaze for drizzling: Balsamic glaze adds a touch of sweetness and acidity that enhances all the flavors in the panini. It provides a beautiful visual finish and a sophisticated touch. You can buy balsamic glaze pre-made, or easily make your own by simmering balsamic vinegar until it thickens into a syrupy consistency. A drizzle of balsamic glaze just before serving elevates the panini to another level of deliciousness.
Choosing high-quality, fresh ingredients is paramount to achieving the best flavor and texture in your Italian Gluten-Free Panini Sandwich with Roasted Red Peppers. Don’t skimp on the bread, mozzarella, or pesto – these are the stars of the show! And remember, the optional prosciutto and balsamic glaze can take this panini from good to absolutely extraordinary.
Instructions: Making Your Italian Gluten-Free Panini Masterpiece
Now that you’ve gathered all your high-quality ingredients, it’s time to bring this Italian Gluten-Free Panini Sandwich with Roasted Red Peppers to life. Follow these detailed, step-by-step instructions to create panini perfection:
Step 1: Roasting the Red Peppers (Preheat and Prep)
- Preheat your oven to 400°F (200°C). Preheating is crucial for even roasting and ensuring the peppers cook through properly without burning. Make sure your oven reaches the correct temperature before placing the peppers inside.
- Wash and prepare the red bell peppers. Rinse the red bell peppers thoroughly under cold water to remove any dirt or residue. Pat them dry with a clean kitchen towel or paper towels.
- Cut the peppers in half and remove seeds and membranes. Using a sharp knife, carefully cut each red bell pepper in half lengthwise, from stem to tip. Scoop out the seeds and white membranes from the inside of each pepper half. Discard the seeds and membranes. Leaving the membranes can result in a slightly bitter taste, so it’s best to remove them.
- Slice the pepper halves into strips (optional but recommended). For faster and more even roasting, and for easier assembly in the panini, slice each pepper half into strips that are about ½ inch wide. Slicing is not strictly necessary, you can roast the pepper halves directly, but strips cook more quickly and are more convenient for panini fillings.
Step 2: Seasoning and Roasting the Peppers
- Toss the pepper strips with olive oil, oregano, salt, and pepper. In a medium-sized bowl, place the sliced red pepper strips. Drizzle with 2 tablespoons of olive oil. Sprinkle with ½ teaspoon dried oregano, ¼ teaspoon salt, and ¼ teaspoon black pepper. Toss everything together with your hands or a spoon to ensure the pepper strips are evenly coated with the oil and seasonings. This step is crucial for infusing the peppers with flavor during roasting.
- Spread the seasoned pepper strips in a single layer on a baking sheet. Line a baking sheet with parchment paper for easy cleanup (optional, but recommended). Spread the seasoned red pepper strips in a single layer on the prepared baking sheet. Avoid overcrowding the baking sheet, as this will cause the peppers to steam instead of roast, and they won’t get that desirable slightly charred and caramelized flavor. If necessary, use two baking sheets to ensure a single layer.
- Roast in the preheated oven for 20-25 minutes, or until tender and slightly charred. Place the baking sheet with the pepper strips in the preheated oven. Roast for 20-25 minutes, or until the peppers are tender and slightly softened, with some edges starting to char and caramelize. Keep an eye on them towards the end of the roasting time to prevent burning. The roasting time may vary slightly depending on your oven and the thickness of the pepper strips. You want them to be soft and flavorful, with a touch of smoky char.
- Remove from the oven and let cool slightly. Once roasted, remove the baking sheet from the oven and let the roasted red peppers cool slightly. They can be used warm or at room temperature in the panini. You can also roast the peppers ahead of time and store them in the refrigerator for up to 3 days.
Step 3: Assembling the Panini
- Prepare your panini ingredients. While the roasted red peppers are cooling slightly, prepare your other panini ingredients. Slice the mozzarella cheese into ¼ inch thick slices. Have your pesto, prosciutto (if using), and gluten-free panini bread slices ready.
- Spread pesto on one side of each slice of gluten-free panini bread. Take each slice of gluten-free panini bread and spread a generous tablespoon of pesto evenly on one side of each slice. The pesto acts as a flavorful base and also helps to prevent the bread from becoming soggy.
- Layer the fillings on the pesto-covered bread. On one pesto-covered slice of bread, layer the fillings in the following order (for each panini):
- Mozzarella cheese slices: Arrange mozzarella cheese slices evenly over the pesto. Use about 2-3 slices of mozzarella per panini, depending on the size of your bread and cheese slices, ensuring good coverage.
- Roasted red pepper strips: Top the mozzarella with a generous portion of roasted red pepper strips. Distribute them evenly over the mozzarella.
- Prosciutto slices (optional): If using prosciutto, layer 1-2 slices of prosciutto over the roasted red peppers. Fold the prosciutto slices if necessary to fit neatly within the bread.
- Top with the remaining pesto-covered bread slice. Carefully place the remaining pesto-covered bread slice on top of the fillings, pesto-side down, to create the panini sandwich.
Step 4: Grilling the Panini (Panini Press or Skillet Method)
Method 1: Using a Panini Press
- Preheat your panini press according to the manufacturer’s instructions. Most panini presses have indicator lights that signal when they are preheated and ready for use.
- Place the assembled panini in the preheated panini press. Carefully place the assembled panini sandwich in the preheated panini press.
- Close the panini press and grill for 3-5 minutes, or until golden brown and cheese is melted and gooey. Close the lid of the panini press gently and grill for 3-5 minutes, or until the bread is golden brown and crispy, and the mozzarella cheese is melted and gooey. The exact grilling time will depend on your panini press and the desired level of browning. Check the panini after 3 minutes and grill for longer if needed.
- Remove the panini from the press and let cool slightly. Once grilled, carefully remove the panini from the panini press using tongs or a spatula. Be careful as the panini will be hot. Let it cool for a minute or two before serving.
Method 2: Using a Skillet or Grill Pan (No Panini Press Needed)
- Preheat a large skillet or grill pan over medium heat. Place a large skillet or grill pan (preferably cast iron for even heat distribution) over medium heat and let it heat up until it’s hot but not smoking.
- Lightly brush the outside of the panini with olive oil or butter (optional). Brushing the outside of the panini with a little olive oil or melted butter will help it to brown and crisp up beautifully in the skillet. This step is optional but recommended for better texture and flavor.
- Place the assembled panini in the hot skillet or grill pan. Carefully place the assembled panini sandwich in the preheated skillet or grill pan.
- Place a heavy object on top of the panini (e.g., another skillet or a pot filled with cans). To press the panini down and achieve those signature grill marks (if using a grill pan) and even cooking, place a heavy object on top of the panini. You can use another heavy skillet, a cast iron skillet, or a pot filled with cans. The weight will press the panini and help it cook evenly and get crispy.
- Cook for 3-4 minutes per side, or until golden brown and cheese is melted. Cook the panini for 3-4 minutes per side, or until the bread is golden brown and crispy, and the mozzarella cheese is melted and gooey. Flip the panini carefully using a spatula and cook the other side for the same amount of time.
- Remove the panini from the skillet and let cool slightly. Once grilled, remove the panini from the skillet using a spatula and let it cool for a minute or two before serving.
Step 5: Serving and Enjoying
- Slice the panini in half (optional). If desired, slice the panini in half diagonally or straight down the middle before serving. This makes it easier to handle and eat, especially if serving as an appetizer or sharing.
- Drizzle with balsamic glaze (optional). If you are using balsamic glaze, drizzle a small amount of balsamic glaze over the top of the panini just before serving. This adds a touch of sweetness and acidity that complements the other flavors.
- Serve immediately and enjoy! Italian Gluten-Free Panini Sandwiches with Roasted Red Peppers are best enjoyed immediately while they are warm, crispy, and the cheese is melted and gooey. Serve them as a delicious and satisfying lunch, light dinner, or appetizer.
Following these detailed instructions will guide you through each step of making these delicious Italian Gluten-Free Panini Sandwiches. Whether you have a panini press or are using a skillet, the result will be a flavorful, satisfying, and gluten-free meal that everyone will love.
Nutrition Facts for Italian Gluten-Free Panini Sandwich With Roasted Red Peppers
(Please note: Nutritional information is an estimate and can vary based on specific ingredients used, brands, and portion sizes. The following is an approximate per serving calculation.)
Serving Size: 1 Panini Sandwich
Approximate Calories Per Serving: 450-550 calories
Approximate Breakdown (per serving):
- Total Fat: 25-35g
- Saturated Fat: 10-15g
- Unsaturated Fat: 15-20g
- Cholesterol: 50-70mg
- Sodium: 600-800mg (can vary greatly depending on prosciutto and pesto)
- Total Carbohydrates: 40-50g
- Dietary Fiber: 5-7g
- Sugars: 8-12g (mostly natural sugars from peppers and pesto)
- Protein: 15-20g
Key Nutritional Highlights:
- Good source of protein: From mozzarella, prosciutto (if used), and bread.
- Source of healthy fats: Primarily from olive oil, pesto (nuts and olive oil), and mozzarella.
- Rich in Vitamin C: Red bell peppers are an excellent source of Vitamin C, a powerful antioxidant.
- Source of fiber: Gluten-free bread and vegetables contribute to dietary fiber intake.
- Vitamins and minerals: Red peppers provide vitamins A, K, and B6, as well as potassium and folate. Pesto contributes vitamins and minerals from basil, pine nuts, and parmesan (if used in pesto).
Important Considerations:
- Gluten-Free: This recipe is naturally gluten-free when using certified gluten-free bread and pesto. Always double-check labels to ensure all ingredients are gluten-free, especially pesto and bread.
- Sodium Content: The sodium content can be moderate to high, primarily due to prosciutto, pesto, and processed cheese. Choose low-sodium prosciutto or pesto if you are watching your sodium intake. Homemade pesto can be made with less salt.
- Fat Content: The fat content is moderate, primarily from healthy fats like olive oil and mozzarella. If you are concerned about fat intake, you can use part-skim mozzarella or reduce the amount of pesto.
- Calorie Adjustments: Calorie counts can be reduced by using less cheese, omitting prosciutto, or choosing lower-calorie gluten-free bread options.
This nutritional information provides a general overview. For precise values, it’s recommended to use a nutrition calculator and input the specific brands and quantities of ingredients you are using. Enjoy this delicious and relatively balanced Italian Gluten-Free Panini as part of a healthy and varied diet!
Preparation Time for Italian Gluten-Free Panini Sandwich With Roasted Red Peppers
The preparation time for making Italian Gluten-Free Panini Sandwiches with Roasted Red Peppers can be broken down into two main components: roasting the red peppers and assembling and grilling the panini. Here’s a detailed breakdown:
1. Roasting the Red Peppers:
- Prep time (washing, cutting, seeding, slicing): 10-15 minutes
- Roasting time in the oven: 20-25 minutes
- Cooling time: 10-15 minutes (while you prepare other ingredients)
Total time for Roasted Red Peppers: Approximately 40-55 minutes
(Note: You can roast the red peppers ahead of time. Roasted red peppers can be stored in an airtight container in the refrigerator for up to 3 days. If you have pre-roasted peppers, you can significantly reduce the overall preparation time.)
2. Assembling and Grilling the Panini:
- Prep time (slicing cheese, bread, gathering ingredients): 5-10 minutes
- Assembly time (spreading pesto, layering fillings): 5-10 minutes
- Grilling time (per panini): 3-5 minutes (panini press) or 6-8 minutes (skillet method, 3-4 minutes per side)
Total time for Assembling and Grilling (per batch of panini): Approximately 15-25 minutes (depending on batch size and grilling method)
Overall Total Preparation Time (from start to finish, including roasting peppers):
- If roasting peppers from scratch: Approximately 1 hour to 1 hour 20 minutes
- If using pre-roasted peppers: Approximately 20-30 minutes
Active vs. Inactive Time:
- Active time: Approximately 30-45 minutes (mostly for prepping peppers, assembling panini, and grilling)
- Inactive time: Approximately 20-25 minutes (oven roasting time and pepper cooling time, during which you can do other things)
Time-Saving Tips:
- Use pre-roasted red peppers: This is the biggest time-saver. Purchase jarred roasted red peppers (ensure they are just peppers and oil/vinegar, no gluten-containing additives) or roast a large batch ahead of time.
- Prepare ingredients in advance: Slice cheese, have pesto ready, and gather all ingredients before starting the assembly process.
- Use a panini press: A panini press generally grills panini faster than the skillet method.
- Assemble panini while peppers are roasting: Maximize your time by preparing other ingredients and assembling the panini while the red peppers are roasting in the oven.
By understanding the breakdown of preparation time, you can plan accordingly and make these delicious Italian Gluten-Free Panini Sandwiches even on busy days. Using pre-roasted peppers is a fantastic way to enjoy this recipe quickly and easily.
How to Serve Italian Gluten-Free Panini Sandwich With Roasted Red Peppers
These Italian Gluten-Free Panini Sandwiches with Roasted Red Peppers are incredibly versatile and can be served in various ways, making them perfect for lunch, a light dinner, or even a casual gathering. Here are some delicious serving suggestions:
As a Main Course (Lunch or Light Dinner):
- With a fresh side salad:
- Classic Italian Salad: A simple salad with mixed greens, cherry tomatoes, cucumbers, red onion, and a light vinaigrette dressing complements the richness of the panini perfectly.
- Arugula Salad with Lemon Vinaigrette: The peppery arugula and bright lemon dressing cut through the richness of the panini and provide a refreshing contrast.
- Caprese Salad: A traditional Italian Caprese salad with fresh mozzarella, tomatoes, and basil, drizzled with balsamic glaze, echoes the Italian flavors of the panini.
- Alongside a light soup:
- Tomato Soup: A classic pairing with grilled cheese and sandwiches, tomato soup is comforting and complements the Italian flavors. Choose a smooth or chunky tomato soup, depending on your preference.
- Minestrone Soup: A hearty and vegetable-packed minestrone soup provides a more substantial meal and adds another layer of Italian flair.
- Creamy Vegetable Soup: A light and creamy vegetable soup like zucchini or carrot soup can be a lovely pairing, especially in cooler weather.
- With crispy potato chips or fries:
- Homemade Potato Chips: For a satisfying crunch, serve the panini with homemade potato chips seasoned with sea salt and herbs.
- Sweet Potato Fries: Sweet potato fries offer a slightly healthier and sweeter alternative to regular fries, complementing the savory panini.
- Seasoned French Fries: Classic French fries, seasoned with your favorite spices, are always a crowd-pleaser.
As an Appetizer or Part of a Buffet:
- Cut into smaller portions: Slice each panini into halves or even thirds to serve as smaller bites for appetizers at a party or gathering.
- Serve with a dipping sauce:
- Marinara Sauce: Warm marinara sauce is a classic Italian dipping sauce that pairs beautifully with the flavors of the panini.
- Pesto Aioli: Create a pesto aioli by mixing pesto with mayonnaise or Greek yogurt for a creamy and flavorful dipping sauce that enhances the pesto already in the panini.
- Roasted Red Pepper Dip: Make a dip using some of the roasted red peppers, blended with cream cheese or ricotta, for an extra layer of red pepper flavor.
- Arrange on a platter with other Italian appetizers: Create an Italian-themed appetizer platter with sliced panini bites alongside olives, marinated artichoke hearts, cured meats (like salami and prosciutto), and cheese cubes.
Drink Pairings:
- Italian Sodas or Sparkling Water: Refreshing Italian sodas or sparkling water with a squeeze of lemon or lime are excellent non-alcoholic choices.
- Iced Tea or Lemonade: Classic iced tea or homemade lemonade are always refreshing and pair well with sandwiches.
- Light-bodied White Wine: A crisp and dry Italian white wine like Pinot Grigio or Vermentino complements the Italian flavors and the richness of the panini.
- Light-bodied Red Wine: A light-bodied Italian red wine like Chianti or Barbera can also pair well, especially if serving the panini as part of a more substantial meal.
- Italian Beer: An Italian lager or pilsner can be a refreshing beer pairing.
Occasions to Serve:
- Casual Lunch: Perfect for a quick and satisfying lunch at home or for taking to work or school.
- Light Dinner: A great option for a light and flavorful dinner, especially when paired with a salad or soup.
- Weekend Brunch: Elevate your weekend brunch with these delicious and easy-to-make panini.
- Picnics and Outdoor Gatherings: Panini are portable and hold up well, making them ideal for picnics, barbecues, and outdoor gatherings.
- Casual Parties and Appetizer Buffets: Perfect for serving as appetizers at casual parties or as part of a buffet spread.
No matter how you choose to serve them, these Italian Gluten-Free Panini Sandwiches with Roasted Red Peppers are sure to be a hit. Their delicious flavors and versatility make them a fantastic meal option for any occasion.
Additional Tips for Perfect Italian Gluten-Free Panini Sandwich With Roasted Red Peppers
To elevate your Italian Gluten-Free Panini Sandwiches with Roasted Red Peppers from good to absolutely exceptional, consider these five helpful tips:
- Choose High-Quality Gluten-Free Bread: The foundation of a great panini is the bread. Don’t compromise on quality, especially when it comes to gluten-free bread. Look for a gluten-free panini bread or sturdy sliced bread that is specifically designed for grilling or toasting. Bread that is too soft or crumbly may fall apart in the panini press or skillet. Experiment with different gluten-free bread brands to find your favorite in terms of taste and texture when toasted. Schar Artisan Baker, Canyon Bakehouse, and Little Northern Bakehouse are generally well-regarded gluten-free bread brands for panini.
- Don’t Overcrowd the Panini: When assembling your panini, avoid overfilling them. While it’s tempting to pile on the fillings, too many ingredients can make the panini difficult to grill evenly and may cause the bread to break or become soggy. Layer the fillings in a moderate and even manner, ensuring that the cheese and roasted red peppers are distributed well but not overflowing. Overcrowding can also prevent the panini press or skillet from properly sealing the edges of the bread.
- Properly Roast the Red Peppers for Maximum Flavor: Roasting red peppers correctly is key to unlocking their sweet, smoky flavor. Roast them at a high enough temperature (400°F/200°C) until they are tender and slightly charred. Don’t be afraid to let them get a little color – that charring adds depth of flavor. Ensure they are spread in a single layer on the baking sheet for even roasting. Consider roasting a larger batch of red peppers at once, as they are a versatile ingredient that can be used in various dishes throughout the week.
- Warm the Pesto Slightly (Optional but Recommended): For an extra layer of flavor and spreadability, consider gently warming the pesto before spreading it on the bread. You can do this by microwaving it for a few seconds or gently heating it in a small saucepan over low heat. Warm pesto spreads more easily and its aroma and flavors are slightly enhanced. Be careful not to overheat it, as you just want to warm it slightly, not cook it.
- Experiment with Cheese Variations: While mozzarella is classic and delicious, don’t be afraid to experiment with other Italian cheeses to customize your panini. Consider using:
- Provolone: Offers a sharper, more pronounced flavor than mozzarella and melts beautifully.
- Fontina: A nutty and slightly earthy cheese that melts wonderfully and adds a sophisticated flavor.
- Asiago: Provides a slightly tangy and sharp flavor that pairs well with roasted red peppers and pesto.
- Burrata: For an extra creamy and decadent panini, try using burrata cheese (tear it into pieces before layering). However, burrata is very soft and may make the panini slightly messier.
By incorporating these tips, you can take your Italian Gluten-Free Panini Sandwiches with Roasted Red Peppers to the next level, creating a truly memorable and delicious meal every time.
Frequently Asked Questions (FAQ) About Italian Gluten-Free Panini Sandwich With Roasted Red Peppers
Here are five frequently asked questions about making Italian Gluten-Free Panini Sandwiches with Roasted Red Peppers, along with their answers:
Q1: Can I make these panini vegetarian or vegan?
A: Yes, absolutely! To make these panini vegetarian, simply omit the prosciutto. The panini will still be incredibly flavorful and satisfying with just the roasted red peppers, mozzarella, and pesto. To make them vegan, you’ll need to make a few substitutions:
* Mozzarella: Use vegan mozzarella cheese. There are many good quality vegan mozzarella shreds and slices available now, often made from cashew or coconut milk.
* Pesto: Ensure your pesto is vegan. Traditional pesto contains Parmesan cheese. Look for vegan pesto options in stores or make your own vegan pesto using nutritional yeast instead of Parmesan cheese.
* Bread: Double-check that your gluten-free panini bread is also vegan, as some breads may contain eggs or dairy.
Q2: I don’t have a panini press. Can I still make these panini?
A: Yes, you definitely can! You can easily make these panini using a skillet or grill pan. Follow the skillet method instructions provided in the “Instructions” section. The key is to use a heavy object (like another skillet or a pot filled with cans) to press down on the panini while it cooks in the skillet. This will help to flatten the panini, create those nice grill marks (if using a grill pan), and ensure even cooking and crisping of the bread.
Q3: Can I prepare the roasted red peppers ahead of time?
A: Absolutely! Roasting the red peppers ahead of time is a great time-saving strategy. Roasted red peppers can be stored in an airtight container in the refrigerator for up to 3 days. In fact, roasting them in advance can even enhance their flavor as they have time for the flavors to meld. When you’re ready to make the panini, simply take the roasted red peppers out of the refrigerator and they are ready to use – you may want to warm them slightly for serving, but they are delicious cold or at room temperature too.
Q4: What are some other vegetables I could add to these panini?
A: While roasted red peppers are the star of this recipe, you can certainly add other vegetables to create variations. Some delicious additions include:
* Roasted Yellow Bell Peppers or Orange Bell Peppers: Adds a different color and slight variation in sweetness.
* Grilled Eggplant: Thinly sliced and grilled eggplant adds a smoky and meaty texture.
* Grilled Zucchini: Grilled zucchini slices provide a mild and slightly sweet flavor.
* Caramelized Onions: Sweet and savory caramelized onions add depth of flavor.
* Sun-dried Tomatoes: Oil-packed sun-dried tomatoes add a concentrated burst of flavor.
* Spinach or Arugula: Fresh spinach or arugula can be added for a fresh green element (add after grilling to prevent wilting too much).
Q5: How do I prevent my gluten-free panini bread from getting soggy?
A: Preventing soggy gluten-free panini bread is important for the best texture. Here are a few tips:
* Use a good quality gluten-free bread designed for toasting: Sturdier gluten-free bread holds up better.
* Spread pesto generously: Pesto acts as a barrier and helps prevent moisture from the fillings from soaking into the bread.
* Don’t overload the fillings: Too many moist fillings can make the bread soggy. Use a moderate amount of fillings.
* Grill at the right temperature: Ensure your panini press or skillet is hot enough. Grilling at the correct temperature helps the bread to crisp up quickly before it absorbs too much moisture.
* Serve immediately: Panini are best enjoyed immediately after grilling when they are at their crispiest. Don’t let them sit for too long before serving, as they may soften over time.
By considering these FAQs and answers, you’ll be well-equipped to make perfect Italian Gluten-Free Panini Sandwiches with Roasted Red Peppers and customize them to your liking! Enjoy!
Print
Italian Gluten Free Panini Sandwich With Roasted Red Peppers recipe
Ingredients
-
- For the Roasted Red Peppers:
-
- 3 large red bell peppers: Choose peppers that are firm, brightly colored, and free from blemishes. Red bell peppers are naturally sweeter than other colors, making them ideal for roasting and bringing a vibrant flavor to the panini. They are also packed with Vitamin C and antioxidants, adding a healthy boost to your meal.
-
- 2 tablespoons olive oil: Extra virgin olive oil is recommended for its rich flavor and health benefits. It helps the peppers roast beautifully, preventing them from drying out and enhancing their natural sweetness. Olive oil also contributes healthy fats to the recipe.
-
- 1/2 teaspoon dried oregano: Oregano adds a classic Italian herb flavor that complements the sweetness of the red peppers perfectly. Dried oregano is convenient and readily available, but you can also use fresh oregano if you have it on hand (about 1 tablespoon chopped fresh oregano).
-
- 1/4 teaspoon salt: Salt is essential for enhancing the flavors of the peppers. Use sea salt or kosher salt for the best taste.
-
- 1/4 teaspoon black pepper: Freshly ground black pepper adds a subtle warmth and spice that balances the sweetness of the peppers and the herbaceousness of the oregano.
-
- For the Roasted Red Peppers:
-
- For the Panini:
-
- 6 slices gluten-free panini bread: The foundation of any great panini is the bread. Look for a good quality gluten-free panini bread that is sturdy enough to hold the fillings and toast well without becoming crumbly. There are many excellent gluten-free bread brands available now, some specifically designed for panini or grilling. Consider trying brands like Schar Artisan Baker Multigrain Ciabatta Rolls (sliced), Canyon Bakehouse Gluten-Free Heritage Style Bread (sliced), or Little Northern Bakehouse Wide Slice Bread. Pre-sliced bread is convenient, but you can also use a gluten-free baguette or loaf and slice it yourself into panini-sized portions, about ½ inch thick. Ensure the slices are roughly the same size and shape for even cooking in the panini press.
-
- 6 tablespoons pesto: Pesto adds a burst of fresh, herbaceous, and garlicky flavor that is quintessentially Italian. You can use store-bought pesto for convenience, or make your own homemade pesto for an even more vibrant and authentic taste. Classic basil pesto is delicious, but you can also experiment with other pesto variations like sun-dried tomato pesto or roasted red pepper pesto for an extra layer of flavor complexity. Ensure your pesto is also gluten-free, as some commercially prepared pestos may contain gluten-based thickeners or fillers.
-
- 6 slices mozzarella cheese: Fresh mozzarella, also known as mozzarella di bufala or fior di latte, is the best choice for this panini. It has a milky, delicate flavor and a wonderfully melty texture when heated. Look for mozzarella that is packed in water or whey. If fresh mozzarella is unavailable, you can use part-skim mozzarella cheese, but the flavor and texture will be slightly different. Slice the mozzarella into slices that are about ¼ inch thick and roughly the same size as your bread slices.
-
- 6 slices prosciutto (optional, but highly recommended): Prosciutto adds a salty, savory, and slightly sweet element to the panini that complements the other flavors beautifully. It provides a wonderful contrast to the creamy mozzarella and sweet roasted red peppers. Prosciutto is a dry-cured ham from Italy, known for its delicate texture and rich flavor. If you are vegetarian or prefer to omit prosciutto, you can substitute it with other savory ingredients like grilled eggplant, marinated artichoke hearts, or sun-dried tomatoes for a similar depth of flavor. Ensure the prosciutto is thinly sliced for easy layering in the panini.
-
- Optional: Balsamic glaze for drizzling: Balsamic glaze adds a touch of sweetness and acidity that enhances all the flavors in the panini. It provides a beautiful visual finish and a sophisticated touch. You can buy balsamic glaze pre-made, or easily make your own by simmering balsamic vinegar until it thickens into a syrupy consistency. A drizzle of balsamic glaze just before serving elevates the panini to another level of deliciousness.
-
- For the Panini:
Instructions
Step 1: Roasting the Red Peppers (Preheat and Prep)
-
- Preheat your oven to 400°F (200°C). Preheating is crucial for even roasting and ensuring the peppers cook through properly without burning. Make sure your oven reaches the correct temperature before placing the peppers inside.
-
- Wash and prepare the red bell peppers. Rinse the red bell peppers thoroughly under cold water to remove any dirt or residue. Pat them dry with a clean kitchen towel or paper towels.
-
- Cut the peppers in half and remove seeds and membranes. Using a sharp knife, carefully cut each red bell pepper in half lengthwise, from stem to tip. Scoop out the seeds and white membranes from the inside of each pepper half. Discard the seeds and membranes. Leaving the membranes can result in a slightly bitter taste, so it’s best to remove them.
-
- Slice the pepper halves into strips (optional but recommended). For faster and more even roasting, and for easier assembly in the panini, slice each pepper half into strips that are about ½ inch wide. Slicing is not strictly necessary, you can roast the pepper halves directly, but strips cook more quickly and are more convenient for panini fillings.
Step 2: Seasoning and Roasting the Peppers
-
- Toss the pepper strips with olive oil, oregano, salt, and pepper. In a medium-sized bowl, place the sliced red pepper strips. Drizzle with 2 tablespoons of olive oil. Sprinkle with ½ teaspoon dried oregano, ¼ teaspoon salt, and ¼ teaspoon black pepper. Toss everything together with your hands or a spoon to ensure the pepper strips are evenly coated with the oil and seasonings. This step is crucial for infusing the peppers with flavor during roasting.
-
- Spread the seasoned pepper strips in a single layer on a baking sheet. Line a baking sheet with parchment paper for easy cleanup (optional, but recommended). Spread the seasoned red pepper strips in a single layer on the prepared baking sheet. Avoid overcrowding the baking sheet, as this will cause the peppers to steam instead of roast, and they won’t get that desirable slightly charred and caramelized flavor. If necessary, use two baking sheets to ensure a single layer.
-
- Roast in the preheated oven for 20-25 minutes, or until tender and slightly charred. Place the baking sheet with the pepper strips in the preheated oven. Roast for 20-25 minutes, or until the peppers are tender and slightly softened, with some edges starting to char and caramelize. Keep an eye on them towards the end of the roasting time to prevent burning. The roasting time may vary slightly depending on your oven and the thickness of the pepper strips. You want them to be soft and flavorful, with a touch of smoky char.
-
- Remove from the oven and let cool slightly. Once roasted, remove the baking sheet from the oven and let the roasted red peppers cool slightly. They can be used warm or at room temperature in the panini. You can also roast the peppers ahead of time and store them in the refrigerator for up to 3 days.
Step 3: Assembling the Panini
-
- Prepare your panini ingredients. While the roasted red peppers are cooling slightly, prepare your other panini ingredients. Slice the mozzarella cheese into ¼ inch thick slices. Have your pesto, prosciutto (if using), and gluten-free panini bread slices ready.
-
- Spread pesto on one side of each slice of gluten-free panini bread. Take each slice of gluten-free panini bread and spread a generous tablespoon of pesto evenly on one side of each slice. The pesto acts as a flavorful base and also helps to prevent the bread from becoming soggy.
-
- Layer the fillings on the pesto-covered bread. On one pesto-covered slice of bread, layer the fillings in the following order (for each panini):
-
- Mozzarella cheese slices: Arrange mozzarella cheese slices evenly over the pesto. Use about 2-3 slices of mozzarella per panini, depending on the size of your bread and cheese slices, ensuring good coverage.
-
- Roasted red pepper strips: Top the mozzarella with a generous portion of roasted red pepper strips. Distribute them evenly over the mozzarella.
-
- Prosciutto slices (optional): If using prosciutto, layer 1-2 slices of prosciutto over the roasted red peppers. Fold the prosciutto slices if necessary to fit neatly within the bread.
-
- Layer the fillings on the pesto-covered bread. On one pesto-covered slice of bread, layer the fillings in the following order (for each panini):
-
- Top with the remaining pesto-covered bread slice. Carefully place the remaining pesto-covered bread slice on top of the fillings, pesto-side down, to create the panini sandwich.
Step 4: Grilling the Panini (Panini Press or Skillet Method)
Method 1: Using a Panini Press
-
- Preheat your panini press according to the manufacturer’s instructions. Most panini presses have indicator lights that signal when they are preheated and ready for use.
-
- Place the assembled panini in the preheated panini press. Carefully place the assembled panini sandwich in the preheated panini press.
-
- Close the panini press and grill for 3-5 minutes, or until golden brown and cheese is melted and gooey. Close the lid of the panini press gently and grill for 3-5 minutes, or until the bread is golden brown and crispy, and the mozzarella cheese is melted and gooey. The exact grilling time will depend on your panini press and the desired level of browning. Check the panini after 3 minutes and grill for longer if needed.
-
- Remove the panini from the press and let cool slightly. Once grilled, carefully remove the panini from the panini press using tongs or a spatula. Be careful as the panini will be hot. Let it cool for a minute or two before serving.
Method 2: Using a Skillet or Grill Pan (No Panini Press Needed)
-
- Preheat a large skillet or grill pan over medium heat. Place a large skillet or grill pan (preferably cast iron for even heat distribution) over medium heat and let it heat up until it’s hot but not smoking.
-
- Lightly brush the outside of the panini with olive oil or butter (optional). Brushing the outside of the panini with a little olive oil or melted butter will help it to brown and crisp up beautifully in the skillet. This step is optional but recommended for better texture and flavor.
-
- Place the assembled panini in the hot skillet or grill pan. Carefully place the assembled panini sandwich in the preheated skillet or grill pan.
-
- Place a heavy object on top of the panini (e.g., another skillet or a pot filled with cans). To press the panini down and achieve those signature grill marks (if using a grill pan) and even cooking, place a heavy object on top of the panini. You can use another heavy skillet, a cast iron skillet, or a pot filled with cans. The weight will press the panini and help it cook evenly and get crispy.
-
- Cook for 3-4 minutes per side, or until golden brown and cheese is melted. Cook the panini for 3-4 minutes per side, or until the bread is golden brown and crispy, and the mozzarella cheese is melted and gooey. Flip the panini carefully using a spatula and cook the other side for the same amount of time.
-
- Remove the panini from the skillet and let cool slightly. Once grilled, remove the panini from the skillet using a spatula and let it cool for a minute or two before serving.
Step 5: Serving and Enjoying
-
- Slice the panini in half (optional). If desired, slice the panini in half diagonally or straight down the middle before serving. This makes it easier to handle and eat, especially if serving as an appetizer or sharing.
-
- Drizzle with balsamic glaze (optional). If you are using balsamic glaze, drizzle a small amount of balsamic glaze over the top of the panini just before serving. This adds a touch of sweetness and acidity that complements the other flavors.
-
- Serve immediately and enjoy! Italian Gluten-Free Panini Sandwiches with Roasted Red Peppers are best enjoyed immediately while they are warm, crispy, and the cheese is melted and gooey. Serve them as a delicious and satisfying lunch, light dinner, or appetizer.
Nutrition
- Serving Size: one normal portion
- Calories: 450-550
- Sugar: 8-12g
- Sodium: 600-800mg
- Fat: 25-35g
- Saturated Fat: 10-15g
- Unsaturated Fat: 15-20g
- Carbohydrates: 40-50g
- Fiber: 5-7g
- Protein: 15-20g
- Cholesterol: 50-70mg


