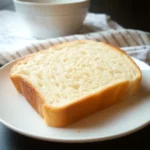
Ingredients
-
- All-Purpose Flour (500g or approximately 4 cups): The backbone of our bread, all-purpose flour provides the gluten structure necessary for a soft and chewy loaf. It’s important to use good quality all-purpose flour. For best results, we recommend using unbleached all-purpose flour as it retains more of the natural wheat flavor and protein content, which aids in gluten development. If you prefer a slightly denser loaf, you can substitute up to half of the all-purpose flour with bread flour, which has a higher protein content and will result in a chewier texture. However, for a classic, soft sandwich bread, all-purpose flour is the way to go. Make sure to measure your flour correctly; spoon it lightly into your measuring cup and level it off with a straight edge. Avoid scooping directly from the bag as this can compact the flour, leading to too much flour in your recipe and a denser, drier bread.
-
- Instant Yeast (7g or 2 ¼ teaspoons or 1 packet): The magic ingredient that makes our bread rise, instant yeast is a fast-acting dry yeast that can be added directly to your dry ingredients without needing to be proofed separately. It’s incredibly convenient and reliable, making it perfect for beginner bread bakers. Ensure your yeast is fresh; check the expiration date to guarantee its potency. If you’re unsure about the freshness of your yeast, you can always test it by mixing a teaspoon of yeast with a quarter cup of warm water and a teaspoon of sugar. If it becomes foamy within 5-10 minutes, your yeast is active and ready to use. While this recipe calls for instant yeast, you can also use active dry yeast. If using active dry yeast, you’ll need to proof it first. To proof active dry yeast, dissolve it in the warm water called for in the recipe along with a pinch of sugar and let it sit for 5-10 minutes until foamy. Then proceed with the recipe.
-
- Warm Water (300ml or 1 ¼ cups, lukewarm, about 105-115°F or 40-46°C): Warm water is essential for activating the yeast and hydrating the flour, initiating the gluten development process. The temperature of the water is crucial; it should be lukewarm, feeling comfortably warm to the touch, but not hot. Water that is too hot can kill the yeast, while water that is too cold will slow down its activity. Using a thermometer is the most accurate way to ensure the water is at the correct temperature. If you don’t have a thermometer, test the water by dripping a little on your wrist; it should feel comfortably warm, like bathwater. Filtered water is always a good choice for baking as it is free from chlorine and other chemicals that can sometimes inhibit yeast activity.
-
- Granulated Sugar (30g or 2 tablespoons): Sugar serves multiple purposes in this recipe. Firstly, it provides food for the yeast, helping it to activate and produce carbon dioxide, which makes the bread rise. Secondly, it adds a subtle sweetness to the bread, enhancing its overall flavor and making it more palatable for sandwiches. Lastly, sugar contributes to the browning of the crust during baking, giving your loaf that beautiful golden color. You can use regular granulated sugar or caster sugar. While you can reduce the amount of sugar slightly if you prefer a less sweet loaf, it’s important not to eliminate it entirely as it plays a vital role in yeast activity and bread texture.
-
- Salt (10g or 2 teaspoons): Salt is a critical ingredient in bread making, and it’s often underestimated. Salt controls the yeast activity, preventing it from rising too quickly and producing a bland, flavorless loaf. It also tightens the gluten strands, strengthening the dough and improving its structure. Furthermore, salt enhances the flavor of the bread, bringing out the subtle nuances of the wheat and other ingredients. Use fine sea salt or table salt for this recipe. It’s important to measure the salt accurately; too much salt can inhibit yeast activity and result in a dense loaf, while too little salt can lead to a bland, flavorless bread. Always add salt after the yeast has been incorporated into the flour, as direct contact with salt can dehydrate the yeast.
-
- Unsalted Butter, melted (30g or 2 tablespoons): Melted butter adds richness, tenderness, and flavor to our sandwich bread. It also helps to create a softer crust and a more moist crumb. Unsalted butter is preferred in baking as it allows you to control the amount of salt in your recipe. Melt the butter until it is just liquid, but not hot. You can melt it in the microwave or in a saucepan over low heat. If you don’t have unsalted butter, you can use salted butter, but reduce the amount of salt added to the dough by about ¼ teaspoon. For a dairy-free option, you can substitute the melted butter with a neutral-flavored oil like canola oil or vegetable oil, although butter will provide a richer flavor and softer texture.
Instructions
Step 1: Combining Dry Ingredients
In a large mixing bowl, whisk together the all-purpose flour, instant yeast, granulated sugar, and salt. Whisking ensures that these dry ingredients are evenly distributed, especially the yeast and salt, preventing any pockets of concentrated ingredients that could affect the dough’s rise or flavor. This step is crucial for creating a consistent and well-balanced dough. Make sure to use a bowl that is large enough to accommodate the dough as it rises, ideally twice its initial volume.
Step 2: Adding Wet Ingredients and Forming the Dough
Pour the warm water and melted butter into the bowl with the dry ingredients. Using a wooden spoon or a spatula, stir the ingredients together until a shaggy dough forms. At this stage, the dough will be quite sticky and may not look perfectly smooth. Don’t worry, this is normal. The goal is just to bring all the ingredients together into a cohesive mass. Once a shaggy dough has formed, it’s time to move on to kneading.
Step 3: Kneading the Dough
Turn the dough out onto a lightly floured surface. Kneading is the process of working the dough to develop gluten, the protein in flour that gives bread its structure and elasticity. Knead the dough for 8-10 minutes, or until it becomes smooth, elastic, and slightly tacky but not sticky. To knead, use the heel of your hand to push the dough away from you, then fold it back over itself, and repeat. Turn the dough a quarter turn after each push and fold. If the dough sticks to your surface, add a tiny sprinkle of flour, but be careful not to add too much, as this can make the dough dry and tough. You’ll know the dough is kneaded enough when it passes the windowpane test: take a small piece of dough and gently stretch it between your fingers. If you can stretch it thin enough to see light through it without tearing, the gluten is well-developed, and the dough is ready. If it tears easily, continue kneading for a few more minutes. Alternatively, if you are using a stand mixer with a dough hook, knead the dough on medium-low speed for 6-8 minutes, or until it reaches the same smooth and elastic consistency.
Step 4: First Rise (Proofing)
Place the kneaded dough in a lightly oiled bowl, turning it to coat all sides with oil. This prevents the dough from drying out as it rises. Cover the bowl tightly with plastic wrap or a damp kitchen towel. Place the bowl in a warm, draft-free place to rise for 1-1.5 hours, or until the dough has doubled in size. A warm spot helps to speed up yeast activity. Good places for proofing include a slightly warmed oven (turned off!), a microwave (also turned off!), or a warm spot in your kitchen away from drafts. The rising time will depend on the temperature of your environment; warmer temperatures will result in faster rising. You’ll know the dough has doubled when it springs back slowly when gently poked with two fingers.
Step 5: Shaping the Dough
Once the dough has doubled, gently punch it down to release the air. Turn the dough out onto a lightly floured surface. Shape the dough into a loaf. To do this, gently flatten the dough into a rectangle, about the length of your loaf pan. Starting from one short end, tightly roll the dough up like a jelly roll. Pinch the seam closed and tuck the ends underneath to create a neat loaf shape. This shaping technique helps to create a uniform texture throughout the loaf.
Step 6: Second Rise (Proofing in the Pan)
Grease a 9×5 inch loaf pan with butter or cooking spray. Place the shaped dough loaf seam-down into the prepared loaf pan. Gently press the dough to evenly fill the pan. Cover the pan loosely with plastic wrap or a damp kitchen towel. Let the dough rise again in a warm, draft-free place for 45-60 minutes, or until it has risen about 1 inch above the rim of the pan. This second rise is crucial for achieving a light and airy loaf. Again, ensure the rising environment is warm and draft-free for optimal results.
Step 7: Baking the Bread
Preheat your oven to 375°F (190°C). Once the dough has completed its second rise, place the loaf pan in the center rack of the preheated oven. Bake for 30-35 minutes, or until the crust is golden brown and the internal temperature reaches 200-210°F (93-99°C). To check for doneness, you can use an instant-read thermometer inserted into the center of the loaf. Alternatively, you can tap the bottom of the loaf; it should sound hollow when done. If the crust is browning too quickly before the bread is fully baked, you can loosely tent the loaf with aluminum foil for the last 10-15 minutes of baking.
Step 8: Cooling and Slicing
Once baked, remove the loaf pan from the oven and let it cool in the pan for 5-10 minutes. This allows the bread to firm up slightly before you remove it from the pan. After 5-10 minutes, gently loosen the edges of the loaf with a knife or spatula and invert it onto a wire rack to cool completely. Allow the bread to cool completely before slicing. This is important because slicing warm bread can result in a gummy texture and can compress the loaf. Cooling completely allows the crumb to set and makes slicing much easier. Once cooled, slice and enjoy your freshly baked homemade sandwich bread!
Nutrition
- Serving Size: one normal portion
- Calories: 130-150
- Sugar: 2-3g
- Sodium: 150-200mg
- Fat: 2-3g
- Saturated Fat: 1-1.5g
- Carbohydrates: 25-30g
- Fiber: 1-2g
- Protein: 3-4g
- Cholesterol: 5-10mg