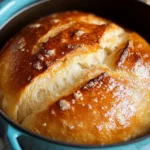
Ingredients
- 3 cups (384 grams) All-Purpose Flour or Bread Flour: Flour is the foundation of our bread, providing structure and texture. While all-purpose flour works beautifully for this recipe, bread flour is highly recommended for a chewier texture and a more robust rise. Bread flour has a higher protein content, which translates to more gluten development, resulting in that desirable chewiness and airy crumb. If you’re aiming for that artisan-style bread, bread flour is your best friend. You can also experiment with a combination of all-purpose and bread flour (e.g., 2 cups all-purpose and 1 cup bread flour) to find your preferred balance.
- 1 ½ teaspoons Salt: Salt is crucial for flavor development in bread. It not only enhances the taste but also controls the yeast activity, slowing it down and allowing for a more even rise and better flavor. Don’t skip or reduce the salt, as it plays a vital role in the overall success of your bread. Use regular table salt or sea salt.
- ½ teaspoon Instant Yeast (also called Rapid Rise Yeast): Yeast is the magic ingredient that makes our bread rise. Instant yeast is particularly convenient for no-knead recipes as it doesn’t require proofing before being added to the dry ingredients. It’s important to use instant yeast, not active dry yeast, for this specific recipe as we’re not activating it separately. Make sure your yeast is fresh; expired yeast will result in a flat loaf.
- 1 ½ cups (360 grams) Lukewarm Water: Water hydrates the flour, allowing the gluten to develop and the yeast to work its magic. The water should be lukewarm, around 105-115°F (40-46°C). This temperature is ideal for activating the yeast without being too hot, which could kill it, or too cold, which would slow down its activity significantly. Use a thermometer to ensure accuracy, or if you don’t have one, the water should feel comfortably warm to the touch, like bathwater.
Optional additions for flavor and texture:
- 1 tablespoon Olive Oil (optional): A tablespoon of olive oil can be added to the dough for a slightly richer flavor and a softer crumb. It’s not essential, but it adds a nice touch.
- Herbs and Spices (optional): Get creative and add your favorite herbs and spices to the dough! Rosemary, thyme, garlic powder, onion powder, everything bagel seasoning, or even a pinch of red pepper flakes can elevate the flavor profile of your bread. Add about 1-2 tablespoons of dried herbs or spices to the dry ingredients.
- Seeds and Nuts (optional): For added texture and nutritional value, incorporate seeds like sesame seeds, poppy seeds, sunflower seeds, or nuts like walnuts or pecans. Add about ¼ to ½ cup of seeds or nuts to the dough.
Instructions
Step 1: Mix the Dry Ingredients (1 minute)
In a large bowl, whisk together the flour, salt, and instant yeast until well combined. This ensures that the yeast and salt are evenly distributed throughout the flour, which is crucial for consistent rising and flavor.
Step 2: Add Water and Mix (2 minutes)
Pour the lukewarm water into the bowl with the dry ingredients. Using a spatula or your hand, mix until just combined. Don’t overmix at this stage. You’re aiming for a shaggy, sticky dough. It will be quite wet and messy, and that’s perfectly normal for no-knead dough. If you’re adding olive oil, incorporate it at this point.
Step 3: First Rise (12-18 hours or overnight)
Cover the bowl tightly with plastic wrap or a lid. Let the dough rise at room temperature for 12-18 hours, or even overnight. This long, slow rise is what develops the incredible flavor and texture of no-knead bread. The yeast will work its magic over time, creating air bubbles and transforming the shaggy dough into a light and airy mixture. The ideal room temperature is around 70-75°F (21-24°C). If your kitchen is colder, the rise may take longer. You’ll know the dough is ready when it has doubled in size and is bubbly on the surface.
Step 4: Shape the Dough (5 minutes)
Gently flour a clean work surface. Turn the dough out onto the floured surface. It will be soft and sticky. Lightly flour your hands. Gently shape the dough into a round or oval. Don’t knead it! The goal is to simply gather it into a ball. Fold the edges of the dough towards the center, rotating as you go, to create some surface tension.
Step 5: Second Rise (1.5-2 hours)
Line a bowl with parchment paper. This will make it easier to transfer the dough to the hot Dutch oven later. Carefully place the shaped dough into the parchment-lined bowl, seam-side down. Lightly dust the top of the dough with flour. Cover the bowl loosely with plastic wrap or a clean kitchen towel. Let the dough rise for another 1.5-2 hours. This second rise is crucial for creating a lighter and airier loaf. Again, the dough should almost double in size.
Step 6: Preheat Dutch Oven and Oven (30 minutes)
About 30 minutes before the second rise is complete, preheat your oven to 450°F (232°C). Place your Dutch oven (with the lid on) in the oven while it preheats. It’s essential to preheat the Dutch oven thoroughly. This creates a steamy environment inside the pot when the dough is added, which is crucial for achieving a crisp crust and a good oven spring (the final rise in the oven).
Step 7: Score the Dough (1 minute)
Carefully remove the hot Dutch oven from the oven. Remove the lid and set it aside. Gently lift the dough out of the bowl using the parchment paper and place it into the hot Dutch oven. Quickly score the top of the dough with a sharp knife or lame. Scoring allows the bread to expand properly in the oven and prevents it from cracking randomly. A simple “X” or a single slash across the top works well.
Step 8: Bake with Lid On (20 minutes)
Cover the Dutch oven with the lid and bake for 20 minutes. Baking with the lid on traps steam inside, creating a moist environment that promotes oven spring and a beautiful crust.
Step 9: Bake without Lid (25-30 minutes)
Remove the lid from the Dutch oven and continue baking for another 25-30 minutes, or until the crust is deeply golden brown and the internal temperature reaches 200-210°F (93-99°C). Baking without the lid allows the crust to crisp up and become deeply colored. Use a digital thermometer inserted into the center of the loaf to check for doneness.
Step 10: Cool Completely (1-2 hours)
Carefully remove the Dutch oven from the oven. Using the parchment paper, lift the bread out of the Dutch oven and place it on a wire rack to cool completely before slicing. This is the hardest part, but it’s crucial! Allowing the bread to cool completely allows the internal structure to set, resulting in a better texture and easier slicing. Resist the temptation to slice into it while it’s still hot, as it will be gummy and the crust may soften. Patience is key!
Nutrition
- Serving Size: one normal portion
- Calories: 200-250 calories
- Sugar: 1-2 grams
- Sodium: 200-300 mg
- Fat: 1-2 grams
- Saturated Fat: 0 grams
- Carbohydrates: 40-50 grams
- Fiber: 2-3 grams
- Protein: 6-8 grams
- Cholesterol: 0 mg