


There are certain food pairings that just sing in perfect harmony, and for me, Crispy Chicken and Waffles is the undisputed king of that choir. The first time I truly experienced this dish, it wasn’t at some fancy brunch spot, but at a little, unassuming diner on a road trip down South. The plate arrived, a glorious mountain of golden-brown, impossibly crispy chicken piled high on a fluffy, tender waffle, with a little pitcher of warm maple syrup on the side. That first bite – the shatteringly crisp chicken skin giving way to juicy meat, combined with the soft, slightly sweet waffle, all drenched in rich syrup – was a revelation. My family, initially a bit hesitant about the sweet-savory combo, were instant converts. My son, who’s usually all about the waffles or the chicken, couldn’t get enough of them together. It’s a dish that feels both indulgent and comforting, a celebration on a plate. Since then, I’ve been on a mission to perfect my own version at home, and this recipe is the culmination of many delicious experiments. It captures that magical contrast of textures and flavors that make Crispy Chicken and Waffles so utterly addictive, and it’s surprisingly achievable in your own kitchen. Get ready, because this is a recipe that will create some serious “wow” moments around your dinner table.
The Ultimate Crispy Chicken and Waffles: A Symphony of Savory and Sweet
Crispy Chicken and Waffles – a dish that effortlessly blends savory, spicy, crispy, sweet, and soft into one unforgettable culinary experience. What started as a soul food staple and a late-night jazz club favorite has blossomed into a brunch icon and a beloved comfort food across the globe. The magic lies in the contrast: the shatteringly crisp, seasoned crust of the fried chicken yielding to tender, juicy meat, perfectly complemented by the light, airy, and slightly sweet waffle that serves as its delicious foundation. Drizzle it all with warm maple syrup, perhaps a touch of hot sauce or a pat of melting butter, and you have a dish that truly tantalizes every taste bud. This guide will walk you through creating the ultimate Crispy Chicken and Waffles at home, ensuring your chicken is phenomenally crispy and your waffles are perfectly fluffy.
Complete Ingredients for Epic Crispy Chicken and Waffles
This recipe is broken down into components for the chicken, the waffles, and essential serving accompaniments.
For the Crispy Fried Chicken:
- Chicken:
- 3 lbs (approx. 1.4 kg) bone-in, skin-on chicken pieces (a mix of thighs, drumsticks, and wings works best; breasts can be used but may cook faster and dry out if not careful)
- Buttermilk Marinade (for tenderizing and flavor):
- 2 cups (480 ml) buttermilk
- 1 tablespoon hot sauce (e.g., Frank’s RedHot or your favorite brand)
- 1 tablespoon salt
- 1 teaspoon black pepper
- 2 cloves garlic, minced (optional)
- Seasoned Flour Dredge (for ultimate crispiness):
- 2 ½ cups (300g) all-purpose flour
- 1/2 cup (60g) cornstarch (the secret to extra crispiness!)
- 2 tablespoons paprika (smoked or sweet)
- 1 tablespoon garlic powder
- 1 tablespoon onion powder
- 1 tablespoon salt (adjust to taste, considering salt in marinade)
- 1 teaspoon black pepper
- 1 teaspoon cayenne pepper (adjust to your heat preference)
- 1/2 teaspoon dried thyme (optional)
- Frying Oil:
- 4-6 cups (0.95 – 1.4 liters) neutral frying oil with a high smoke point (e.g., peanut oil, canola oil, vegetable oil)
For the Classic Fluffy Waffles:
- Dry Ingredients:
- 2 cups (240g) all-purpose flour
- 2 tablespoons granulated sugar
- 1 tablespoon baking powder (make sure it’s fresh for maximum fluffiness)
- 1/2 teaspoon salt
- Wet Ingredients:
- 2 large eggs, separated (yolks and whites)
- 1 ¾ cups (420 ml) milk (whole milk or buttermilk recommended)
- 1/2 cup (113g) unsalted butter, melted and slightly cooled (or 1/2 cup neutral oil)
- 1 teaspoon vanilla extract
- For Cooking Waffles:
- Non-stick cooking spray or a little extra melted butter for the waffle iron
For Serving (Essential & Optional):
- Warm pure maple syrup (the real stuff makes a difference!)
- Butter pats
- Hot sauce (for an extra kick)
- Hot honey (a fantastic sweet and spicy drizzle)
- Powdered sugar (for dusting, optional)
Step-by-Step Instructions for Perfect Crispy Chicken and Waffles
Follow these detailed instructions for an unforgettable meal. It’s best to start the chicken marinade ahead of time.
Part 1: Preparing and Frying the Crispy Chicken
- Marinate the Chicken (Minimum 2 Hours, Preferably Overnight):
- In a large bowl or a large resealable plastic bag, combine the buttermilk, hot sauce, 1 tablespoon salt, 1 teaspoon black pepper, and minced garlic (if using).
- Add the chicken pieces to the marinade, ensuring each piece is well-coated.
- Cover the bowl or seal the bag and refrigerate for at least 2 hours, or ideally overnight (up to 24 hours). This step is crucial for tender, flavorful chicken.
- Prepare the Seasoned Flour Dredge:
- In a large, shallow dish or a large resealable bag, whisk together the all-purpose flour, cornstarch, paprika, garlic powder, onion powder, 1 tablespoon salt, 1 teaspoon black pepper, cayenne pepper, and dried thyme (if using). Mix thoroughly until all ingredients are evenly distributed.
- Set Up Your Frying Station:
- Pour your frying oil into a large, heavy-bottomed pot (like a Dutch oven) or a deep skillet to a depth of at least 1.5-2 inches. Make sure there’s enough headspace to prevent oil from bubbling over.
- Place a wire rack over a baking sheet nearby. This is where you’ll drain the fried chicken to keep it crispy.
- Have a kitchen thermometer (deep-fry or instant-read) ready.
- Dredge the Chicken:
- Remove chicken pieces from the buttermilk marinade one at a time, allowing excess marinade to drip off.
- Dredge each piece thoroughly in the seasoned flour mixture, pressing the flour onto the chicken to ensure it adheres well. For an extra-crispy crust (recommended!), dip the floured chicken back into the buttermilk marinade briefly, then dredge it again in the seasoned flour (this is a double dredge).
- Place the coated chicken pieces on a separate clean plate or wire rack and let them rest for 10-15 minutes. This helps the coating set and adhere better during frying.
- Heat the Frying Oil:
- Heat the oil over medium-high heat until it reaches a temperature of 325-350°F (160-175°C). Use your thermometer to monitor the temperature. It’s important to maintain this temperature range; too low and the chicken will be greasy, too high and the outside will burn before the inside is cooked.
- Fry the Chicken in Batches:
- Carefully place a few pieces of chicken into the hot oil, ensuring not to overcrowd the pot (this lowers the oil temperature and results in soggy chicken). The oil should come about halfway up the sides of the chicken.
- Fry for about 6-8 minutes on the first side, or until deeply golden brown and crispy.
- Using tongs, carefully flip the chicken pieces and continue to fry for another 6-8 minutes on the other side, or until golden brown and the internal temperature reaches 165°F (74°C) in the thickest part, avoiding the bone. Wings will cook faster than thighs or drumsticks.
- Adjust the heat as needed to maintain the oil temperature.
- Drain and Keep Warm:
- Once cooked, remove the chicken from the oil and place it on the prepared wire rack to drain. Do not place it on paper towels directly, as this can steam the bottom and make it less crispy.
- If cooking in multiple batches, you can keep the cooked chicken warm in a preheated oven at 200°F (95°C) on the wire rack while you fry the remaining pieces.
- Allow the oil temperature to return to 325-350°F before adding the next batch.
Part 2: Making the Fluffy Waffles
- Prepare the Waffle Batter:
- Preheat your waffle iron according to the manufacturer’s instructions.
- In a large bowl, whisk together the dry ingredients: 2 cups all-purpose flour, sugar, baking powder, and 1/2 teaspoon salt.
- In a separate medium bowl, whisk together the egg yolks, milk, melted butter (or oil), and vanilla extract.
- In a clean, dry bowl (preferably glass or metal), beat the egg whites with an electric mixer until stiff peaks form. This is key for light and airy waffles.
- Pour the wet ingredients (yolk mixture) into the dry ingredients and mix until just combined. A few lumps are okay; do not overmix.
- Gently fold about one-third of the beaten egg whites into the batter to lighten it. Then, carefully fold in the remaining egg whites until just incorporated. Again, be careful not to overmix, as this will deflate the egg whites.
- Cook the Waffles:
- Lightly grease the preheated waffle iron with non-stick cooking spray or a little melted butter (if your waffle iron requires it).
- Pour the recommended amount of batter (as per your waffle iron’s instructions) onto the hot waffle iron.
- Close the lid and cook for the time specified by your waffle iron manufacturer, usually 3-5 minutes, or until the waffles are golden brown and crisp. Steam will typically stop or lessen significantly when they are ready.
- Carefully remove the cooked waffle and place it on a wire rack to prevent it from getting soggy. You can keep cooked waffles warm in a 200°F (95°C) oven directly on the oven rack or on a baking sheet while you cook the remaining batter.
Part 3: Assembling Your Crispy Chicken and Waffles
- Plate: Place a warm, fluffy waffle on each plate.
- Top: Arrange 1-2 pieces of crispy fried chicken on top of each waffle.
- Serve: Serve immediately with warm maple syrup, pats of butter, and any other desired accompaniments like hot sauce or hot honey. A light dusting of powdered sugar can add a nice visual touch.
Nutrition Facts (Approximate)
- Servings: 4-6 (assuming 1 waffle and 2 pieces of chicken per person)
- Calories per serving (approximate): 800-1200 calories
Disclaimer: Nutritional information is a rough estimate and can vary widely based on the specific chicken pieces used, amount of oil absorbed during frying, exact portion sizes of chicken and waffles, and type/amount of syrup and butter used. This is an indulgent dish.
Preparation & Cooking Time
This dish has several components, so planning is key.
- Chicken Marinating Time: Minimum 2 hours, ideally 8-24 hours (overnight)
- Active Preparation Time (Chicken & Waffle Batter): 45-60 minutes
- Chicken Frying Time (in batches): 30-45 minutes
- Waffle Cooking Time (in batches): 20-30 minutes
- Total Active Cooking & Assembly Time (after marinating): Approximately 1.5 – 2 hours
- Total Time (Including ideal marination): Approximately 10 – 26 hours
While the total time seems long due to marination, the active cooking period is manageable, especially if you multitask.
How to Serve Your Epic Crispy Chicken and Waffles
This dish is a star on its own, but here are some ways to present and enhance it:
- The Classic Stack:
- A golden waffle as the base.
- One or two pieces of crispy chicken proudly perched on top.
- A generous drizzle of warm, pure maple syrup.
- A melting pat of butter on the warm waffle or chicken.
- Spice it Up:
- Offer a bottle of your favorite hot sauce on the side.
- Drizzle with hot honey for a perfect sweet-spicy glaze.
- Add Some Freshness (Optional Sides):
- A small bowl of fresh fruit salad can provide a light, balancing contrast.
- Simple collard greens or a tangy coleslaw for a Southern touch.
- Brunch Extravaganza:
- Serve alongside other brunch favorites like scrambled eggs or a breakfast fruit platter.
- Garnish for Glory:
- A light dusting of powdered sugar over the waffles before adding chicken.
- A sprig of fresh parsley or chives for a pop of color (though not traditional, it can look nice).
- Sauce on the Side:
- Some enjoy a side of savory gravy (like a white country gravy) in addition to or instead of syrup, though this is a regional preference.
Additional Tips for Next-Level Chicken and Waffles (5 tips)
- Don’t Skip the Chicken Rest (Post-Dredge): After dredging the chicken in the seasoned flour (especially after a double dredge), let it sit on a wire rack at room temperature for at least 10-15 minutes, or even up to 30 minutes. This allows the coating to hydrate and adhere much better to the chicken, resulting in a crispier crust that won’t fall off during frying.
- Oil Temperature is Non-Negotiable: Invest in a good frying thermometer. If the oil is too cool, the chicken will absorb too much oil and become greasy. If it’s too hot, the crust will burn before the chicken is cooked through. Maintain that 325-350°F (160-175°C) sweet spot, adjusting your stove’s heat as needed, especially between batches.
- Double Dredge for Maximum Crunch: For that truly shatteringly crisp chicken crust, the double dredge technique (flour -> buttermilk -> flour again) is highly recommended. It builds up more layers and crags for an unbeatable texture.
- For Fluffier Waffles, Don’t Overmix & Use Beaten Egg Whites: The secret to light, airy waffles is twofold: first, mix the batter until just combined (lumps are okay!), and second, beat your egg whites separately to stiff peaks and gently fold them into the batter. This incorporates air, leading to a much fluffier result.
- Keep Components Warm Properly: To ensure everything is hot when serving, use your oven. Place a wire rack on a baking sheet. As chicken pieces are fried, place them on the rack and keep them in a warm oven (around 200°F / 95°C). You can do the same for the waffles, placing them directly on the oven rack or on a separate wire rack to maintain crispness.
Frequently Asked Questions (FAQ) About Crispy Chicken and Waffles
Here are answers to some common queries:
- Q: Can I bake the chicken instead of frying it for a healthier version?
- A: Yes, you can bake the chicken, but it won’t achieve the same level of crispiness as deep-frying. To bake, after dredging, spray the chicken generously with cooking oil and bake on a wire rack set over a baking sheet at 400-425°F (200-220°C) for about 35-45 minutes, or until cooked through and golden. The flavor will still be good, but the texture will be different. An air fryer is another good option for a less oily but still crispy result.
- Q: What are the best chicken pieces to use for chicken and waffles?
- A: Bone-in, skin-on pieces are traditional and yield the juiciest, most flavorful results. A mix of thighs, drumsticks, and wings is ideal. Thighs and drumsticks stay moist, while wings offer a great skin-to-meat ratio. Boneless, skinless breasts can be used, but they tend to cook faster and can dry out more easily; consider cutting them into smaller tenders if using.
- Q: Can I make the waffle batter ahead of time?
- A: It’s generally best to make waffle batter just before you plan to cook the waffles, especially if you’re folding in beaten egg whites, as they can deflate over time. However, you can mix the dry ingredients and wet ingredients (except egg whites) separately and store them covered in the fridge. Then, when ready, combine them, beat and fold in the egg whites, and cook.
- Q: I don’t have buttermilk for the chicken marinade. What can I use as a substitute?
- A: You can easily make a buttermilk substitute! For every 1 cup of regular milk, stir in 1 tablespoon of white vinegar or lemon juice. Let it sit for 5-10 minutes until it curdles slightly. This mixture will provide the acidity needed to tenderize the chicken. Plain yogurt thinned with a bit of milk also works well.
- Q: What’s the best way to reheat leftover chicken and waffles?
- A: For leftover fried chicken, the best way to retain crispiness is to reheat it in an oven or air fryer. Preheat to 375-400°F (190-200°C) and heat for 10-15 minutes (oven) or 5-8 minutes (air fryer) until hot and crispy. For waffles, a toaster or toaster oven works best to crisp them up again. Microwaving will make both the chicken and waffles soft.
This Crispy Chicken and Waffles recipe is more than just food; it’s an event. It’s a delightful indulgence that promises a fantastic collision of flavors and textures. While it involves a few steps, the payoff of that first perfect bite makes every moment worth it. Enjoy the process and the delicious results!
Print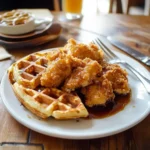
Crispy Chicken and Waffles recipe
Ingredients
For the Crispy Fried Chicken:
-
- Chicken:
-
- 3 lbs (approx. 1.4 kg) bone-in, skin-on chicken pieces (a mix of thighs, drumsticks, and wings works best; breasts can be used but may cook faster and dry out if not careful)
-
- Chicken:
-
- Buttermilk Marinade (for tenderizing and flavor):
-
- 2 cups (480 ml) buttermilk
-
- 1 tablespoon hot sauce (e.g., Frank’s RedHot or your favorite brand)
-
- 1 tablespoon salt
-
- 1 teaspoon black pepper
-
- 2 cloves garlic, minced (optional)
-
- Buttermilk Marinade (for tenderizing and flavor):
-
- Seasoned Flour Dredge (for ultimate crispiness):
-
- 2 ½ cups (300g) all-purpose flour
-
- 1/2 cup (60g) cornstarch (the secret to extra crispiness!)
-
- 2 tablespoons paprika (smoked or sweet)
-
- 1 tablespoon garlic powder
-
- 1 tablespoon onion powder
-
- 1 tablespoon salt (adjust to taste, considering salt in marinade)
-
- 1 teaspoon black pepper
-
- 1 teaspoon cayenne pepper (adjust to your heat preference)
-
- 1/2 teaspoon dried thyme (optional)
-
- Seasoned Flour Dredge (for ultimate crispiness):
-
- Frying Oil:
-
- 4–6 cups (0.95 – 1.4 liters) neutral frying oil with a high smoke point (e.g., peanut oil, canola oil, vegetable oil)
-
- Frying Oil:
For the Classic Fluffy Waffles:
-
- Dry Ingredients:
-
- 2 cups (240g) all-purpose flour
-
- 2 tablespoons granulated sugar
-
- 1 tablespoon baking powder (make sure it’s fresh for maximum fluffiness)
-
- 1/2 teaspoon salt
-
- Dry Ingredients:
-
- Wet Ingredients:
-
- 2 large eggs, separated (yolks and whites)
-
- 1 ¾ cups (420 ml) milk (whole milk or buttermilk recommended)
-
- 1/2 cup (113g) unsalted butter, melted and slightly cooled (or 1/2 cup neutral oil)
-
- 1 teaspoon vanilla extract
-
- Wet Ingredients:
-
- For Cooking Waffles:
-
- Non-stick cooking spray or a little extra melted butter for the waffle iron
-
- For Cooking Waffles:
Instructions
Part 1: Preparing and Frying the Crispy Chicken
-
- Marinate the Chicken (Minimum 2 Hours, Preferably Overnight):
-
- In a large bowl or a large resealable plastic bag, combine the buttermilk, hot sauce, 1 tablespoon salt, 1 teaspoon black pepper, and minced garlic (if using).
-
- Add the chicken pieces to the marinade, ensuring each piece is well-coated.
-
- Cover the bowl or seal the bag and refrigerate for at least 2 hours, or ideally overnight (up to 24 hours). This step is crucial for tender, flavorful chicken.
-
- Marinate the Chicken (Minimum 2 Hours, Preferably Overnight):
-
- Prepare the Seasoned Flour Dredge:
-
- In a large, shallow dish or a large resealable bag, whisk together the all-purpose flour, cornstarch, paprika, garlic powder, onion powder, 1 tablespoon salt, 1 teaspoon black pepper, cayenne pepper, and dried thyme (if using). Mix thoroughly until all ingredients are evenly distributed.
-
- Prepare the Seasoned Flour Dredge:
-
- Set Up Your Frying Station:
-
- Pour your frying oil into a large, heavy-bottomed pot (like a Dutch oven) or a deep skillet to a depth of at least 1.5-2 inches. Make sure there’s enough headspace to prevent oil from bubbling over.
-
- Place a wire rack over a baking sheet nearby. This is where you’ll drain the fried chicken to keep it crispy.
-
- Have a kitchen thermometer (deep-fry or instant-read) ready.
-
- Set Up Your Frying Station:
-
- Dredge the Chicken:
-
- Remove chicken pieces from the buttermilk marinade one at a time, allowing excess marinade to drip off.
-
- Dredge each piece thoroughly in the seasoned flour mixture, pressing the flour onto the chicken to ensure it adheres well. For an extra-crispy crust (recommended!), dip the floured chicken back into the buttermilk marinade briefly, then dredge it again in the seasoned flour (this is a double dredge).
-
- Place the coated chicken pieces on a separate clean plate or wire rack and let them rest for 10-15 minutes. This helps the coating set and adhere better during frying.
-
- Dredge the Chicken:
-
- Heat the Frying Oil:
-
- Heat the oil over medium-high heat until it reaches a temperature of 325-350°F (160-175°C). Use your thermometer to monitor the temperature. It’s important to maintain this temperature range; too low and the chicken will be greasy, too high and the outside will burn before the inside is cooked.
-
- Heat the Frying Oil:
-
- Fry the Chicken in Batches:
-
- Carefully place a few pieces of chicken into the hot oil, ensuring not to overcrowd the pot (this lowers the oil temperature and results in soggy chicken). The oil should come about halfway up the sides of the chicken.
-
- Fry for about 6-8 minutes on the first side, or until deeply golden brown and crispy.
-
- Using tongs, carefully flip the chicken pieces and continue to fry for another 6-8 minutes on the other side, or until golden brown and the internal temperature reaches 165°F (74°C) in the thickest part, avoiding the bone. Wings will cook faster than thighs or drumsticks.
-
- Adjust the heat as needed to maintain the oil temperature.
-
- Fry the Chicken in Batches:
-
- Drain and Keep Warm:
-
- Once cooked, remove the chicken from the oil and place it on the prepared wire rack to drain. Do not place it on paper towels directly, as this can steam the bottom and make it less crispy.
-
- If cooking in multiple batches, you can keep the cooked chicken warm in a preheated oven at 200°F (95°C) on the wire rack while you fry the remaining pieces.
-
- Allow the oil temperature to return to 325-350°F before adding the next batch.
-
- Drain and Keep Warm:
Part 2: Making the Fluffy Waffles
-
- Prepare the Waffle Batter:
-
- Preheat your waffle iron according to the manufacturer’s instructions.
-
- In a large bowl, whisk together the dry ingredients: 2 cups all-purpose flour, sugar, baking powder, and 1/2 teaspoon salt.
-
- In a separate medium bowl, whisk together the egg yolks, milk, melted butter (or oil), and vanilla extract.
-
- In a clean, dry bowl (preferably glass or metal), beat the egg whites with an electric mixer until stiff peaks form. This is key for light and airy waffles.
-
- Pour the wet ingredients (yolk mixture) into the dry ingredients and mix until just combined. A few lumps are okay; do not overmix.
-
- Gently fold about one-third of the beaten egg whites into the batter to lighten it. Then, carefully fold in the remaining egg whites until just incorporated. Again, be careful not to overmix, as this will deflate the egg whites.
-
- Prepare the Waffle Batter:
-
- Cook the Waffles:
-
- Lightly grease the preheated waffle iron with non-stick cooking spray or a little melted butter (if your waffle iron requires it).
-
- Pour the recommended amount of batter (as per your waffle iron’s instructions) onto the hot waffle iron.
-
- Close the lid and cook for the time specified by your waffle iron manufacturer, usually 3-5 minutes, or until the waffles are golden brown and crisp. Steam will typically stop or lessen significantly when they are ready.
-
- Carefully remove the cooked waffle and place it on a wire rack to prevent it from getting soggy. You can keep cooked waffles warm in a 200°F (95°C) oven directly on the oven rack or on a baking sheet while you cook the remaining batter.
-
- Cook the Waffles:
Part 3: Assembling Your Crispy Chicken and Waffles
-
- Plate: Place a warm, fluffy waffle on each plate.
-
- Top: Arrange 1-2 pieces of crispy fried chicken on top of each waffle.
-
- Serve: Serve immediately with warm maple syrup, pats of butter, and any other desired accompaniments like hot sauce or hot honey. A light dusting of powdered sugar can add a nice visual touch.
Nutrition
- Serving Size: one normal portion
- Calories: 800-1200


