Ingredients
- Frozen Bananas: The Creamy Base (Approximately 3-4 ripe bananas per batch): Bananas are the absolute star of this recipe, forming the creamy, ice cream-like base without any dairy or added fats. But not just any bananas will do. The key is to use ripe bananas, and freeze them properly.
- Ripeness Matters: The riper the banana, the sweeter and creamier your ice cream will be. Look for bananas that are spotty brown, indicating they are at their peak ripeness and natural sugars are fully developed. Green or underripe bananas will be starchy and lack the desired sweetness and creamy texture. Overripe bananas that are too mushy might also be less ideal, although still usable if they haven’t fermented. The perfect ripeness is that sweet spot – yellow with plenty of brown spots.
- Freezing Technique is Crucial: How you freeze your bananas significantly impacts the final texture.
- Slice Before Freezing: Always slice your ripe bananas into coins (about ½ inch thick) before freezing. This makes them easier to blend later and prevents your blender or food processor from struggling with large frozen chunks. Slicing also allows for more even freezing.
- Single Layer Freezing: Arrange the banana slices in a single layer on a parchment-lined baking sheet or plate. This prevents them from clumping together into a solid block, which would be much harder to blend. Freezing them individually allows them to freeze quickly and evenly.
- Freeze Until Solid: Freeze the banana slices until they are completely solid, at least 2-3 hours, or preferably overnight. Fully frozen bananas are essential for achieving that thick, ice cream-like consistency. If they are not frozen solid enough, your ice cream might be too soft or soupy.
- Why Bananas Work Wonders: Bananas, when frozen and blended, undergo a magical transformation. Their natural sugars and pectin create a smooth, creamy texture that mimics traditional ice cream. They also contribute a subtle sweetness and a slight banana flavor that serves as a delicious base for countless flavor variations. Furthermore, bananas are packed with nutrients like potassium, fiber, and Vitamin B6, making this ice cream a significantly healthier option compared to traditional versions.
- Liquid: The Blending Aid (Approximately 1-2 tablespoons per batch): A touch of liquid is often needed to help your blender or food processor get the frozen bananas moving and achieve a smooth, creamy consistency. The type of liquid you choose can also subtly influence the flavor and texture of your ice cream.
- Popular Liquid Choices:
- Milk (Dairy or Non-Dairy): A splash of milk is a classic choice and works well with most flavors. You can use dairy milk (whole, 2%, skim), or non-dairy alternatives like almond milk, oat milk, soy milk, coconut milk (light or full-fat – use sparingly as it adds strong coconut flavor), or cashew milk. Unsweetened milk is generally recommended to control the overall sweetness.
- Water: Plain water works surprisingly well, especially if you want to keep the flavor as neutral as possible and highlight other added flavors. It’s a calorie-free and readily available option.
- Fruit Juice: A small amount of fruit juice can complement certain flavors. For example, orange juice pairs well with chocolate or citrus flavors, while apple juice can enhance caramel or cinnamon variations. Use juices sparingly as they add to the sugar content.
- Coffee or Espresso: For coffee-flavored ice cream, a tablespoon or two of cooled brewed coffee or espresso is the perfect liquid to enhance the coffee notes.
- Liquor (for Adult Versions): For adult-only ice cream, a tablespoon of liquor like rum, bourbon, or liqueur (like coffee liqueur or chocolate liqueur) can add a boozy kick and enhance certain flavors. Use sparingly and responsibly.
- Less is More: Start with just 1 tablespoon of liquid and add more very gradually, only if needed, to get the blending process going. Adding too much liquid can result in a softer, more milkshake-like consistency rather than a thick, scoopable ice cream. You want to use the minimum amount of liquid necessary to achieve a smooth blend.
- Popular Liquid Choices:
- Flavor Enhancers: The Creative Element (Optional, but Highly Recommended): While frozen bananas alone create a delicious base, flavor enhancers are where you can truly unleash your creativity and customize your 3-Ingredient Healthy Ice Cream to your heart’s content. This is where the “healthy” and “delicious” aspects truly come together!
- Natural Sweeteners (Optional): If your ripe bananas are not quite sweet enough for your taste, or if you are using less ripe bananas, you can add a touch of natural sweetener.
- Honey or Maple Syrup: A teaspoon or two of honey or maple syrup adds a natural sweetness and subtle flavor complexity.
- Dates (Medjool): Medjool dates, pitted, are a fantastic natural sweetener and add a caramel-like flavor and extra creaminess. Soak them in hot water for 10 minutes to soften before blending.
- Stevia or Monk Fruit: For sugar-free options, stevia or monk fruit extract can be used sparingly. They are very potent, so start with a tiny amount and add more to taste.
- Flavor Extracts and Spices: A few drops of flavor extracts or a pinch of spices can dramatically transform the flavor profile.
- Vanilla Extract: A classic and versatile flavor enhancer that works beautifully with banana and almost any other flavor combination.
- Almond Extract: Adds a nutty and slightly marzipan-like note.
- Peppermint Extract: Perfect for peppermint chocolate chip or holiday-themed ice cream.
- Cinnamon, Nutmeg, Ginger, Cardamom: Warming spices add depth and complexity, especially for fall or winter flavors.
- Cocoa Powder (Unsweetened): For chocolate ice cream, unsweetened cocoa powder is a healthy and delicious addition. Start with 1-2 tablespoons and adjust to taste.
- Fruits and Berries (Frozen or Fresh): Adding other fruits or berries expands the flavor possibilities and boosts the nutritional value.
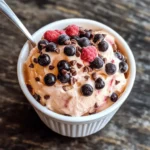
- Frozen Berries (Strawberries, Blueberries, Raspberries): Frozen berries blend beautifully with bananas and add vibrant color and antioxidant power.
- Mango, Pineapple, Peach (Frozen): Tropical fruits create refreshing and exotic flavor combinations.
- Fresh Fruit (Added After Blending): Chopped fresh fruits like strawberries, blueberries, peaches, or mango can be stirred in after blending for added texture and freshness.
- Nut Butters and Seeds: Nut butters and seeds add healthy fats, protein, and delicious nutty flavors.
- Peanut Butter, Almond Butter, Cashew Butter: Creamy nut butters create rich and satisfying ice cream flavors.
- Tahini (Sesame Seed Butter): Adds a unique and slightly savory note.
- Chia Seeds, Flax Seeds: Add a boost of omega-3 fatty acids and fiber, and can slightly thicken the ice cream.
- Chocolate and Cacao Nibs: For chocolate lovers, these are essential additions.
- Chocolate Chips (Dark or Semi-Sweet): Stir in chocolate chips after blending for classic chocolate chip ice cream.
- Cacao Nibs: Unsweetened cacao nibs add a crunchy texture and intense chocolate flavor with added antioxidants.
- Melted Dark Chocolate: Drizzle melted dark chocolate over the blended ice cream for a decadent touch.
- Coffee or Matcha Powder: For caffeinated and flavorful ice cream variations.
- Instant Coffee or Espresso Powder: For coffee ice cream, add a teaspoon or two of instant coffee or espresso powder directly to the blender.
- Matcha Powder: For a vibrant green tea ice cream, add matcha powder to taste.
- Natural Sweeteners (Optional): If your ripe bananas are not quite sweet enough for your taste, or if you are using less ripe bananas, you can add a touch of natural sweetener.
Instructions
- Prepare Your Frozen Bananas: Ensure your bananas are properly ripe (yellow with brown spots), sliced into ½-inch thick coins, and frozen solid for at least 2-3 hours, or preferably overnight. This is the most crucial step for achieving the right texture.
- Gather Your Equipment and Ingredients: Have your blender or food processor ready. High-powered blenders work best, but food processors and even less powerful blenders can work with a bit of patience and scraping. Measure out your liquid (milk, water, juice, etc.) and any flavor enhancers you plan to use (vanilla extract, cocoa powder, nut butter, etc.). Having everything prepped and ready will make the process smooth and efficient.
- Start Blending with Frozen Bananas: Place the frozen banana slices into your blender or food processor. Start blending on low speed, gradually increasing to medium speed. Initially, the bananas will be crumbly and may seem like they are not blending. This is normal.
- Add Liquid Gradually (If Needed): As the bananas start to break down, they may become quite thick and the blender might struggle. This is where you add liquid, one tablespoon at a time. Start with 1 tablespoon of your chosen liquid and blend again. Scrape down the sides of the blender or food processor with a spatula as needed to ensure all banana pieces are incorporated. Continue to add liquid, one tablespoon at a time, only if necessary, until the mixture starts to become creamy and smooth. Remember, less liquid is better for a thicker ice cream consistency. You might not need any liquid at all, especially with a high-powered blender and very ripe bananas.
- Blend Until Smooth and Creamy: Continue blending until the mixture transforms from crumbly banana pieces into a smooth, soft-serve ice cream consistency. This may take a few minutes, depending on your blender and the frozenness of the bananas. The texture should be thick, creamy, and easily scoopable (or spoonable). Avoid over-blending, as this can make the mixture too soft or even melt slightly.
- Add Flavor Enhancers (and Blend Briefly): Once you have achieved a smooth, creamy base, add any flavor enhancers you desire – vanilla extract, cocoa powder, nut butter, spices, sweeteners, etc. Blend again briefly, just until the flavor enhancers are fully incorporated. Avoid over-blending after adding flavorings, as it can also soften the ice cream.
- Enjoy Immediately as Soft Serve (or Freeze for Firmer Texture): Your 3-Ingredient Healthy Ice Cream is now ready to be enjoyed! It will have a soft-serve consistency right out of the blender, which is incredibly delicious and satisfying.
- For Soft Serve: Serve immediately in bowls or cones and enjoy the creamy, soft texture.
- For Firmer Texture: If you prefer a firmer, more scoopable ice cream like traditional hard-packed ice cream, transfer the blended mixture to a freezer-safe container (like a loaf pan or airtight container). Spread it out evenly and freeze for at least 2-3 hours, or longer, until it firms up to your desired consistency. Freezing will solidify the ice cream further, making it easier to scoop.
- Scoop and Serve (if Frozen): If you froze your ice cream for a firmer texture, let it sit at room temperature for 5-10 minutes before scooping to soften it slightly and make it easier to scoop. Use an ice cream scoop to serve in bowls or cones.
Nutrition
- Serving Size: one normal portion
- Calories: 100-150 kcal
- Sugar: 15-20g
- Sodium: 1-10mg
- Fat: 1g
- Saturated Fat: 0.5g
- Unsaturated Fat: 0.5g
- Carbohydrates: 25-35g
- Fiber: 3-4g
- Protein: 1-2g
- Cholesterol: 0-2mg