

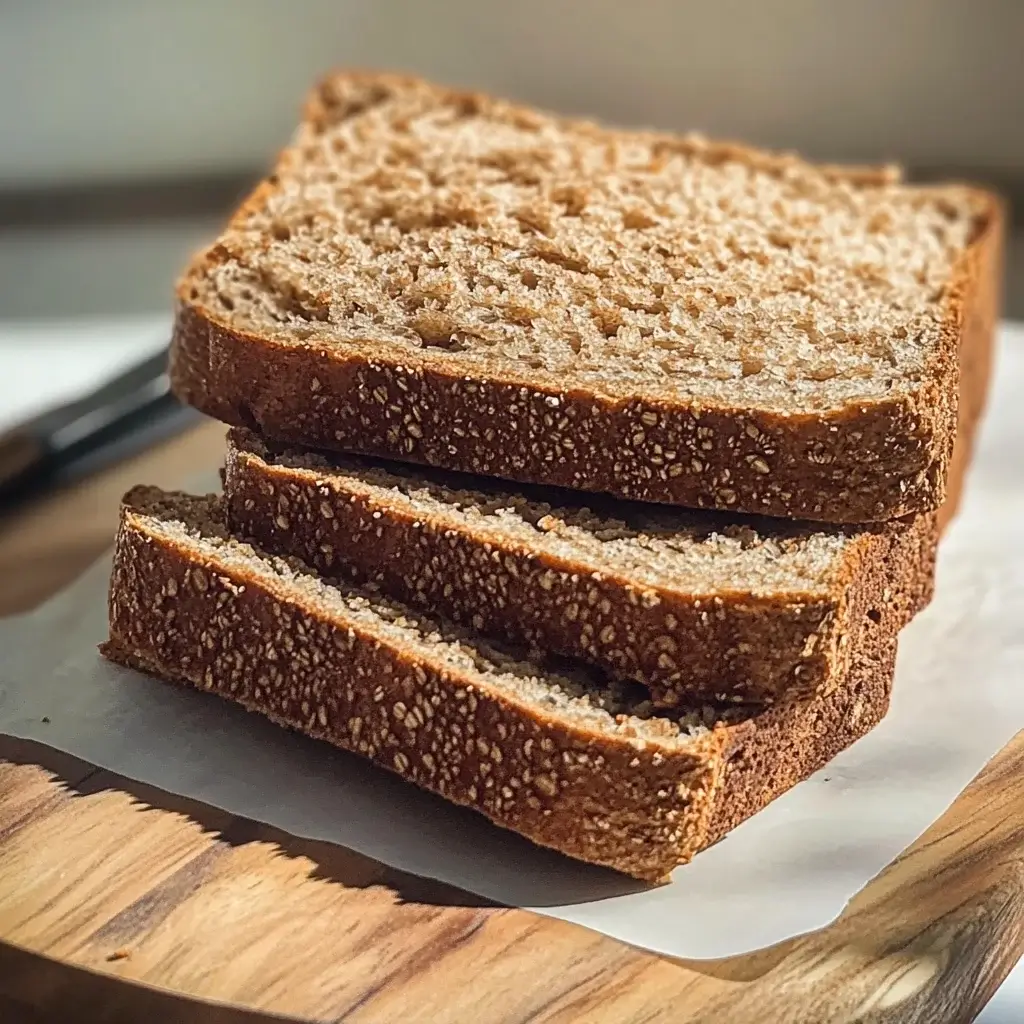
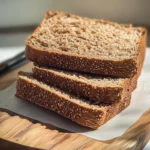
The aroma of freshly baked bread is, without a doubt, one of life’s simplest yet most profound pleasures. For years, I shied away from baking my own bread, intimidated by the tales of finicky yeast and dense, brick-like failures. But a desire for healthier, additive-free options for my family pushed me to explore. This Whole Wheat Brown Bread recipe was a game-changer. The first time I pulled a golden-brown loaf from the oven, the entire house filled with a warm, nutty scent that had my kids peeking into the kitchen with eager anticipation. Slicing into it revealed a perfectly soft, slightly chewy crumb – a far cry from the dry, commercial whole wheat breads we’d reluctantly consumed. It was an instant hit! My husband, usually a white bread aficionado, found himself reaching for a second slice, slathered with butter that melted into its warm surface. My children loved it for sandwiches, and I felt a deep sense of satisfaction knowing exactly what went into their food. This recipe isn’t just about making bread; it’s about creating wholesome nourishment and cherished family moments. It has become a staple in our home, a testament to how easy and rewarding homemade baking can be.
The Heart of Homemade Goodness: Whole Wheat Brown Bread Ingredients
To embark on your journey to baking the most delicious and wholesome whole wheat brown bread, you’ll need a few key ingredients. Each plays a vital role in achieving that perfect texture, flavor, and rise. Ensure your ingredients are fresh, especially the yeast, for the best results.
- Warm Water (105-115°F / 40-46°C): 1 ½ cups (360 ml) – Crucial for activating the yeast. Too hot will kill it, too cold and it won’t activate properly.
- Active Dry Yeast: 2 ¼ teaspoons (1 standard packet or 7g) – The magic ingredient that makes your bread rise.
- Molasses (Unsulphured): ¼ cup (60 ml) – Adds characteristic color, a hint of sweetness, and moisture. You can substitute with honey or maple syrup, but molasses gives that classic brown bread flavor.
- Melted Unsalted Butter (or Olive Oil/Coconut Oil): ¼ cup (60 ml / 57g) – Adds richness, flavor, and helps create a softer crumb.
- Salt: 1 ½ teaspoons (9g) – Essential for flavor and controlling yeast activity.
- Whole Wheat Flour: 3 ½ to 4 cups (420g to 480g) – The star of the show, providing fiber, nutrients, and a hearty flavor. The exact amount can vary depending on humidity and flour brand.
- Optional: Vital Wheat Gluten: 1 tablespoon (8g) – If you want a lighter, chewier loaf, especially if using 100% whole wheat flour, this can help improve the texture.
- Optional: Egg Wash (1 egg beaten with 1 tablespoon of water): For a shiny, golden crust.
- Optional: Rolled Oats or Seeds (like sunflower, pumpkin, or flax): For topping or mixing into the dough for added texture and nutrition.
Crafting Your Loaf: Step-by-Step Whole Wheat Brown Bread Instructions
Baking bread is a process that requires a little patience, but the rewards are immeasurable. Follow these steps carefully, and you’ll be well on your way to a perfect loaf.
- Activate the Yeast (Proofing):
- In a large mixing bowl (or the bowl of your stand mixer), pour in the warm water. The temperature is key here – use a thermometer if you have one.
- Sprinkle the active dry yeast over the water.
- Add a pinch of sugar or a teaspoon of the molasses to the water. This gives the yeast a little food to kickstart its activity.
- Let the mixture sit for 5-10 minutes. It should become foamy or bubbly. If it doesn’t, your yeast may be old or the water temperature was off. It’s best to start over with fresh yeast if this happens.
- Combine Wet Ingredients:
- Once the yeast is foamy, stir in the remaining molasses and the melted butter (or oil). Mix well to combine.
- Add Dry Ingredients:
- To the wet mixture, add the salt and 3 cups (360g) of the whole wheat flour (and vital wheat gluten, if using).
- If using a stand mixer, use the dough hook attachment and mix on low speed until the flour is incorporated.
- If mixing by hand, use a sturdy wooden spoon or spatula to combine the ingredients until a shaggy dough forms.
- Knead the Dough:
- Stand Mixer Method: Increase the speed to medium-low and continue to knead for 7-10 minutes. Gradually add more flour, ¼ cup at a time, only if the dough is excessively sticky and not pulling away from the sides of the bowl. The dough should be smooth, elastic, and slightly tacky to the touch.
- Hand Kneading Method: Turn the shaggy dough out onto a lightly floured surface. Begin kneading, folding the dough over itself and pushing it away with the heel of your hand. Rotate the dough a quarter turn and repeat. Continue kneading for 10-15 minutes. Add small amounts of flour to the surface as needed to prevent sticking, but avoid adding too much, which can make the bread dense. The dough is ready when it’s smooth, elastic, and springs back when lightly poked.
- First Rise (Bulk Fermentation):
- Lightly grease a large clean bowl with a little oil or cooking spray.
- Form the kneaded dough into a ball and place it in the greased bowl, turning it once to coat the entire surface with oil. This prevents a dry crust from forming.
- Cover the bowl tightly with plastic wrap or a damp kitchen towel.
- Place the bowl in a warm, draft-free place to rise. This could be a slightly warmed (then turned off) oven, near a sunny window (but not in direct hot sun), or on top of your refrigerator.
- Let the dough rise for 60-90 minutes, or until it has doubled in size. The exact time will depend on the temperature of your kitchen.
- Shape the Loaf:
- Once doubled, gently punch down the dough to release the air.
- Turn the dough out onto a lightly floured surface.
- Gently pat or roll the dough into a rectangle, roughly the length of your loaf pan (a standard 9×5 inch loaf pan is ideal).
- Tightly roll up the rectangle, starting from one of the shorter ends, to form a log. Pinch the seam and the ends closed to seal.
- Grease your loaf pan with butter or cooking spray. You can also line it with parchment paper for easy removal.
- Place the shaped dough, seam-side down, into the prepared loaf pan.
- Second Rise (Proofing):
- Cover the loaf pan loosely with plastic wrap (grease the top of the plastic wrap if it might touch the dough) or a damp kitchen towel.
- Let the dough rise again in a warm, draft-free place for another 30-60 minutes, or until it has risen about 1 inch above the rim of the pan. Don’t let it overproof, as this can cause it to collapse during baking.
- Preheat Oven and Bake:
- About 20 minutes before the second rise is complete, preheat your oven to 375°F (190°C). Position an oven rack in the center of the oven.
- Optional: If you want a shiny crust, gently brush the top of the risen loaf with the egg wash. If you’re adding oats or seeds, do this after the egg wash so they stick.
- Once the oven is preheated and the dough has completed its second rise, place the loaf pan in the center of the oven.
- Bake for 30-40 minutes. The bread is done when the crust is a deep golden brown and the internal temperature registers 190-200°F (88-93°C) on an instant-read thermometer. If you don’t have a thermometer, you can tap the bottom of the loaf; it should sound hollow.
- If the top of the bread starts to brown too quickly, you can loosely tent it with aluminum foil for the remainder of the baking time.
- Cool the Bread:
- Carefully remove the loaf pan from the oven.
- Immediately turn the bread out of the pan and onto a wire cooling rack. If you leave it in the pan, the bottom will become soggy from steam.
- Let the bread cool completely before slicing, ideally for at least 1-2 hours. This is a crucial step! Slicing hot bread can result in a gummy texture as the internal structure is still setting.
Understanding the Goodness: Nutrition Facts
This whole wheat brown bread is not only delicious but also a nutritious choice. Whole wheat flour is packed with fiber, vitamins, and minerals.
- Servings: This recipe makes 1 standard loaf, which typically yields 12-16 slices, depending on thickness.
- Calories per serving (approximate): Assuming 14 slices per loaf, each slice contains approximately 130-160 calories.
Please Note: Nutritional information is an estimate and can vary significantly based on the exact ingredients used (brand of flour, type of sweetener, added oil/butter), portion size, and any optional additions. For precise nutritional data, using a recipe calculator with your specific ingredients is recommended. Key nutritional benefits include:
* High in Fiber: Whole wheat flour is a great source of dietary fiber, which aids digestion, helps regulate blood sugar, and promotes satiety.
* Whole Grains: Provides complex carbohydrates for sustained energy.
* Vitamins and Minerals: Contains B vitamins, iron, magnesium, and selenium.
Timing Your Bake: Preparation and Rising Time
Understanding the time commitment will help you plan your baking day. While much of this is inactive rising time, it’s good to know the overall schedule.
- Active Preparation Time (Mixing & Kneading): 20-25 minutes
- First Rise (Bulk Fermentation): 60-90 minutes
- Shaping: 5-10 minutes
- Second Rise (Proofing): 30-60 minutes
- Baking Time: 30-40 minutes
- Cooling Time (Essential!): At least 1-2 hours, preferably longer before slicing.
Total Estimated Time: Approximately 3.5 to 5 hours (mostly inactive time).
Savoring Your Creation: How to Serve Whole Wheat Brown Bread
The versatility of homemade whole wheat brown bread is one of its greatest joys. Once cooled and sliced, here are numerous ways to enjoy your freshly baked loaf:
- Classic Toast:
- With Butter: The quintessential way. A warm, toasted slice with melting butter is pure comfort.
- With Jam or Marmalade: Strawberry, raspberry, apricot, or orange marmalade pair wonderfully.
- With Honey or Maple Syrup: A drizzle of natural sweetness.
- With Peanut Butter (or other nut butters): A protein-packed and satisfying option. Add sliced bananas for extra goodness.
- With Cream Cheese: Plain or flavored cream cheese makes a delightful spread.
- Perfect for Sandwiches: The sturdy yet soft texture of this bread makes it ideal for all kinds of sandwiches.
- Classic Lunchbox: Turkey and Swiss, ham and cheddar, roast beef and provolone.
- Veggie Delight: Hummus, avocado, cucumber, tomato, sprouts, and lettuce.
- Grilled Cheese: The nutty flavor of whole wheat elevates a simple grilled cheese. Add tomato or bacon for an upgrade.
- Peanut Butter & Jelly: A kid-friendly favorite that’s healthier with whole wheat bread.
- Club Sandwiches: Its structure holds up well to multiple layers.
- Breakfast Champion:
- French Toast: Soak thicker slices in an egg-milk-cinnamon mixture and pan-fry until golden. Serve with syrup and berries.
- Alongside Eggs: Perfect for dipping into runny yolks or mopping up scrambled eggs.
- Avocado Toast: Toasted bread topped with mashed avocado, a sprinkle of salt, pepper, and perhaps red pepper flakes or a fried egg.
- Soups, Stews, and Salads:
- Dipping Bread: Serve alongside hearty soups, stews, or chilis.
- Croutons: Cube stale bread, toss with olive oil and herbs, and bake or pan-fry until crispy for salads or soups.
- Breadcrumbs: Process stale bread into breadcrumbs for coating chicken or fish, or for use in meatballs and meatloaf.
- Appetizers and Snacks:
- Bruschetta: Toast slices, rub with garlic, and top with diced tomatoes, basil, and balsamic glaze.
- With Cheese and Charcuterie: Serve slices as part of a cheese board or charcuterie platter.
- With Dips: Great with hummus, spinach artichoke dip, or a savory bean dip.
- Sweet Treats (less common but possible):
- Bread Pudding: Stale whole wheat bread can be used to make a rustic, hearty bread pudding.
The possibilities are truly endless! Enjoy experimenting with different toppings and accompaniments to find your favorite ways to serve this wholesome bread.
Elevate Your Bake: Additional Tips for Perfect Whole Wheat Brown Bread
Achieving a consistently great loaf of whole wheat bread involves a few nuances. Here are five additional tips to help you master this recipe:
- Accurate Flour Measurement is Key: How you measure flour can significantly impact your dough’s hydration. Instead of scooping flour directly from the bag with your measuring cup (which compacts it), lightly spoon the flour into your measuring cup and then level off the excess with a straight edge. This “spoon and level” method prevents you from adding too much flour, which is a common cause of dense, dry bread. Alternatively, using a kitchen scale to weigh your flour (as indicated in grams in the ingredient list) is the most accurate method.
- Don’t Rush the Rise (But Don’t Overproof Either): Patience is a virtue in bread baking. The rising times are estimates; focus on the visual cue of the dough doubling in size. A warm environment (around 75-80°F or 24-27°C) is ideal. However, be cautious of overproofing, especially during the second rise. If the dough rises too much, it can exhaust the yeast’s power and may collapse in the oven or result in a coarse, overly airy texture. It should look puffy and have increased significantly, but still have some spring when gently poked.
- Understand Whole Wheat Flour’s Thirst: Whole wheat flour absorbs more liquid than all-purpose white flour due to the bran and germ content. This is why the recipe might seem to need a bit more liquid or a slightly stickier dough initially. Resist the urge to add too much extra flour during kneading. A slightly tacky dough is often desirable for a softer crumb. If your dough feels exceptionally dry, you can add a teaspoon or two of water at a time. Conversely, if it’s unmanageably sticky after several minutes of kneading, add flour a tablespoon at a time.
- Consider an Autolyse for Softer Texture: For an even softer crumb with 100% whole wheat bread, you can try an “autolyse.” This simply means mixing just the flour and water from the recipe and letting it rest for 20-30 minutes before adding the yeast, salt, and other ingredients. This pre-soak allows the flour to fully hydrate, which helps soften the bran and aids in gluten development, leading to a more tender loaf.
- Proper Cooling is Non-Negotiable: It’s incredibly tempting to slice into a warm loaf fresh from the oven, but this is a critical stage. The bread is still cooking internally as it cools, and its structure is setting. Slicing too early can release steam, leading to a gummy, doughy texture in the slices. Allow the bread to cool completely on a wire rack for at least 1-2 hours, and ideally 3-4 hours, for the best texture and easiest slicing. This also allows the flavors to fully develop.
Your Whole Wheat Bread Questions Answered: FAQ
Here are answers to some frequently asked questions about baking whole wheat brown bread:
- Q: Can I use 100% whole wheat flour, or should I mix it with white bread flour?
- A: This recipe is designed for 100% whole wheat flour to maximize its health benefits and hearty flavor. However, 100% whole wheat bread can sometimes be denser than loaves made with a mix of flours. If you prefer a lighter texture, you can substitute up to half of the whole wheat flour with white bread flour or all-purpose flour. Using vital wheat gluten (as mentioned in the ingredients) can also significantly improve the texture and rise of a 100% whole wheat loaf by boosting the gluten content.
- Q: My whole wheat bread came out dense and heavy. What did I do wrong?
- A: Several factors can lead to dense bread:
- Too much flour: This is the most common culprit. Ensure you’re measuring flour correctly (spoon and level, or weigh it).
- Not enough kneading: Kneading develops gluten, which gives bread its structure and allows it to trap air. Under-kneaded dough won’t rise well.
- Insufficient rising time: The dough needs adequate time to double in size during both rises.
- Old or inactive yeast: Always check the expiration date and proof your yeast to ensure it’s active.
- Water temperature too hot or too cold: This can kill or inhibit yeast activity.
- Too little liquid: Whole wheat flour is thirsty; ensure your dough has enough hydration.
- A: Several factors can lead to dense bread:
- Q: Can I make this recipe without a stand mixer?
- A: Absolutely! While a stand mixer makes the kneading process easier, this bread can be successfully made entirely by hand. You’ll need a large bowl for mixing and a clean, lightly floured surface for kneading. Hand kneading will take a bit longer (around 10-15 minutes) and requires more physical effort, but many bakers find it a very rewarding process. Just ensure you knead until the dough is smooth and elastic.
- Q: How should I store my homemade whole wheat brown bread, and how long will it last?
- A: Once completely cooled, store your bread in an airtight container, a bread box, or a resealable plastic bag at room temperature. It should stay fresh for 3-4 days. Avoid storing it in the refrigerator, as this can actually make it go stale faster. For longer storage, you can freeze the bread. Slice it completely before freezing, then wrap the slices tightly in plastic wrap and place them in a freezer-safe bag or container. It will keep well in the freezer for up to 3 months. Thaw slices at room temperature or toast them directly from frozen.
- Q: Can I substitute honey or maple syrup for the molasses?
- A: Yes, you can substitute honey or maple syrup for molasses in a 1:1 ratio. However, be aware that this will alter the flavor and color of the bread. Molasses gives traditional brown bread its characteristic dark color and robust, slightly bittersweet flavor. Honey will result in a lighter-colored loaf with a milder, sweeter flavor, while maple syrup will also yield a lighter color and its own distinct sweet notes. The texture should remain largely similar.
Whole Wheat Brown Bread recipe
Ingredients
- Warm Water (105-115°F / 40-46°C): 1 ½ cups (360 ml) – Crucial for activating the yeast. Too hot will kill it, too cold and it won’t activate properly.
- Active Dry Yeast: 2 ¼ teaspoons (1 standard packet or 7g) – The magic ingredient that makes your bread rise.
- Molasses (Unsulphured): ¼ cup (60 ml) – Adds characteristic color, a hint of sweetness, and moisture. You can substitute with honey or maple syrup, but molasses gives that classic brown bread flavor.
- Melted Unsalted Butter (or Olive Oil/Coconut Oil): ¼ cup (60 ml / 57g) – Adds richness, flavor, and helps create a softer crumb.
- Salt: 1 ½ teaspoons (9g) – Essential for flavor and controlling yeast activity.
- Whole Wheat Flour: 3 ½ to 4 cups (420g to 480g) – The star of the show, providing fiber, nutrients, and a hearty flavor. The exact amount can vary depending on humidity and flour brand.
- Optional: Vital Wheat Gluten: 1 tablespoon (8g) – If you want a lighter, chewier loaf, especially if using 100% whole wheat flour, this can help improve the texture.
- Optional: Egg Wash (1 egg beaten with 1 tablespoon of water): For a shiny, golden crust.
- Optional: Rolled Oats or Seeds (like sunflower, pumpkin, or flax): For topping or mixing into the dough for added texture and nutrition.
Instructions
- Activate the Yeast (Proofing):
- In a large mixing bowl (or the bowl of your stand mixer), pour in the warm water. The temperature is key here – use a thermometer if you have one.
- Sprinkle the active dry yeast over the water.
- Add a pinch of sugar or a teaspoon of the molasses to the water. This gives the yeast a little food to kickstart its activity.
- Let the mixture sit for 5-10 minutes. It should become foamy or bubbly. If it doesn’t, your yeast may be old or the water temperature was off. It’s best to start over with fresh yeast if this happens.
- Combine Wet Ingredients:
- Once the yeast is foamy, stir in the remaining molasses and the melted butter (or oil). Mix well to combine.
- Add Dry Ingredients:
- To the wet mixture, add the salt and 3 cups (360g) of the whole wheat flour (and vital wheat gluten, if using).
- If using a stand mixer, use the dough hook attachment and mix on low speed until the flour is incorporated.
- If mixing by hand, use a sturdy wooden spoon or spatula to combine the ingredients until a shaggy dough forms.
- Knead the Dough:
- Stand Mixer Method: Increase the speed to medium-low and continue to knead for 7-10 minutes. Gradually add more flour, ¼ cup at a time, only if the dough is excessively sticky and not pulling away from the sides of the bowl. The dough should be smooth, elastic, and slightly tacky to the touch.
- Hand Kneading Method: Turn the shaggy dough out onto a lightly floured surface. Begin kneading, folding the dough over itself and pushing it away with the heel of your hand. Rotate the dough a quarter turn and repeat. Continue kneading for 10-15 minutes. Add small amounts of flour to the surface as needed to prevent sticking, but avoid adding too much, which can make the bread dense. The dough is ready when it’s smooth, elastic, and springs back when lightly poked.
- First Rise (Bulk Fermentation):
- Lightly grease a large clean bowl with a little oil or cooking spray.
- Form the kneaded dough into a ball and place it in the greased bowl, turning it once to coat the entire surface with oil. This prevents a dry crust from forming.
- Cover the bowl tightly with plastic wrap or a damp kitchen towel.
- Place the bowl in a warm, draft-free place to rise. This could be a slightly warmed (then turned off) oven, near a sunny window (but not in direct hot sun), or on top of your refrigerator.
- Let the dough rise for 60-90 minutes, or until it has doubled in size. The exact time will depend on the temperature of your kitchen.
- Shape the Loaf:
- Once doubled, gently punch down the dough to release the air.
- Turn the dough out onto a lightly floured surface.
- Gently pat or roll the dough into a rectangle, roughly the length of your loaf pan (a standard 9×5 inch loaf pan is ideal).
- Tightly roll up the rectangle, starting from one of the shorter ends, to form a log. Pinch the seam and the ends closed to seal.
- Grease your loaf pan with butter or cooking spray. You can also line it with parchment paper for easy removal.
- Place the shaped dough, seam-side down, into the prepared loaf pan.
- Second Rise (Proofing):
- Cover the loaf pan loosely with plastic wrap (grease the top of the plastic wrap if it might touch the dough) or a damp kitchen towel.
- Let the dough rise again in a warm, draft-free place for another 30-60 minutes, or until it has risen about 1 inch above the rim of the pan. Don’t let it overproof, as this can cause it to collapse during baking.
- Preheat Oven and Bake:
- About 20 minutes before the second rise is complete, preheat your oven to 375°F (190°C). Position an oven rack in the center of the oven.
- Optional: If you want a shiny crust, gently brush the top of the risen loaf with the egg wash. If you’re adding oats or seeds, do this after the egg wash so they stick.
- Once the oven is preheated and the dough has completed its second rise, place the loaf pan in the center of the oven.
- Bake for 30-40 minutes. The bread is done when the crust is a deep golden brown and the internal temperature registers 190-200°F (88-93°C) on an instant-read thermometer. If you don’t have a thermometer, you can tap the bottom of the loaf; it should sound hollow.
- If the top of the bread starts to brown too quickly, you can loosely tent it with aluminum foil for the remainder of the baking time.
- Cool the Bread:
- Carefully remove the loaf pan from the oven.
- Immediately turn the bread out of the pan and onto a wire cooling rack. If you leave it in the pan, the bottom will become soggy from steam.
- Let the bread cool completely before slicing, ideally for at least 1-2 hours. This is a crucial step! Slicing hot bread can result in a gummy texture as the internal structure is still setting.
Nutrition
- Serving Size: one normal portion
- Calories: 130-160


