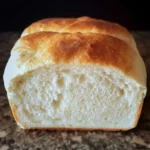
Ingredients
Scale
- 1 cup (240ml) Warm Water (105-115°F or 40-46°C): Water is the foundation of our bread, and warm water activates the yeast, helping it to rise properly. Make sure your water is warm, not hot, as hot water can kill the yeast. Using a thermometer is the best way to ensure the right temperature.
- 2 tablespoons (30ml) Vegetable Oil (or Melted Unsalted Butter): Oil or melted butter adds richness and tenderness to the bread, contributing to a softer crumb and better flavor. Vegetable oil is a neutral choice, while melted butter will impart a slightly richer, buttery flavor. You can use canola oil, sunflower oil, or any other neutral-tasting oil.
- 1 ½ teaspoons Salt: Salt is crucial for controlling the yeast activity and enhancing the flavor of the bread. It prevents the yeast from rising too quickly and adds depth to the overall taste. Don’t skip the salt!
- 2 tablespoons (25g) Sugar: Sugar provides food for the yeast, helping it to rise and also adds a touch of sweetness to the bread, balancing the savory flavors. Granulated sugar works perfectly.
- 3 cups (360g) Bread Flour: Bread flour is the star ingredient here. It has a higher protein content than all-purpose flour, which develops more gluten. Gluten is what gives bread its structure and chewiness. Using bread flour is essential for achieving a light and airy loaf in the bread machine. Do not substitute with all-purpose flour if you want the best texture.
- 1 ½ teaspoons Active Dry Yeast (or Instant Yeast): Yeast is the leavening agent that makes the bread rise. Active dry yeast needs to be proofed in warm water if you are not using a bread machine’s delayed start function. However, for most bread machines, especially with the basic white bread cycle, instant yeast (also called bread machine yeast or rapid rise yeast) can be added directly with the dry ingredients. If using active dry yeast and not using the delayed start, you can proof it by dissolving it in the warm water for 5-10 minutes until foamy before adding it to the bread machine. If using instant yeast, you can add it directly to the dry ingredients as per most bread machine instructions. Always check the expiration date on your yeast to ensure it is still active.
Instructions
Step 1: Prepare Your Bread Machine Pan
- Ensure your bread machine pan is clean and dry. This prevents any sticking and ensures a smooth release of the loaf after baking.
Step 2: Add the Wet Ingredients
- Pour the warm water into the bread machine pan.
- Add the vegetable oil (or melted butter) to the water.
Step 3: Add the Dry Ingredients (Except Yeast)
- Add the salt to the bread machine pan. It’s best to add salt and yeast separately, as direct contact can sometimes inhibit yeast activity.
- Sprinkle the sugar over the salt.
- Measure the bread flour accurately using the scoop and level method or a kitchen scale for the most consistent results. Add the bread flour to the pan, ensuring it covers the liquid ingredients.
Step 4: Add the Yeast
- Make a small well in the center of the flour, being careful not to reach the liquid underneath.
- Pour the active dry yeast (or instant yeast) into the well. This keeps the yeast separate from the liquid until the bread machine starts mixing.
Step 5: Select Your Bread Machine Settings
- Place the bread machine pan securely into the bread machine.
- Close the lid.
- Select the Basic White Bread cycle on your bread machine. This is usually the standard setting for white bread.
- Choose your desired Crust Color. Options usually include light, medium, or dark. Medium crust is generally a good choice for white bread.
- Select your desired Loaf Size. This recipe is designed for a 1.5 or 2-pound loaf, depending on your bread machine. Choose the appropriate size setting.
- Press the Start button to begin the bread-making process.
Step 6: Let the Bread Machine Work its Magic
- Now, simply let the bread machine do its job! The machine will automatically knead, rise, and bake the bread.
- Resist the urge to open the lid during the kneading and rising cycles, as this can affect the temperature and rising process. You can usually peek through the window to observe the dough.
- During the baking cycle, you’ll be rewarded with the incredible aroma of baking bread filling your kitchen.
Step 7: Remove the Bread from the Machine
- Once the bread machine cycle is complete, it will usually beep or signal to indicate the bread is done.
- Carefully open the lid of the bread machine.
- Use oven mitts or pot holders to remove the bread machine pan from the machine.
- Turn the pan upside down and gently shake to release the loaf of bread onto a wire rack. If the bread is sticking, you can gently loosen the sides with a spatula or knife.
- Remove the kneading paddle from the bottom of the loaf if it is still attached.
Step 8: Cool Completely Before Slicing
- Allow the bread to cool completely on the wire rack before slicing. This is crucial! Slicing warm bread can result in a gummy texture. Cooling allows the bread to set properly and makes slicing much easier. Resist the temptation to cut into it right away – the wait is worth it!
Step 9: Enjoy Your Freshly Baked Bread!
- Once cooled, slice and enjoy your delicious homemade white bread! The aroma and taste of freshly baked bread are simply unbeatable.
Nutrition
- Serving Size: one normal portion
- Calories: 120-150
