

This Ricotta Pea Spread has become an absolute sensation in my household. Initially, I whipped it up as a quick, healthy-ish snack for a weekend gathering, not expecting much more than a polite nibble from my guests. Boy, was I wrong! It vanished within minutes, with everyone clamoring for the recipe. My kids, who usually turn their noses up at anything green, were surprisingly enthusiastic, especially when served with crunchy breadsticks. It’s the vibrant color, the creamy texture, and the burst of fresh, sweet pea flavor perfectly balanced by the rich ricotta and zesty lemon that makes it so irresistible. Since then, it’s become a staple – perfect for last-minute appetizers, a light lunch spread on toast, or even a dollop on grilled chicken. It’s incredibly versatile, astonishingly easy to make, and a guaranteed crowd-pleaser. If you’re looking for a recipe that’s both elegant and effortless, this Ricotta Pea Spread is your answer.
Why This Ricotta Pea Spread Will Become Your New Go-To Appetizer
In a world filled with countless dips and spreads, what makes this Ricotta Pea Spread stand out? It’s more than just a mixture of ingredients; it’s an experience. This vibrant, verdant concoction offers a unique combination of flavor, texture, and versatility that makes it an indispensable addition to any cook’s repertoire.
First and foremost, the flavor profile is exceptional. The natural sweetness of fresh or frozen peas forms the base, a gentle, earthy taste that’s instantly appealing. This is beautifully complemented by the creamy, slightly tangy ricotta cheese, which adds a luxurious richness without being heavy. Fresh mint introduces a bright, cooling aromatic note, while lemon zest and juice cut through the richness with a vibrant, citrusy zing. A hint of garlic provides a subtle savory depth, and good quality extra virgin olive oil ties everything together with its fruity undertones. The balance is key – no single ingredient overpowers another; instead, they harmonize to create a truly delightful taste.
Then there’s the texture. This spread can be customized to your preference, from a slightly chunky, rustic consistency that offers delightful little bursts of pea, to a super smooth, almost mousse-like texture. The ricotta contributes to its inherent creaminess, making it feel indulgent yet light. This textural versatility means it can adapt to various serving methods, whether roughly spooned onto a rustic cracker or elegantly piped onto delicate cucumber rounds.
Ease of preparation is another significant draw. In under 15 minutes, you can transform a few simple ingredients into an impressive appetizer. There’s no complex cooking involved – just a quick blanch for the peas (if using fresh, or even to brighten frozen ones), and then everything gets a whirl in the food processor. This makes it perfect for busy weekdays, last-minute entertaining, or when you simply crave something delicious without a lot of fuss.
The visual appeal is undeniable. The bright, vibrant green color of the spread is incredibly inviting and signals freshness. Garnished with a swirl of olive oil, a sprinkle of red pepper flakes, or some extra mint leaves, it becomes a beautiful centerpiece on any appetizer platter. This makes it particularly well-suited for spring and summer gatherings, garden parties, or any occasion where you want to add a pop of color to your table.
Finally, its versatility is unparalleled. While it shines as a dip with crudités, crackers, or crostini, its uses extend far beyond. Spread it on sandwiches or wraps for a flavorful and healthy alternative to mayonnaise. Dollop it onto grilled chicken, fish, or lamb for a fresh, herbaceous accompaniment. Thin it out slightly with a little pasta water and toss it with your favorite pasta for a quick and light meal. You can even use it as a base for a savory tart or a topping for bruschetta with a sprinkle of toasted pine nuts.
This Ricotta Pea Spread isn’t just food; it’s a celebration of fresh, simple ingredients coming together to create something truly special. It’s healthy, quick, and incredibly satisfying – a culinary triple threat that will undoubtedly earn a permanent spot in your recipe rotation.
Ricotta Pea Spread: Complete Ingredients List
To create this delightful and refreshing spread, you’ll need the following high-quality ingredients. The quality, especially of the ricotta and fresh herbs, will significantly impact the final flavor.
- Peas: 2 cups (approximately 10 ounces or 280g) fresh or frozen sweet peas. If using fresh, shelled. Frozen peas work wonderfully and often have a sweeter taste.
- Ricotta Cheese: 1 cup (approximately 8 ounces or 225g) whole milk ricotta cheese. Whole milk ricotta offers the creamiest texture and richest flavor. Ensure it’s well-drained if it appears watery.
- Fresh Mint Leaves: 1/4 cup packed fresh mint leaves. More can be added to taste. Freshness is key here.
- Lemon: 1 medium lemon, providing both zest (about 1 teaspoon) and fresh juice (about 1-2 tablespoons, to taste).
- Garlic: 1 small clove, roughly chopped. Use sparingly, as raw garlic can be potent. You can also use roasted garlic for a milder, sweeter flavor.
- Extra Virgin Olive Oil: 2-3 tablespoons, plus extra for drizzling when serving. Use a good quality oil for the best flavor.
- Salt: 1/2 teaspoon, or to taste. Kosher salt or sea salt is recommended.
- Freshly Ground Black Pepper: 1/4 teaspoon, or to taste.
- Optional Garnish:
- Red pepper flakes (a pinch, for a little heat and color)
- Toasted pine nuts or slivered almonds
- Extra mint leaves
- A sprinkle of flaky sea salt
A Note on Ingredients:
- Peas: While fresh peas in season are lovely, high-quality frozen peas are an excellent, convenient alternative and are often picked and frozen at their peak sweetness. There’s no need to thaw frozen peas completely before blanching or using.
- Ricotta: The star alongside the peas! Good quality whole milk ricotta will give you the creamiest, most luscious spread. If your ricotta seems particularly wet, you can let it drain in a fine-mesh sieve lined with cheesecloth for about 30 minutes to an hour to remove excess whey. This will result in a thicker spread.
- Mint: Fresh mint is crucial for that signature bright, herbaceous flavor. Dried mint will not provide the same fresh, vibrant taste. Spearmint is generally preferred over peppermint for savory applications due to its milder flavor.
- Lemon: Always use fresh lemon juice and zest. Bottled lemon juice lacks the brightness and complexity of fresh. Zest the lemon before juicing it.
- Garlic: One small clove is usually sufficient. If you are sensitive to raw garlic, you can blanch the clove along with the peas for a few seconds to mellow its flavor, or use roasted garlic.
Choosing the best possible ingredients, even for a simple recipe like this, elevates the final dish from good to truly memorable.
Step-by-Step Instructions for Perfect Ricotta Pea Spread
Follow these simple steps to create a vibrant and flavorful Ricotta Pea Spread. The process is quick and straightforward, yielding a delicious result with minimal effort.
- Prepare the Peas (Blanching):
- Bring a small saucepan of lightly salted water to a rolling boil.
- Prepare an ice bath: Fill a medium bowl with ice and a little cold water.
- Add the peas (fresh or frozen) to the boiling water. Cook for just 1-2 minutes if using frozen peas, or 2-3 minutes if using fresh peas. The goal is to cook them until they are bright green and tender-crisp, not mushy. You’re essentially just blanching them to enhance their color and sweetness.
- Immediately drain the peas using a colander or slotted spoon and transfer them to the ice bath. This stops the cooking process and helps retain their vibrant green color.
- Once the peas are completely cool (about 1-2 minutes in the ice bath), drain them thoroughly. Pat them dry with a clean kitchen towel or paper towels to remove excess moisture, which can make the spread watery.
- Combine Ingredients in Food Processor:
- To the bowl of a food processor, add the blanched and dried peas, whole milk ricotta cheese, packed fresh mint leaves, chopped garlic clove, and the zest of one lemon.
- Pulse the mixture 5-7 times to roughly chop and combine the ingredients. This initial pulsing helps break down the larger components before adding liquid.
- Process to Desired Consistency:
- Add 2 tablespoons of extra virgin olive oil and 1 tablespoon of fresh lemon juice to the food processor.
- Process continuously until the spread reaches your desired consistency.
- For a chunkier, more rustic spread, process for about 30-45 seconds, scraping down the sides of the bowl once or twice.
- For a smoother, creamier spread, process for 1-2 minutes, scraping down the sides as needed, until very smooth. You might need to add the additional tablespoon of olive oil or a touch more lemon juice if you prefer it very smooth and slightly thinner.
- Chef’s Tip: Avoid over-processing if you prefer some texture, as it can become too homogenous and lose some of the distinct pea character.
- Season and Adjust:
- Once the spread has reached your preferred texture, add 1/2 teaspoon of salt and 1/4 teaspoon of freshly ground black pepper.
- Pulse a few more times to incorporate the seasonings.
- Taste the spread carefully. Adjust seasonings as needed. You might want to add more salt, pepper, lemon juice (for brightness), or even a few more mint leaves (for extra freshness). Remember that flavors will meld and intensify slightly as it chills.
- Chill (Recommended):
- Transfer the Ricotta Pea Spread to an airtight container or a serving bowl covered with plastic wrap.
- Refrigerate for at least 30 minutes, or up to a few hours, before serving. Chilling allows the flavors to meld together beautifully and improves the overall taste and texture.
- Serve:
- When ready to serve, give the spread a good stir.
- Spoon it into a serving bowl.
- Garnish generously. A drizzle of good quality extra virgin olive oil is classic. You can also add a sprinkle of red pepper flakes for a pop of color and a hint of spice, a few fresh mint leaves, a light grating of lemon zest, or some toasted pine nuts for crunch.
- Serve with your choice of accompaniments (see “How to Serve” section for ideas).
Enjoy your homemade, fresh, and delicious Ricotta Pea Spread!
Nutrition Facts (Estimated)
Please note that these nutritional values are approximate and can vary based on the specific brands of ingredients used, an exact serving size, and any modifications made to the recipe. This estimation is for the spread itself, not including accompaniments like bread or vegetables.
- Servings: This recipe yields approximately 2 to 2.5 cups of spread.
- As an appetizer dip/spread, this can comfortably serve 6-8 people.
- Estimated Calories per Serving (assuming 8 servings, approximately 1/4 cup per serving): Around 100-150 calories.
Breakdown of Key Nutritional Contributions:
- Peas: A good source of vitamins K, C, A, and folate, as well as manganese and fiber. They also provide some plant-based protein.
- Ricotta Cheese (Whole Milk): Provides protein, calcium, phosphorus, and vitamin B12. Whole milk ricotta contributes more fat and calories but also a creamier texture and richer flavor compared to part-skim.
- Extra Virgin Olive Oil: Rich in monounsaturated fats (oleic acid), which are heart-healthy. It also contains antioxidants.
- Lemon: Excellent source of Vitamin C and antioxidants.
- Mint: Contains small amounts of vitamins and minerals and offers antioxidant properties.
- Garlic: Known for its potential health benefits, including immune-boosting properties, and contains compounds like allicin.
General Nutritional Profile:
- Relatively Low in Calories (per serving): Making it a lighter option compared to many cream cheese or mayonnaise-based dips.
- Good Source of Protein: Primarily from the ricotta cheese and peas.
- Contains Healthy Fats: From the extra virgin olive oil and ricotta.
- Rich in Vitamins and Minerals: Thanks to the peas, lemon, and mint.
- Good Fiber Content: Primarily from the peas, aiding in digestion and satiety.
- Vegetarian-Friendly: A great option for vegetarian diets.
- Gluten-Free (the spread itself): Serve with gluten-free crackers or vegetables for a fully gluten-free snack.
Considerations for Specific Dietary Needs:
- Lower Fat: You can use part-skim ricotta cheese to reduce the fat content, though this will slightly alter the creaminess and richness.
- Sodium Control: Adjust the amount of salt added to your preference. Many store-bought ricottas also contain sodium, so check labels if this is a concern.
This Ricotta Pea Spread offers a delicious way to incorporate more vegetables and beneficial nutrients into your diet. It’s a flavorful, satisfying, and relatively wholesome choice for snacking or as part of a larger meal.
Preparation Time
Understanding the time commitment for a recipe is crucial for planning. This Ricotta Pea Spread is delightfully quick to prepare, making it an excellent choice for both spontaneous cravings and planned gatherings.
- Active Preparation Time: Approximately 10-15 minutes.
- This includes:
- Gathering and measuring ingredients (2-3 minutes).
- Bringing water to a boil and blanching the peas (5-7 minutes, including cooling in the ice bath).
- Processing the ingredients in the food processor (3-5 minutes, including scraping down sides and taste adjustments).
- This includes:
- Chilling Time (Recommended): At least 30 minutes, up to 4 hours.
- While the spread can be served immediately, chilling allows the flavors to meld and deepen, resulting in a more cohesive and delicious taste. It also firms up the spread slightly, giving it a better texture for dipping. If you’re short on time, even 15-20 minutes in the refrigerator will make a difference. For optimal flavor, aim for at least an hour of chilling.
- Total Time (including minimum chilling): Approximately 40-45 minutes.
- Total Time (if served immediately, not recommended for best flavor): Approximately 10-15 minutes.
Factors that might affect preparation time:
- Using Fresh vs. Frozen Peas: Shelling fresh peas will add extra time. Frozen peas are ready to go.
- Efficiency in the Kitchen: Your speed in chopping, measuring, and operating the food processor.
- Draining Ricotta: If your ricotta is very watery and you choose to drain it, this will add passive time (30 minutes to 1 hour) before you start the active preparation.
Overall, this is a very quick recipe, with the majority of the “waiting” time being the optional (but highly recommended) chilling period. Its rapid active prep makes it ideal for whipping up a fresh, impressive appetizer with minimal notice.
How to Serve Your Delicious Ricotta Pea Spread
The beauty of this Ricotta Pea Spread lies not only in its flavor but also in its incredible versatility. Here are numerous ways to serve and enjoy this vibrant concoction, suitable for various occasions and culinary pairings:
- Classic Dip with Accompaniments:
- Crostini or Bruschetta: Serve with toasted slices of baguette, ciabatta, or sourdough bread. Rub the toasted bread with a garlic clove before topping for extra flavor.
- Crackers: Offer an assortment of crackers – whole wheat, seeded, rice crackers, or artisanal crisps.
- Pita Bread or Pita Chips: Warm pita bread cut into wedges or crunchy pita chips are excellent vehicles for the spread.
- Crudités Platter: Arrange a colorful selection of fresh vegetables for dipping. Consider:
- Carrot sticks
- Celery sticks
- Cucumber rounds or spears
- Bell pepper strips (red, yellow, orange)
- Radishes (halved or sliced)
- Cherry tomatoes
- Snap peas or snow peas
- Blanched asparagus spears
- Endive leaves (they make great little boats for the spread)
- Breadsticks: Crunchy breadsticks are always a hit, especially with kids.
- Spread for Sandwiches and Wraps:
- Use as a flavorful and healthier alternative to mayonnaise or cream cheese in sandwiches and wraps.
- Particularly delicious in vegetarian sandwiches with grilled vegetables, sprouts, and avocado.
- Spread it on toast and top with a poached or fried egg for a savory breakfast or light lunch.
- Topping or Accompaniment:
- Grilled Meats or Fish: Serve a dollop alongside grilled chicken breast, salmon, cod, or lamb chops for a fresh, herbaceous contrast.
- Roasted Vegetables: Add a spoonful to a plate of roasted vegetables like zucchini, eggplant, or potatoes.
- Baked Potatoes: Use as a flavorful topping for baked potatoes or sweet potatoes.
- Grain Bowls: Incorporate a scoop into grain bowls for added creaminess, protein, and flavor.
- In Pasta Dishes:
- Thin the spread with a little reserved pasta water or a splash of cream/milk and toss with your favorite hot pasta (like orecchiette, farfalle, or penne) for a quick and light pasta sauce. Garnish with Parmesan cheese.
- Filling for Appetizers:
- Use as a filling for small tartlets or phyllo cups.
- Stuff into mini bell peppers or cherry tomatoes.
- On a Cheese Board or Mezze Platter:
- Include it as a vibrant, fresh element on a larger cheese board or mezze platter alongside cheeses, olives, cured meats, and other dips.
Presentation Tips for Serving:
- Garnish Generously: A drizzle of good quality extra virgin olive oil, a sprinkle of red pepper flakes, fresh mint leaves, lemon zest, or toasted nuts not only adds flavor but also enhances visual appeal.
- Serving Dish: Choose an attractive bowl. A white or light-colored bowl will make the green color pop.
- Swirl it: Use the back of a spoon to create an attractive swirl on the surface before adding garnishes.
No matter how you choose to serve it, this Ricotta Pea Spread is sure to be a refreshing and delightful addition to your meal or snack time. Its adaptability makes it a true kitchen hero!
Additional Tips for the Best Ricotta Pea Spread
To ensure your Ricotta Pea Spread is consistently delicious and perfectly tailored to your taste, consider these five valuable tips:
- Taste and Adjust Seasoning Religiously: This is perhaps the most crucial tip for any recipe, but especially for one with fresh, bright flavors. After processing, always taste the spread. Is it salty enough? Does it need more lemon juice for acidity and brightness? Could it use a bit more fresh mint for that cool, herbaceous note? Or perhaps a tiny pinch more garlic if you prefer a stronger savory kick? Don’t be afraid to add ingredients incrementally, tasting after each addition, until it’s perfect for your palate. Remember that flavors will meld and slightly intensify upon chilling, but it’s better to adjust while it’s being made.
- Don’t Over-Process for Texture: The final texture of your spread is a matter of personal preference. Some like it super smooth, almost like a mousse, while others prefer a bit more chunkiness with visible bits of pea. If you’re aiming for a more rustic, textured spread, pulse the ingredients in the food processor rather than letting it run continuously for too long. You can always process it more if it’s too chunky, but you can’t go back once it’s overly smooth. Scrape down the sides of the processor bowl frequently to ensure even blending.
- Prioritize Fresh, High-Quality Ingredients: The simplicity of this recipe means that the quality of each ingredient truly shines through. Use the best whole milk ricotta you can find; it makes a huge difference in creaminess and flavor. Fresh mint is non-negotiable – dried mint will not yield the same vibrant taste. Similarly, fresh lemon juice and zest are far superior to bottled alternatives. Even a good quality extra virgin olive oil will contribute a more nuanced, fruity flavor.
- Ensure Peas Are Well-Drained and Dry: After blanching and cooling the peas in an ice bath, it’s vital to drain them thoroughly and pat them dry with paper towels or a clean kitchen towel. Excess water clinging to the peas can make your spread watery and dilute the flavors. Taking a moment to properly dry them will result in a thicker, more concentrated spread.
- Chill Before Serving for Optimal Flavor Fusion: While you can serve the Ricotta Pea Spread immediately, allowing it to chill in the refrigerator for at least 30 minutes (and ideally an hour or two) makes a significant difference. This resting period allows all the individual flavors – the sweet peas, creamy ricotta, zesty lemon, aromatic mint, and pungent garlic – to meld together harmoniously, creating a more complex and well-rounded taste profile. The spread will also firm up slightly, making it better for dipping.
By keeping these tips in mind, you’ll be well on your way to creating a Ricotta Pea Spread that is not just good, but absolutely exceptional every single time.
Frequently Asked Questions (FAQ) about Ricotta Pea Spread
Here are answers to some common questions you might have about making and enjoying this delicious Ricotta Pea Spread:
- Q: Can I use frozen peas instead of fresh peas? Do I need to thaw them first?
- A: Absolutely! Frozen peas are an excellent choice for this recipe. They are often picked and frozen at their peak sweetness and are incredibly convenient. You do not need to thaw them completely before blanching. You can add them directly from the freezer into the boiling water; they will just take a moment longer to come back to a boil and cook through (usually 1-2 minutes once the water returns to a boil).
- Q: How long will this Ricotta Pea Spread last in the refrigerator?
- A: When stored properly in an airtight container, the Ricotta Pea Spread will keep well in the refrigerator for about 3 to 4 days. The flavors might even continue to meld and improve by the second day. Give it a good stir before serving, as a little liquid separation can sometimes occur (this is normal). If it looks or smells off after a few days, it’s best to discard it.
- Q: Can I make this spread ahead of time?
- A: Yes, this spread is perfect for making ahead! In fact, as mentioned in the tips, allowing it to chill for at least 30 minutes to a few hours before serving actually enhances the flavor as the ingredients meld. You can make it up to a day in advance. Store it in an airtight container in the refrigerator. Just before serving, give it a stir and refresh the garnishes (like a drizzle of olive oil or fresh mint).
- Q: My spread seems a bit too thick/thin. How can I adjust the consistency?
- A: Adjusting the consistency is easy!
- If it’s too thick: You can thin it out by adding a little more extra virgin olive oil, a squeeze of fresh lemon juice, or even a tablespoon of cold water or milk, processing briefly until it reaches your desired consistency.
- If it’s too thin: This can sometimes happen if the peas weren’t dried thoroughly or if the ricotta was particularly watery. You can try to thicken it by adding a bit more ricotta cheese and pulsing again. Chilling the spread will also naturally help it firm up. In the future, ensure peas are well-dried and consider draining your ricotta if it seems very wet.
- A: Adjusting the consistency is easy!
- Q: Can I make this Ricotta Pea Spread vegan or dairy-free?
- A: The traditional recipe relies on dairy-based ricotta cheese. However, you can certainly make a vegan version! Substitute the dairy ricotta with a good quality store-bought vegan ricotta alternative (often made from almonds, cashews, or tofu). The texture and flavor will be slightly different but can still be delicious. Ensure your other ingredients are also vegan-friendly. Alternatively, for a different kind of pea spread (though not a ricotta pea spread), you could blend the peas with cannellini beans, tahini, lemon, mint, and olive oil for a hummus-like consistency.
This Ricotta Pea Spread is designed to be simple and adaptable. Don’t hesitate to experiment and make it your own!
Print
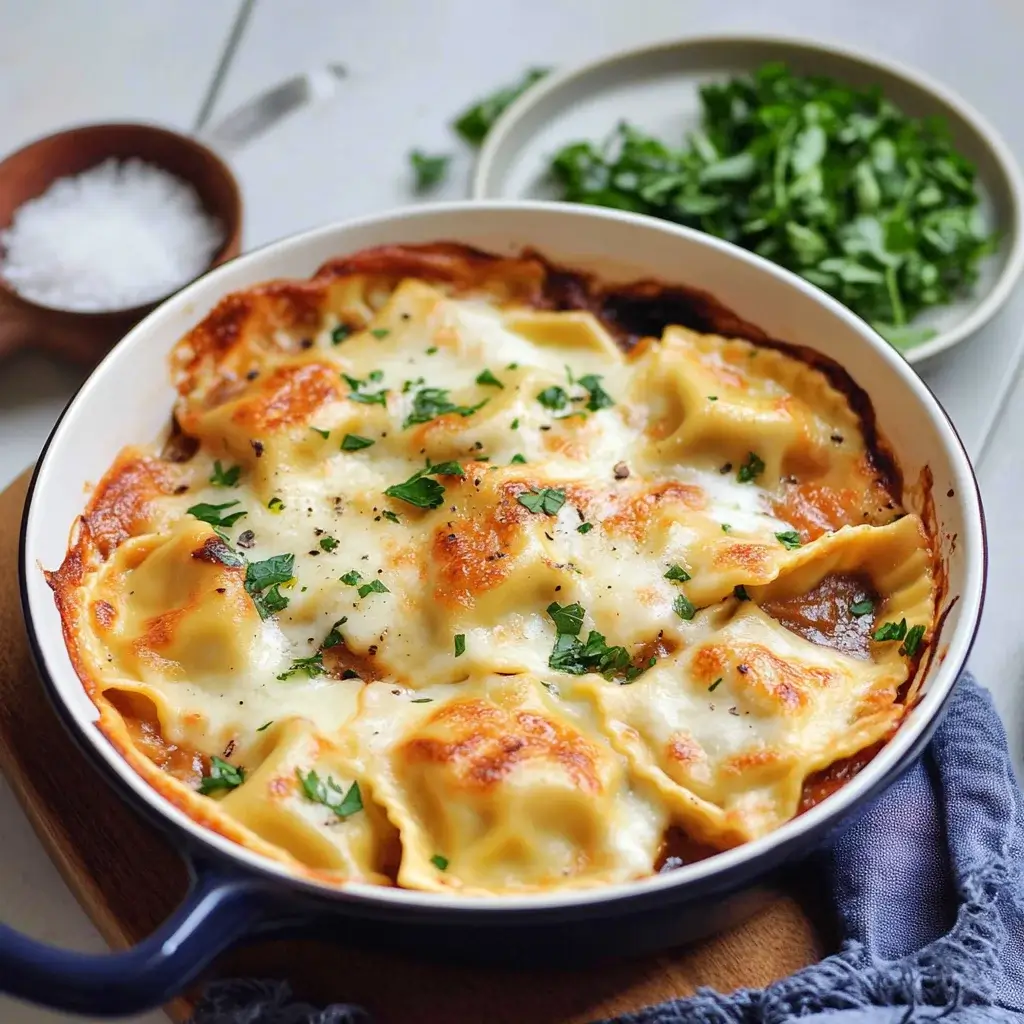
Vegetarian Ravioli Bake recipe
Ingredients
-
- Peas: 2 cups (approximately 10 ounces or 280g) fresh or frozen sweet peas. If using fresh, shelled. Frozen peas work wonderfully and often have a sweeter taste.
-
- Ricotta Cheese: 1 cup (approximately 8 ounces or 225g) whole milk ricotta cheese. Whole milk ricotta offers the creamiest texture and richest flavor. Ensure it’s well-drained if it appears watery.
-
- Fresh Mint Leaves: 1/4 cup packed fresh mint leaves. More can be added to taste. Freshness is key here.
-
- Lemon: 1 medium lemon, providing both zest (about 1 teaspoon) and fresh juice (about 1-2 tablespoons, to taste).
-
- Garlic: 1 small clove, roughly chopped. Use sparingly, as raw garlic can be potent. You can also use roasted garlic for a milder, sweeter flavor.
-
- Extra Virgin Olive Oil: 2-3 tablespoons, plus extra for drizzling when serving. Use a good quality oil for the best flavor.
-
- Salt: 1/2 teaspoon, or to taste. Kosher salt or sea salt is recommended.
-
- Freshly Ground Black Pepper: 1/4 teaspoon, or to taste.
-
- Optional Garnish:
-
- Red pepper flakes (a pinch, for a little heat and color)
-
- Toasted pine nuts or slivered almonds
-
- Extra mint leaves
-
- A sprinkle of flaky sea salt
-
- Optional Garnish:
A Note on Ingredients:
-
- Peas: While fresh peas in season are lovely, high-quality frozen peas are an excellent, convenient alternative and are often picked and frozen at their peak sweetness. There’s no need to thaw frozen peas completely before blanching or using.
-
- Ricotta: The star alongside the peas! Good quality whole milk ricotta will give you the creamiest, most luscious spread. If your ricotta seems particularly wet, you can let it drain in a fine-mesh sieve lined with cheesecloth for about 30 minutes to an hour to remove excess whey. This will result in a thicker spread.
-
- Mint: Fresh mint is crucial for that signature bright, herbaceous flavor. Dried mint will not provide the same fresh, vibrant taste. Spearmint is generally preferred over peppermint for savory applications due to its milder flavor.
-
- Lemon: Always use fresh lemon juice and zest. Bottled lemon juice lacks the brightness and complexity of fresh. Zest the lemon before juicing it.
-
- Garlic: One small clove is usually sufficient. If you are sensitive to raw garlic, you can blanch the clove along with the peas for a few seconds to mellow its flavor, or use roasted garlic.
Choosing the best possible ingredients, even for a simple recipe like this, elevates the final dish from good to truly memorable.
Instructions
-
- Prepare the Peas (Blanching):
-
- Bring a small saucepan of lightly salted water to a rolling boil.
-
- Prepare an ice bath: Fill a medium bowl with ice and a little cold water.
-
- Add the peas (fresh or frozen) to the boiling water. Cook for just 1-2 minutes if using frozen peas, or 2-3 minutes if using fresh peas. The goal is to cook them until they are bright green and tender-crisp, not mushy. You’re essentially just blanching them to enhance their color and sweetness.
-
- Immediately drain the peas using a colander or slotted spoon and transfer them to the ice bath. This stops the cooking process and helps retain their vibrant green color.
-
- Once the peas are completely cool (about 1-2 minutes in the ice bath), drain them thoroughly. Pat them dry with a clean kitchen towel or paper towels to remove excess moisture, which can make the spread watery.
-
- Prepare the Peas (Blanching):
-
- Combine Ingredients in Food Processor:
-
- To the bowl of a food processor, add the blanched and dried peas, whole milk ricotta cheese, packed fresh mint leaves, chopped garlic clove, and the zest of one lemon.
-
- Pulse the mixture 5-7 times to roughly chop and combine the ingredients. This initial pulsing helps break down the larger components before adding liquid.
-
- Combine Ingredients in Food Processor:
-
- Process to Desired Consistency:
-
- Add 2 tablespoons of extra virgin olive oil and 1 tablespoon of fresh lemon juice to the food processor.
-
- Process continuously until the spread reaches your desired consistency.
-
- For a chunkier, more rustic spread, process for about 30-45 seconds, scraping down the sides of the bowl once or twice.
-
- For a smoother, creamier spread, process for 1-2 minutes, scraping down the sides as needed, until very smooth. You might need to add the additional tablespoon of olive oil or a touch more lemon juice if you prefer it very smooth and slightly thinner.
-
- Process continuously until the spread reaches your desired consistency.
-
- Chef’s Tip: Avoid over-processing if you prefer some texture, as it can become too homogenous and lose some of the distinct pea character.
-
- Process to Desired Consistency:
-
- Season and Adjust:
-
- Once the spread has reached your preferred texture, add 1/2 teaspoon of salt and 1/4 teaspoon of freshly ground black pepper.
-
- Pulse a few more times to incorporate the seasonings.
-
- Taste the spread carefully. Adjust seasonings as needed. You might want to add more salt, pepper, lemon juice (for brightness), or even a few more mint leaves (for extra freshness). Remember that flavors will meld and intensify slightly as it chills.
-
- Season and Adjust:
-
- Chill (Recommended):
-
- Transfer the Ricotta Pea Spread to an airtight container or a serving bowl covered with plastic wrap.
-
- Refrigerate for at least 30 minutes, or up to a few hours, before serving. Chilling allows the flavors to meld together beautifully and improves the overall taste and texture.
-
- Chill (Recommended):
-
- Serve:
-
- When ready to serve, give the spread a good stir.
-
- Spoon it into a serving bowl.
-
- Garnish generously. A drizzle of good quality extra virgin olive oil is classic. You can also add a sprinkle of red pepper flakes for a pop of color and a hint of spice, a few fresh mint leaves, a light grating of lemon zest, or some toasted pine nuts for crunch.
-
- Serve with your choice of accompaniments (see “How to Serve” section for ideas).
-
- Serve:
Nutrition
- Serving Size: one normal portion
- Calories: 100-150


