

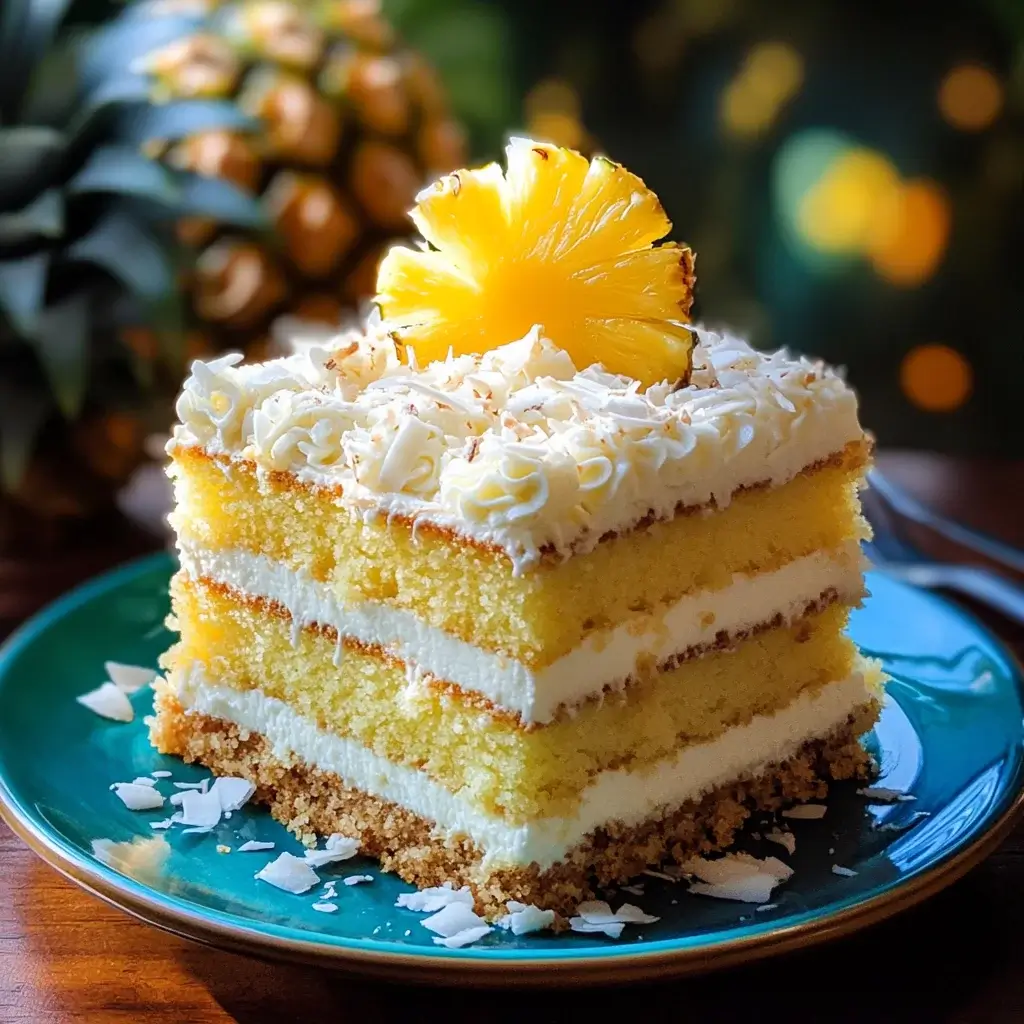
I still remember the first time I baked this Pineapple Coconut Layer Cake. It was for a summer family gathering, one of those warm afternoons where the air hums with cicadas and laughter. I wanted something special, something that tasted like sunshine and vacation. Scrolling through endless recipes, this combination of tropical pineapple and creamy coconut called out to me. I was a little intimidated by layer cakes back then, worried about lopsided layers and collapsing frosting. But the lure of that flavor combination was too strong to resist. As the cakes baked, the house filled with the most incredible aroma – sweet coconut mingling with the tangy scent of pineapple. The assembly was surprisingly therapeutic, smoothing the luscious cream cheese frosting over the tender cake layers, carefully arranging the pineapple filling. When it was finally time for dessert, the cake sat proudly on the table, adorned with toasted coconut flakes, looking every bit the tropical dream I’d hoped for. The first bite was pure bliss – incredibly moist cake, a burst of sweet-tart pineapple, and that rich, tangy, coconut-infused frosting. It wasn’t just good; it was spectacular. My notoriously picky nephew asked for seconds (a rare event!), and my sister-in-law immediately demanded the recipe. Since that day, this Pineapple Coconut Layer Cake recipe has become my go-to for celebrations, potlucks, or just when we need a little taste of the tropics. It consistently disappears faster than any other dessert, a testament to its crowd-pleasing magic. It’s more than just a cake; it’s a guaranteed smile-inducer, a slice of edible happiness that brings a little bit of paradise to any occasion.
Ingredients for the Ultimate Pineapple Coconut Layer Cake
This recipe is broken down into three main components: the moist coconut cake layers, the vibrant pineapple filling, and the luscious coconut cream cheese frosting. Using high-quality ingredients is key to achieving the best flavour and texture.
For the Coconut Cake Layers:
- All-Purpose Flour: 3 cups (360g), spooned and leveled – Provides the structure for the cake.
- Granulated Sugar: 2 cups (400g) – Sweetens the cake and contributes to its tender crumb.
- Baking Powder: 1 tablespoon – The primary leavening agent, making the cake rise and become light.
- Baking Soda: 1/2 teaspoon – Works with acidic ingredients (like pineapple juice, potentially) to provide additional lift.
- Salt: 1 teaspoon – Enhances all the other flavours and balances the sweetness.
- Unsalted Butter: 1 cup (2 sticks or 226g), at room temperature – Adds richness, flavour, and tenderness. Room temperature butter incorporates air better when creamed with sugar.
- Large Eggs: 4, at room temperature – Bind the ingredients, add richness, and contribute to structure. Room temperature eggs incorporate more easily.
- Unsweetened Coconut Milk (Full-Fat, Canned): 1 cup (240ml), well-shaken, at room temperature – Provides moisture and distinct coconut flavour. Full-fat yields the richest result. Ensure it’s the beverage kind, not cream of coconut for the cake batter.
- Sour Cream or Plain Full-Fat Yogurt: 1/2 cup (120g), at room temperature – Adds moisture and a slight tang, resulting in a very tender crumb.
- Vanilla Extract: 2 teaspoons – Enhances the sweetness and complements the coconut and pineapple flavours.
- Coconut Extract: 1 teaspoon (optional, but recommended for intense coconut flavour) – Boosts the coconut profile.
- Sweetened Shredded Coconut: 1 cup (100g) – Adds texture and flavour directly into the cake batter.
For the Pineapple Filling:
- Crushed Pineapple (Canned in Juice): 1 can (20 oz or 567g), undrained – The star of the filling. Using pineapple packed in juice (not heavy syrup) gives a brighter flavour. Do not drain; the juice is crucial.
- Granulated Sugar: 1/2 cup (100g), adjust to taste based on pineapple sweetness – Sweetens the filling and helps it thicken.
- Cornstarch: 3 tablespoons – Thickens the pineapple juice into a luscious filling.
- Lemon Juice: 1 tablespoon (optional) – Adds brightness and balances the sweetness.
- Butter: 1 tablespoon (optional) – Adds a touch of richness and smoothness at the end.
For the Coconut Cream Cheese Frosting:
- Cream Cheese: 16 oz (two 8oz packages or 452g), softened to room temperature – Provides the tangy base and creamy texture. Full-fat works best. Ensure it’s properly softened for a smooth frosting.
- Unsalted Butter: 1 cup (2 sticks or 226g), softened to room temperature – Adds structure, richness, and flavour to the frosting.
- Powdered Sugar (Confectioners’ Sugar): 5-6 cups (600-720g), sifted – Sweetens and thickens the frosting. Sifting prevents lumps. Adjust amount for desired sweetness and consistency.
- Unsweetened Coconut Milk (Full-Fat, Canned) or Heavy Cream: 2-4 tablespoons, as needed – Used to adjust the frosting consistency.
- Vanilla Extract: 2 teaspoons – Enhances flavour.
- Coconut Extract: 1-2 teaspoons (adjust to taste) – Infuses the frosting with strong coconut flavour.
- Salt: 1/4 teaspoon – Balances the sweetness.
- Sweetened Shredded Coconut: 1 1/2 – 2 cups (150-200g), lightly toasted for garnish (optional but highly recommended) – For coating the outside of the cake, adding texture, flavour, and visual appeal.
Step-by-Step Instructions for Baking Perfection
Follow these detailed steps carefully to create your show-stopping Pineapple Coconut Layer Cake. Precision in baking often leads to the best results!
Phase 1: Prepare the Pineapple Filling (Allow time for cooling)
- Combine Ingredients: In a medium saucepan, combine the undrained crushed pineapple (including all the juice), granulated sugar, and cornstarch. Whisk thoroughly until the cornstarch is fully dissolved and there are no lumps. This is crucial to prevent a lumpy filling.
- Cook and Thicken: Place the saucepan over medium heat. Bring the mixture to a gentle simmer, whisking constantly to prevent scorching on the bottom. Continue to cook and whisk for about 5-8 minutes, or until the mixture has noticeably thickened to a jam-like consistency. It should coat the back of a spoon.
- Add Flavour (Optional): Remove the saucepan from the heat. Stir in the optional lemon juice (for brightness) and butter (for richness) until the butter is fully melted and incorporated.
- Cool Completely: Transfer the pineapple filling to a heatproof bowl. Cover the surface directly with plastic wrap (press it down onto the filling) to prevent a skin from forming. Allow it to cool completely to room temperature, and then refrigerate until well-chilled (at least 1-2 hours, or preferably longer). A cold filling is essential for assembling the cake without melting the frosting or making the layers slide.
Phase 2: Bake the Coconut Cake Layers
- Preheat and Prepare Pans: Preheat your oven to 350°F (175°C). Grease and flour three 8-inch or 9-inch round cake pans. Alternatively, line the bottoms with parchment paper circles and grease/flour the sides. Proper pan preparation prevents sticking and ensures clean cake layers.
- Combine Dry Ingredients: In a large bowl, whisk together the all-purpose flour, granulated sugar, baking powder, baking soda, and salt. Whisking aerates the flour and ensures the leavening agents and salt are evenly distributed.
- Combine Wet Ingredients: In a separate medium bowl, whisk together the room temperature coconut milk, sour cream (or yogurt), vanilla extract, and optional coconut extract until smooth.
- Cream Butter and Sugar: In the bowl of a stand mixer fitted with the paddle attachment (or using a large bowl and a hand mixer), beat the room temperature butter on medium speed until creamy, about 1 minute. Add the granulated sugar gradually and continue beating on medium-high speed for 3-5 minutes, until the mixture is very pale, light, and fluffy. Scrape down the sides and bottom of the bowl occasionally. This step incorporates air, which is crucial for a light cake texture.
- Add Eggs: Add the room temperature eggs one at a time, beating well (about 30 seconds) after each addition. Scrape down the bowl again after the last egg is incorporated. Adding eggs one at a time ensures they emulsify properly into the batter.
- Alternate Dry and Wet Ingredients: Reduce the mixer speed to low. Add the dry ingredients in three additions, alternating with the wet ingredients in two additions, beginning and ending with the dry ingredients. (Dry -> Wet -> Dry -> Wet -> Dry). Mix only until just combined after each addition. Overmixing develops gluten, which can make the cake tough. Stop mixing as soon as you no longer see streaks of flour.
- Fold in Coconut: Remove the bowl from the mixer. Gently fold in the 1 cup of sweetened shredded coconut using a rubber spatula.
- Divide Batter: Evenly divide the batter among the three prepared cake pans. Use a kitchen scale for precision if desired. Smooth the tops with an offset spatula.
- Bake: Bake in the preheated oven for 25-35 minutes (8-inch pans might take slightly longer than 9-inch). The cakes are done when a wooden skewer or toothpick inserted into the center comes out clean or with a few moist crumbs attached. The tops should be lightly golden and spring back when gently touched.
- Cool Cakes: Let the cakes cool in their pans on a wire rack for 10-15 minutes. Then, carefully run a thin knife or offset spatula around the edges of the pans and invert the cakes onto the wire racks. Peel off the parchment paper if used. Let the cakes cool completely to room temperature (at least 1-2 hours). Warm cakes will melt the frosting and cause assembly issues.
Phase 3: Prepare the Coconut Cream Cheese Frosting
- Beat Cream Cheese and Butter: In the clean bowl of your stand mixer fitted with the paddle attachment (or using a large bowl and hand mixer), beat the softened cream cheese and softened butter together on medium-high speed until completely smooth, creamy, and well combined, about 2-3 minutes. Scrape down the sides and bottom of the bowl frequently to ensure no lumps remain.
- Add Sugar and Flavourings: Reduce the mixer speed to low. Gradually add the sifted powdered sugar, about 1 cup at a time, mixing until just incorporated after each addition. Once all the sugar is added, add the vanilla extract, coconut extract (start with the lower amount), and salt.
- Whip Frosting: Increase the mixer speed to medium-high and beat for 2-4 minutes until the frosting is light, fluffy, and smooth.
- Adjust Consistency: Check the frosting consistency. If it’s too thick, add the coconut milk or heavy cream, 1 tablespoon at a time, beating well after each addition, until you reach a smooth, spreadable consistency. If it’s too thin, add more sifted powdered sugar, 1/4 cup at a time. Taste and add more coconut extract if desired.
Phase 4: Assemble the Pineapple Coconut Layer Cake
- Level Cakes (Optional but Recommended): If your cake layers have domed tops, use a long serrated knife to carefully level them. This creates a stable, even cake. Save the scraps for snacking!
- First Layer: Place one cake layer (top-side down for a flat surface) onto your serving plate or cake stand.
- Pipe a Frosting Dam: Transfer some frosting to a piping bag fitted with a round tip (or snip the corner off a sturdy zip-top bag). Pipe a thick ring of frosting around the outer edge of the first cake layer. This “dam” will hold the pineapple filling in place and prevent it from oozing out the sides.
- Add Pineapple Filling: Spread about half of the chilled pineapple filling evenly inside the frosting dam.
- Second Layer: Carefully place the second cake layer on top (top-side down). Gently press down to secure it. Pipe another frosting dam around the edge of this layer.
- Add Remaining Filling: Spread the remaining chilled pineapple filling evenly inside the second frosting dam.
- Third Layer: Place the third cake layer on top, this time placing it top-side up (or leveled side up).
- Crumb Coat (Highly Recommended): Apply a thin, even layer of frosting over the entire cake (top and sides). This is called a crumb coat, and it traps any loose crumbs, ensuring your final layer of frosting is clean and beautiful. Don’t worry if it looks messy.
- Chill: Refrigerate the crumb-coated cake for at least 30 minutes (or freeze for 15 minutes) to allow the frosting to firm up.
- Final Frosting: Apply the remaining frosting generously over the top and sides of the chilled cake, smoothing it with an offset spatula or creating decorative swirls.
- Garnish with Toasted Coconut: Gently press the toasted shredded coconut onto the sides and/or sprinkle it over the top of the cake. To toast coconut: spread shredded coconut on a dry baking sheet and bake at 325°F (160°C) for 5-10 minutes, stirring occasionally, until lightly golden and fragrant. Watch carefully as it burns quickly!
- Chill Before Serving: Refrigerate the fully assembled cake for at least 1 hour (or preferably 2-4 hours) before slicing and serving. This allows the frosting to set firmly and the flavours to meld, making it easier to slice cleanly.
Nutritional Information (Estimated)
- Servings: 12-16 slices
- Calories per serving (approximate): 650-850 kcal (This is a highly decadent cake! The exact value depends on the specific ingredients used, final frosting thickness, and slice size.)
Disclaimer: Nutritional information is an estimate calculated using standard ingredient databases. Actual values may vary based on specific brands, ingredient substitutions, and serving sizes.
Preparation and Cooking Time
- Pineapple Filling Prep & Cool Time: 15 minutes prep + 2-3 hours cooling
- Cake Prep Time: 25-30 minutes
- Cake Bake Time: 25-35 minutes
- Cake Cooling Time: 1-2 hours
- Frosting Prep Time: 10-15 minutes
- Assembly & Chilling Time: 30 minutes assembly + 1.5 hours chilling (minimum)
- Total Time: Approximately 5.5 – 7.5 hours (includes significant cooling and chilling time, active time is much less)
How to Serve Your Tropical Masterpiece
This Pineapple Coconut Layer Cake is a star on its own, but here are some ways to elevate the serving experience:
- Classic Slice: Serve generous slices on dessert plates. The visual appeal of the layers, filling, and toasted coconut is often enough!
- A La Mode: A scoop of high-quality vanilla bean or coconut ice cream alongside a slice is a match made in heaven. The cool creaminess complements the cake beautifully.
- Tropical Fruit Garnish:
- Top each slice with a small dollop of whipped cream and a fresh pineapple wedge or a maraschino cherry for a retro touch.
- Arrange a few thin slices of fresh mango or kiwi around the plate for extra colour and tropical flavour.
- Sauce Drizzle:
- Drizzle a little extra pineapple sauce (you can reserve some filling or make a quick pineapple coulis) over the slice or plate.
- A light drizzle of passion fruit sauce or caramel sauce can add another layer of complexity.
- Beverage Pairings:
- Coffee/Tea: A good cup of coffee or a tropical-flavoured tea (like passion fruit or mango black tea) cuts through the richness nicely.
- Milk: A cold glass of milk is a classic pairing for any rich cake.
- Tropical Cocktails: For an adult gathering, pair slices with light rum-based cocktails like Piña Coladas (of course!), Mojitos, or a simple Rum Punch.
- Sparkling Wine: A slightly sweet Prosecco or Moscato d’Asti can complement the fruitiness and cut the richness.
- Presentation: Use a sharp, long knife dipped in hot water and wiped clean between each cut for neat slices. Present the whole cake first before slicing for maximum visual impact at gatherings.
Baker’s Wisdom: Additional Tips for Success
- Room Temperature is Key: This cannot be stressed enough for layer cakes. Using room temperature butter, eggs, coconut milk, and sour cream is crucial for proper emulsification and a light, tender crumb. Cold ingredients don’t incorporate as well, potentially leading to a dense or greasy cake. Take them out of the fridge at least 1-2 hours before you start baking. Similarly, softened (not melted!) butter and cream cheese are essential for a smooth, non-greasy frosting.
- Don’t Overmix the Batter: Once you start alternating the wet and dry ingredients, mix only until the ingredients are just combined. A few small streaks of flour remaining before you add the next ingredient is fine. Overmixing develops the gluten in the flour, resulting in a tough, chewy cake instead of a tender, moist one. Gentle folding at the end is best.
- Ensure Filling is COLD: The pineapple filling absolutely must be completely chilled before assembling the cake. If it’s even slightly warm, it will melt the frosting, make the layers slide, and potentially ooze out the sides, creating a messy disaster. Patience here pays off dividends in the final presentation.
- Master the Crumb Coat: Don’t skip the crumb coat step! It seems like extra work, but it’s the secret to a professional-looking finish. It traps all the loose crumbs, preventing them from muddying your beautiful final layer of frosting. Chilling the crumb-coated cake solidifies this base layer, making the final frosting application much smoother and cleaner.
- Toast Coconut Carefully: Toasting the coconut garnish dramatically enhances its flavour and adds a delightful crunch and visual appeal. However, shredded coconut burns very quickly due to its sugar and oil content. Spread it in a thin layer on a baking sheet and watch it like a hawk, stirring frequently, especially as it starts to colour. Remove it as soon as it’s lightly golden and fragrant.
Frequently Asked Questions (FAQ) about Pineapple Coconut Layer Cake
1. Can I make this cake ahead of time?
- Yes, absolutely! Components can be made ahead:
- Cake Layers: Bake the layers up to 2 days in advance. Once completely cool, wrap them tightly in plastic wrap (individually) and store them at room temperature. For longer storage (up to a month), double-wrap in plastic wrap and then foil, and freeze. Thaw overnight in the refrigerator while still wrapped.
- Pineapple Filling: Can be made up to 3-4 days ahead and stored in an airtight container in the refrigerator.
- Frosting: Can be made up to 3 days ahead and stored in an airtight container in the refrigerator. Let it sit at room temperature for about 30-60 minutes and re-whip briefly before using to restore its fluffy texture.
- Assembled Cake: The fully assembled and frosted cake (before adding toasted coconut garnish is best for freshness) can be stored in an airtight cake carrier in the refrigerator for up to 3 days. Add the toasted coconut just before serving for best texture. Let the cake sit at room temperature for about 30-60 minutes before serving for optimal flavour and texture.
2. Can I use fresh pineapple instead of canned for the filling?
- Yes, you can, but it requires extra steps and adjustments. Fresh pineapple contains an enzyme called bromelain, which can prevent thickening agents like cornstarch from working properly unless it’s heated sufficiently to deactivate the enzyme. You’ll need to finely dice about 3-4 cups of fresh pineapple. Cook it with the sugar and a little water (about 1/4 cup, as fresh pineapple releases less juice initially than canned) until it’s softened and the enzyme is deactivated (simmer for at least 5-10 minutes) before adding the cornstarch slurry (cornstarch mixed with a little cold water). You may also need to adjust the sugar depending on the sweetness of your fresh pineapple. Canned pineapple is generally easier and more consistent for this type of cooked filling.
3. My frosting seems too soft/runny or too stiff. How can I fix it?
- Too Soft/Runny: This usually happens if the cream cheese or butter was too warm, if too much liquid was added, or if the kitchen is very warm.
- Chill it: The first step is often just to refrigerate the frosting for 20-30 minutes and then try re-whipping it. Chilling helps firm up the butter and cream cheese.
- Add More Powdered Sugar: If chilling doesn’t suffice, gradually add more sifted powdered sugar, 1/4 cup at a time, beating well after each addition, until it reaches the desired consistency. Be aware this will also make the frosting sweeter.
- Too Stiff: This typically means too much powdered sugar was added or the butter/cream cheese was too cold when mixed.
- Add Liquid: Add liquid (coconut milk, heavy cream, or even regular milk) 1 teaspoon at a time, beating well after each addition, until it reaches a smooth, spreadable consistency. Be careful not to add too much too quickly.
- Warm Slightly (Carefully): If it’s stiff due to being too cold, let the bowl sit at room temperature for 15-20 minutes and then try re-whipping.
4. Can I make this cake in different sized pans? Or as cupcakes?
- Different Pan Sizes:
- Two 9-inch Layers: You can bake this in two 9-inch pans instead of three. The layers will be thicker, so the baking time will increase significantly (likely 40-50 minutes). Check for doneness carefully.
- Sheet Cake: You can bake it in a 9×13 inch pan. Baking time will likely be around 35-45 minutes. You can frost the top and sprinkle with coconut, or slice the cooled cake horizontally to create two layers and spread the filling and frosting between them.
- Cupcakes: Yes! This recipe should yield approximately 24-30 standard-sized cupcakes. Fill cupcake liners about 2/3 full. Bake at 350°F (175°C) for 18-22 minutes, or until a toothpick inserted into the center comes out clean. Cool completely before frosting. You can core the center of each cupcake, fill with a teaspoon of the pineapple filling, and then top with the coconut cream cheese frosting and toasted coconut.
5. How should I store leftover Pineapple Coconut Layer Cake?
- Due to the cream cheese frosting and pineapple filling, the cake must be stored in the refrigerator. Place leftover slices in an airtight container, or cover the remaining cake tightly with plastic wrap or use an airtight cake keeper. It will stay fresh for up to 4-5 days in the refrigerator. For the best taste and texture, allow slices to sit at room temperature for about 20-30 minutes before serving to take the chill off. Freezing leftover frosted cake is possible (wrap slices tightly), but the texture of the cream cheese frosting and pineapple filling might change slightly upon thawing. Thaw frozen slices in the refrigerator.

Pineapple Coconut Layer Cake Recipe
Ingredients
For the Coconut Cake Layers:
- All-Purpose Flour: 3 cups (360g), spooned and leveled – Provides the structure for the cake.
- Granulated Sugar: 2 cups (400g) – Sweetens the cake and contributes to its tender crumb.
- Baking Powder: 1 tablespoon – The primary leavening agent, making the cake rise and become light.
- Baking Soda: 1/2 teaspoon – Works with acidic ingredients (like pineapple juice, potentially) to provide additional lift.
- Salt: 1 teaspoon – Enhances all the other flavours and balances the sweetness.
- Unsalted Butter: 1 cup (2 sticks or 226g), at room temperature – Adds richness, flavour, and tenderness. Room temperature butter incorporates air better when creamed with sugar.
- Large Eggs: 4, at room temperature – Bind the ingredients, add richness, and contribute to structure. Room temperature eggs incorporate more easily.
- Unsweetened Coconut Milk (Full-Fat, Canned): 1 cup (240ml), well-shaken, at room temperature – Provides moisture and distinct coconut flavour. Full-fat yields the richest result. Ensure it’s the beverage kind, not cream of coconut for the cake batter.
- Sour Cream or Plain Full-Fat Yogurt: 1/2 cup (120g), at room temperature – Adds moisture and a slight tang, resulting in a very tender crumb.
- Vanilla Extract: 2 teaspoons – Enhances the sweetness and complements the coconut and pineapple flavours.
- Coconut Extract: 1 teaspoon (optional, but recommended for intense coconut flavour) – Boosts the coconut profile.
- Sweetened Shredded Coconut: 1 cup (100g) – Adds texture and flavour directly into the cake batter.
For the Pineapple Filling:
- Crushed Pineapple (Canned in Juice): 1 can (20 oz or 567g), undrained – The star of the filling. Using pineapple packed in juice (not heavy syrup) gives a brighter flavour. Do not drain; the juice is crucial.
- Granulated Sugar: 1/2 cup (100g), adjust to taste based on pineapple sweetness – Sweetens the filling and helps it thicken.
- Cornstarch: 3 tablespoons – Thickens the pineapple juice into a luscious filling.
- Lemon Juice: 1 tablespoon (optional) – Adds brightness and balances the sweetness.
- Butter: 1 tablespoon (optional) – Adds a touch of richness and smoothness at the end.
For the Coconut Cream Cheese Frosting:
- Cream Cheese: 16 oz (two 8oz packages or 452g), softened to room temperature – Provides the tangy base and creamy texture. Full-fat works best. Ensure it’s properly softened for a smooth frosting.
- Unsalted Butter: 1 cup (2 sticks or 226g), softened to room temperature – Adds structure, richness, and flavour to the frosting.
- Powdered Sugar (Confectioners’ Sugar): 5-6 cups (600-720g), sifted – Sweetens and thickens the frosting. Sifting prevents lumps. Adjust amount for desired sweetness and consistency.
- Unsweetened Coconut Milk (Full-Fat, Canned) or Heavy Cream: 2-4 tablespoons, as needed – Used to adjust the frosting consistency.
- Vanilla Extract: 2 teaspoons – Enhances flavour.
- Coconut Extract: 1-2 teaspoons (adjust to taste) – Infuses the frosting with strong coconut flavour.
- Salt: 1/4 teaspoon – Balances the sweetness.
- Sweetened Shredded Coconut: 1 1/2 – 2 cups (150-200g), lightly toasted for garnish (optional but highly recommended) – For coating the outside of the cake, adding texture, flavour, and visual appeal.
Instructions
Phase 1: Prepare the Pineapple Filling (Allow time for cooling)
- Combine Ingredients: In a medium saucepan, combine the undrained crushed pineapple (including all the juice), granulated sugar, and cornstarch. Whisk thoroughly until the cornstarch is fully dissolved and there are no lumps. This is crucial to prevent a lumpy filling.
- Cook and Thicken: Place the saucepan over medium heat. Bring the mixture to a gentle simmer, whisking constantly to prevent scorching on the bottom. Continue to cook and whisk for about 5-8 minutes, or until the mixture has noticeably thickened to a jam-like consistency. It should coat the back of a spoon.
- Add Flavour (Optional): Remove the saucepan from the heat. Stir in the optional lemon juice (for brightness) and butter (for richness) until the butter is fully melted and incorporated.
- Cool Completely: Transfer the pineapple filling to a heatproof bowl. Cover the surface directly with plastic wrap (press it down onto the filling) to prevent a skin from forming. Allow it to cool completely to room temperature, and then refrigerate until well-chilled (at least 1-2 hours, or preferably longer). A cold filling is essential for assembling the cake without melting the frosting or making the layers slide.
Phase 2: Bake the Coconut Cake Layers
- Preheat and Prepare Pans: Preheat your oven to 350°F (175°C). Grease and flour three 8-inch or 9-inch round cake pans. Alternatively, line the bottoms with parchment paper circles and grease/flour the sides. Proper pan preparation prevents sticking and ensures clean cake layers.
- Combine Dry Ingredients: In a large bowl, whisk together the all-purpose flour, granulated sugar, baking powder, baking soda, and salt. Whisking aerates the flour and ensures the leavening agents and salt are evenly distributed.
- Combine Wet Ingredients: In a separate medium bowl, whisk together the room temperature coconut milk, sour cream (or yogurt), vanilla extract, and optional coconut extract until smooth.
- Cream Butter and Sugar: In the bowl of a stand mixer fitted with the paddle attachment (or using a large bowl and a hand mixer), beat the room temperature butter on medium speed until creamy, about 1 minute. Add the granulated sugar gradually and continue beating on medium-high speed for 3-5 minutes, until the mixture is very pale, light, and fluffy. Scrape down the sides and bottom of the bowl occasionally. This step incorporates air, which is crucial for a light cake texture.
- Add Eggs: Add the room temperature eggs one at a time, beating well (about 30 seconds) after each addition. Scrape down the bowl again after the last egg is incorporated. Adding eggs one at a time ensures they emulsify properly into the batter.
- Alternate Dry and Wet Ingredients: Reduce the mixer speed to low. Add the dry ingredients in three additions, alternating with the wet ingredients in two additions, beginning and ending with the dry ingredients. (Dry -> Wet -> Dry -> Wet -> Dry). Mix only until just combined after each addition. Overmixing develops gluten, which can make the cake tough. Stop mixing as soon as you no longer see streaks of flour.
- Fold in Coconut: Remove the bowl from the mixer. Gently fold in the 1 cup of sweetened shredded coconut using a rubber spatula.
- Divide Batter: Evenly divide the batter among the three prepared cake pans. Use a kitchen scale for precision if desired. Smooth the tops with an offset spatula.
- Bake: Bake in the preheated oven for 25-35 minutes (8-inch pans might take slightly longer than 9-inch). The cakes are done when a wooden skewer or toothpick inserted into the center comes out clean or with a few moist crumbs attached. The tops should be lightly golden and spring back when gently touched.
- Cool Cakes: Let the cakes cool in their pans on a wire rack for 10-15 minutes. Then, carefully run a thin knife or offset spatula around the edges of the pans and invert the cakes onto the wire racks. Peel off the parchment paper if used. Let the cakes cool completely to room temperature (at least 1-2 hours). Warm cakes will melt the frosting and cause assembly issues.
Phase 3: Prepare the Coconut Cream Cheese Frosting
- Beat Cream Cheese and Butter: In the clean bowl of your stand mixer fitted with the paddle attachment (or using a large bowl and hand mixer), beat the softened cream cheese and softened butter together on medium-high speed until completely smooth, creamy, and well combined, about 2-3 minutes. Scrape down the sides and bottom of the bowl frequently to ensure no lumps remain.
- Add Sugar and Flavourings: Reduce the mixer speed to low. Gradually add the sifted powdered sugar, about 1 cup at a time, mixing until just incorporated after each addition. Once all the sugar is added, add the vanilla extract, coconut extract (start with the lower amount), and salt.
- Whip Frosting: Increase the mixer speed to medium-high and beat for 2-4 minutes until the frosting is light, fluffy, and smooth.
- Adjust Consistency: Check the frosting consistency. If it’s too thick, add the coconut milk or heavy cream, 1 tablespoon at a time, beating well after each addition, until you reach a smooth, spreadable consistency. If it’s too thin, add more sifted powdered sugar, 1/4 cup at a time. Taste and add more coconut extract if desired.
Phase 4: Assemble the Pineapple Coconut Layer Cake
- Level Cakes (Optional but Recommended): If your cake layers have domed tops, use a long serrated knife to carefully level them. This creates a stable, even cake. Save the scraps for snacking!
- First Layer: Place one cake layer (top-side down for a flat surface) onto your serving plate or cake stand.
- Pipe a Frosting Dam: Transfer some frosting to a piping bag fitted with a round tip (or snip the corner off a sturdy zip-top bag). Pipe a thick ring of frosting around the outer edge of the first cake layer. This “dam” will hold the pineapple filling in place and prevent it from oozing out the sides.
- Add Pineapple Filling: Spread about half of the chilled pineapple filling evenly inside the frosting dam.
- Second Layer: Carefully place the second cake layer on top (top-side down). Gently press down to secure it. Pipe another frosting dam around the edge of this layer.
- Add Remaining Filling: Spread the remaining chilled pineapple filling evenly inside the second frosting dam.
- Third Layer: Place the third cake layer on top, this time placing it top-side up (or leveled side up).
- Crumb Coat (Highly Recommended): Apply a thin, even layer of frosting over the entire cake (top and sides). This is called a crumb coat, and it traps any loose crumbs, ensuring your final layer of frosting is clean and beautiful. Don’t worry if it looks messy.
- Chill: Refrigerate the crumb-coated cake for at least 30 minutes (or freeze for 15 minutes) to allow the frosting to firm up.
- Final Frosting: Apply the remaining frosting generously over the top and sides of the chilled cake, smoothing it with an offset spatula or creating decorative swirls.
- Garnish with Toasted Coconut: Gently press the toasted shredded coconut onto the sides and/or sprinkle it over the top of the cake. To toast coconut: spread shredded coconut on a dry baking sheet and bake at 325°F (160°C) for 5-10 minutes, stirring occasionally, until lightly golden and fragrant. Watch carefully as it burns quickly!
- Chill Before Serving: Refrigerate the fully assembled cake for at least 1 hour (or preferably 2-4 hours) before slicing and serving. This allows the frosting to set firmly and the flavours to meld, making it easier to slice cleanly.
Nutrition
- Serving Size: one normal portion
- Calories: 650-850 kcal


