

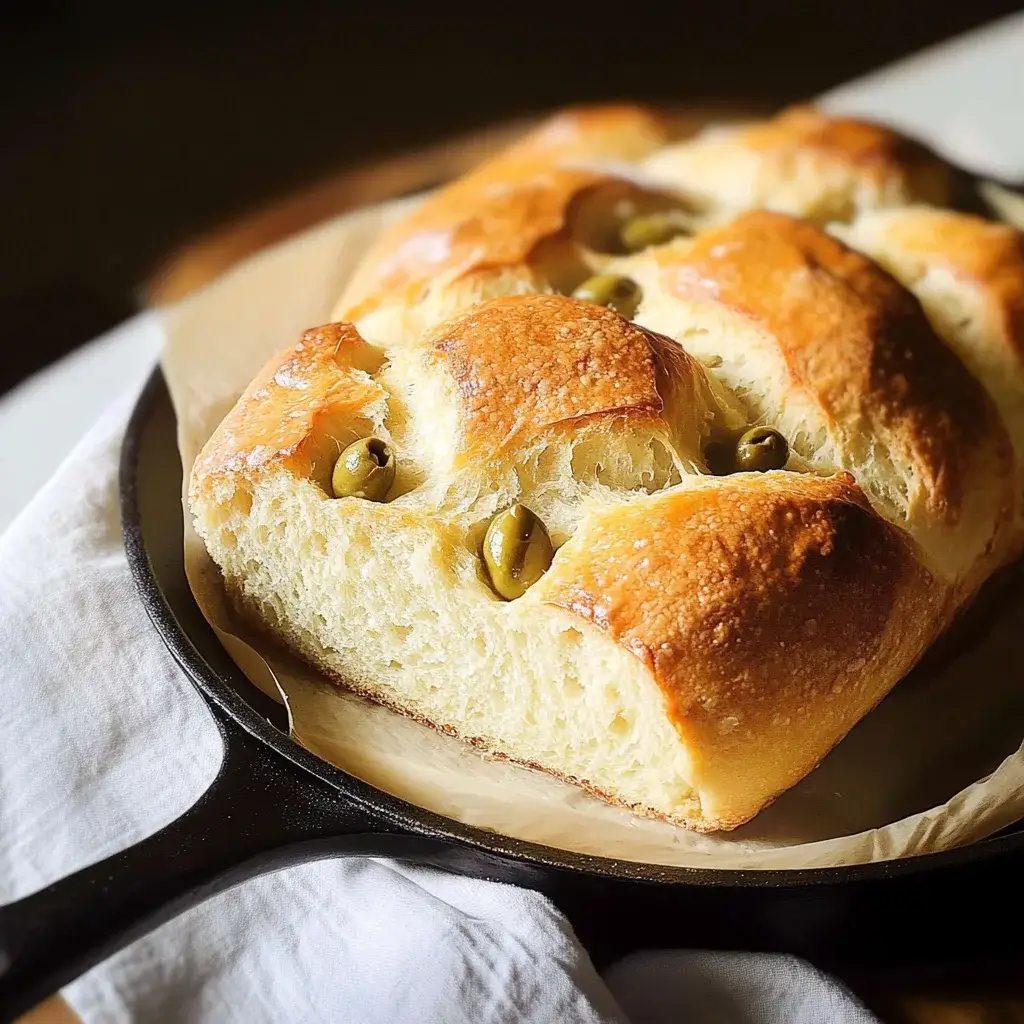
Let me tell you a secret: I used to be intimidated by bread making. The kneading, the proving, the potential for dense, hockey-puck outcomes… it all felt a bit too much for a busy weeknight. Then, I stumbled upon the magic of no-knead bread, and everything changed. And within the realm of no-knead wonders, this Skillet Olive Bread has become an absolute staple in our home. Honestly, it’s almost embarrassing how often I make it. The aroma alone, a heady mix of warm yeast, toasty olives, and fragrant herbs, is enough to draw everyone to the kitchen, practically salivating. But the real magic happens when you take that first bite. A shatteringly crisp crust gives way to a soft, chewy interior studded with briny, flavorful olives. It’s rustic, it’s beautiful, and it’s unbelievably easy. My kids, who are usually picky eaters, devour it. My husband declares it “restaurant quality” (high praise indeed!). And me? I just love how effortlessly it comes together, allowing me to serve fresh, homemade bread any time the craving strikes. If you’ve been searching for a bread recipe that’s both impressive and foolproof, look no further. This No-Knead Skillet Olive Bread is about to become your new best friend in the kitchen. Prepare to be amazed by the sheer simplicity and incredible flavor of this rustic loaf.
Ingredients: Simple Goodness for Unforgettable Flavor
The beauty of this No-Knead Skillet Olive Bread lies in its simplicity. You don’t need a long list of fancy ingredients or specialized equipment. Just a few pantry staples and some good quality olives will transform into a loaf of bread that tastes like it came straight from a gourmet bakery. Here’s what you’ll need to gather:
- 3 cups (380g) All-Purpose Flour or Bread Flour: Both all-purpose and bread flour will work beautifully in this recipe. Bread flour, with its higher protein content, will yield a slightly chewier texture, while all-purpose flour will result in a softer, more tender crumb. Choose whichever you have on hand or prefer the texture of. For best results, measure your flour correctly – spoon it into your measuring cup and level it off with a knife, rather than scooping it directly from the bag, which can lead to using too much flour.
- 1 ½ teaspoons Salt: Salt is crucial for flavor development in bread. It not only enhances the taste of the other ingredients but also controls the yeast activity and strengthens the gluten structure. Use fine sea salt or kosher salt for this recipe.
- ½ teaspoon Instant Yeast (or Active Dry Yeast): Instant yeast (also known as rapid-rise or bread machine yeast) is incredibly convenient and can be added directly to the dry ingredients. If you’re using active dry yeast, you’ll need to proof it first by dissolving it in warm water with a pinch of sugar for about 5-10 minutes until it becomes foamy. However, for the ultimate ease of no-knead baking, instant yeast is the way to go.
- 1 ½ cups (360ml) Lukewarm Water: Water is the lifeblood of bread. It hydrates the flour, activates the yeast, and creates steam during baking, contributing to a crisp crust. The water should be lukewarm, about 105-115°F (40-46°C). Too cold, and the yeast won’t activate properly; too hot, and it could kill the yeast. If you don’t have a thermometer, aim for water that feels comfortably warm to the touch, like bathwater.
- 2 tablespoons Olive Oil, plus more for greasing: Olive oil adds richness, flavor, and moisture to the bread. It also contributes to a beautiful golden crust. Use a good quality extra virgin olive oil for the best flavor. We’ll use some in the dough and more to grease the skillet and drizzle over the top.
- 1 cup (approximately 150g) Pitted Olives, roughly chopped: The star of the show! Choose your favorite olives for this recipe. Kalamata olives, with their rich, briny flavor, are a classic choice. Green olives, such as Castelvetrano or Manzanilla, offer a milder, more buttery taste. A mix of both is also fantastic! Make sure the olives are pitted and roughly chopped into smaller pieces so they distribute evenly throughout the dough.
- 1 tablespoon Fresh Rosemary, chopped (optional, but highly recommended): Fresh rosemary adds a wonderful aromatic and herbaceous note that complements the olives perfectly. If you don’t have fresh rosemary, you can substitute with 1 teaspoon of dried rosemary, but fresh is definitely preferred. Other herbs like thyme or oregano would also work well.
Instructions: Effortless Steps to Skillet Bread Perfection
The beauty of no-knead bread is in its hands-off approach. Most of the work is done by time and the magic of yeast. Follow these simple steps, and you’ll be rewarded with a loaf of artisan-style bread with minimal effort.
- Combine Dry Ingredients: In a large mixing bowl, whisk together the flour, salt, and instant yeast (or proofed active dry yeast). Make sure these ingredients are well combined to ensure even distribution. This step sets the foundation for a consistent and flavorful loaf.
- Add Wet Ingredients and Olives: Pour in the lukewarm water and olive oil into the bowl with the dry ingredients. Using a spatula or wooden spoon, stir everything together until just combined. The dough will be shaggy and sticky, and that’s perfectly normal – don’t worry about overmixing. Once a rough dough has formed, gently fold in the chopped olives and fresh rosemary (if using), distributing them evenly throughout the dough.
- First Rise (Bulk Fermentation): Cover the bowl tightly with plastic wrap or a damp kitchen towel. Let the dough rise at room temperature for 12-18 hours, or even up to 24 hours. The longer rise allows for maximum flavor development and a lighter, more airy texture. The dough will roughly double or even triple in size and become bubbly and airy. This slow fermentation process is what truly makes no-knead bread so flavorful and easy to digest. If your room is particularly warm, the dough may rise faster, so keep an eye on it.
- Shape the Dough: Gently scrape the dough out onto a lightly floured surface. It will be very soft and pliable. Lightly flour your hands and gently shape the dough into a round or oval. Try to handle it as little as possible to maintain the air bubbles that have formed during the rise. You don’t need to knead it, just gently gather it into a ball.
- Second Rise (Proofing in Skillet): Generously grease a 10-inch cast iron skillet (or oven-safe skillet) with olive oil. Carefully place the shaped dough into the center of the skillet. Cover loosely with plastic wrap or a damp kitchen towel and let it rise again for 30-45 minutes. This second rise, also known as proofing, allows the dough to relax and rise further, resulting in a lighter and more evenly textured final loaf. While the dough is proofing, preheat your oven to 450°F (232°C). Place the rack in the center of the oven.
- Bake to Golden Perfection: Once the dough has proofed and the oven is preheated, remove the cover from the skillet. Drizzle the top of the dough with a little extra olive oil and sprinkle with a pinch of flaky sea salt, if desired. Place the skillet in the preheated oven and bake for 30-35 minutes, or until the bread is deeply golden brown and sounds hollow when tapped on the bottom. The baking time may vary slightly depending on your oven and the skillet you use. Keep an eye on it and adjust the baking time as needed.
- Cool and Enjoy: Carefully remove the skillet from the oven and let the bread cool in the skillet for about 10-15 minutes before transferring it to a wire rack to cool completely. Resist the urge to slice into it immediately – allowing it to cool slightly will ensure a better texture and make it easier to slice. Once slightly cooled, slice and enjoy the incredible aroma and flavor of your homemade No-Knead Skillet Olive Bread!
Nutrition Facts: Wholesome Goodness in Every Slice
This No-Knead Skillet Olive Bread is not only delicious but also provides some nutritional value. Here’s an estimated nutritional breakdown per serving:
- Servings: Approximately 12 slices
- Calories per Serving: Approximately 220-250 calories (This is an estimate and can vary depending on the exact ingredients used and slice size).
Approximate Nutritional Information (per serving – estimated):
- Calories: 220-250
- Protein: 6-7g
- Fat: 8-10g (primarily from olive oil and olives, including healthy monounsaturated fats)
- Saturated Fat: 1-2g
- Cholesterol: 0mg
- Sodium: 300-400mg (depending on the saltiness of the olives)
- Carbohydrates: 30-35g
- Fiber: 2-3g
- Sugar: 1-2g
Please Note: These are estimates and may vary. For more precise nutritional information, you can use online nutritional calculators, inputting the specific brands and quantities of ingredients you use. This bread provides a good source of carbohydrates and some fiber, with healthy fats from the olive oil and olives. Enjoy in moderation as part of a balanced diet.
Preparation Time: From Start to Finish
While the hands-on time for this recipe is minimal, the total preparation time includes the rising and baking periods. Here’s a breakdown:
- Hands-on Time: Approximately 15-20 minutes (for mixing and shaping)
- First Rise (Bulk Fermentation): 12-24 hours (room temperature)
- Second Rise (Proofing): 30-45 minutes
- Baking Time: 30-35 minutes
- Cooling Time: 15-20 minutes
Total Time (Approximate): 13-25 hours (mostly inactive time)
Active Time (Mixing, Shaping, Baking): Approximately 1-1.5 hours
The long first rise is crucial for flavor development, but the active time you spend in the kitchen is surprisingly short, making this recipe perfect for busy individuals who still want to enjoy homemade bread.
How to Serve: Endless Possibilities for Enjoyment
This No-Knead Skillet Olive Bread is incredibly versatile and can be enjoyed in countless ways. Its rustic charm and delicious flavor make it a welcome addition to any meal. Here are some serving suggestions:
- With Olive Oil and Balsamic Vinegar: Simply slice the warm bread and serve it with a dish of high-quality olive oil and balsamic vinegar for dipping. This is a classic and simple way to appreciate the bread’s inherent flavors.
- Alongside Soups and Stews: The hearty texture of this bread makes it perfect for soaking up flavorful soups, stews, and chili. It adds a comforting element to any warm and comforting meal.
- As an Appetizer with Cheese and Charcuterie: Create a stunning appetizer platter with slices of this olive bread alongside your favorite cheeses, cured meats, olives, and roasted red peppers. It’s an elegant and crowd-pleasing starter for any gathering.
- For Sandwiches and Paninis: Slice the bread lengthwise to create hearty and flavorful sandwiches or paninis. It pairs beautifully with Mediterranean-inspired fillings like grilled vegetables, pesto, mozzarella, and prosciutto.
- Toasted with Butter or Jam: Enjoy a slice of toasted olive bread for breakfast or a snack, spread with butter, jam, or ricotta cheese and honey. The toasting enhances the crust and brings out even more flavor.
- As a Side Dish for Pasta Dishes: Serve slices of this bread alongside pasta dishes, especially those with tomato-based sauces or pesto. It’s perfect for mopping up the delicious sauce.
- Bruschetta Topping: Slice the bread and lightly toast or grill it. Top with fresh tomatoes, garlic, basil, and a drizzle of olive oil for a simple and flavorful bruschetta.
- Croutons for Salads: Cube leftover bread and bake or pan-fry with olive oil and herbs to make flavorful croutons for salads. It adds a wonderful crunchy texture and savory flavor to your greens.
- Breadcrumbs for Cooking: Dry out leftover bread completely and then pulse it in a food processor to make homemade breadcrumbs. These breadcrumbs can be used for topping casseroles, coating chicken or fish, or adding texture to meatballs and meatloaf.
- Simply on its own! Sometimes, the best way to enjoy this bread is simply on its own, fresh out of the oven, with nothing else. The flavor is so satisfying and delicious, it needs no accompaniment.
Additional Tips for No-Knead Skillet Olive Bread Success
While this recipe is incredibly straightforward, here are a few extra tips to ensure your No-Knead Skillet Olive Bread turns out perfectly every time:
- Use a Kitchen Scale for Accuracy: For the most consistent results in baking, especially bread making, using a kitchen scale to measure your ingredients by weight is highly recommended. Cup measurements can be inconsistent, while weight measurements are precise and reliable. This is particularly important for flour.
- Don’t Over-Flour Your Work Surface: When shaping the dough, use just a light dusting of flour on your work surface and your hands. Too much flour can make the dough dry and prevent it from rising properly. The dough is meant to be a little sticky, so embrace the stickiness and use a dough scraper if needed to help handle it.
- Adjust Rising Time Based on Temperature: The rising times in the recipe are guidelines, but the actual time may vary depending on the temperature of your kitchen. Warmer temperatures will speed up the rise, while cooler temperatures will slow it down. Keep an eye on the dough rather than strictly adhering to the time. It should roughly double or triple in size and become bubbly.
- Preheat Your Skillet in the Oven (Optional but Recommended): For an even crispier crust, you can preheat your cast iron skillet in the oven while it preheats. Carefully remove the hot skillet from the oven and then place the dough in it for baking. Be extremely cautious when handling a hot skillet. However, this step is optional and the bread will still have a wonderful crust even without preheating the skillet.
- Experiment with Different Olives and Add-Ins: Feel free to get creative with your olive choices and add-ins! Try using different types of olives, such as Cerignola, Nicoise, or stuffed olives. You can also add other ingredients like sun-dried tomatoes, roasted garlic, feta cheese, or different herbs like thyme, oregano, or basil. Just be mindful of the total quantity of add-ins so they don’t overwhelm the dough.
FAQ: Your No-Knead Skillet Olive Bread Questions Answered
Got questions about making No-Knead Skillet Olive Bread? Here are answers to some frequently asked questions to help you bake with confidence:
Q1: Can I use active dry yeast instead of instant yeast?
A: Yes, you can! If using active dry yeast, you’ll need to proof it first. Dissolve ½ teaspoon of active dry yeast in ¼ cup of lukewarm water with a pinch of sugar. Let it sit for 5-10 minutes until it becomes foamy. Then, use this mixture in place of the instant yeast and lukewarm water in the recipe, reducing the lukewarm water added later to 1 ¼ cups.
Q2: My dough didn’t rise much during the first rise, what went wrong?
A: Several factors can affect the rise. First, ensure your yeast is fresh and active. Expired yeast won’t work. Second, the temperature of your kitchen plays a role. If your kitchen is very cold, the dough will rise much slower. Try placing the bowl in a slightly warmer spot, like a slightly warmed oven (turned off!) or near a radiator. Also, make sure you used lukewarm water, not too hot or too cold, to activate the yeast. Sometimes, it just takes longer – be patient!
Q3: Can I make this bread ahead of time?
A: Yes, you can prepare the dough up to the shaping stage ahead of time. After the first rise, you can gently deflate the dough, shape it into a ball, and place it in a lightly oiled bowl. Cover tightly and refrigerate for up to 24 hours. When you’re ready to bake, remove the dough from the refrigerator and let it come to room temperature for about 1-2 hours before proceeding with the second rise and baking.
Q4: My bread is browning too quickly on top, what should I do?
A: If your bread is browning too quickly on top before it’s fully baked through, you can loosely tent it with aluminum foil during the last 10-15 minutes of baking. This will help to prevent the top from burning while allowing the inside to continue baking.
Q5: Can I double the recipe?
A: Yes, you can easily double this recipe. Simply double all the ingredient quantities. You may need a larger bowl for mixing and you might need to bake the loaves in two separate skillets or in batches depending on the size of your skillet and oven. Baking time may also need to be slightly increased for a larger loaf.
Print
No Knead Skillet Olive Bread Recipe
Ingredients
- 3 cups (380g) All-Purpose Flour or Bread Flour: Both all-purpose and bread flour will work beautifully in this recipe. Bread flour, with its higher protein content, will yield a slightly chewier texture, while all-purpose flour will result in a softer, more tender crumb. Choose whichever you have on hand or prefer the texture of. For best results, measure your flour correctly – spoon it into your measuring cup and level it off with a knife, rather than scooping it directly from the bag, which can lead to using too much flour.
- 1 ½ teaspoons Salt: Salt is crucial for flavor development in bread. It not only enhances the taste of the other ingredients but also controls the yeast activity and strengthens the gluten structure. Use fine sea salt or kosher salt for this recipe.
- ½ teaspoon Instant Yeast (or Active Dry Yeast): Instant yeast (also known as rapid-rise or bread machine yeast) is incredibly convenient and can be added directly to the dry ingredients. If you’re using active dry yeast, you’ll need to proof it first by dissolving it in warm water with a pinch of sugar for about 5-10 minutes until it becomes foamy. However, for the ultimate ease of no-knead baking, instant yeast is the way to go.
- 1 ½ cups (360ml) Lukewarm Water: Water is the lifeblood of bread. It hydrates the flour, activates the yeast, and creates steam during baking, contributing to a crisp crust. The water should be lukewarm, about 105-115°F (40-46°C). Too cold, and the yeast won’t activate properly; too hot, and it could kill the yeast. If you don’t have a thermometer, aim for water that feels comfortably warm to the touch, like bathwater.
- 2 tablespoons Olive Oil, plus more for greasing: Olive oil adds richness, flavor, and moisture to the bread. It also contributes to a beautiful golden crust. Use a good quality extra virgin olive oil for the best flavor. We’ll use some in the dough and more to grease the skillet and drizzle over the top.
- 1 cup (approximately 150g) Pitted Olives, roughly chopped: The star of the show! Choose your favorite olives for this recipe. Kalamata olives, with their rich, briny flavor, are a classic choice. Green olives, such as Castelvetrano or Manzanilla, offer a milder, more buttery taste. A mix of both is also fantastic! Make sure the olives are pitted and roughly chopped into smaller pieces so they distribute evenly throughout the dough.
- 1 tablespoon Fresh Rosemary, chopped (optional, but highly recommended): Fresh rosemary adds a wonderful aromatic and herbaceous note that complements the olives perfectly. If you don’t have fresh rosemary, you can substitute with 1 teaspoon of dried rosemary, but fresh is definitely preferred. Other herbs like thyme or oregano would also work well.
Instructions
- Combine Dry Ingredients: In a large mixing bowl, whisk together the flour, salt, and instant yeast (or proofed active dry yeast). Make sure these ingredients are well combined to ensure even distribution. This step sets the foundation for a consistent and flavorful loaf.
- Add Wet Ingredients and Olives: Pour in the lukewarm water and olive oil into the bowl with the dry ingredients. Using a spatula or wooden spoon, stir everything together until just combined. The dough will be shaggy and sticky, and that’s perfectly normal – don’t worry about overmixing. Once a rough dough has formed, gently fold in the chopped olives and fresh rosemary (if using), distributing them evenly throughout the dough.
- First Rise (Bulk Fermentation): Cover the bowl tightly with plastic wrap or a damp kitchen towel. Let the dough rise at room temperature for 12-18 hours, or even up to 24 hours. The longer rise allows for maximum flavor development and a lighter, more airy texture. The dough will roughly double or even triple in size and become bubbly and airy. This slow fermentation process is what truly makes no-knead bread so flavorful and easy to digest. If your room is particularly warm, the dough may rise faster, so keep an eye on it.
- Shape the Dough: Gently scrape the dough out onto a lightly floured surface. It will be very soft and pliable. Lightly flour your hands and gently shape the dough into a round or oval. Try to handle it as little as possible to maintain the air bubbles that have formed during the rise. You don’t need to knead it, just gently gather it into a ball.
- Second Rise (Proofing in Skillet): Generously grease a 10-inch cast iron skillet (or oven-safe skillet) with olive oil. Carefully place the shaped dough into the center of the skillet. Cover loosely with plastic wrap or a damp kitchen towel and let it rise again for 30-45 minutes. This second rise, also known as proofing, allows the dough to relax and rise further, resulting in a lighter and more evenly textured final loaf. While the dough is proofing, preheat your oven to 450°F (232°C). Place the rack in the center of the oven.
- Bake to Golden Perfection: Once the dough has proofed and the oven is preheated, remove the cover from the skillet. Drizzle the top of the dough with a little extra olive oil and sprinkle with a pinch of flaky sea salt, if desired. Place the skillet in the preheated oven and bake for 30-35 minutes, or until the bread is deeply golden brown and sounds hollow when tapped on the bottom. The baking time may vary slightly depending on your oven and the skillet you use. Keep an eye on it and adjust the baking time as needed.
- Cool and Enjoy: Carefully remove the skillet from the oven and let the bread cool in the skillet for about 10-15 minutes before transferring it to a wire rack to cool completely. Resist the urge to slice into it immediately – allowing it to cool slightly will ensure a better texture and make it easier to slice. Once slightly cooled, slice and enjoy the incredible aroma and flavor of your homemade No-Knead Skillet Olive Bread!
Nutrition
- Serving Size: one normal portion
- Calories: 220-250
- Sugar: 1-2g
- Sodium: 300-400mg
- Fat: 8-10g
- Saturated Fat: 1-2g
- Carbohydrates: 30-35g
- Fiber: 2-3g
- Protein: 6-7g


