There are some recipes that just instantly become part of your family’s regular rotation, and this Herb-Crusted Chicken is unequivocally one of them in our household. I remember the first time I made it; I was looking for something a bit more exciting than our usual grilled chicken, but still easy enough for a hectic weeknight. The aroma that filled the kitchen as it baked was incredible – a fragrant blend of fresh herbs, garlic, and Parmesan that had everyone migrating towards the kitchen, asking what smelled so good. When it came out of the oven, golden brown and perfectly crispy, I knew we were onto a winner. My eldest, usually a picky eater, declared it “the best chicken ever,” and my husband, who appreciates a good, flavorful meal, was equally impressed by how juicy and tender the chicken was beneath that savory crust. Since then, it’s become a go-to for everything from quick dinners to casual gatherings with friends. It’s impressively delicious yet deceptively simple, proving that you don’t need complicated techniques or exotic ingredients to create a truly memorable meal. The delightful crunch of the herb coating, combined with the moist, flavorful chicken inside, is a textural and taste sensation that consistently earns rave reviews. It’s a recipe that makes me feel like a kitchen hero every single time.
Herb-Crusted Chicken: The Ultimate Recipe for a Flavorful & Easy Meal
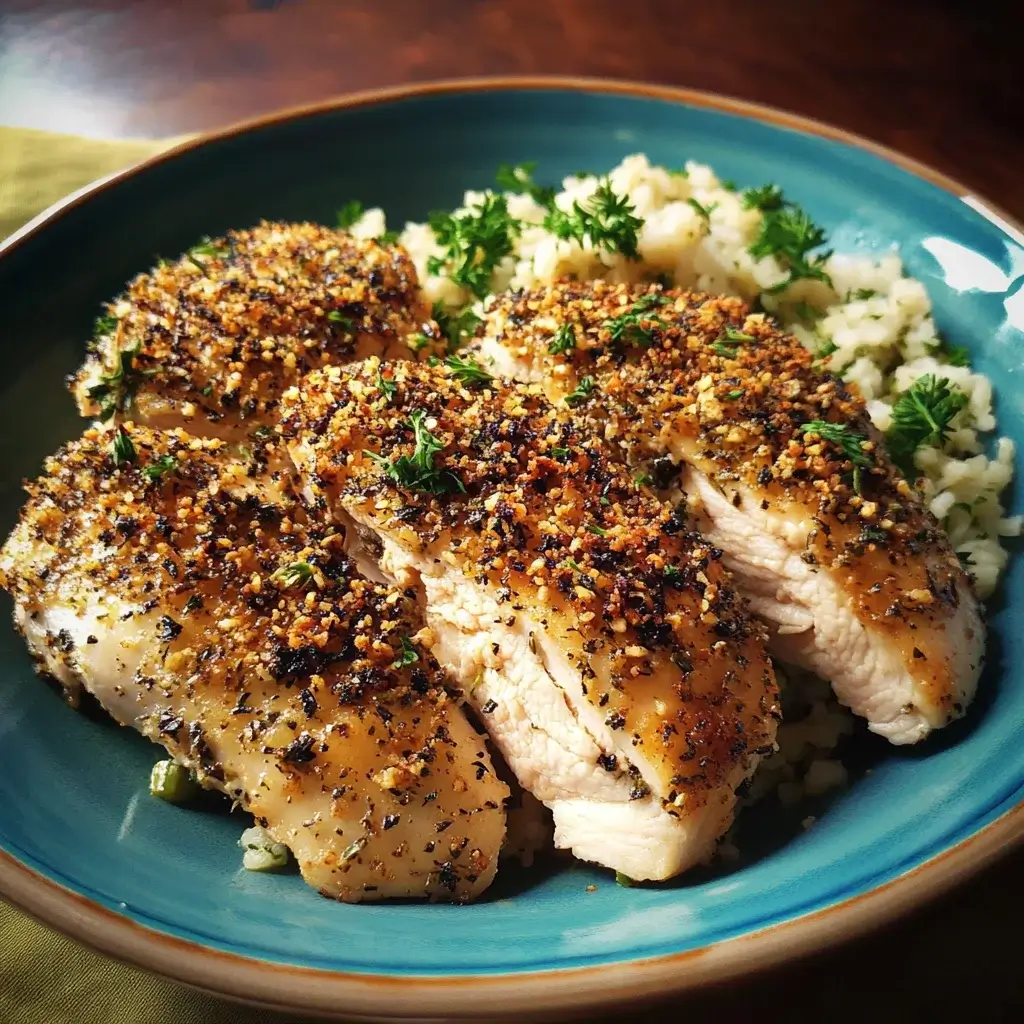
This Herb-Crusted Chicken recipe is designed to deliver maximum flavor with minimal fuss. The combination of fresh herbs, panko breadcrumbs, and Parmesan cheese creates an irresistibly crispy and savory crust that keeps the chicken underneath wonderfully moist and tender. It’s a versatile dish perfect for any occasion.
Complete Ingredients List
To create this show-stopping Herb-Crusted Chicken, you will need the following ingredients. Using fresh, high-quality components will significantly enhance the final flavor of your dish.
- For the Chicken:
- 4 boneless, skinless chicken breasts (about 6-8 oz each), pounded to an even thickness of about ½ – ¾ inch
- 2 tablespoons olive oil (plus extra for drizzling or greasing)
- Salt and freshly ground black pepper to taste
- For the Herb Crust:
- 1 cup panko breadcrumbs (these provide superior crispiness compared to regular breadcrumbs)
- ½ cup freshly grated Parmesan cheese (avoid the pre-grated kind in a canister for best flavor and melt)
- ¼ cup fresh parsley, finely chopped
- 2 tablespoons fresh thyme leaves, finely chopped
- 1 tablespoon fresh rosemary, finely chopped
- 2 cloves garlic, minced (or 1 teaspoon garlic powder)
- ½ teaspoon onion powder
- ½ teaspoon paprika (smoked paprika adds a lovely depth)
- ¼ teaspoon red pepper flakes (optional, for a little heat)
- Zest of 1 lemon (optional, but adds brightness)
- 1 tablespoon olive oil (to help bind the crust and promote browning)
Step-by-Step Instructions
Follow these instructions carefully to achieve perfectly cooked, crispy, and juicy herb-crusted chicken every time.
- Preheat and Prepare: Preheat your oven to 400°F (200°C). Lightly grease a baking sheet or a shallow baking dish with olive oil, or line it with parchment paper for easier cleanup. This prevents sticking and helps the bottom of the chicken crisp up.
- Prepare the Chicken: If you haven’t already, place the chicken breasts between two sheets of plastic wrap or in a large zip-top bag. Using a meat mallet, rolling pin, or the bottom of a heavy skillet, gently pound the chicken breasts to an even thickness of about ½ to ¾ inch. This is a crucial step for ensuring even cooking; if parts are thicker than others, the thinner parts will dry out before the thicker parts are cooked through. Pat the chicken breasts dry with paper towels – this helps the olive oil and crust adhere better. Season both sides of the chicken generously with salt and freshly ground black pepper. Drizzle the 2 tablespoons of olive oil over the chicken, rubbing it to coat all sides. This acts as a binder for the herb crust.
- Make the Herb Crust: In a shallow dish or a pie plate (something wide enough to fit a chicken breast), combine all the herb crust ingredients: panko breadcrumbs, grated Parmesan cheese, chopped fresh parsley, thyme, rosemary, minced garlic (or garlic powder), onion powder, paprika, red pepper flakes (if using), and lemon zest (if using). Add the 1 tablespoon of olive oil to this mixture. Use a fork or your fingers to toss everything together until well combined and the olive oil is evenly distributed. The mixture should look slightly clumpy, like damp sand. This little bit of oil in the crust itself is key to achieving that beautiful golden-brown color and extra crispiness.
- Coat the Chicken: Take one seasoned chicken breast and press it firmly into the panko mixture, ensuring both sides are thoroughly coated. Gently press the crumbs onto the chicken to help them adhere. Don’t be shy; you want a good, thick coating. Repeat with the remaining chicken breasts.
- Arrange on Baking Sheet: Place the coated chicken breasts in a single layer on the prepared baking sheet, ensuring there is some space between each piece. Overcrowding the pan can lead to steaming rather than baking, which will prevent the crust from getting crispy. If necessary, use two baking sheets.
- Bake to Perfection: Transfer the baking sheet to the preheated oven. Bake for 20-25 minutes, or until the chicken is cooked through and the crust is golden brown and crispy. The exact cooking time will depend on the thickness of your chicken breasts. To ensure the chicken is cooked perfectly, use a meat thermometer inserted into the thickest part of the breast; it should register 165°F (74°C). If the crust starts to brown too quickly before the chicken is cooked through, you can loosely tent it with aluminum foil.
- Rest the Chicken: Once cooked, remove the chicken from the oven and let it rest on the baking sheet or a cutting board for 5-10 minutes before slicing or serving. This resting period is vital as it allows the juices to redistribute throughout the meat, resulting in a much juicier and more flavorful chicken breast. If you cut into it immediately, all those delicious juices will run out.
- Serve and Enjoy: Serve the Herb-Crusted Chicken warm, garnished with a little extra fresh parsley or a lemon wedge, if desired.
Nutrition Facts
- Servings: 4
- Calories per serving (approximate): 380-450 calories (This is an estimate and can vary based on the exact size of the chicken breasts and specific brands of ingredients used. For instance, a larger 8oz breast will be higher in calories than a 6oz breast. The amount of oil absorbed can also slightly alter the count.)
This calorie count primarily considers the chicken breast, the panko-Parmesan crust, and the olive oil used for coating and in the crust. It aims to provide a healthy yet satisfying main course option.
Preparation Time
Understanding the time commitment can help you plan your meal preparation effectively.
- Prep Time: 20-25 minutes (This includes pounding the chicken, chopping herbs, mincing garlic, and coating the chicken.)
- Cook Time: 20-25 minutes
- Resting Time: 5-10 minutes
- Total Time: Approximately 50-60 minutes
This makes the Herb-Crusted Chicken an excellent option for a weeknight meal that feels a little special without requiring hours in the kitchen.
How to Serve Herb-Crusted Chicken
This versatile Herb-Crusted Chicken pairs beautifully with a wide variety of side dishes. Here are some serving suggestions to create a complete and satisfying meal:
- Classic Comfort Sides:
- Creamy Mashed Potatoes: The smooth texture of mashed potatoes is a wonderful contrast to the crispy chicken. A dollop of garlic mashed potatoes or even sweet potato mash would be delightful.
- Roasted Root Vegetables: Toss carrots, parsnips, and potatoes with olive oil, salt, and pepper, then roast alongside the chicken (they may need a slightly longer cooking time, so start them a bit earlier). Think Brussels sprouts, broccoli florets, or asparagus spears.
- Rice Pilaf or Quinoa: A fluffy rice pilaf seasoned with herbs, or a nutty quinoa salad, provides a healthy grain component. Lemon-herb rice would be particularly complementary.
- Buttered Noodles: Simple egg noodles tossed with butter and a sprinkle of parsley are a kid-friendly favorite.
- Lighter, Fresher Options:
- Green Salad: A simple mixed green salad with a light vinaigrette (lemon-based would be perfect) offers a refreshing counterpoint. Consider adding cherry tomatoes, cucumbers, and a sprinkle of feta.
- Steamed Green Beans or Asparagus: Quickly steamed and tossed with a squeeze of lemon juice and a touch of olive oil.
- Caprese Salad: Sliced fresh mozzarella, ripe tomatoes, and basil leaves drizzled with balsamic glaze.
- With a Sauce (though it’s great on its own!):
- Lemon Wedges: A simple squeeze of fresh lemon juice right before serving brightens all the flavors.
- Light Lemon-Butter Sauce: After removing the chicken, you could deglaze the pan (if there are any browned bits) with a splash of white wine, then whisk in a knob of butter and some lemon juice.
- Yogurt-Dill Sauce: A cool, creamy sauce made with Greek yogurt, fresh dill, lemon juice, and a touch of garlic can be a lovely accompaniment.
- Marinara Sauce: For a chicken Parmesan-esque vibe without the heavy cheese topping, serve with a side of warm marinara for dipping.
- Presentation Matters:
- Garnish: Sprinkle with extra chopped fresh parsley or the herbs used in the crust just before serving for a pop of color and fresh aroma.
- Slicing: For a more elegant presentation, slice the chicken breast on a bias before arranging it on the plate.
- Creative Uses for Leftovers:
- Chicken Sandwiches: Sliced herb-crusted chicken makes an amazing sandwich on crusty bread with lettuce, tomato, and aioli.
- Salad Topper: Chop the leftover chicken and add it to a large salad for a protein-packed lunch.
- Pasta Addition: Slice and toss with your favorite pasta and a light sauce.
No matter how you choose to serve it, this chicken is sure to be the star of the plate!
Additional Tips for Herb-Crusted Chicken Perfection
To elevate your Herb-Crusted Chicken from great to absolutely exceptional, consider these five additional tips:
- Don’t Skip Pounding the Chicken: It might seem like an extra, skippable step, but pounding the chicken breasts to an even thickness is paramount. This ensures that every part of the chicken cooks at the same rate. Without this step, the thinner edges can dry out and become tough while you wait for the thicker center to reach a safe internal temperature. An evenly thick breast means uniformly juicy and tender chicken. Use gentle but firm pressure to avoid tearing the meat.
- Fresh Herbs Make a Difference (But Dried Can Work in a Pinch): While the recipe calls for fresh parsley, thyme, and rosemary, which provide vibrant flavor and aroma, you can substitute dried herbs if that’s what you have. The general rule is to use one-third the amount of dried herbs as fresh (e.g., if a recipe calls for 1 tablespoon fresh, use 1 teaspoon dried). However, for a crust like this, the texture and bright notes of fresh herbs are truly superior. If using dried, try to crush them between your fingers before adding to the breadcrumb mixture to help release their oils and flavor.
- Toast Your Panko Breadcrumbs (Optional Extra Step for Crunch): For an even deeper golden color and an extra layer of nutty flavor and crispiness, you can lightly toast the panko breadcrumbs before mixing them with the other crust ingredients. Simply spread the panko in a dry skillet over medium heat and stir frequently until they turn a light golden brown (about 3-5 minutes). Let them cool completely before using. This small step can add a remarkable textural improvement.
- Use a Meat Thermometer – The Key to Juiciness: The single most effective tool for preventing dry chicken is a reliable instant-read meat thermometer. Ovens can vary, and chicken breast thickness can differ slightly even after pounding. The only way to know for sure if your chicken is perfectly cooked is to check its internal temperature. Insert the thermometer into the thickest part of the breast, ensuring it doesn’t touch any bone if you were using bone-in chicken. For chicken breasts, the target is 165°F (74°C). Pulling it out at this exact temperature ensures it’s safe to eat and optimally juicy.
- Don’t Overcrowd the Baking Pan: When placing the coated chicken breasts on the baking sheet, make sure there’s adequate space between each piece. If they are too close together or touching, they will steam rather than bake. This steam hinders the Maillard reaction (the chemical process responsible for browning and flavor development) and will result in a less crispy, potentially soggy crust. If your baking sheet isn’t large enough to hold all the chicken with proper spacing, it’s better to use two separate baking sheets. This allows hot air to circulate freely around each piece, promoting even cooking and that coveted golden-brown, crispy exterior.
Frequently Asked Questions (FAQ)
Here are answers to some common questions you might have about making this Herb-Crusted Chicken recipe:
- Q: Can I use chicken thighs instead of breasts for this recipe?
- A: Absolutely! Boneless, skinless chicken thighs are a fantastic alternative. They are naturally more tender and flavorful due to their higher fat content, making them more forgiving if slightly overcooked. The herb crust will be just as delicious. Keep in mind that cooking times might vary slightly. Chicken thighs may cook a bit faster or slower depending on their size and thickness, so start checking for an internal temperature of 165°F (74°C) around the 18-22 minute mark.
- Q: How can I make this recipe gluten-free?
- A: Making this Herb-Crusted Chicken gluten-free is quite simple. The main ingredient to swap is the panko breadcrumbs. Use your favorite brand of gluten-free panko-style breadcrumbs or regular gluten-free breadcrumbs. You can often find these in the gluten-free section of most supermarkets. Ensure your Parmesan cheese is also certified gluten-free, as some pre-grated varieties may contain anti-caking agents with gluten. The rest of the ingredients are typically naturally gluten-free, but always double-check labels if you have celiac disease or severe gluten sensitivity.
- Q: Can I prepare the Herb-Crusted Chicken ahead of time?
- A: Yes, you have a couple of options for advance preparation.
- Option 1 (Prep crust and chicken separately): You can prepare the herb crust mixture and store it in an airtight container at room temperature for up to 2 days. You can also pound and season the chicken breasts, then store them covered in the refrigerator for up to 24 hours. When ready to cook, simply coat the chicken and bake as directed.
- Option 2 (Coat and refrigerate): You can coat the chicken breasts with the herb mixture, place them on the baking sheet, cover tightly with plastic wrap, and refrigerate for up to 4-6 hours before baking. Any longer, and the crust might become a bit soggy from the chicken’s moisture. You might need to add a few extra minutes to the baking time if cooking directly from cold.
- Option 3 (Bake ahead and reheat): You can bake the chicken fully, let it cool, and store it in an airtight container in the refrigerator for up to 3 days. To reheat, place it on a baking sheet in a 350°F (175°C) oven for about 10-15 minutes, or until warmed through and the crust is re-crisped. Avoid microwaving, as it will make the crust soggy.
- A: Yes, you have a couple of options for advance preparation.
- Q: What other herbs can I use in the crust?
- A: This recipe is very adaptable to different herb combinations! While parsley, thyme, and rosemary are a classic and delicious trio, feel free to experiment based on your preferences or what’s available.
- Oregano: Adds a robust, Mediterranean flavor.
- Sage: Offers an earthy, slightly peppery note, especially good in fall and winter.
- Marjoram: Similar to oregano but sweeter and more delicate.
- Dill: Provides a fresh, slightly tangy flavor that pairs well with lemon.
- Tarragon: Has a distinctive, slightly sweet, anise-like flavor.
- Italian Seasoning Blend: A good quality dried Italian seasoning blend can also be used as a convenient shortcut, though fresh herbs will always offer a brighter taste. Adjust quantities based on the potency of the herbs you choose.
- A: This recipe is very adaptable to different herb combinations! While parsley, thyme, and rosemary are a classic and delicious trio, feel free to experiment based on your preferences or what’s available.
- Q: How do I store and reheat leftovers?
- A: Store any leftover Herb-Crusted Chicken in an airtight container in the refrigerator. It will keep well for up to 3-4 days.
- Reheating: The best way to reheat the chicken and maintain some of its crispiness is in the oven or a toaster oven. Preheat your oven to 350°F (175°C). Place the chicken on a baking sheet and heat for 10-15 minutes, or until warmed through. An air fryer also works wonderfully for reheating, usually at around 350-375°F (175-190°C) for 5-8 minutes.
- Avoid the Microwave: While you can microwave it if you’re in a hurry, be aware that the crust will lose its crispiness and become soft and somewhat soggy. If you must use a microwave, heat it in short intervals until just warmed through.
- A: Store any leftover Herb-Crusted Chicken in an airtight container in the refrigerator. It will keep well for up to 3-4 days.
This Herb-Crusted Chicken recipe is designed to be a crowd-pleaser, and with these tips and answers, you’re well on your way to making it a staple in your own kitchen! Enjoy the process and the delicious results.
Print
Herb-Crusted Chicken recipe
Ingredients
-
- For the Chicken:
-
- 4 boneless, skinless chicken breasts (about 6–8 oz each), pounded to an even thickness of about ½ – ¾ inch
-
- 2 tablespoons olive oil (plus extra for drizzling or greasing)
-
- Salt and freshly ground black pepper to taste
-
- For the Chicken:
-
- For the Herb Crust:
-
- 1 cup panko breadcrumbs (these provide superior crispiness compared to regular breadcrumbs)
-
- ½ cup freshly grated Parmesan cheese (avoid the pre-grated kind in a canister for best flavor and melt)
-
- ¼ cup fresh parsley, finely chopped
-
- 2 tablespoons fresh thyme leaves, finely chopped
-
- 1 tablespoon fresh rosemary, finely chopped
-
- 2 cloves garlic, minced (or 1 teaspoon garlic powder)
-
- ½ teaspoon onion powder
-
- ½ teaspoon paprika (smoked paprika adds a lovely depth)
-
- ¼ teaspoon red pepper flakes (optional, for a little heat)
-
- Zest of 1 lemon (optional, but adds brightness)
-
- 1 tablespoon olive oil (to help bind the crust and promote browning)
-
- For the Herb Crust:
Instructions
-
- Preheat and Prepare: Preheat your oven to 400°F (200°C). Lightly grease a baking sheet or a shallow baking dish with olive oil, or line it with parchment paper for easier cleanup. This prevents sticking and helps the bottom of the chicken crisp up.
-
- Prepare the Chicken: If you haven’t already, place the chicken breasts between two sheets of plastic wrap or in a large zip-top bag. Using a meat mallet, rolling pin, or the bottom of a heavy skillet, gently pound the chicken breasts to an even thickness of about ½ to ¾ inch. This is a crucial step for ensuring even cooking; if parts are thicker than others, the thinner parts will dry out before the thicker parts are cooked through. Pat the chicken breasts dry with paper towels – this helps the olive oil and crust adhere better. Season both sides of the chicken generously with salt and freshly ground black pepper. Drizzle the 2 tablespoons of olive oil over the chicken, rubbing it to coat all sides. This acts as a binder for the herb crust.
-
- Make the Herb Crust: In a shallow dish or a pie plate (something wide enough to fit a chicken breast), combine all the herb crust ingredients: panko breadcrumbs, grated Parmesan cheese, chopped fresh parsley, thyme, rosemary, minced garlic (or garlic powder), onion powder, paprika, red pepper flakes (if using), and lemon zest (if using). Add the 1 tablespoon of olive oil to this mixture. Use a fork or your fingers to toss everything together until well combined and the olive oil is evenly distributed. The mixture should look slightly clumpy, like damp sand. This little bit of oil in the crust itself is key to achieving that beautiful golden-brown color and extra crispiness.
-
- Coat the Chicken: Take one seasoned chicken breast and press it firmly into the panko mixture, ensuring both sides are thoroughly coated. Gently press the crumbs onto the chicken to help them adhere. Don’t be shy; you want a good, thick coating. Repeat with the remaining chicken breasts.
-
- Arrange on Baking Sheet: Place the coated chicken breasts in a single layer on the prepared baking sheet, ensuring there is some space between each piece. Overcrowding the pan can lead to steaming rather than baking, which will prevent the crust from getting crispy. If necessary, use two baking sheets.
-
- Bake to Perfection: Transfer the baking sheet to the preheated oven. Bake for 20-25 minutes, or until the chicken is cooked through and the crust is golden brown and crispy. The exact cooking time will depend on the thickness of your chicken breasts. To ensure the chicken is cooked perfectly, use a meat thermometer inserted into the thickest part of the breast; it should register 165°F (74°C). If the crust starts to brown too quickly before the chicken is cooked through, you can loosely tent it with aluminum foil.
-
- Rest the Chicken: Once cooked, remove the chicken from the oven and let it rest on the baking sheet or a cutting board for 5-10 minutes before slicing or serving. This resting period is vital as it allows the juices to redistribute throughout the meat, resulting in a much juicier and more flavorful chicken breast. If you cut into it immediately, all those delicious juices will run out.
-
- Serve and Enjoy: Serve the Herb-Crusted Chicken warm, garnished with a little extra fresh parsley or a lemon wedge, if desired.
Nutrition
- Serving Size: one normal portion
- Calories: 380-450