

The aroma of freshly baked bread wafting through the house is one of life’s simple, yet profound, pleasures. For years, I searched for the perfect healthy multigrain bread recipe – one that wasn’t too dense, too complicated, or lacking in flavour. Store-bought multigrain loaves often contain hidden sugars or preservatives, and frankly, they rarely match the satisfaction of a homemade slice. When I finally landed on this particular recipe, adapting and tweaking it over time, it was a revelation. The first time I baked it, the golden-brown crust cracked invitingly as it cooled, and the inside was surprisingly soft yet substantial, studded with wholesome seeds and grains. My family, initially skeptical of anything labelled “healthy bread,” were instantly converted. It became our go-to for everything – morning toast topped with avocado, hearty lunchtime sandwiches, and even just a simple slice slathered with butter alongside soup. It’s nutritious, filling, and genuinely delicious. This isn’t just a healthy multigrain bread recipe; it’s our healthy multigrain bread recipe, and I’m thrilled to share the wholesome goodness with you. It proves that healthy eating doesn’t mean sacrificing taste or comfort.
Healthy Multigrain Bread Recipe: Ingredients You’ll Need
Crafting the perfect loaf of healthy multigrain bread starts with quality ingredients. Each component plays a crucial role in the final texture, flavour, and nutritional profile. This recipe balances whole grains, seeds, and natural binders to create a loaf that’s both nourishing and delightful.
Here’s what you’ll need:
- Warm Water: 1 ½ cups (360ml) – Should be lukewarm, around 105-115°F (40-46°C). Too hot kills the yeast, too cold slows it down.
- Active Dry Yeast: 2 ¼ teaspoons (1 standard packet, approx. 7g) – The powerhouse that gives your bread its rise.
- Honey or Maple Syrup: 2 tablespoons (30ml) – Provides food for the yeast and adds a subtle touch of sweetness. Use maple syrup for a vegan option.
- Whole Wheat Flour: 1 ½ cups (180g) – Forms the robust base, adding fiber and a nutty flavour.
- Bread Flour: 1 ½ cups (180g) – Provides higher protein content, essential for gluten development, giving the bread structure and chew. You can substitute with all-purpose flour, but the texture might be slightly less chewy.
- Rolled Oats (Old-Fashioned): ½ cup (45g) – Adds texture, moisture retention, and nutritional value. Do not use instant oats.
- Mixed Seeds: ½ cup (approx. 70-80g) – A blend works best for flavour and nutrition. Good options include:
- Flax seeds (whole or ground)
- Sunflower seeds (shelled)
- Pumpkin seeds (pepitas)
- Sesame seeds
- Chia seeds
- Olive Oil or Melted Unsalted Butter: 2 tablespoons (30ml) – Adds richness, flavour, and helps create a softer crumb.
- Salt: 1 ½ teaspoons (9g) – Crucial for flavour balance and controlling yeast activity.
Optional additions for topping:
- Extra rolled oats or mixed seeds for sprinkling on top before baking.
- An egg wash (1 egg beaten with 1 tbsp water) or milk wash for a shinier, browner crust.
Understanding the Ingredients:
- Flours: The combination of whole wheat and bread flour offers the best of both worlds: the nutritional benefits and nutty taste of whole grains, plus the strong gluten network from bread flour needed for a good rise and structure in a heavier multigrain loaf.
- Yeast & Sweetener: Yeast feeds on the sugars (from the honey/maple syrup and starches in the flour) and releases carbon dioxide gas, which creates the air pockets that make bread light and airy.
- Seeds & Oats: These aren’t just for show! They contribute significantly to the bread’s nutritional profile, adding fiber, protein, healthy fats, vitamins, and minerals. They also provide wonderful texture and flavour complexity.
- Fat (Oil/Butter): Fat tenderizes the crumb, improves keeping quality, and adds flavour.
- Salt: Beyond flavour, salt strengthens the gluten structure and moderates yeast fermentation, preventing the dough from rising too quickly and collapsing.
Choosing high-quality ingredients will significantly impact the final result. Opt for fresh flours and seeds whenever possible.
Step-by-Step Instructions for Baking Your Multigrain Loaf
Baking bread is a rewarding process that engages the senses. Follow these steps carefully for a beautiful and delicious healthy multigrain loaf. Don’t be intimidated; even beginners can achieve great results with a little patience.
1. Activate the Yeast (Proofing)
- In a large mixing bowl (or the bowl of your stand mixer), combine the warm water, honey or maple syrup, and active dry yeast.
- Give it a gentle stir.
- Let the mixture sit undisturbed for 5-10 minutes.
- You’ll know the yeast is active and ready if the mixture becomes foamy or bubbly on the surface. If it doesn’t foam, your yeast might be old or the water temperature was off. It’s best to discard it and start again with fresh yeast and correctly heated water. This step is crucial for ensuring your bread will rise.
2. Combine Wet and Dry Ingredients
- Once the yeast is proofed and foamy, add the olive oil or melted butter to the bowl.
- In a separate medium bowl, whisk together the whole wheat flour, bread flour, rolled oats, mixed seeds, and salt. Whisking helps distribute the salt and seeds evenly throughout the flour mixture.
- Gradually add the dry ingredient mixture to the wet ingredients in the large bowl (or stand mixer bowl).
3. Mixing and Kneading the Dough
- Using a Stand Mixer: Attach the dough hook. Mix on low speed until the ingredients just come together into a shaggy dough. Increase the speed to medium-low and knead for 7-10 minutes. The dough should become smooth, elastic, and pull away cleanly from the sides of the bowl. It will likely still be slightly sticky due to the whole grains and seeds, but it should be manageable.
- Mixing by Hand: Use a sturdy wooden spoon or your hands to mix the ingredients until a shaggy dough forms. Turn the dough out onto a lightly floured surface. Knead by hand for 10-15 minutes. To knead, fold the dough over onto itself, then push it down and away from you with the heel of your hand. Rotate the dough a quarter turn and repeat. Continue this process until the dough is smooth, elastic, and supple. It should spring back slowly when poked gently. Add minimal extra flour to the surface as needed to prevent excessive sticking, but avoid adding too much, which can make the bread dense.
- Windowpane Test (Optional but helpful): To check if the gluten is sufficiently developed, pinch off a small piece of dough. Gently stretch it between your fingers. If you can stretch it thin enough to see light through it without it tearing immediately (like a windowpane), it’s ready. If it tears easily, knead for a few more minutes.
4. First Rise (Bulk Fermentation)
- Lightly grease the large mixing bowl you used (or a clean one) with a little olive oil or cooking spray.
- Shape the kneaded dough into a ball. Place the dough ball into the greased bowl and turn it over once to coat the entire surface lightly with oil. This prevents it from drying out.
- Cover the bowl tightly with plastic wrap or a clean, damp kitchen towel.
- Place the bowl in a warm, draft-free place to rise. Ideal temperature is around 75-85°F (24-29°C). A slightly warmed (but turned off) oven with the light on can work well.
- Let the dough rise for 1 to 1.5 hours, or until it has doubled in size. The exact time will depend on the ambient temperature and yeast activity.
5. Shaping the Loaf
- Once the dough has doubled, gently punch it down in the center to release the trapped gases.
- Turn the dough out onto a lightly floured surface.
- Gently press the dough into a rough rectangle shape (about 8×12 inches or 20×30 cm). Be careful not to deflate it completely.
- Starting from one of the shorter sides, tightly roll the dough up into a log, pressing out any large air bubbles as you go.
- Pinch the seam firmly closed along the length of the log. Tuck the ends under slightly and pinch them closed as well. This creates surface tension, which helps the loaf rise upwards during baking.
- Ensure the log is roughly the length of your loaf pan.
6. Second Rise (Proofing)
- Lightly grease a standard 9×5 inch (or similar size) loaf pan.
- Carefully place the shaped dough log into the prepared pan, seam-side down.
- Cover the pan loosely with greased plastic wrap or a damp kitchen towel. Don’t cover it too tightly, as the dough needs room to expand upwards.
- Let the dough rise again in a warm, draft-free place for 45-60 minutes, or until it has puffed up and risen about 1 inch above the rim of the pan. It won’t necessarily double this time, but it should look visibly larger and feel airy.
- Optional: If you want to add a topping, gently brush the top of the loaf with an egg wash or milk wash and sprinkle with extra oats or seeds during the last 10-15 minutes of proofing. Be gentle not to deflate the dough.
7. Baking the Bread
- Preheat your oven to 375°F (190°C) about 15-20 minutes before the second rise is complete. Position an oven rack in the center.
- Once the dough has finished its second rise and the oven is preheated, carefully place the loaf pan onto the center rack in the oven.
- Bake for 35-45 minutes.
- The bread is done when the crust is a deep golden brown, and it sounds hollow when tapped gently on the bottom (carefully remove it from the pan to test this if needed).
- For the most accurate check, use an instant-read thermometer inserted into the center of the loaf (avoiding the bottom or sides). The internal temperature should register between 190-210°F (88-99°C).
- If the crust is browning too quickly before the inside is cooked, you can loosely tent the loaf with aluminum foil for the last 10-15 minutes of baking.
8. Cooling the Loaf
- Immediately remove the bread from the loaf pan once it’s out of the oven. If left in the pan, the bottom crust can become soggy from trapped steam.
- Place the loaf on a wire cooling rack.
- Crucial Step: Let the bread cool completely on the rack before slicing. This usually takes at least 1-2 hours. Slicing into hot bread can result in a gummy texture, as the internal structure is still setting. Patience here is key!
Once cooled, slice with a serrated bread knife and enjoy the fruits (or grains!) of your labor.
Nutritional Information (Approximate)
Please note that these values are estimates and can vary based on the specific ingredients used (e.g., type of seeds, flour brands, sweetener). This information is provided for general guidance.
- Servings Per Loaf: Approximately 12-16 slices, depending on thickness.
- Calories Per Serving (1 slice): Roughly 150-190 calories.
Key Nutritional Highlights:
- Fiber: Thanks to the whole wheat flour, oats, and seeds, this bread is a good source of dietary fiber, which is important for digestive health, blood sugar control, and satiety.
- Whole Grains: Provides complex carbohydrates for sustained energy release.
- Healthy Fats: Seeds like flax, sunflower, and pumpkin contribute beneficial unsaturated fats, including omega-3 fatty acids (especially from flax).
- Protein: Contains a moderate amount of plant-based protein from the flours, oats, and seeds.
- Vitamins & Minerals: Offers various micronutrients like B vitamins, iron, magnesium, and zinc, naturally present in the whole grains and seeds.
Compared to standard white bread, this healthy multigrain bread offers significantly more fiber, protein, and micronutrients, making it a more satiating and nourishing choice.
Preparation and Baking Time
Understanding the time commitment helps plan your baking day. While much of the time is hands-off rising, it’s important to be available for the active steps.
- Active Preparation Time: 20-30 minutes (Mixing, kneading, shaping)
- First Rise (Bulk Fermentation): 60-90 minutes
- Second Rise (Proofing): 45-60 minutes
- Baking Time: 35-45 minutes
- Cooling Time: 1-2 hours (Essential!)
Total Time: Approximately 3.5 – 5 hours (largely dependent on rising times influenced by ambient temperature).
While it seems like a long process, remember that most of this time involves waiting for the dough to rise or bake. The actual hands-on work is relatively short and incredibly rewarding.
How to Serve Your Delicious Homemade Multigrain Bread
This versatile healthy multigrain bread is fantastic in many ways. Its sturdy texture and nutty flavour make it suitable for various meals and snacks throughout the day. Here are some serving suggestions:
- Classic Toast:
- Enjoy slices toasted until golden brown.
- Top with butter, jam, marmalade, or honey.
- Spread with peanut butter, almond butter, or other nut/seed butters for a protein boost.
- Avocado Toast:
- Mash ripe avocado onto toasted slices.
- Season with salt, pepper, red pepper flakes, or everything bagel seasoning.
- Add toppings like a poached egg, cherry tomatoes, feta cheese, or smoked salmon.
- Hearty Sandwiches:
- Its firm structure holds up well to substantial fillings.
- Perfect for classic deli sandwiches (turkey, ham, roast beef, cheese).
- Makes excellent veggie sandwiches with hummus, sprouts, cucumber, tomato, and lettuce.
- Great for grilled cheese sandwiches – the seeds add a nice textural contrast.
- Alongside Soups and Salads:
- Serve a slice (toasted or plain) for dipping into hearty soups, stews, or chilis.
- Use it as a base for croutons: cube stale bread, toss with olive oil and herbs, and bake until crispy.
- Enjoy a slice with a large salad for a more complete and satisfying meal.
- Breakfast Foundations:
- Use it for French toast – the dense texture soaks up the egg mixture beautifully.
- Top with cottage cheese or Greek yogurt and fruit for a balanced breakfast.
- Simple Snack:
- Enjoy a plain slice on its own to appreciate the complex flavours of the grains and seeds.
- Spread with a thin layer of cream cheese.
The possibilities are endless! Its wholesome flavour complements both sweet and savory toppings and fillings.
Additional Tips for Perfect Multigrain Bread Every Time
Achieve consistent baking success with these helpful tips:
- Measure Flour Correctly: How you measure flour significantly impacts the dough’s hydration. Avoid scooping directly from the bag, which compacts the flour. Instead, use the “spoon and level” method: Spoon the flour lightly into your measuring cup until it’s overflowing, then sweep the excess off with the straight edge of a knife. For utmost accuracy, use a kitchen scale (weights provided in the ingredient list are ideal).
- Don’t Rush the Rise: Patience during the rising phases (fermentation and proofing) is crucial for flavour development and texture. Allow the dough to fully double (or rise significantly in the second proof) as indicated. Rising times are approximate; watch the dough, not just the clock. A warmer environment speeds rising, while a cooler one slows it down (which can actually enhance flavour).
- Customize Your Seed & Grain Mix: Feel free to experiment! Swap out some of the listed seeds for others like millet, poppy seeds, or cracked wheat (adjusting total volume accordingly). You could even add a tablespoon or two of wheat germ or bran for extra nutrition. Ensure any larger grains (like whole wheat berries) are pre-cooked or soaked, or stick to smaller seeds/rolled grains.
- Achieving the Right Crust: For a softer crust, brush the top of the loaf with melted butter immediately after removing it from the oven. For a chewier, thicker crust, place a shallow pan of hot water on the bottom rack of the oven during the first 15-20 minutes of baking to create steam (be cautious when opening the oven door).
- Proper Storage for Freshness: Store cooled bread at room temperature in a bread box or a loosely sealed paper or plastic bag for 2-3 days. Avoid storing bread in the refrigerator, as it tends to make it stale faster. For longer storage, slice the cooled loaf completely, wrap it tightly in plastic wrap, and then place it inside a freezer bag. It freezes beautifully for up to 3 months. Toast slices directly from frozen or thaw at room temperature.
Frequently Asked Questions (FAQ) about Healthy Multigrain Bread
Here are answers to some common questions about baking this healthy multigrain bread:
- Q: Can I make this recipe entirely with whole wheat flour?
- A: You can, but the loaf will likely be much denser and heavier. The bread flour provides essential gluten strength for a better rise and lighter texture, especially when combined with heavy whole grains and seeds. If you choose to use only whole wheat, you might need to add a tablespoon or two of vital wheat gluten (if available) to improve the structure, or be prepared for a very dense loaf. Adjust hydration slightly if needed, as whole wheat flour absorbs more water.
- Q: Is this recipe vegan? How can I make it vegan?
- A: The recipe is easily made vegan. Simply ensure you use maple syrup instead of honey as the sweetener, and use olive oil or another plant-based oil/melted vegan butter instead of dairy butter. If using an optional topping wash, use plant-based milk (like almond or soy) instead of an egg wash.
- Q: My bread came out dense and didn’t rise much. What went wrong?
- A: Several factors can cause dense bread:
- Inactive Yeast: Your yeast might have been old or killed by water that was too hot. Always proof it first.
- Insufficient Kneading: Not developing enough gluten means the dough structure can’t trap the gas produced by the yeast.
- Too Much Flour: Adding too much extra flour during kneading makes the dough stiff and heavy.
- Under-Proofing: Not letting the dough rise long enough in either the first or second rise.
- Cold Environment: Rising dough in a place that’s too cold significantly slows yeast activity.
- A: Several factors can cause dense bread:
- Q: Can I use a bread machine for this recipe?
- A: Yes, this recipe can usually be adapted for a bread machine. Add the liquid ingredients (water, oil, sweetener) first, followed by the dry ingredients (flours, oats, seeds, salt), with the yeast added last on top (don’t let it touch the liquid directly until mixing starts). Select the “Whole Wheat” or “Multigrain” setting appropriate for your loaf size (likely a 1.5 or 2 lb setting). Check the dough consistency during the first kneading cycle; you may need to add a teaspoon of water if too dry or a teaspoon of flour if too wet. Results may vary slightly from the oven-baked version.
- Q: How do I know when the bread is perfectly baked?
- A: Look for three key signs:
- Color: A deep, rich golden-brown crust all over.
- Sound: It should sound hollow when you carefully remove it from the pan and tap the bottom.
- Temperature: This is the most reliable method. An instant-read thermometer inserted into the center should register between 190°F and 210°F (88°C and 99°C). If it’s lower, it needs more time.
- A: Look for three key signs:
Baking your own healthy multigrain bread is a journey of delicious discovery. Enjoy the process, the aroma, and most importantly, the incredibly tasty and nourishing results!
Print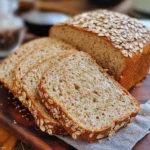
Healthy Multigrain Bread recipe
Ingredients
- Warm Water: 1 ½ cups (360ml) – Should be lukewarm, around 105-115°F (40-46°C). Too hot kills the yeast, too cold slows it down.
- Active Dry Yeast: 2 ¼ teaspoons (1 standard packet, approx. 7g) – The powerhouse that gives your bread its rise.
- Honey or Maple Syrup: 2 tablespoons (30ml) – Provides food for the yeast and adds a subtle touch of sweetness. Use maple syrup for a vegan option.
- Whole Wheat Flour: 1 ½ cups (180g) – Forms the robust base, adding fiber and a nutty flavour.
- Bread Flour: 1 ½ cups (180g) – Provides higher protein content, essential for gluten development, giving the bread structure and chew. You can substitute with all-purpose flour, but the texture might be slightly less chewy.
- Rolled Oats (Old-Fashioned): ½ cup (45g) – Adds texture, moisture retention, and nutritional value. Do not use instant oats.
- Mixed Seeds: ½ cup (approx. 70-80g) – A blend works best for flavour and nutrition. Good options include:
- Flax seeds (whole or ground)
- Sunflower seeds (shelled)
- Pumpkin seeds (pepitas)
- Sesame seeds
- Chia seeds
- Olive Oil or Melted Unsalted Butter: 2 tablespoons (30ml) – Adds richness, flavour, and helps create a softer crumb.
- Salt: 1 ½ teaspoons (9g) – Crucial for flavour balance and controlling yeast activity.
Optional additions for topping:
- Extra rolled oats or mixed seeds for sprinkling on top before baking.
- An egg wash (1 egg beaten with 1 tbsp water) or milk wash for a shinier, browner crust.
Instructions
1. Activate the Yeast (Proofing)
- In a large mixing bowl (or the bowl of your stand mixer), combine the warm water, honey or maple syrup, and active dry yeast.
- Give it a gentle stir.
- Let the mixture sit undisturbed for 5-10 minutes.
- You’ll know the yeast is active and ready if the mixture becomes foamy or bubbly on the surface. If it doesn’t foam, your yeast might be old or the water temperature was off. It’s best to discard it and start again with fresh yeast and correctly heated water. This step is crucial for ensuring your bread will rise.
2. Combine Wet and Dry Ingredients
- Once the yeast is proofed and foamy, add the olive oil or melted butter to the bowl.
- In a separate medium bowl, whisk together the whole wheat flour, bread flour, rolled oats, mixed seeds, and salt. Whisking helps distribute the salt and seeds evenly throughout the flour mixture.
- Gradually add the dry ingredient mixture to the wet ingredients in the large bowl (or stand mixer bowl).
3. Mixing and Kneading the Dough
- Using a Stand Mixer: Attach the dough hook. Mix on low speed until the ingredients just come together into a shaggy dough. Increase the speed to medium-low and knead for 7-10 minutes. The dough should become smooth, elastic, and pull away cleanly from the sides of the bowl. It will likely still be slightly sticky due to the whole grains and seeds, but it should be manageable.
- Mixing by Hand: Use a sturdy wooden spoon or your hands to mix the ingredients until a shaggy dough forms. Turn the dough out onto a lightly floured surface. Knead by hand for 10-15 minutes. To knead, fold the dough over onto itself, then push it down and away from you with the heel of your hand. Rotate the dough a quarter turn and repeat. Continue this process until the dough is smooth, elastic, and supple. It should spring back slowly when poked gently. Add minimal extra flour to the surface as needed to prevent excessive sticking, but avoid adding too much, which can make the bread dense.
- Windowpane Test (Optional but helpful): To check if the gluten is sufficiently developed, pinch off a small piece of dough. Gently stretch it between your fingers. If you can stretch it thin enough to see light through it without it tearing immediately (like a windowpane), it’s ready. If it tears easily, knead for a few more minutes.
4. First Rise (Bulk Fermentation)
- Lightly grease the large mixing bowl you used (or a clean one) with a little olive oil or cooking spray.
- Shape the kneaded dough into a ball. Place the dough ball into the greased bowl and turn it over once to coat the entire surface lightly with oil. This prevents it from drying out.
- Cover the bowl tightly with plastic wrap or a clean, damp kitchen towel.
- Place the bowl in a warm, draft-free place to rise. Ideal temperature is around 75-85°F (24-29°C). A slightly warmed (but turned off) oven with the light on can work well.
- Let the dough rise for 1 to 1.5 hours, or until it has doubled in size. The exact time will depend on the ambient temperature and yeast activity.
5. Shaping the Loaf
- Once the dough has doubled, gently punch it down in the center to release the trapped gases.
- Turn the dough out onto a lightly floured surface.
- Gently press the dough into a rough rectangle shape (about 8×12 inches or 20×30 cm). Be careful not to deflate it completely.
- Starting from one of the shorter sides, tightly roll the dough up into a log, pressing out any large air bubbles as you go.
- Pinch the seam firmly closed along the length of the log. Tuck the ends under slightly and pinch them closed as well. This creates surface tension, which helps the loaf rise upwards during baking.
- Ensure the log is roughly the length of your loaf pan.
6. Second Rise (Proofing)
- Lightly grease a standard 9×5 inch (or similar size) loaf pan.
- Carefully place the shaped dough log into the prepared pan, seam-side down.
- Cover the pan loosely with greased plastic wrap or a damp kitchen towel. Don’t cover it too tightly, as the dough needs room to expand upwards.
- Let the dough rise again in a warm, draft-free place for 45-60 minutes, or until it has puffed up and risen about 1 inch above the rim of the pan. It won’t necessarily double this time, but it should look visibly larger and feel airy.
- Optional: If you want to add a topping, gently brush the top of the loaf with an egg wash or milk wash and sprinkle with extra oats or seeds during the last 10-15 minutes of proofing. Be gentle not to deflate the dough.
7. Baking the Bread
- Preheat your oven to 375°F (190°C) about 15-20 minutes before the second rise is complete. Position an oven rack in the center.
- Once the dough has finished its second rise and the oven is preheated, carefully place the loaf pan onto the center rack in the oven.
- Bake for 35-45 minutes.
- The bread is done when the crust is a deep golden brown, and it sounds hollow when tapped gently on the bottom (carefully remove it from the pan to test this if needed).
- For the most accurate check, use an instant-read thermometer inserted into the center of the loaf (avoiding the bottom or sides). The internal temperature should register between 190-210°F (88-99°C).
- If the crust is browning too quickly before the inside is cooked, you can loosely tent the loaf with aluminum foil for the last 10-15 minutes of baking.
8. Cooling the Loaf
- Immediately remove the bread from the loaf pan once it’s out of the oven. If left in the pan, the bottom crust can become soggy from trapped steam.
- Place the loaf on a wire cooling rack.
- Crucial Step: Let the bread cool completely on the rack before slicing. This usually takes at least 1-2 hours. Slicing into hot bread can result in a gummy texture, as the internal structure is still setting. Patience here is key!
Nutrition
- Serving Size: one normal portion
- Calories: 150-190


