

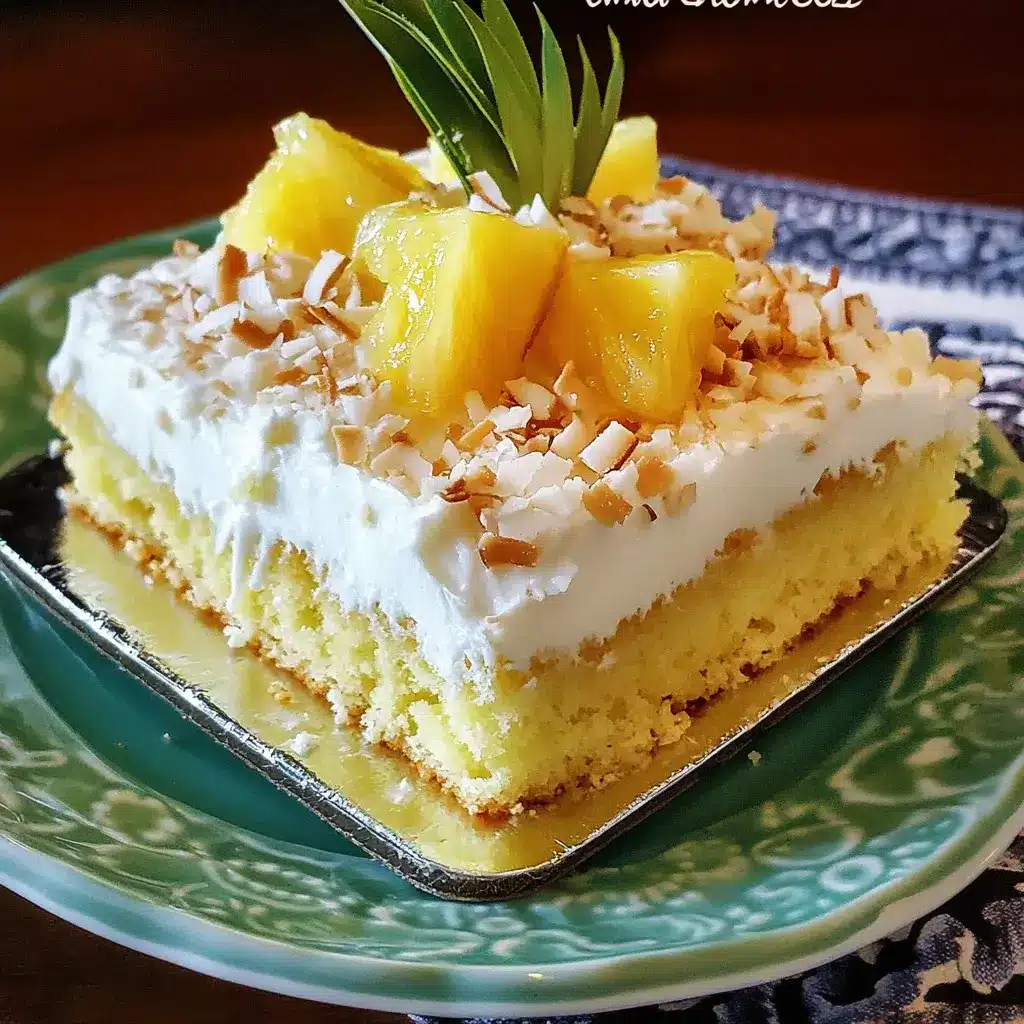
My family has always been a big fan of desserts, but finding one that’s both incredibly delicious and relatively easy to make can sometimes feel like searching for a culinary unicorn. That is, until I stumbled upon the Hawaiian Pineapple Coconut Poke Cake. From the moment I pulled this tropical dream from the oven, the aroma alone transported us to sun-kissed beaches and swaying palm trees. The first bite was pure bliss – the moist, tender cake soaked with sweet pineapple juice and creamy coconut milk, topped with a luscious whipped cream and toasted coconut frosting. It’s the perfect balance of sweet, tangy, and utterly decadent. Even my pickiest eater, my youngest son, devoured two slices! This recipe isn’t just a dessert; it’s a taste of paradise, and it has quickly become a family favorite for potlucks, birthdays, or simply a delightful weekend treat. If you’re looking for a show-stopping dessert that’s surprisingly simple to create, look no further – this Hawaiian Pineapple Coconut Poke Cake is guaranteed to be a hit.
Ingredients: Your Tropical Treasure Chest
To embark on this delicious journey to the islands, you’ll need to gather these key ingredients. Each plays a vital role in creating the perfect Hawaiian Pineapple Coconut Poke Cake. Let’s explore them in detail:
For the Cake:
- 1 box (15.25 ounces) White Cake Mix: The base of our tropical masterpiece. White cake mix is ideal as it provides a light and neutral flavor that allows the pineapple and coconut to truly shine. You can use your favorite brand, but ensure it’s a standard 15.25-ounce box. Using a white cake mix also ensures a tender and moist crumb that perfectly soaks up the delicious poke mixture.
- 1 cup Water: Water is crucial for activating the cake mix and achieving the right consistency for the batter. Use room temperature water for the best results.
- 1/3 cup Vegetable Oil: Oil adds moisture and richness to the cake, ensuring it stays tender for days. Vegetable oil is a neutral choice, but you could also use canola oil. Avoid using strongly flavored oils like olive oil as they can alter the intended flavor profile.
- 3 Large Eggs: Eggs bind the ingredients together, add richness, and contribute to the cake’s structure. Use large eggs at room temperature for better emulsification and volume. Room temperature eggs also incorporate more easily into the batter, leading to a smoother texture.
- 1 teaspoon Vanilla Extract: A touch of vanilla enhances the overall flavor profile, adding warmth and depth. Use pure vanilla extract for the best flavor, but imitation vanilla can also be used in a pinch. Vanilla extract complements both the pineapple and coconut beautifully.
For the “Poke” and Flavor Infusion:
- 1 can (20 ounces) Crushed Pineapple in Juice, Undrained: This is the heart of the Hawaiian flavor! Undrained crushed pineapple provides both the sweet pineapple pieces and the flavorful juice that soaks into the cake. Don’t drain the juice – it’s essential for the “poke” aspect of the cake. Using crushed pineapple ensures even distribution of pineapple flavor throughout the cake.
- 1 can (13.5 ounces) Unsweetened Coconut Milk: Coconut milk adds a creamy, tropical richness and complements the pineapple perfectly. Use unsweetened coconut milk to control the sweetness of the cake. Full-fat coconut milk will provide the richest flavor and texture, but you can also use light coconut milk if you prefer a slightly lighter dessert. Make sure to shake the can well before opening to ensure the coconut cream is properly mixed with the liquid.
For the Frosting and Topping:
- 1 container (8 ounces) Frozen Whipped Topping, thawed: This provides a light, airy, and perfectly sweet frosting. Thaw it completely in the refrigerator before using. Whipped topping is a convenient and readily available option that complements the tropical flavors without being overly heavy.
- 1 cup Sweetened Shredded Coconut: Toasted shredded coconut adds a delightful crunch, nutty flavor, and beautiful visual appeal. Sweetened shredded coconut provides a touch of extra sweetness and a satisfying texture contrast to the soft cake and frosting.
- Optional: Maraschino Cherries, for garnish: Maraschino cherries add a pop of color and a classic finishing touch to poke cakes. They are entirely optional but enhance the visual appeal of the dessert.
Ingredient Notes for Success:
- Cake Mix Quality: While any white cake mix will work, choosing a good quality mix can make a difference in the final taste and texture. Look for mixes that are known for producing moist and tender cakes.
- Pineapple Type: Crushed pineapple is recommended for this recipe as it distributes evenly throughout the cake and soaks in nicely. Do not use pineapple tidbits or chunks as they will not create the same texture.
- Coconut Milk Choice: Unsweetened coconut milk is preferred to prevent the cake from becoming overly sweet. If you only have sweetened coconut milk, you may want to reduce the amount of sugar in the cake mix batter slightly (though it’s generally not necessary).
- Toasting Coconut: Toasting the shredded coconut is highly recommended. It intensifies the coconut flavor and adds a wonderful crunch. You can toast it in a dry skillet over medium heat, stirring constantly, until golden brown, or bake it in a preheated oven at 350°F (175°C) for 5-7 minutes, stirring occasionally. Watch it closely as it can burn quickly.
- Whipped Topping Alternatives: If you prefer homemade whipped cream, you can certainly make your own. You’ll need heavy cream, powdered sugar, and vanilla extract. Whip the heavy cream until soft peaks form, then gradually add powdered sugar and vanilla extract, continuing to whip until stiff peaks form.
By gathering these ingredients and understanding their roles, you’re well on your way to creating a truly spectacular Hawaiian Pineapple Coconut Poke Cake!
Instructions: Baking Your Way to Paradise
Now that you have all your ingredients assembled, let’s dive into the step-by-step instructions to bake this delightful Hawaiian Pineapple Coconut Poke Cake. Follow these directions carefully for a guaranteed taste of tropical heaven:
Step 1: Prepare the Cake Batter
- Preheat Oven and Prepare Pan: Preheat your oven to 350°F (175°C). Grease and flour a 9×13 inch baking pan. Alternatively, you can use baking spray with flour for easy release. Ensuring the pan is properly prepared will prevent the cake from sticking and make removal a breeze.
- Combine Cake Mix Ingredients: In a large mixing bowl, combine the white cake mix, water, vegetable oil, eggs, and vanilla extract. It’s best to use a large bowl to accommodate all the ingredients and prevent spillage during mixing.
- Mix Until Just Combined: Using an electric mixer (hand mixer or stand mixer), beat the ingredients on low speed until just combined. Then, increase the speed to medium and beat for 2 minutes, or as directed on your cake mix box. Be careful not to overmix the batter. Overmixing can develop gluten, resulting in a tougher cake. Mix until the batter is smooth and there are no lumps of dry cake mix remaining.
Step 2: Bake the Cake
- Pour Batter into Pan: Pour the prepared cake batter evenly into the greased and floured 9×13 inch baking pan. Spread the batter to the corners of the pan to ensure even baking.
- Bake Until Done: Bake in the preheated oven for 30-35 minutes, or until a wooden skewer inserted into the center comes out clean. Baking times can vary slightly depending on your oven, so it’s always best to check for doneness using a skewer. The cake should be golden brown on top and spring back lightly when touched.
- Cool Completely: Once baked, remove the cake from the oven and let it cool completely in the pan on a wire rack. This is crucial! The cake needs to be completely cool before you poke holes and pour the pineapple mixture. Cooling allows the cake to firm up slightly and prevents the hot pineapple mixture from making it mushy.
Step 3: Poke and Infuse with Tropical Flavor
- Poke Holes: Once the cake is completely cooled, use the handle of a wooden spoon or a fork to poke holes all over the cake. Make the holes about 1 inch apart. Don’t be shy – you want to create plenty of channels for the pineapple mixture to soak into. The more holes, the more flavorful and moist the cake will be.
- Prepare Pineapple Mixture: Open the can of crushed pineapple (undrained) and the can of unsweetened coconut milk. You don’t need to mix them separately; they will be poured directly over the cake.
- Pour Pineapple and Coconut Milk: Slowly and evenly pour the undrained crushed pineapple and the unsweetened coconut milk over the poked cake. Make sure to distribute it as evenly as possible so that all parts of the cake get infused with the tropical goodness. The liquid will seem like a lot at first, but the cake will absorb it as it sits.
- Refrigerate to Soak: Cover the cake with plastic wrap or foil and refrigerate for at least 2 hours, or preferably overnight. Refrigerating allows the cake to fully absorb the pineapple and coconut milk, resulting in an incredibly moist and flavorful poke cake. The longer it chills, the better the flavors will meld together.
Step 4: Frost and Finish
- Frost with Whipped Topping: Once the cake is thoroughly chilled and soaked, remove it from the refrigerator. Spread the thawed whipped topping evenly over the top of the cake, creating a smooth and creamy frosting layer.
- Toast Coconut (Optional but Recommended): If you haven’t already, toast the shredded coconut. Spread the shredded coconut in a thin layer on a baking sheet and bake at 350°F (175°C) for 5-7 minutes, or until golden brown, stirring occasionally. Watch carefully to prevent burning. Let it cool completely.
- Sprinkle with Toasted Coconut: Sprinkle the toasted shredded coconut generously over the whipped topping. This adds a delightful crunch, nutty flavor, and beautiful texture to the cake.
- Garnish with Cherries (Optional): If desired, garnish with maraschino cherries for a pop of color and a classic poke cake finish.
- Serve and Enjoy! Slice and serve your Hawaiian Pineapple Coconut Poke Cake. Keep any leftover cake refrigerated to maintain its freshness and moisture.
Following these detailed instructions will guide you to create a perfect Hawaiian Pineapple Coconut Poke Cake that is moist, flavorful, and a true tropical delight. Enjoy the baking process and the delicious results!
Nutrition Facts: A Sweet Treat in Moderation
While the Hawaiian Pineapple Coconut Poke Cake is undeniably delicious and perfect for special occasions, it’s important to be mindful of its nutritional content. Here’s a general overview of the nutrition facts for this dessert. Please note that these are estimates and can vary based on specific ingredient brands and portion sizes.
Servings: 12-16 servings (depending on slice size)
Approximate Nutrition Facts Per Serving (based on 1/12th of the cake):
- Calories: 300-350 kcal
- Total Fat: 15-20g
- Saturated Fat: 10-12g
- Cholesterol: 50-60mg
- Sodium: 200-250mg
- Total Carbohydrates: 40-45g
- Dietary Fiber: 0-1g
- Sugars: 25-30g
- Protein: 2-3g
Key Nutritional Considerations:
- Calories: This cake is a moderate to high-calorie dessert due to the cake mix, oil, coconut milk, and whipped topping. Portion control is important if you are watching your calorie intake.
- Fat: The saturated fat content is relatively high due to the coconut milk and oil. Enjoy in moderation as part of a balanced diet.
- Sugar: The cake is sweet due to the cake mix, pineapple, and whipped topping. The sugar content is moderate to high.
- Sodium: Cake mixes can contain sodium. Check the nutrition label of your specific cake mix for accurate sodium content.
Important Disclaimer:
These nutrition facts are estimates only. Actual values may vary. If you have specific dietary needs or concerns, it’s always best to calculate the nutrition information based on the exact brands and quantities of ingredients you use. You can use online nutrition calculators or apps to help you get more precise values.
Tips for Making it Slightly Lighter (Nutritionally):
- Use Light Coconut Milk: Substituting full-fat coconut milk with light coconut milk will reduce the fat and calorie content slightly.
- Reduce Whipped Topping: Use a thinner layer of whipped topping or consider using a lighter whipped topping alternative.
- Increase Serving Size: Cutting smaller slices will naturally reduce the calorie and nutrient intake per serving.
While this Hawaiian Pineapple Coconut Poke Cake is a delightful indulgence, enjoying it in moderation and being aware of its nutritional profile is key to maintaining a healthy lifestyle. It’s a perfect treat for special occasions, but not necessarily an everyday dessert.
Preparation Time: Planning Your Tropical Treat
Knowing the preparation time for a recipe is essential for planning your baking schedule. Here’s a breakdown of the preparation time for the Hawaiian Pineapple Coconut Poke Cake:
- Prep Time: 20-25 minutes
- This includes the time it takes to gather ingredients, preheat the oven, grease and flour the pan, mix the cake batter, and toast the coconut (if toasting your own).
- Bake Time: 30-35 minutes
- The time the cake spends baking in the oven.
- Cooling Time (Cake): 1-2 hours
- The time required for the cake to cool completely in the pan before poking holes and adding the pineapple mixture. This is passive time, where you don’t need to actively work on the cake.
- Chilling Time (Soaking): Minimum 2 hours, ideally overnight
- The time the cake needs to chill in the refrigerator to fully absorb the pineapple and coconut milk. This is also passive time.
- Frosting and Finishing Time: 10-15 minutes
- The time to frost the cake with whipped topping, sprinkle with toasted coconut, and garnish (if using cherries).
Total Active Time: Approximately 40-50 minutes (prep time + frosting time)
Total Passive Time: Approximately 3-4 hours (cooling time + chilling time)
Total Time from Start to Finish: Minimum 5-6 hours, ideally overnight for best flavor and texture.
Planning Tips:
- Bake Ahead: You can bake the cake and poke it the day before you plan to serve it. This allows ample time for chilling and soaking, which enhances the flavor and moisture.
- Toast Coconut Ahead: The toasted coconut can be prepared a day or two in advance and stored in an airtight container at room temperature.
- Thaw Whipped Topping: Remember to thaw the frozen whipped topping in the refrigerator several hours before you plan to frost the cake.
- Consider Overnight Chilling: For the best results, especially in terms of moisture and flavor infusion, plan to chill the cake overnight. This makes it an excellent dessert to prepare ahead of time for gatherings or events.
By understanding the preparation time breakdown, you can efficiently plan your baking process and ensure your Hawaiian Pineapple Coconut Poke Cake is ready to impress whenever you need it. It’s a relatively hands-off dessert once the cake is baked and the soaking process begins, making it a convenient choice for busy bakers.
How to Serve: Presenting Your Tropical Masterpiece
The Hawaiian Pineapple Coconut Poke Cake is not only delicious but also visually appealing. Here are some delightful ways to serve and present this tropical dessert to impress your family and guests:
Serving Options:
- Classic Slices: The most traditional way to serve poke cake is in square or rectangular slices directly from the 9×13 inch pan. This is perfect for casual gatherings, potlucks, or family dinners.
- Individual Portions: For a more elegant presentation, you can cut the cake into squares and serve individual portions on dessert plates. This is ideal for dinner parties or more formal occasions.
- Dessert Cups or Bowls: For a fun and informal twist, you can crumble the poke cake and layer it in dessert cups or bowls with extra whipped topping, toasted coconut, and fresh pineapple chunks. This is a great option for kids and makes for easy serving at picnics or outdoor events.
- With Fresh Fruit: Enhance the tropical flavors by serving slices of poke cake alongside fresh fruit such as pineapple wedges, mango slices, or berries. The fresh fruit adds a refreshing contrast to the richness of the cake.
- With Ice Cream or Sorbet: For an extra decadent treat, serve a scoop of vanilla ice cream, coconut sorbet, or pineapple sorbet alongside a slice of poke cake. The cold ice cream or sorbet complements the moist cake beautifully.
Garnishing Ideas:
- Toasted Coconut: Generously sprinkle toasted shredded coconut over the whipped topping for a classic and textural garnish.
- Maraschino Cherries: Place maraschino cherries on top of each slice for a pop of color and a retro poke cake vibe.
- Fresh Pineapple Wedges or Chunks: Arrange fresh pineapple wedges or chunks around the cake or on top of each slice to emphasize the pineapple flavor and add a fresh element.
- Mint Sprigs: A few fresh mint sprigs can add a touch of green and freshness to the presentation.
- Chocolate Shavings: For a richer twist, sprinkle dark or white chocolate shavings over the whipped topping along with the toasted coconut.
- Caramel Drizzle: A light drizzle of caramel sauce can add another layer of sweetness and flavor complexity.
Serving Temperature:
- Cold: Hawaiian Pineapple Coconut Poke Cake is best served chilled directly from the refrigerator. The cold temperature enhances the moist texture and refreshing flavors, especially on warm days.
Occasion-Based Serving Suggestions:
- Potlucks and Picnics: Serve directly from the 9×13 inch pan for easy transport and serving.
- Birthday Parties: Decorate with candles and serve slices on dessert plates.
- Summer Gatherings: Serve chilled with fresh fruit or sorbet for a refreshing summer dessert.
- Holiday Celebrations: Garnish with festive sprinkles or holiday-themed cherries for a special touch.
- Casual Family Dinners: Serve simple slices after dinner for a sweet ending to the meal.
No matter how you choose to serve it, the Hawaiian Pineapple Coconut Poke Cake is sure to be a crowd-pleaser. Its tropical flavors and moist texture make it a perfect dessert for any occasion. Present it with pride and watch your guests enjoy every bite!
Additional Tips for Poke Cake Perfection
To ensure your Hawaiian Pineapple Coconut Poke Cake is an absolute triumph, here are five additional tips to elevate your baking experience and achieve poke cake perfection:
- Don’t Overmix the Batter: Overmixing cake batter can develop gluten, resulting in a tougher cake. Mix the ingredients until just combined, and then beat for the specified time (usually 2 minutes) on medium speed. Stop mixing as soon as the batter is smooth and there are no lumps of dry cake mix remaining. A tender cake starts with a gently mixed batter.
- Ensure Cake is Completely Cool Before Poking: Patience is key! Make sure the cake is completely cooled before you start poking holes and pouring the pineapple mixture. If the cake is still warm, the hot liquid can make it mushy and the whipped topping may melt prematurely. Allow ample cooling time for the cake to firm up and be ready for the next steps.
- Poke Holes Generously and Evenly: Don’t be shy with the poking! Create plenty of holes, about 1 inch apart, all over the surface of the cake. This allows the pineapple and coconut milk mixture to soak into every part of the cake, ensuring maximum flavor and moisture. Evenly distributed holes result in a consistently delicious poke cake.
- Chill for Sufficient Time (Ideally Overnight): While the recipe suggests a minimum of 2 hours of chilling, chilling the cake overnight is highly recommended for the best results. The longer chilling time allows the cake to fully absorb the liquid, resulting in a significantly moister and more flavorful poke cake. Overnight chilling also allows the flavors to meld together beautifully.
- Toast Coconut Just Before Serving (or Store Separately): Toasted coconut adds a wonderful crunch and nutty flavor, but it can lose its crispness if it sits on the moist whipped topping for too long. For the best texture, toast the coconut just before you plan to frost and serve the cake. If you are preparing the cake ahead of time, you can toast the coconut and store it in an airtight container at room temperature until ready to use. Sprinkle it on the cake right before serving to maintain its delightful crunch.
By following these additional tips, you’ll be well-equipped to bake a Hawaiian Pineapple Coconut Poke Cake that is not only delicious but also perfectly textured and bursting with tropical flavor. These small details can make a big difference in the final outcome of your poke cake masterpiece!
FAQ: Your Poke Cake Questions Answered
Got questions about making the perfect Hawaiian Pineapple Coconut Poke Cake? Here are answers to five frequently asked questions to help you bake with confidence:
Q1: Can I use a different type of cake mix?
A: While white cake mix is traditionally used and recommended for this recipe as it allows the pineapple and coconut flavors to shine, you can experiment with other light-flavored cake mixes like yellow cake mix or even a coconut cake mix for an intensified coconut flavor. However, avoid using chocolate or very strong flavored cake mixes as they may overpower the delicate tropical flavors.
Q2: Can I use fresh pineapple instead of canned crushed pineapple?
A: While canned crushed pineapple (undrained) is recommended for its convenience and the juice it provides for soaking, you can use fresh pineapple if you prefer. If using fresh pineapple, finely chop it and use about 2 cups. You may need to add a little extra pineapple juice or even a touch of pineapple extract to ensure the cake is adequately moist and flavorful, as fresh pineapple may not release as much juice as canned.
Q3: Can I use regular milk instead of coconut milk?
A: Coconut milk is key to the tropical flavor profile of this poke cake. While you can technically use regular milk in a pinch, it will significantly alter the flavor and you’ll lose the signature coconut richness. For the best Hawaiian Pineapple Coconut Poke Cake experience, stick with coconut milk. If you want a slightly lighter version, use light coconut milk instead of full-fat.
Q4: Can I make this cake ahead of time?
A: Absolutely! In fact, making this cake ahead of time is highly recommended. The Hawaiian Pineapple Coconut Poke Cake is an excellent make-ahead dessert. You can bake the cake, poke it, and pour the pineapple and coconut milk mixture over it a day or two in advance. Store it covered in the refrigerator. Frost with whipped topping and add toasted coconut just before serving to maintain the best texture and freshness.
Q5: How should I store leftover poke cake?
A: Leftover Hawaiian Pineapple Coconut Poke Cake should be stored covered in the refrigerator. The whipped topping and moist cake are best kept chilled to prevent spoilage and maintain their texture. The cake will stay moist and delicious in the refrigerator for up to 3-4 days. If you want to freeze leftover cake, it’s best to freeze it unfrosted. Wrap individual slices tightly in plastic wrap and then in foil. Thaw in the refrigerator before frosting and serving.
We hope these FAQs have answered your questions and given you even more confidence to bake your own amazing Hawaiian Pineapple Coconut Poke Cake! Happy baking and enjoy your taste of paradise!
Print
Hawaiian Pineapple Coconut Poke Cake recipe
Ingredients
For the Cake:
- 1 box (15.25 ounces) White Cake Mix: The base of our tropical masterpiece. White cake mix is ideal as it provides a light and neutral flavor that allows the pineapple and coconut to truly shine. You can use your favorite brand, but ensure it’s a standard 15.25-ounce box. Using a white cake mix also ensures a tender and moist crumb that perfectly soaks up the delicious poke mixture.
- 1 cup Water: Water is crucial for activating the cake mix and achieving the right consistency for the batter. Use room temperature water for the best results.
- 1/3 cup Vegetable Oil: Oil adds moisture and richness to the cake, ensuring it stays tender for days. Vegetable oil is a neutral choice, but you could also use canola oil. Avoid using strongly flavored oils like olive oil as they can alter the intended flavor profile.
- 3 Large Eggs: Eggs bind the ingredients together, add richness, and contribute to the cake’s structure. Use large eggs at room temperature for better emulsification and volume. Room temperature eggs also incorporate more easily into the batter, leading to a smoother texture.
- 1 teaspoon Vanilla Extract: A touch of vanilla enhances the overall flavor profile, adding warmth and depth. Use pure vanilla extract for the best flavor, but imitation vanilla can also be used in a pinch. Vanilla extract complements both the pineapple and coconut beautifully.
For the “Poke” and Flavor Infusion:
- 1 can (20 ounces) Crushed Pineapple in Juice, Undrained: This is the heart of the Hawaiian flavor! Undrained crushed pineapple provides both the sweet pineapple pieces and the flavorful juice that soaks into the cake. Don’t drain the juice – it’s essential for the “poke” aspect of the cake. Using crushed pineapple ensures even distribution of pineapple flavor throughout the cake.
- 1 can (13.5 ounces) Unsweetened Coconut Milk: Coconut milk adds a creamy, tropical richness and complements the pineapple perfectly. Use unsweetened coconut milk to control the sweetness of the cake. Full-fat coconut milk will provide the richest flavor and texture, but you can also use light coconut milk if you prefer a slightly lighter dessert. Make sure to shake the can well before opening to ensure the coconut cream is properly mixed with the liquid.
For the Frosting and Topping:
- 1 container (8 ounces) Frozen Whipped Topping, thawed: This provides a light, airy, and perfectly sweet frosting. Thaw it completely in the refrigerator before using. Whipped topping is a convenient and readily available option that complements the tropical flavors without being overly heavy.
- 1 cup Sweetened Shredded Coconut: Toasted shredded coconut adds a delightful crunch, nutty flavor, and beautiful visual appeal. Sweetened shredded coconut provides a touch of extra sweetness and a satisfying texture contrast to the soft cake and frosting.
- Optional: Maraschino Cherries, for garnish: Maraschino cherries add a pop of color and a classic finishing touch to poke cakes. They are entirely optional but enhance the visual appeal of the dessert.
Instructions
Step 1: Prepare the Cake Batter
- Preheat Oven and Prepare Pan: Preheat your oven to 350°F (175°C). Grease and flour a 9×13 inch baking pan. Alternatively, you can use baking spray with flour for easy release. Ensuring the pan is properly prepared will prevent the cake from sticking and make removal a breeze.
- Combine Cake Mix Ingredients: In a large mixing bowl, combine the white cake mix, water, vegetable oil, eggs, and vanilla extract. It’s best to use a large bowl to accommodate all the ingredients and prevent spillage during mixing.
- Mix Until Just Combined: Using an electric mixer (hand mixer or stand mixer), beat the ingredients on low speed until just combined. Then, increase the speed to medium and beat for 2 minutes, or as directed on your cake mix box. Be careful not to overmix the batter. Overmixing can develop gluten, resulting in a tougher cake. Mix until the batter is smooth and there are no lumps of dry cake mix remaining.
Step 2: Bake the Cake
- Pour Batter into Pan: Pour the prepared cake batter evenly into the greased and floured 9×13 inch baking pan. Spread the batter to the corners of the pan to ensure even baking.
- Bake Until Done: Bake in the preheated oven for 30-35 minutes, or until a wooden skewer inserted into the center comes out clean. Baking times can vary slightly depending on your oven, so it’s always best to check for doneness using a skewer. The cake should be golden brown on top and spring back lightly when touched.
- Cool Completely: Once baked, remove the cake from the oven and let it cool completely in the pan on a wire rack. This is crucial! The cake needs to be completely cool before you poke holes and pour the pineapple mixture. Cooling allows the cake to firm up slightly and prevents the hot pineapple mixture from making it mushy.
Step 3: Poke and Infuse with Tropical Flavor
- Poke Holes: Once the cake is completely cooled, use the handle of a wooden spoon or a fork to poke holes all over the cake. Make the holes about 1 inch apart. Don’t be shy – you want to create plenty of channels for the pineapple mixture to soak into. The more holes, the more flavorful and moist the cake will be.
- Prepare Pineapple Mixture: Open the can of crushed pineapple (undrained) and the can of unsweetened coconut milk. You don’t need to mix them separately; they will be poured directly over the cake.
- Pour Pineapple and Coconut Milk: Slowly and evenly pour the undrained crushed pineapple and the unsweetened coconut milk over the poked cake. Make sure to distribute it as evenly as possible so that all parts of the cake get infused with the tropical goodness. The liquid will seem like a lot at first, but the cake will absorb it as it sits.
- Refrigerate to Soak: Cover the cake with plastic wrap or foil and refrigerate for at least 2 hours, or preferably overnight. Refrigerating allows the cake to fully absorb the pineapple and coconut milk, resulting in an incredibly moist and flavorful poke cake. The longer it chills, the better the flavors will meld together.
Step 4: Frost and Finish
- Frost with Whipped Topping: Once the cake is thoroughly chilled and soaked, remove it from the refrigerator. Spread the thawed whipped topping evenly over the top of the cake, creating a smooth and creamy frosting layer.
- Toast Coconut (Optional but Recommended): If you haven’t already, toast the shredded coconut. Spread the shredded coconut in a thin layer on a baking sheet and bake at 350°F (175°C) for 5-7 minutes, or until golden brown, stirring occasionally. Watch carefully to prevent burning. Let it cool completely.
- Sprinkle with Toasted Coconut: Sprinkle the toasted shredded coconut generously over the whipped topping. This adds a delightful crunch, nutty flavor, and beautiful texture to the cake.
- Garnish with Cherries (Optional): If desired, garnish with maraschino cherries for a pop of color and a classic poke cake finish.
- Serve and Enjoy! Slice and serve your Hawaiian Pineapple Coconut Poke Cake. Keep any leftover cake refrigerated to maintain its freshness and moisture.
Nutrition
- Serving Size: one normal portion
- Calories: 300-350
- Sugar: 25-30g
- Sodium: 200-250mg
- Fat: 15-20g
- Saturated Fat: 10-12g
- Carbohydrates: 40-45g
- Fiber: 0-1g
- Protein: 2-3g
- Cholesterol: 50-60mg


