

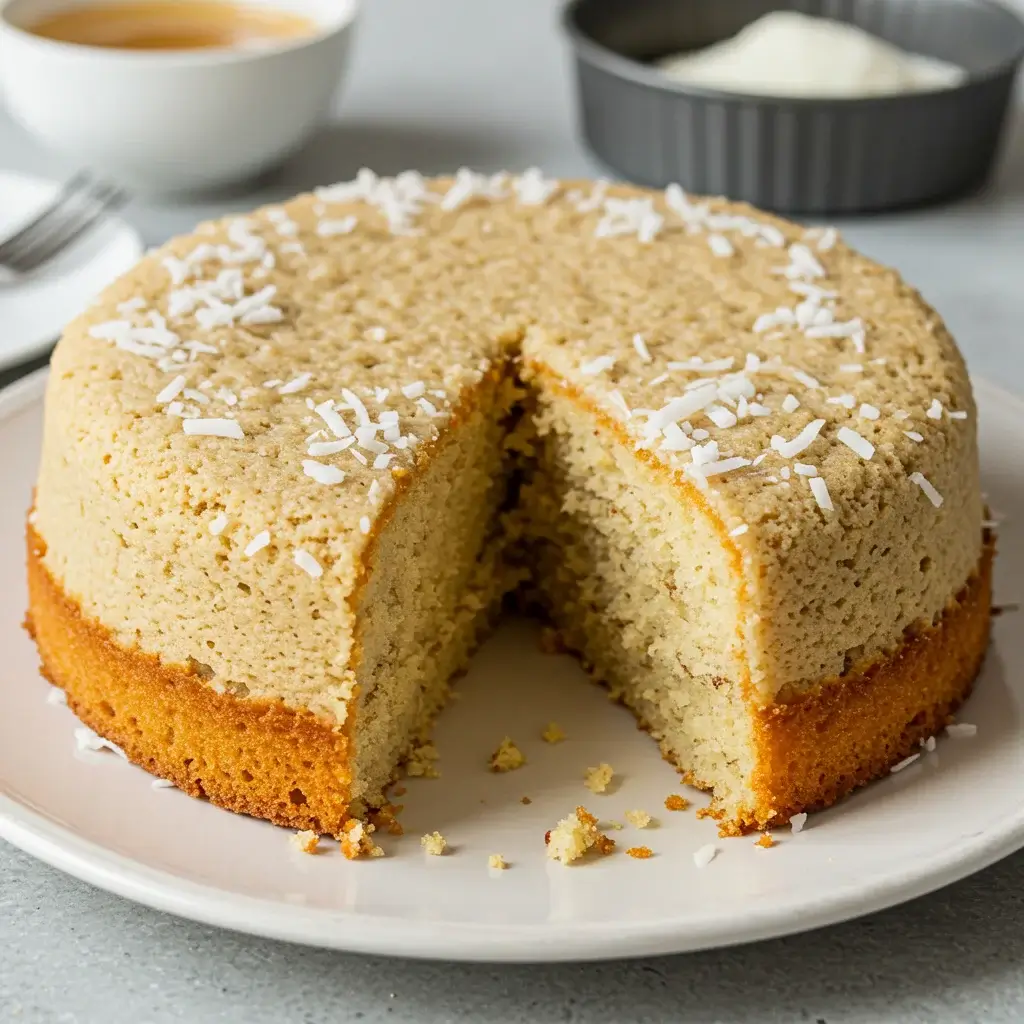
Italian Cream Cake is a classic dessert that never goes out of style. With its rich flavors and creamy texture, it’s a favorite at many family gatherings and festive occasions. But what if you’re following a gluten-free diet? Fear not! This Gluten-Free Italian Cream Cake recipe is here to save the day. It’s just as delicious as the traditional version, but without the gluten. In this article, we’ll guide you through the ingredients, instructions, and some helpful tips to make this delightful cake. Let’s dive in!
Ingredients
Before we start, let’s gather all the necessary ingredients. The beauty of this recipe is that it uses simple, gluten-free ingredients that you may already have at home.
- 2 cups gluten-free all-purpose flour
- 1 ½ cups sugar
- ½ cup unsalted butter, softened
- 4 large eggs
- 1 cup buttermilk (or almond milk with lemon juice)
- 1 tsp vanilla extract
- 1 tsp baking powder
- ½ tsp baking soda
- ½ tsp salt
- 1 cup shredded coconut
- ½ cup chopped pecans or walnuts
With these ingredients on hand, you’re ready to create a cake that’s both scrumptious and gluten-free.
Instructions
Now that we’ve gathered our ingredients, let’s move on to the step-by-step instructions for making this delicious Gluten-Free Italian Cream Cake. Follow these steps carefully to ensure the perfect cake every time.
- Preheat your oven to 350°F (175°C). Grease and flour two 9-inch round cake pans.
- In a large bowl, cream together the butter and sugar until fluffy. This should take about 3-5 minutes using an electric mixer.
- Add eggs one at a time, mixing well after each addition. This helps incorporate air into the batter, making the cake light and fluffy.
- Stir in buttermilk and vanilla extract. Mix until well combined.
- In a separate bowl, combine the flour, baking powder, baking soda, and salt. Gradually add this dry mixture to the wet mixture, mixing until just combined. Be careful not to over-mix.
- Fold in the coconut and nuts gently. This adds texture and flavor to the cake.
- Divide the batter evenly between the prepared cake pans. Smooth the tops with a spatula.
- Bake for 25-30 minutes, or until a toothpick inserted into the center comes out clean.
- Let cool in the pans for 10 minutes, then transfer to wire racks to cool completely.
Congratulations! You’ve just baked a delicious Gluten-Free Italian Cream Cake. Now, let’s take a look at its nutritional content.
Nutrition Facts
Understanding the nutritional profile of your cake is essential, especially if you’re mindful of your dietary intake. Here’s the nutrition breakdown per slice, assuming the cake serves 12:
- Calories: 220
- Protein: 3g
- Carbs: 30g
- Fat: 10g
- Fiber: 1g
- Sugar: 15g
This cake is a delightful treat that balances indulgence with a mindful approach to nutrition.
How to Serve Your Gluten-Free Italian Cream Cake
Serving your Gluten-Free Italian Cream Cake can be as simple or as elaborate as you wish. The way you present and serve this dessert can significantly enhance the overall experience, making it not just a treat for the palate but also a feast for the eyes. Here are some detailed ideas to elevate your cake presentation and flavor experience:
Classic Cream Cheese Frosting
One of the hallmarks of an Italian Cream Cake is its rich and tangy cream cheese frosting. To prepare this delightful topping while keeping it gluten-free, it’s essential to use certified gluten-free ingredients.
Ingredients for Classic Cream Cheese Frosting:
- 8 oz cream cheese, softened
- 1/2 cup unsalted butter, softened
- 4 cups powdered sugar (make sure it’s gluten-free)
- 1 teaspoon vanilla extract
- A pinch of salt
Instructions:
- In a large mixing bowl, beat together the softened cream cheese and unsalted butter until smooth and creamy.
- Gradually add the powdered sugar, mixing well after each addition until you achieve a fluffy consistency.
- Stir in the vanilla extract and a pinch of salt to enhance the flavor.
- Frost the cooled cake generously, allowing some to cascade down the sides for a rustic look.
This classic frosting not only complements the cake’s texture but also adds a delicious tanginess that balances the sweetness of the cake.
Decorative Toppings
To add an elegant finishing touch to your cake, consider incorporating decorative toppings that not only enhance the visual appeal but also contribute additional textures and flavors.
Suggestions for Decorative Toppings:
- Shredded Coconut: Toasted or plain shredded coconut can provide a delightful chewiness and a tropical flair. Scatter it generously over the frosted surface of the cake.
- Chopped Nuts: Pecans or walnuts are traditional in Italian Cream Cakes. Lightly toast the nuts for added flavor before sprinkling them on top. They add a nice crunch and complement the creamy frosting beautifully.
- Chocolate Shavings: For those who love chocolate, adding dark or white chocolate shavings can create a luxurious look and taste. Use a vegetable peeler to create delicate shavings from a chocolate bar.
Fruit Garnish
Fresh fruits are a fantastic way to add a pop of color and a refreshing element to your Italian Cream Cake. They also offer a natural sweetness that complements the richness of the cake and frosting.
Ideas for Fruit Garnishes:
- Fresh Berries: Strawberries, blueberries, raspberries, or blackberries can be arranged around the base of the cake or scattered atop the frosting. Their vibrant colors will contrast beautifully with the white frosting.
- Sliced Fruits: Thinly sliced citrus fruits, such as oranges or lemons, can provide a zesty flavor that cuts through the sweetness. Consider arranging them in an eye-catching pattern on top of the cake.
- Edible Flowers: For a more sophisticated touch, use edible flowers such as pansies or violets to decorate the cake. They add a whimsical element and make the cake visually stunning.
Serving Temperature: Warm or Chilled
One of the unique aspects of the Gluten-Free Italian Cream Cake is its versatility in serving temperature. Depending on your preference or the occasion, you can serve it slightly warm or chilled.
- Slightly Warm: If you prefer a warm slice, serve the cake shortly after baking, allowing it to cool just enough to handle. The warmth enhances the flavors and gives a comforting, homestyle feel to the dessert.
- Chilled: For a refreshing dessert, refrigerate the cake for a couple of hours before serving. Chilled cake has a firmer texture, and the flavors meld beautifully, making each bite rich and satisfying.
Presentation Ideas
Consider how you plate your cake to create an impressive presentation. Use a cake stand to elevate the cake, and serve it with a side of fresh whipped cream or a scoop of vanilla ice cream for an indulgent touch. You can also drizzle a homemade fruit sauce or chocolate ganache on the plate for added flair.
By incorporating these serving suggestions and presentation ideas, your Gluten-Free Italian Cream Cake will not only taste incredible but also look stunning, making it the perfect centerpiece for any gathering or celebration. Enjoy the process of serving this delightful dessert, and watch your guests savor each bite!
Additional Tips for a Successful Baking Experience
To elevate your baking, especially when working with gluten-free recipes or any baking endeavor, consider the following detailed tips. These suggestions will not only enhance the flavor and texture of your baked goods but also streamline your process, ensuring a more enjoyable experience in the kitchen.
Gluten-Free Flour Blend
Choosing the right gluten-free flour blend is crucial for the success of your baking. Not all gluten-free flours perform the same way, so it’s essential to look for a blend that is specifically designed for baking cakes and pastries. Here are some key points to consider:
- Versatile Blends: Many brands offer gluten-free all-purpose flour blends that include a mix of rice flour, tapioca flour, and potato starch. These blends are formulated to mimic the properties of wheat flour, providing the right structure and texture.
- Xanthan Gum: Some gluten-free flour blends come pre-mixed with xanthan gum or guar gum, which are vital for providing elasticity and binding in gluten-free baking. If your blend does not contain these additives, consider adding about 1/4 teaspoon of xanthan gum per cup of flour for optimal results.
- Experimentation: Gluten-free baking often requires some experimentation. Each brand of flour behaves differently, so don’t hesitate to try a few varieties to find the one that works best for your specific recipe.
Room Temperature Ingredients
Using room temperature ingredients is a fundamental aspect of successful baking. Here’s why it matters and how to prepare your ingredients:
- Improved Mixing: When eggs and butter are at room temperature, they blend more easily, resulting in a smoother batter. This is especially important for recipes that require creaming butter and sugar, as the process relies on incorporating air into the mixture to create a light and fluffy texture.
- Tips for Quick Preparation: If you forget to take your eggs and butter out ahead of time, there are quick fixes. For butter, cut it into small cubes to help it soften faster. For eggs, submerge them in warm water for about 10-15 minutes to bring them to room temperature without cooking them.
Buttermilk Substitute
Buttermilk adds a delightful tang and moisture to baked goods, but if you find yourself without any, fear not—there are simple substitutes that can easily mimic its properties:
- Homemade Buttermilk: As mentioned, mixing 1 cup of almond milk (or any milk of your choice) with 1 tablespoon of lemon juice or white vinegar will create a suitable substitute. Letting the mixture sit for about 5-10 minutes allows it to thicken slightly and develop that characteristic tanginess.
- Other Substitutes: In addition to almond milk, you can use regular milk, coconut milk, or even yogurt thinned with a bit of water. Simply adjust the proportions to achieve a similar consistency to buttermilk.
Storage Tips for Leftover Cake
Proper storage of your baked goods is essential to maintain their freshness and flavor. Here are some comprehensive tips for storing leftover cake:
- Airtight Containers: Once your cake has cooled completely, place it in an airtight container to prevent it from drying out or absorbing other odors in the refrigerator. If you don’t have a suitable container, wrap the cake tightly in plastic wrap or aluminum foil.
- Refrigeration: Storing your cake in the refrigerator can extend its shelf life, allowing it to stay fresh for up to 5 days. However, cakes with cream cheese or whipped cream frosting should be refrigerated immediately due to their perishable nature.
- Serving Temperature: For the best texture and flavor, allow your cake to come to room temperature before serving. Simply take it out of the refrigerator about 30 minutes to 1 hour prior to serving. This will help restore its original moisture and softness, making every bite delightful.
- Freezing Options: If you have more cake than you can consume within a few days, consider freezing it. Slice the cake into portions, wrap each slice in plastic wrap, and then place them in a freezer-safe bag. This way, you can enjoy your cake later without compromising its quality. Just remember to thaw it in the refrigerator before serving for the best results.
By incorporating these additional tips into your baking routine, you can enhance your skills and create delicious, gluten-free baked goods that everyone will enjoy. Happy baking!
FAQs
Q: Can I make this cake dairy-free?
A: Yes! Substitute the butter with a plant-based alternative and use almond milk with lemon juice instead of buttermilk.
Q: Can I freeze this cake?
A: Absolutely. Wrap the unfrosted cake layers tightly in plastic wrap, then place them in a freezer-safe bag. They can be frozen for up to 3 months. Thaw in the refrigerator overnight before frosting and serving.
Q: What if I don’t like nuts?
A: You can omit the nuts or replace them with more coconut or dried fruit.
Q: How can I make a vegan version?
A: Substitute eggs with a suitable egg replacer and use plant-based butter and milk alternatives.
Conclusion
Creating a Gluten-Free Italian Cream Cake is a rewarding experience that brings the classic flavors of this beloved dessert to those with dietary restrictions. With its rich texture, delightful coconut and nut blend, and creamy frosting, this cake is sure to impress both gluten-free and non-gluten-free guests alike. Follow the steps carefully, use quality gluten-free ingredients, and enjoy a slice of Italy in your own home. Happy baking!
Print
Gluten-Free Italian Cream Cake recipe
Ingredients
- 2 cups gluten-free all-purpose flour
- 1 ½ cups sugar
- ½ cup unsalted butter, softened
- 4 large eggs
- 1 cup buttermilk (or almond milk with lemon juice)
- 1 tsp vanilla extract
- 1 tsp baking powder
- ½ tsp baking soda
- ½ tsp salt
- 1 cup shredded coconut
- ½ cup chopped pecans or walnuts
Instructions
- Preheat your oven to 350°F (175°C). Grease and flour two 9-inch round cake pans.
- In a large bowl, cream together the butter and sugar until fluffy. This should take about 3-5 minutes using an electric mixer.
- Add eggs one at a time, mixing well after each addition. This helps incorporate air into the batter, making the cake light and fluffy.
- Stir in buttermilk and vanilla extract. Mix until well combined.
- In a separate bowl, combine the flour, baking powder, baking soda, and salt. Gradually add this dry mixture to the wet mixture, mixing until just combined. Be careful not to over-mix.
- Fold in the coconut and nuts gently. This adds texture and flavor to the cake.
- Divide the batter evenly between the prepared cake pans. Smooth the tops with a spatula.
- Bake for 25-30 minutes, or until a toothpick inserted into the center comes out clean.
- Let cool in the pans for 10 minutes, then transfer to wire racks to cool completely.
Nutrition
- Serving Size: one normal portion
- Calories: 220
- Sugar: 15g
- Fat: 10g
- Carbohydrates: 30g
- Fiber: 1g
- Protein: 3g


