

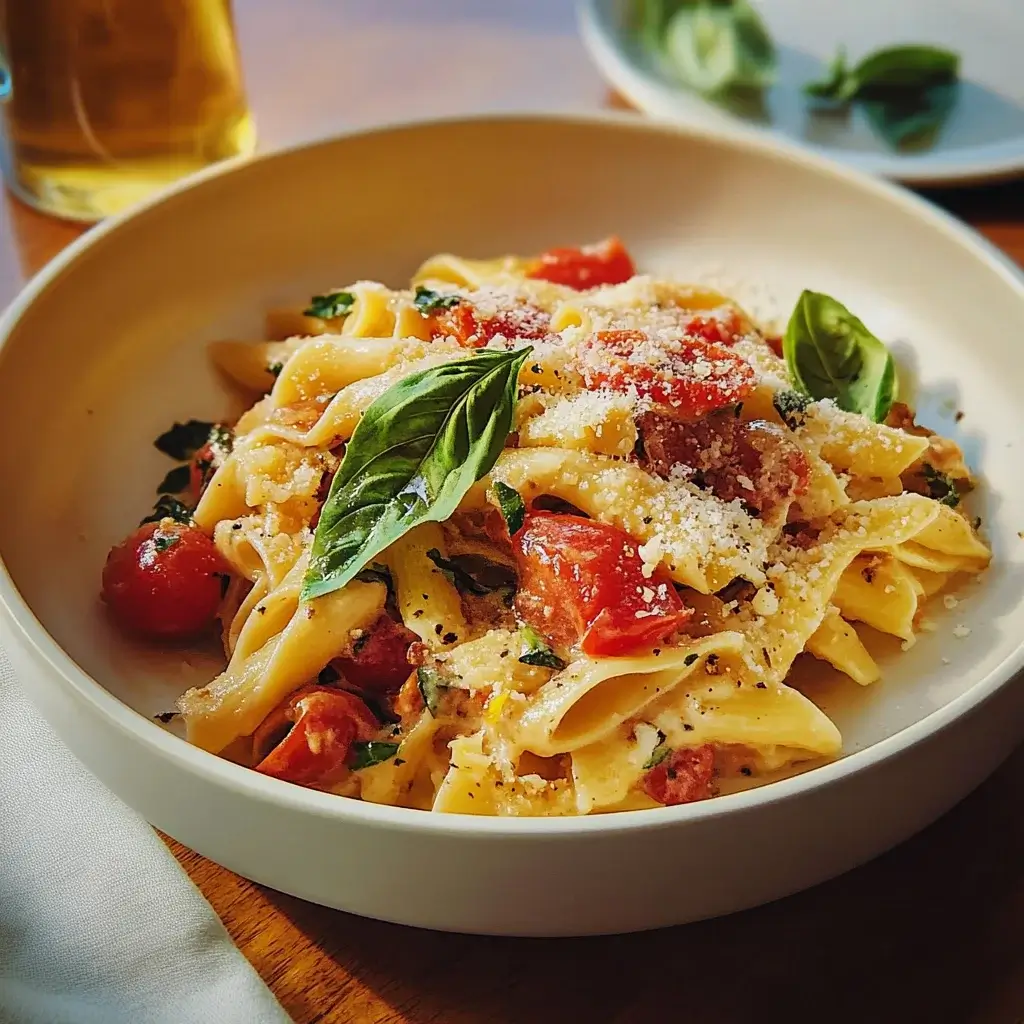
Honestly, the words “gluten-free” and “fresh pasta” used to sound like an oxymoron to me. I’ve always associated fresh pasta with that beautiful, slightly chewy, wheat-based goodness. But with more and more family members leaning towards gluten-free diets, I knew I had to find a way to bring that homemade pasta joy back into our kitchen. After countless experiments (and a few doughy disasters!), I finally landed on this recipe for gluten-free fresh pasta. And let me tell you, it’s a game-changer. The first time I served it, the silence at the table was quickly broken by enthusiastic “wows” and requests for seconds. Even my pasta-purist husband, initially skeptical, was blown away by the texture and flavor. This isn’t just good for gluten-free pasta; it’s genuinely delicious pasta, period. It’s tender, holds its shape beautifully, and most importantly, it tastes like real pasta. If you’ve been missing fresh pasta because of gluten sensitivities, or if you’re simply curious about exploring gluten-free options, you absolutely have to try this recipe. Get ready to roll out some pasta magic!
Ingredients
This recipe uses a blend of gluten-free flours to achieve the perfect texture. You might be surprised at how simple the ingredient list is!
- 1 cup (120g) Gluten-Free All-Purpose Flour Blend: Choose a high-quality blend that contains xanthan gum or another binder. Brands like Bob’s Red Mill Gluten-Free 1-to-1 Baking Flour or King Arthur Measure for Measure Gluten-Free Flour work well. Note: If your blend doesn’t contain xanthan gum, add 1/2 teaspoon of xanthan gum to the recipe.
- 1/2 cup (60g) Tapioca Starch/Flour: Tapioca starch adds elasticity and chewiness to the pasta, mimicking the properties of gluten.
- 1/4 cup (30g) Potato Starch: Potato starch contributes to a light and tender texture.
- 1 teaspoon Xanthan Gum (if not included in your flour blend): Xanthan gum is crucial for binding the gluten-free flours and preventing the pasta from becoming crumbly.
- 1/2 teaspoon Salt: Enhances the flavor of the pasta and helps to control the dough’s texture.
- 2 Large Eggs: Eggs provide richness, structure, and bind the dough together.
- 2-3 tablespoons Olive Oil: Olive oil adds moisture and elasticity to the dough, making it easier to handle and roll.
- 2-4 tablespoons Water (ice cold), as needed: Cold water helps to bring the dough together without overworking it and prevents the gluten-free flours from becoming gummy.
Instructions
Making gluten-free fresh pasta might seem daunting, but with these step-by-step instructions, you’ll be a pasta-making pro in no time!
- Combine Dry Ingredients: In a large mixing bowl, whisk together the gluten-free all-purpose flour blend, tapioca starch, potato starch, xanthan gum (if using), and salt. Ensure all the dry ingredients are thoroughly combined to distribute the xanthan gum evenly. This is important for consistent texture.
- Create a Well and Add Wet Ingredients: Make a well in the center of the dry ingredients. Crack the eggs into the well. Add the olive oil.
- Start Mixing: Using a fork, gently whisk the eggs and olive oil together in the well. Gradually begin to incorporate the dry ingredients from the sides of the well into the wet ingredients. Start slowly and work your way outwards.
- Bring the Dough Together: Continue mixing until a shaggy dough starts to form. At this point, switch from the fork to your hands. Bring the dough together into a ball. It might seem a bit dry at first, but resist the urge to add too much water immediately.
- Knead the Dough (Gentle Kneading): Turn the dough out onto a lightly floured (gluten-free flour) surface. Knead the dough gently for 5-7 minutes. Gluten-free dough doesn’t develop gluten, so the kneading process is more about bringing the dough together into a smooth, cohesive ball rather than developing structure. The dough should become smoother and more elastic as you knead. If the dough is too dry and crumbly, add ice-cold water, one tablespoon at a time, kneading until the dough comes together. If it’s too sticky, add a little more gluten-free all-purpose flour, one tablespoon at a time.
- Rest the Dough: Wrap the dough tightly in plastic wrap and let it rest at room temperature for at least 30 minutes, or up to 1 hour. Resting allows the flours to fully hydrate and the dough to relax, making it easier to roll out. This is a crucial step for gluten-free pasta, as it improves the texture and prevents cracking.
- Divide the Dough: After resting, divide the dough into 4 equal portions. Keep the portions you are not working with wrapped in plastic wrap to prevent them from drying out.
- Roll Out the Dough (Pasta Machine or Rolling Pin):
- Using a Pasta Machine: Flatten one portion of dough into a disc with your hands. Set your pasta machine to the widest setting. Feed the dough through the machine several times, folding it in half each time, until it becomes smooth and even. Gradually decrease the setting on your pasta machine, passing the dough through each setting until you reach your desired thickness (usually setting 6 or 7 on most machines, depending on your preference and machine). Work quickly and lightly flour the dough if it becomes sticky to prevent tearing.
- Using a Rolling Pin: On a lightly floured surface, roll out one portion of dough as thinly as possible, aiming for about 1/16 inch thickness. Roll from the center outwards, rotating the dough as you go to ensure even thickness. This will take more time and effort than using a pasta machine, but it is definitely achievable.
- Cut the Pasta: Once the dough is rolled out to your desired thickness, you can cut it into your preferred pasta shapes.
- For Spaghetti or Fettuccine (using a pasta machine): Use the cutting attachments on your pasta machine to cut the sheets into spaghetti or fettuccine. Lightly dust the cut pasta with gluten-free flour to prevent sticking.
- For Tagliatelle or Pappardelle (by hand): If you rolled the dough by hand or prefer wider noodles, use a sharp knife or pizza cutter to cut the pasta sheets into ribbons of your desired width. For tagliatelle, aim for about 1/4 inch wide; for pappardelle, aim for about 1 inch wide.
- For Ravioli or Lasagna Sheets: Cut the dough into squares or rectangles for ravioli, or larger sheets for lasagna.
- Cook the Pasta: Bring a large pot of salted water to a rolling boil. Add the fresh pasta and cook for only 2-4 minutes, or until it floats to the surface and is tender but still slightly al dente. Fresh gluten-free pasta cooks very quickly, so watch it carefully to avoid overcooking.
- Drain and Serve: Drain the pasta immediately and toss it with your favorite sauce. Fresh pasta is best served right away.
Nutrition Facts (Per Serving)
Please note: Nutritional information is an estimate and can vary based on specific ingredients and serving sizes.
- Servings: Approximately 4 servings
- Calories per Serving: Around 350-400 calories (depending on serving size and olive oil amount)
Approximate breakdown per serving:
- Protein: 10-12g
- Fat: 15-20g (primarily from eggs and olive oil, including healthy fats)
- Carbohydrates: 40-50g (primarily from gluten-free flours and starches)
- Fiber: 2-3g (fiber content can vary depending on the gluten-free flour blend used)
This gluten-free pasta is a moderate-calorie, moderate-carbohydrate food. It provides a good source of protein and some fiber, making it a more balanced option than some commercially produced gluten-free pastas that can be high in refined starches. Remember to consider the nutritional content of your chosen sauce as well, as this will significantly impact the overall nutritional profile of your pasta dish.
Preparation Time
- Prep time: 30 minutes (including measuring, mixing, and kneading)
- Resting time: 30 minutes – 1 hour
- Cooking time: 2-4 minutes per batch
- Total time: Approximately 1 hour 30 minutes (including resting time)
While it takes a bit longer than boiling dried pasta, the hands-on time for making fresh gluten-free pasta is surprisingly manageable, and the fresh taste is absolutely worth the effort!
How to Serve Gluten-Free Fresh Pasta
Fresh pasta is incredibly versatile! Here are some delicious ways to serve your homemade gluten-free pasta:
- Classic Italian Sauces:
- Marinara Sauce: A simple and vibrant tomato sauce is always a winner.
- Pesto: The bright flavors of basil, pine nuts, garlic, and Parmesan (ensure gluten-free Parmesan if needed) pair beautifully with fresh pasta.
- Arrabbiata Sauce: For a spicy kick, try a fiery tomato sauce with chili flakes.
- Aglio e Olio: A classic and simple sauce of garlic, olive oil, chili flakes, and parsley.
- Carbonara: A rich and creamy sauce made with eggs, pancetta, Pecorino Romano cheese, and black pepper (ensure gluten-free pancetta and Pecorino Romano if needed).
- Creamy Sauces:
- Alfredo Sauce: A decadent cream and Parmesan sauce.
- Mushroom Cream Sauce: Earthy mushrooms in a creamy sauce create a comforting dish.
- Vodka Sauce: A creamy tomato sauce with a touch of vodka for extra depth of flavor.
- Vegetable-Forward Dishes:
- Spring Vegetables and Lemon: Toss pasta with sautéed asparagus, peas, zucchini, and a bright lemon vinaigrette.
- Roasted Vegetable Medley: Combine roasted vegetables like bell peppers, eggplant, zucchini, and onions with pasta and a drizzle of balsamic glaze.
- Pasta Primavera: A vibrant and colorful pasta dish with a variety of fresh spring vegetables and a light cream or white wine sauce.
- Seafood Pairings:
- Shrimp Scampi: Sautéed shrimp in garlic, butter, white wine, and lemon juice is a classic pairing.
- Clam Sauce (White or Red): A flavorful sauce made with clams, garlic, white wine (for white clam sauce), or tomatoes (for red clam sauce).
- Smoked Salmon Cream Sauce: A luxurious and flavorful sauce with smoked salmon, cream cheese, and dill.
- Beyond Sauce – Simple and Delicious:
- Brown Butter and Sage: A simple yet elegant sauce of browned butter, fresh sage, and Parmesan cheese.
- Just Olive Oil, Garlic, and Herbs: Sometimes, simplicity is best! Toss the pasta with high-quality olive oil, sautéed garlic, fresh herbs like basil or parsley, and a sprinkle of salt and pepper.
Additional Tips for Perfect Gluten-Free Fresh Pasta
Mastering gluten-free pasta is all about understanding the nuances of gluten-free flours. Here are five essential tips to ensure your homemade pasta is a success:
- Use a High-Quality Gluten-Free Flour Blend: Not all gluten-free flour blends are created equal. Choose a reputable brand specifically designed for baking or all-purpose use, and make sure it contains xanthan gum or another binder. This binder is crucial for mimicking the structure that gluten provides in traditional pasta. Experiment with different brands to find your favorite in terms of taste and texture.
- Don’t Overwork the Dough: Gluten-free dough can become tough if overworked. Knead it gently just until it comes together into a smooth ball. Over-kneading can develop a rubbery texture. Remember, we are not developing gluten, so gentle handling is key.
- Resting is Essential: The resting period allows the gluten-free flours to fully hydrate and the dough to relax. This makes it much easier to roll out and reduces the chances of cracking or tearing. Don’t skip the resting step! It significantly improves the texture and workability of the dough.
- Control Moisture Carefully: Gluten-free flours absorb liquid differently than wheat flour. Start with the recommended amount of water and add more, one tablespoon at a time, only if the dough is too dry and crumbly. Conversely, if it’s too sticky, add a little more gluten-free flour. The dough should be pliable but not sticky.
- Cook Quickly and Al Dente: Fresh gluten-free pasta cooks very rapidly. Overcooking will result in mushy pasta. Cook it for just 2-4 minutes in boiling water, until it floats and is tender but still slightly firm to the bite (al dente). Taste test a piece to ensure it’s cooked to your liking. Drain immediately to prevent overcooking.
FAQ – Your Gluten-Free Fresh Pasta Questions Answered
Here are some frequently asked questions to help you troubleshoot and perfect your gluten-free pasta making:
Q1: Can I make this pasta ahead of time?
A: Yes, you can make the pasta dough ahead of time. Wrap it tightly in plastic wrap and store it in the refrigerator for up to 24 hours. Let it come to room temperature for about 30 minutes before rolling it out. You can also freeze uncooked pasta. Lay the cut pasta strands or shapes in a single layer on a baking sheet lined with parchment paper and freeze until solid. Then, transfer to a freezer-safe bag or container for up to 2 months. Cook directly from frozen, adding a minute or two to the cooking time.
Q2: Can I use other gluten-free flours?
A: Yes, you can experiment with other gluten-free flours, but the blend in this recipe is specifically designed for optimal texture and flavor. If you want to experiment, you could try substituting some of the tapioca starch with arrowroot starch or cornstarch. Brown rice flour can also be added in small amounts, but it can sometimes make the pasta a bit grainy. Cassava flour can also be used, but it absorbs more liquid, so you may need to adjust the water amount. Always start with the recommended recipe and make small adjustments in subsequent batches.
Q3: My dough is too sticky, what should I do?
A: If your dough is too sticky, gradually add more gluten-free all-purpose flour, one tablespoon at a time, kneading until the dough is easier to handle and less sticky. Be careful not to add too much flour, as this can make the pasta dry. Lightly flour your work surface and hands as needed while kneading and rolling.
Q4: My pasta is breaking or tearing when I roll it out, what am I doing wrong?
A: This could be due to a few reasons:
* Dough is too dry: If the dough is too dry, it will be brittle and prone to cracking. Add a tiny bit of ice-cold water (1 teaspoon at a time) and knead gently until the dough becomes more pliable.
* Not rested enough: Resting the dough is crucial for hydration and relaxation. Ensure you rest the dough for at least 30 minutes.
* Rolling too aggressively: Roll the dough gently and evenly, especially when using a rolling pin. Avoid pressing down too hard in one spot.
* Too thin: If you roll the pasta too thin, it can become fragile. Aim for a thickness of about 1/16 inch.
Q5: Can I add flavorings to the pasta dough?
A: Absolutely! You can easily customize your gluten-free fresh pasta by adding flavorings to the dough. Consider adding:
* Herbs: Finely chopped fresh herbs like basil, parsley, rosemary, or thyme. Add about 1-2 tablespoons of chopped herbs to the dry ingredients.
* Spices: A pinch of red pepper flakes for a spicy pasta, or a teaspoon of garlic powder or onion powder for savory flavor.
* Vegetable Purees: For color and flavor, you can incorporate cooked and pureed vegetables like spinach (for green pasta), roasted red peppers (for red pasta), or butternut squash (for orange pasta). Reduce the amount of water if using a wet puree.
* Lemon Zest: Add the zest of one lemon for a bright and citrusy pasta.
Experiment and have fun with it! Making gluten-free fresh pasta is a rewarding experience, and with a little practice, you’ll be creating delicious and satisfying pasta dishes for everyone to enjoy. Buon Appetito!
Print
Gluten-Free Fresh Pasta recipe
Ingredients
-
- 1 cup (120g) Gluten-Free All-Purpose Flour Blend: Choose a high-quality blend that contains xanthan gum or another binder. Brands like Bob’s Red Mill Gluten-Free 1-to-1 Baking Flour or King Arthur Measure for Measure Gluten-Free Flour work well. Note: If your blend doesn’t contain xanthan gum, add 1/2 teaspoon of xanthan gum to the recipe.
-
- 1/2 cup (60g) Tapioca Starch/Flour: Tapioca starch adds elasticity and chewiness to the pasta, mimicking the properties of gluten.
-
- 1/4 cup (30g) Potato Starch: Potato starch contributes to a light and tender texture.
-
- 1 teaspoon Xanthan Gum (if not included in your flour blend): Xanthan gum is crucial for binding the gluten-free flours and preventing the pasta from becoming crumbly.
-
- 1/2 teaspoon Salt: Enhances the flavor of the pasta and helps to control the dough’s texture.
-
- 2 Large Eggs: Eggs provide richness, structure, and bind the dough together.
-
- 2–3 tablespoons Olive Oil: Olive oil adds moisture and elasticity to the dough, making it easier to handle and roll.
-
- 2–4 tablespoons Water (ice cold), as needed: Cold water helps to bring the dough together without overworking it and prevents the gluten-free flours from becoming gummy.
Instructions
-
- Combine Dry Ingredients: In a large mixing bowl, whisk together the gluten-free all-purpose flour blend, tapioca starch, potato starch, xanthan gum (if using), and salt. Ensure all the dry ingredients are thoroughly combined to distribute the xanthan gum evenly. This is important for consistent texture.
-
- Create a Well and Add Wet Ingredients: Make a well in the center of the dry ingredients. Crack the eggs into the well. Add the olive oil.
-
- Start Mixing: Using a fork, gently whisk the eggs and olive oil together in the well. Gradually begin to incorporate the dry ingredients from the sides of the well into the wet ingredients. Start slowly and work your way outwards.
-
- Bring the Dough Together: Continue mixing until a shaggy dough starts to form. At this point, switch from the fork to your hands. Bring the dough together into a ball. It might seem a bit dry at first, but resist the urge to add too much water immediately.
-
- Knead the Dough (Gentle Kneading): Turn the dough out onto a lightly floured (gluten-free flour) surface. Knead the dough gently for 5-7 minutes. Gluten-free dough doesn’t develop gluten, so the kneading process is more about bringing the dough together into a smooth, cohesive ball rather than developing structure. The dough should become smoother and more elastic as you knead. If the dough is too dry and crumbly, add ice-cold water, one tablespoon at a time, kneading until the dough comes together. If it’s too sticky, add a little more gluten-free all-purpose flour, one tablespoon at a time.
-
- Rest the Dough: Wrap the dough tightly in plastic wrap and let it rest at room temperature for at least 30 minutes, or up to 1 hour. Resting allows the flours to fully hydrate and the dough to relax, making it easier to roll out. This is a crucial step for gluten-free pasta, as it improves the texture and prevents cracking.
-
- Divide the Dough: After resting, divide the dough into 4 equal portions. Keep the portions you are not working with wrapped in plastic wrap to prevent them from drying out.
-
- Roll Out the Dough (Pasta Machine or Rolling Pin):
-
- Using a Pasta Machine: Flatten one portion of dough into a disc with your hands. Set your pasta machine to the widest setting. Feed the dough through the machine several times, folding it in half each time, until it becomes smooth and even. Gradually decrease the setting on your pasta machine, passing the dough through each setting until you reach your desired thickness (usually setting 6 or 7 on most machines, depending on your preference and machine). Work quickly and lightly flour the dough if it becomes sticky to prevent tearing.
-
- Using a Rolling Pin: On a lightly floured surface, roll out one portion of dough as thinly as possible, aiming for about 1/16 inch thickness. Roll from the center outwards, rotating the dough as you go to ensure even thickness. This will take more time and effort than using a pasta machine, but it is definitely achievable.
-
- Roll Out the Dough (Pasta Machine or Rolling Pin):
-
- Cut the Pasta: Once the dough is rolled out to your desired thickness, you can cut it into your preferred pasta shapes.
-
- For Spaghetti or Fettuccine (using a pasta machine): Use the cutting attachments on your pasta machine to cut the sheets into spaghetti or fettuccine. Lightly dust the cut pasta with gluten-free flour to prevent sticking.
-
- For Tagliatelle or Pappardelle (by hand): If you rolled the dough by hand or prefer wider noodles, use a sharp knife or pizza cutter to cut the pasta sheets into ribbons of your desired width. For tagliatelle, aim for about 1/4 inch wide; for pappardelle, aim for about 1 inch wide.
-
- For Ravioli or Lasagna Sheets: Cut the dough into squares or rectangles for ravioli, or larger sheets for lasagna.
-
- Cut the Pasta: Once the dough is rolled out to your desired thickness, you can cut it into your preferred pasta shapes.
-
- Cook the Pasta: Bring a large pot of salted water to a rolling boil. Add the fresh pasta and cook for only 2-4 minutes, or until it floats to the surface and is tender but still slightly al dente. Fresh gluten-free pasta cooks very quickly, so watch it carefully to avoid overcooking.
-
- Drain and Serve: Drain the pasta immediately and toss it with your favorite sauce. Fresh pasta is best served right away.
Nutrition
- Serving Size: one normal portion
- Calories: 350-400
- Fat: 15-20g
- Carbohydrates: 40-50g
- Fiber: 2-3g
- Protein: 10-12g


