


The aroma of freshly baked bread is one of life’s simplest yet most profound pleasures, and when that bread is a hearty, wholesome Flaxseed Brown Bread, the satisfaction is even greater. I remember the first time I decided to tackle this recipe; I was on a mission to incorporate more fiber and healthy fats into our family’s diet without sacrificing taste. My kids, usually wary of anything labeled “healthy,” were surprisingly enthusiastic. The rich, dark crumb, speckled with flaxseeds, and the slightly sweet, nutty flavor won them over instantly. It quickly became a staple, perfect for morning toast slathered with almond butter, robust sandwiches for lunch, or simply as an accompaniment to a warm bowl of soup. This isn’t just bread; it’s a slice of comfort, a testament to how delicious and nourishing homemade baking can be. The subtle earthiness of the whole wheat combined with the nutritional powerhouse of flaxseed creates a loaf that’s not only good for you but genuinely a joy to eat. It’s dense enough to be satisfying but light enough not to feel heavy, a perfect balance that keeps everyone coming back for another slice.
Flaxseed Brown Bread: The Ultimate Healthy & Hearty Loaf (Complete Recipe)
This recipe focuses on creating a delicious, moist, and nutritionally dense brown bread, packed with the goodness of whole wheat and flaxseed. It’s designed to be straightforward, even for those newer to bread baking, while delivering a truly superior loaf.
Ingredients for Your Wholesome Flaxseed Brown Bread
Here’s what you’ll need to gather to create this wonderfully textured and flavored bread. Using high-quality ingredients will make a noticeable difference in the final product.
- Warm Water (105-115°F / 40-46°C): 1 ½ cups (360 ml) – Crucial for activating the yeast. Too hot will kill it, too cold and it won’t activate properly.
- Active Dry Yeast: 2 ¼ teaspoons (1 standard packet, or 7g) – The leavening agent that will make your bread rise.
- Molasses (Unsulphured): ¼ cup (60 ml or 84g) – Adds color, a distinct rich flavor, and a touch of sweetness. It also feeds the yeast. You can use blackstrap molasses for a more intense flavor, or a lighter variety for a milder taste.
- Honey or Maple Syrup: 2 tablespoons (30 ml or 42g honey / 40g maple syrup) – For additional sweetness and to help with browning.
- Melted Unsalted Butter or Neutral Oil (like avocado or light olive oil): ¼ cup (60 ml or 56g butter) – Adds richness, tenderness, and flavor.
- Ground Flaxseed (Flaxseed Meal): ½ cup (70g) – The star ingredient! Provides fiber, omega-3 fatty acids, and a lovely nutty texture. Grind whole flaxseeds fresh for maximum benefit, or use pre-ground flaxseed meal.
- Whole Wheat Flour: 3 cups (360g) – The backbone of the bread, providing structure, fiber, and a hearty flavor.
- All-Purpose Flour or Bread Flour: 1 to 1 ½ cups (120g to 180g) – Used to achieve the right dough consistency. Bread flour will yield a chewier crumb due to its higher protein content. Start with 1 cup and add more as needed.
- Salt: 1 ½ teaspoons (9g) – Essential for flavor and for controlling yeast activity.
- Optional: Whole Flaxseeds for topping: 1-2 tablespoons – For an attractive finish and extra texture.
- Optional: Rolled Oats for topping: 1-2 tablespoons – Adds another textural element and visual appeal.
A Note on Flours: The ratio of whole wheat to all-purpose/bread flour can be adjusted slightly based on your preference for a denser or lighter loaf. Using only whole wheat flour can result in a very dense bread. The addition of some white flour helps to lighten the texture.
Step-by-Step Instructions for Perfect Flaxseed Brown Bread
Follow these instructions carefully for a beautifully risen and perfectly baked loaf of flaxseed brown bread. Baking bread is a science, but it’s also an art, so enjoy the process!
- Activate the Yeast (Proofing):
- In a large mixing bowl (or the bowl of your stand mixer), combine the warm water, active dry yeast, and 1 tablespoon of the molasses (or honey/maple syrup).
- Gently stir and let it sit for 5-10 minutes until the mixture becomes foamy and bubbly. This indicates the yeast is alive and active. If it doesn’t foam, your yeast may be old, or the water temperature was incorrect. Discard and start again with fresh yeast.
- Combine Wet Ingredients:
- Once the yeast is proofed, add the remaining molasses, honey (or maple syrup), and melted butter (or oil) to the bowl. Stir gently to combine.
- Add Dry Ingredients (Part 1):
- To the wet mixture, add the ground flaxseed, 3 cups of whole wheat flour, and the salt.
- If using a stand mixer, use the dough hook attachment and mix on low speed until these ingredients are just combined.
- If mixing by hand, use a sturdy wooden spoon or spatula to bring the ingredients together into a shaggy dough.
- Incorporate Remaining Flour & Knead:
- Stand Mixer Method: Gradually add ½ cup of the all-purpose or bread flour while the mixer is on low. Continue to add more flour, a tablespoon at a time, until the dough starts to pull away from the sides of the bowl and forms a cohesive ball. The dough should be slightly sticky to the touch but manageable. Increase the speed to medium-low and knead for 7-10 minutes.
- Hand Kneading Method: Turn the shaggy dough out onto a lightly floured surface. Start by adding ½ cup of the all-purpose or bread flour. Begin to knead, gradually incorporating more flour as needed, until the dough is smooth, elastic, and only slightly tacky. This will take about 10-15 minutes. To knead, push the dough away from you with the heel of your hand, then fold it over and turn it a quarter turn. Repeat this process.
- Windowpane Test: To check if the dough is sufficiently kneaded, take a small piece and gently stretch it. It should stretch thin enough to see light through it without tearing easily (like a windowpane).
- First Rise (Bulk Fermentation):
- Lightly oil a large, clean bowl.
- Form the kneaded dough into a ball and place it in the oiled bowl, turning it once to coat the entire surface with oil. This prevents a dry crust from forming.
- Cover the bowl tightly with plastic wrap or a damp kitchen towel.
- Place the bowl in a warm, draft-free spot (around 75-80°F / 24-27°C is ideal) and let it rise for 1 to 1.5 hours, or until it has doubled in size. The exact time will depend on the temperature of your kitchen.
- Shape the Loaf:
- Once doubled, gently punch down the dough to release the air.
- Turn the dough out onto a lightly floured surface.
- Gently pat or roll the dough into a rectangle, roughly the length of your loaf pan (typically 8.5×4.5 inches or 9×5 inches).
- Tightly roll up the rectangle, starting from one of the shorter ends, to form a log. Pinch the seam and the ends closed to seal.
- Grease and lightly flour your loaf pan, or line it with parchment paper for easy removal.
- Place the shaped dough, seam-side down, into the prepared loaf pan.
- Second Rise (Proofing):
- Cover the loaf pan loosely with plastic wrap (you might want to lightly oil the side facing the dough to prevent sticking) or a damp kitchen towel.
- Let it rise again in a warm, draft-free place for another 45-60 minutes, or until the dough has risen about 1 inch above the rim of the pan. It shouldn’t quite double this time.
- Preheat Oven & Prepare for Baking:
- About 20 minutes before the second rise is complete, preheat your oven to 375°F (190°C). Position an oven rack in the center.
- Optional: If you want a slightly crustier loaf, place a shallow pan (like a baking sheet or cast iron skillet) on the bottom rack of the oven while it preheats. You’ll add water to this later to create steam.
- Optional: Just before baking, you can brush the top of the loaf lightly with an egg wash (1 egg beaten with 1 tablespoon of water) or milk for a shinier crust. Sprinkle with whole flaxseeds or rolled oats if desired.
- Bake the Bread:
- Place the loaf pan in the preheated oven.
- If using the steam method, carefully pour about 1 cup of hot water into the shallow pan on the bottom rack immediately after placing the bread in the oven. Quickly close the oven door to trap the steam. (Be cautious of steam burns).
- Bake for 35-45 minutes. The bread is done when the crust is a deep golden brown and it sounds hollow when tapped on the bottom. An instant-read thermometer inserted into the center of the loaf should register between 190-200°F (88-93°C).
- If the top of the bread starts to brown too quickly, you can loosely tent it with aluminum foil for the remainder of the baking time.
- Cool the Bread:
- Once baked, immediately remove the bread from the loaf pan and transfer it to a wire cooling rack. This prevents the bottom from becoming soggy.
- Let the bread cool completely (at least 1-2 hours, preferably longer) before slicing. Slicing warm bread can result in a gummy texture and can make it difficult to get clean slices. This cooling period allows the internal structure to set.
Nutrition Facts (Per Serving)
- Servings: This recipe yields 1 standard loaf, which can be sliced into approximately 12-16 servings, depending on thickness.
- Calories per serving (approximate, based on 14 slices): Around 180-220 calories per slice.
Please Note: Nutritional information is an estimate and can vary significantly based on the specific brands of ingredients used, exact measurements, and final yield. This bread is a good source of dietary fiber, primarily from the whole wheat flour and flaxseeds. Flaxseeds also contribute valuable ALA (alpha-linolenic acid), a type of omega-3 fatty acid, and lignans, which are beneficial plant compounds. It also provides complex carbohydrates for sustained energy.
Preparation & Baking Time
Understanding the time commitment is key to successful bread baking. Much of this is hands-off rising time.
- Yeast Proofing: 5-10 minutes
- Mixing & Kneading: 15-25 minutes (depending on hand vs. mixer)
- First Rise (Bulk Fermentation): 60-90 minutes
- Shaping: 5-10 minutes
- Second Rise (Proofing): 45-60 minutes
- Baking Time: 35-45 minutes
- Cooling Time: At least 1-2 hours (crucial!)
Total Active Time: Approximately 25-45 minutes
Total Inactive Time (Rising & Cooling): Approximately 3.5 – 5 hours
Overall Time from Start to Sliced Loaf: Roughly 4 – 6 hours
How to Serve Your Delicious Flaxseed Brown Bread
This versatile flaxseed brown bread can be enjoyed in countless ways. Its hearty texture and nutty flavor make it a fantastic base for both sweet and savory applications.
- Classic Toast:
- Serve warm, toasted slices with a pat of butter.
- Top with your favorite jam, marmalade, or honey.
- Spread with nut butters like almond, peanut, or cashew butter.
- Try it with cream cheese and a sprinkle of cinnamon.
- Breakfast Star:
- Use for French toast, its sturdy crumb holds up well.
- Serve alongside scrambled, fried, or poached eggs.
- Make avocado toast, topped with everything bagel seasoning or red pepper flakes.
- Sandwich Hero:
- Perfect for hearty sandwiches:
- Turkey or chicken salad
- Roast beef and cheddar
- Hummus and roasted vegetable
- Classic BLT
- Grilled cheese (the flax adds a nice texture)
- Perfect for hearty sandwiches:
- Soup & Salad Companion:
- Serve slices alongside a warm bowl of soup, stew, or chili for dipping.
- Use it to make croutons for salads or soups.
- Enjoy a slice with a fresh garden salad.
- Snack Attack:
- A simple slice with a piece of cheese makes a satisfying snack.
- Spread with a thin layer of apple butter.
- Appetizers & Dips:
- Cut into smaller pieces or fingers for dipping into hummus, baba ghanoush, or spinach artichoke dip.
- Toast and cut into triangles to serve with bruschetta topping.
Additional Tips for Flaxseed Brown Bread Success
Achieving bread perfection often comes down to a few key details. Here are five tips to elevate your flaxseed brown bread:
- Freshly Grind Your Flaxseeds: While pre-ground flaxseed meal is convenient, flaxseeds contain delicate oils that can go rancid over time. Grinding whole flaxseeds in a coffee grinder or spice mill just before use ensures maximum freshness, flavor, and nutritional potency. Store whole flaxseeds in the refrigerator or freezer to prolong their shelf life.
- Don’t Rush the Rises: The rising times (fermentation and proofing) are crucial for developing flavor and texture. Ensure your dough has truly doubled during the first rise and risen sufficiently during the second. A warm, consistent environment helps, but patience is key. Under-proofed bread can be dense, while over-proofed bread may collapse.
- Measure Flour Correctly: The most common baking mistake is adding too much flour, resulting in dry, heavy bread. Use the “spoon and level” method: fluff up your flour, lightly spoon it into your measuring cup, and then level off the excess with a straight edge. Avoid scooping directly from the bag, as this compacts the flour.
- Invest in an Instant-Read Thermometer: Taking the guesswork out of baking is a game-changer. An instant-read thermometer ensures your water for yeast is at the correct temperature and, most importantly, tells you precisely when your bread is perfectly baked internally (190-200°F or 88-93°C for this type of loaf).
- Proper Storage for Lasting Freshness: Once completely cooled, store your flaxseed brown bread in an airtight container or bread bag at room temperature for 2-3 days. For longer storage, slice the cooled loaf, wrap it tightly in plastic wrap and then in foil or a freezer bag, and freeze for up to 3 months. Thaw slices as needed at room temperature or in a toaster.
Frequently Asked Questions (FAQ) About Flaxseed Brown Bread
Here are answers to some common questions you might have about making and enjoying this healthy bread:
- Q: Can I make this flaxseed brown bread gluten-free?
A: This specific recipe relies heavily on wheat flour for its structure and gluten development, which is essential for traditional bread texture. Adapting it to be gluten-free would require a specialized gluten-free flour blend designed for yeast breads, along with possible additions like xanthan gum or psyllium husk. It would be a significant alteration rather than a simple substitution. It’s best to seek out a recipe specifically developed for gluten-free flaxseed bread. - Q: Can I add other seeds or nuts to this recipe?
A: Absolutely! This recipe is a great base for additions. Consider adding ¼ to ½ cup of sunflower seeds, pumpkin seeds, chia seeds, or chopped walnuts or pecans. Incorporate them during the last few minutes of kneading to distribute them evenly without over-processing. This will add extra texture, flavor, and nutritional benefits. - Q: Why is my flaxseed brown bread dense or heavy?
A: Several factors can contribute to a dense loaf:- Too much flour: As mentioned in the tips, accurate flour measurement is critical.
- Not enough kneading: Kneading develops the gluten structure that traps air and allows the bread to rise properly.
- Yeast issues: Old yeast, or yeast killed by water that was too hot, won’t provide enough lift.
- Under-proofing: Not allowing the dough to rise sufficiently in either the first or second rise.
- Too much flaxseed meal: While nutritious, too much flax can weigh down the dough. Stick to the recommended amount.
- Q: What are the main health benefits of adding flaxseed to bread?
A: Flaxseeds are a nutritional powerhouse! They are one of the best plant-based sources of alpha-linolenic acid (ALA), an omega-3 fatty acid important for heart health. They are also rich in dietary fiber (both soluble and insoluble), which aids digestion, helps regulate blood sugar, and promotes satiety. Furthermore, flaxseeds contain lignans, which are phytoestrogens with antioxidant properties that may offer protection against certain types of cancer and support hormonal balance. - Q: Can I make this recipe in a bread machine?
A: Yes, this recipe can likely be adapted for a bread machine. You’ll generally add the wet ingredients first (water, molasses, honey, oil), followed by the dry ingredients (flours, ground flaxseed, salt), with the yeast added last on top, ensuring it doesn’t touch the wet ingredients until mixing begins. Select the “whole wheat” or a similar cycle appropriate for a 1.5 to 2-pound loaf. You may need to adjust the amount of liquid or flour slightly based on your specific machine’s recommendations and how the dough looks during the initial kneading cycle – it should form a smooth, cohesive ball. Refer to your bread machine’s manual for specific guidance.
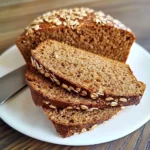
Flaxseed Brown Bread recipe
Ingredients
-
- Warm Water (105-115°F / 40-46°C): 1 ½ cups (360 ml) – Crucial for activating the yeast. Too hot will kill it, too cold and it won’t activate properly.
-
- Active Dry Yeast: 2 ¼ teaspoons (1 standard packet, or 7g) – The leavening agent that will make your bread rise.
-
- Molasses (Unsulphured): ¼ cup (60 ml or 84g) – Adds color, a distinct rich flavor, and a touch of sweetness. It also feeds the yeast. You can use blackstrap molasses for a more intense flavor, or a lighter variety for a milder taste.
-
- Honey or Maple Syrup: 2 tablespoons (30 ml or 42g honey / 40g maple syrup) – For additional sweetness and to help with browning.
-
- Melted Unsalted Butter or Neutral Oil (like avocado or light olive oil): ¼ cup (60 ml or 56g butter) – Adds richness, tenderness, and flavor.
-
- Ground Flaxseed (Flaxseed Meal): ½ cup (70g) – The star ingredient! Provides fiber, omega-3 fatty acids, and a lovely nutty texture. Grind whole flaxseeds fresh for maximum benefit, or use pre-ground flaxseed meal.
-
- Whole Wheat Flour: 3 cups (360g) – The backbone of the bread, providing structure, fiber, and a hearty flavor.
-
- All-Purpose Flour or Bread Flour: 1 to 1 ½ cups (120g to 180g) – Used to achieve the right dough consistency. Bread flour will yield a chewier crumb due to its higher protein content. Start with 1 cup and add more as needed.
-
- Salt: 1 ½ teaspoons (9g) – Essential for flavor and for controlling yeast activity.
-
- Optional: Whole Flaxseeds for topping: 1-2 tablespoons – For an attractive finish and extra texture.
-
- Optional: Rolled Oats for topping: 1-2 tablespoons – Adds another textural element and visual appeal.
Instructions
-
- Activate the Yeast (Proofing):
-
- In a large mixing bowl (or the bowl of your stand mixer), combine the warm water, active dry yeast, and 1 tablespoon of the molasses (or honey/maple syrup).
-
- Gently stir and let it sit for 5-10 minutes until the mixture becomes foamy and bubbly. This indicates the yeast is alive and active. If it doesn’t foam, your yeast may be old, or the water temperature was incorrect. Discard and start again with fresh yeast.
-
- Activate the Yeast (Proofing):
-
- Combine Wet Ingredients:
-
- Once the yeast is proofed, add the remaining molasses, honey (or maple syrup), and melted butter (or oil) to the bowl. Stir gently to combine.
-
- Combine Wet Ingredients:
-
- Add Dry Ingredients (Part 1):
-
- To the wet mixture, add the ground flaxseed, 3 cups of whole wheat flour, and the salt.
-
- If using a stand mixer, use the dough hook attachment and mix on low speed until these ingredients are just combined.
-
- If mixing by hand, use a sturdy wooden spoon or spatula to bring the ingredients together into a shaggy dough.
-
- Add Dry Ingredients (Part 1):
-
- Incorporate Remaining Flour & Knead:
-
- Stand Mixer Method: Gradually add ½ cup of the all-purpose or bread flour while the mixer is on low. Continue to add more flour, a tablespoon at a time, until the dough starts to pull away from the sides of the bowl and forms a cohesive ball. The dough should be slightly sticky to the touch but manageable. Increase the speed to medium-low and knead for 7-10 minutes.
-
- Hand Kneading Method: Turn the shaggy dough out onto a lightly floured surface. Start by adding ½ cup of the all-purpose or bread flour. Begin to knead, gradually incorporating more flour as needed, until the dough is smooth, elastic, and only slightly tacky. This will take about 10-15 minutes. To knead, push the dough away from you with the heel of your hand, then fold it over and turn it a quarter turn. Repeat this process.
-
- Windowpane Test: To check if the dough is sufficiently kneaded, take a small piece and gently stretch it. It should stretch thin enough to see light through it without tearing easily (like a windowpane).
-
- Incorporate Remaining Flour & Knead:
-
- First Rise (Bulk Fermentation):
-
- Lightly oil a large, clean bowl.
-
- Form the kneaded dough into a ball and place it in the oiled bowl, turning it once to coat the entire surface with oil. This prevents a dry crust from forming.
-
- Cover the bowl tightly with plastic wrap or a damp kitchen towel.
-
- Place the bowl in a warm, draft-free spot (around 75-80°F / 24-27°C is ideal) and let it rise for 1 to 1.5 hours, or until it has doubled in size. The exact time will depend on the temperature of your kitchen.
-
- First Rise (Bulk Fermentation):
-
- Shape the Loaf:
-
- Once doubled, gently punch down the dough to release the air.
-
- Turn the dough out onto a lightly floured surface.
-
- Gently pat or roll the dough into a rectangle, roughly the length of your loaf pan (typically 8.5×4.5 inches or 9×5 inches).
-
- Tightly roll up the rectangle, starting from one of the shorter ends, to form a log. Pinch the seam and the ends closed to seal.
-
- Grease and lightly flour your loaf pan, or line it with parchment paper for easy removal.
-
- Place the shaped dough, seam-side down, into the prepared loaf pan.
-
- Shape the Loaf:
-
- Second Rise (Proofing):
-
- Cover the loaf pan loosely with plastic wrap (you might want to lightly oil the side facing the dough to prevent sticking) or a damp kitchen towel.
-
- Let it rise again in a warm, draft-free place for another 45-60 minutes, or until the dough has risen about 1 inch above the rim of the pan. It shouldn’t quite double this time.
-
- Second Rise (Proofing):
-
- Preheat Oven & Prepare for Baking:
-
- About 20 minutes before the second rise is complete, preheat your oven to 375°F (190°C). Position an oven rack in the center.
-
- Optional: If you want a slightly crustier loaf, place a shallow pan (like a baking sheet or cast iron skillet) on the bottom rack of the oven while it preheats. You’ll add water to this later to create steam.
-
- Optional: Just before baking, you can brush the top of the loaf lightly with an egg wash (1 egg beaten with 1 tablespoon of water) or milk for a shinier crust. Sprinkle with whole flaxseeds or rolled oats if desired.
-
- Preheat Oven & Prepare for Baking:
-
- Bake the Bread:
-
- Place the loaf pan in the preheated oven.
-
- If using the steam method, carefully pour about 1 cup of hot water into the shallow pan on the bottom rack immediately after placing the bread in the oven. Quickly close the oven door to trap the steam. (Be cautious of steam burns).
-
- Bake for 35-45 minutes. The bread is done when the crust is a deep golden brown and it sounds hollow when tapped on the bottom. An instant-read thermometer inserted into the center of the loaf should register between 190-200°F (88-93°C).
-
- If the top of the bread starts to brown too quickly, you can loosely tent it with aluminum foil for the remainder of the baking time.
-
- Bake the Bread:
-
- Cool the Bread:
-
- Once baked, immediately remove the bread from the loaf pan and transfer it to a wire cooling rack. This prevents the bottom from becoming soggy.
-
- Let the bread cool completely (at least 1-2 hours, preferably longer) before slicing. Slicing warm bread can result in a gummy texture and can make it difficult to get clean slices. This cooling period allows the internal structure to set.
-
- Cool the Bread:
Nutrition
- Serving Size: one normal portion
- Calories: 180-220


