

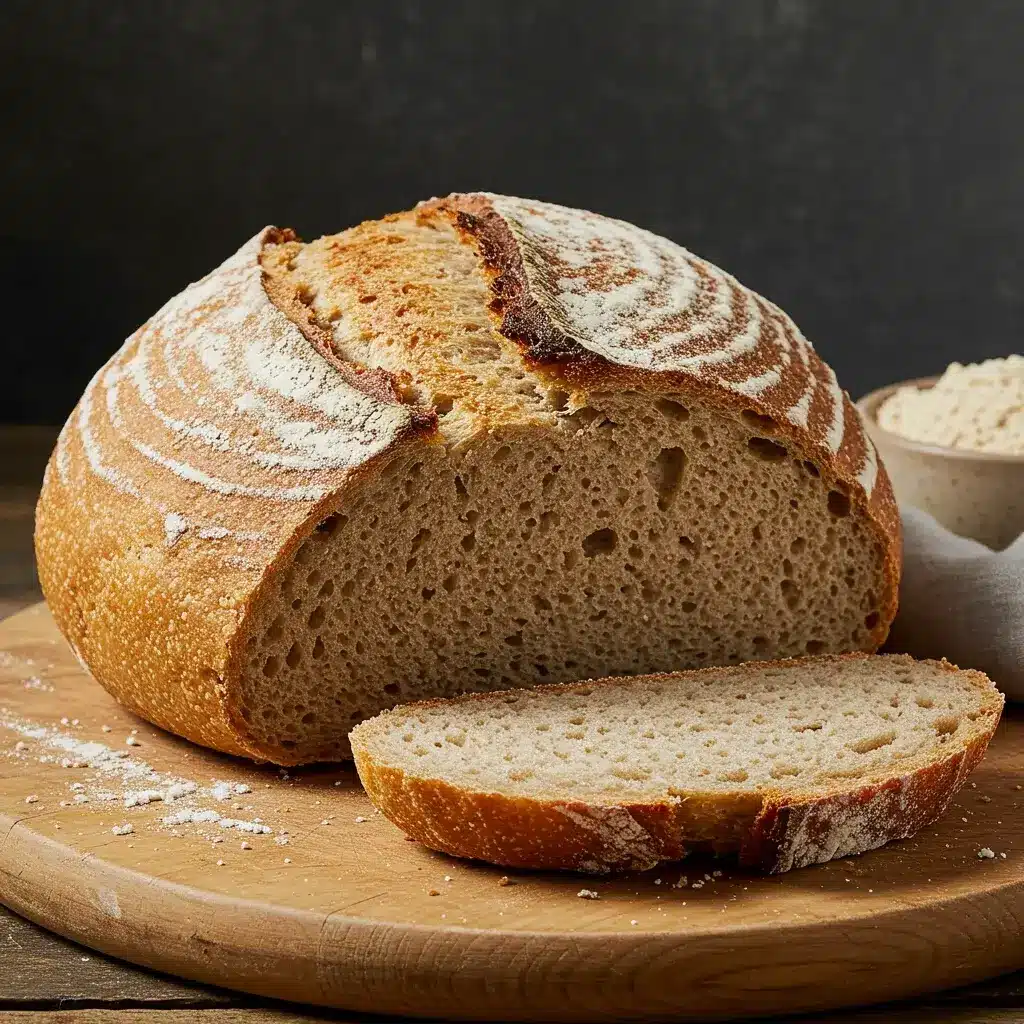
In the world of baking, few things are as satisfying as pulling a warm, crusty loaf of bread from your oven. The aroma fills your home, and the first bite makes the effort worthwhile. If you’re new to bread making or simply looking for a reliable recipe, this Easy Whole Grain Artisan Bread is your ticket to success. With simple ingredients and minimal effort, you can enjoy homemade bread that’s not only delicious but also packed with nutrients. Let’s dive into the details of how to make this wholesome bread from scratch.
Ingredients
Creating this artisan bread requires just a handful of ingredients, all of which you likely have in your pantry. Here’s what you’ll need:
- 3 cups whole grain flour
- 1 ½ cups warm water
- 1 tsp instant yeast
- 1 tsp salt
- Optional: 1 tbsp honey or agave syrup
Instructions
Making this bread is a straightforward process that even novice bakers can follow. Here’s a step-by-step guide to baking your own loaf:
- Mix Dry Ingredients:
- In a large bowl, combine the whole grain flour and salt. Stir until the salt is evenly distributed throughout the flour.
- Prepare Wet Ingredients:
- In a separate bowl, mix the warm water with the instant yeast. If you choose to use honey or agave syrup, add it to this mixture. Stir until the yeast is dissolved.
- Combine and Stir:
- Pour the wet mixture into the bowl with the dry ingredients. Stir until all the ingredients are well combined and a sticky dough forms.
- Let it Rest:
- Cover the bowl with plastic wrap or a cloth and let the dough sit at room temperature for 12-18 hours. This long resting period allows the dough to ferment and develop flavor.
- Preheat the Oven:
- When you’re ready to bake, preheat your oven to 450°F (230°C). Place a Dutch oven inside to heat up along with the oven.
- Shape the Dough:
- Dust a clean surface with flour and gently turn the dough out of the bowl. Shape it into a ball, being careful not to overwork it.
- Bake the Bread:
- Carefully place the dough into the hot Dutch oven. Cover with the lid and bake for 30 minutes. Remove the lid and bake for an additional 15-20 minutes until the bread is golden brown.
- Cool and Slice:
- Let the bread cool on a wire rack before slicing. This ensures the interior sets and the crust remains crisp.
Nutrition Facts
Understanding the nutritional content of your homemade bread can help you manage your dietary needs. Here’s a breakdown per slice, based on 12 slices:
- Calories: 100
- Protein: 4g
- Carbohydrates: 20g
- Dietary Fiber: 3g
- Sugars: 0.5g
- Fat: 1.5g
How to Serve
This easy whole grain artisan bread is not only a delightful addition to your meals but also a versatile base that can be enjoyed in numerous ways. Here are some detailed suggestions for serving this delicious bread, ensuring you maximize its potential and flavor in various dining scenarios:
As a Side
Serving slices of whole grain artisan bread as a side is an excellent way to elevate the heartiness of your meals. Here are a few ideas:
- Soups: Pair slices of the bread with creamy soups like tomato basil or potato leek. The bread’s texture can add a satisfying crunch when toasted and dipped into the soup, while its whole grain goodness complements the dish nutritionally.
- Stews: Serve the bread alongside hearty stews, such as beef bourguignon or vegetable chili. The bread can be used to soak up the flavorful broth, making each bite a delicious experience.
- Salads: Complement salads, particularly those with robust ingredients like kale or quinoa, with slices of this artisan bread. Create croutons by toasting cubed bread in olive oil and seasoning, adding a crunchy element to your salad.
For Breakfast
Transform your morning routine by incorporating this bread into your breakfast. Here are some tasty ideas:
- Toast it Up: Slice the bread and toast it to perfection. Spread a layer of creamy butter for a classic taste, or opt for a homemade jam to add a fruity sweetness. For a savory twist, top with smashed avocado, a sprinkle of salt, and a drizzle of olive oil for a nutritious and energizing start to your day.
- Breakfast Sandwiches: Use this artisan bread as the base for a filling breakfast sandwich. Layer it with scrambled eggs, cheese, and some sautéed spinach or tomatoes for a wholesome breakfast option that will keep you satisfied throughout the morning.
- French Toast: Use this bread to make delicious French toast. Dip slices into a mixture of eggs, milk, vanilla, and cinnamon, then cook on a griddle until golden brown. Serve with fresh berries and a dusting of powdered sugar for a delightful weekend brunch.
As a Snack
This artisan bread also makes for an excellent snack option, perfect for any time of the day:
- Cheese Pairing: Create a cheese platter featuring an assortment of cheeses—soft brie, sharp cheddar, or tangy goat cheese. Serve slices of the bread alongside the cheeses for a sophisticated snack. Add some fruit preserves or honey for an extra touch of sweetness.
- Hummus and Dips: Cut the bread into bite-sized pieces or strips for dipping into hummus, tzatziki, or baba ghanoush. This pairing not only provides you with a satisfying crunch but also packs in fiber and nutrients.
- Nut Butter Delight: Spread almond butter or peanut butter on toasted slices for a quick and nutritious snack. Top with banana slices or a sprinkle of chia seeds for added health benefits.
For Sandwiches
The hearty texture and robust flavor of this whole grain artisan bread make it an ideal choice for sandwiches. Here are some ideas to get you started:
- Classic Sandwiches: Build a classic ham and cheese sandwich or a turkey club. Layer your favorite deli meats, cheeses, and fresh vegetables like lettuce, tomato, and avocado for a balanced and filling lunch.
- Vegetarian Options: Create delicious vegetarian sandwiches by layering roasted vegetables, hummus, and fresh greens. Consider adding slices of fresh mozzarella or feta for a creamy contrast.
- Panini or Grilled Sandwiches: Use this bread to make a panini or grilled cheese. Layer your choice of cheeses and other fillings, then grill until the bread is crispy and the cheese is melted. Serve with a side of marinara sauce for dipping.
In conclusion, this easy whole grain artisan bread is a versatile staple that can enhance any meal or occasion. Whether served as a side, breakfast, snack, or sandwich, it brings a wholesome and delicious element to your dining experience. Enjoy exploring the many ways to incorporate this delectable bread into your culinary repertoire!
Additional Tips for Successful Bread-Making
To ensure success and enhance your bread-making experience, consider these additional tips:
Flour Variations
Experimenting with different types of flour can dramatically alter the flavor and texture of your bread. Whole grain options like rye, spelt, or multigrain flour each bring their own unique qualities to the dough. Rye flour, for instance, offers a robust, earthy flavor and can result in a denser loaf with a beautiful crumb. Spelt flour, on the other hand, is lighter and nuttier, and can yield a softer bread with a slight sweetness. Multigrain flour blends various grains, providing a complex flavor profile and increased nutrition. When incorporating these flours, be mindful that they may absorb moisture differently than all-purpose flour, so adjustments in hydration may be necessary.
Add-ins
Incorporating seeds, nuts, or dried fruits into your dough not only enhances flavor but also boosts the nutritional value of your bread. Seeds like sunflower, pumpkin, or sesame can add a delightful crunch and are excellent sources of healthy fats and proteins. Nuts, such as walnuts or almonds, can introduce a rich, buttery flavor and provide additional texture. Dried fruits like raisins, cranberries, or apricots offer natural sweetness and can help balance the savory elements of the bread. It’s best to add these ingredients during the final stages of kneading or folding to ensure an even distribution throughout the dough.
Water Temperature
The temperature of the water you use is crucial for yeast activation. Warm water, typically around 100-110°F (38-43°C), is ideal for activating yeast, as it encourages fermentation without compromising the yeast’s viability. Water that is too hot can kill the yeast, leading to a failed rise, while water that is too cold may not activate the yeast effectively, resulting in a longer fermentation time. To check the temperature, you can use a kitchen thermometer or test it with your wrist; it should feel warm but not hot to the touch.
Resting Time
Allowing your dough to rest is essential for developing flavor and texture. While the standard resting time may be around 1-2 hours, extending this time to closer to 18 hours can lead to a more robust flavor profile due to the longer fermentation process. This is especially true for no-knead bread recipes, where a slow fermentation allows the gluten to develop naturally, resulting in a chewy texture and complex taste. You can let the dough rest at room temperature or in the refrigerator, which can slow down fermentation while enhancing flavor even further. Just be sure to bring the dough back to room temperature before shaping it.
Dutch Oven Alternative
If you don’t have a Dutch oven, there are several alternatives that can yield similar results. A heavy oven-safe pot with a lid—such as a cast-iron pot or a ceramic baking dish—can effectively trap steam, creating a moist environment that is essential for achieving a crispy crust. If your alternative pot doesn’t have a lid, you can cover it with aluminum foil to create a makeshift lid. Additionally, placing a pan filled with water in the oven while your bread bakes can help create steam, promoting a better crust without the need for a Dutch oven. Just be cautious when handling hot pots, and always use oven mitts to prevent burns.
By incorporating these tips into your bread-making process, you can elevate your baking skills, create delicious loaves with varied flavors and textures, and enjoy the rewarding experience of homemade bread. Happy baking!
FAQs
Q: Can I use all-purpose flour instead of whole grain flour?
A: Yes, you can substitute all-purpose flour, but the nutritional content and texture will differ.
Q: What if my dough is too sticky to handle?
A: Dust your hands and work surface with flour to manage the stickiness. Avoid adding too much flour to the dough itself, as it can affect the texture.
Q: How do I store the bread?
A: Store the bread in a paper bag or wrapped in a cloth to maintain the crust. For longer storage, slice and freeze the bread in an airtight container.
Q: Can I make this bread without a Dutch oven?
A: Yes, you can use any heavy, oven-safe pot with a lid. The lid helps create steam, which is crucial for a crispy crust.
Q: Is it possible to double the recipe?
A: Absolutely, but be sure to use a larger bowl for mixing and a bigger Dutch oven for baking.
Conclusion
Baking your own Easy Whole Grain Artisan Bread is not just a culinary task; it’s a rewarding endeavor that transforms your kitchen into a haven of warmth and enticing aromas. The act of kneading dough and watching it rise is as much a sensory experience as it is a creative one. From the moment you mix the simple ingredients of flour, water, salt, and yeast, you embark on a journey that connects you to age-old traditions of bread-making practiced by cultures around the world.
This recipe stands out for its accessibility, making it ideal for both baking novices and seasoned artisans. The straightforward method demystifies the process, encouraging even those who have never baked bread before to give it a try. With just a handful of ingredients, you can create a wholesome loaf that is not only delicious but also packed with nutrients. Whole grain flour offers a rich source of fiber, vitamins, and minerals, contributing to a healthier lifestyle while still satisfying your cravings for freshly baked bread.
Once you pull your loaf from the oven, the experience is truly magical. The golden crust crackles as it cools, releasing a delightful aroma that fills your home, inviting everyone to gather around and enjoy a slice. Whether you savor it warm, slathered with butter, or use it to create the perfect sandwich the next day, this artisan bread is sure to become a staple in your kitchen. Its versatility allows it to complement a variety of dishes, from hearty soups and stews to fresh salads, making it an essential accompaniment to your meals.
Moreover, baking bread at home fosters a sense of accomplishment and connection to the food you consume. It opens the door to experimentation—feel free to customize the recipe by adding seeds, nuts, or herbs to create your unique flavor profile. As you become more comfortable with the process, you may even want to explore variations of whole grain bread, such as adding different types of flour or incorporating whole grains like oats or spelt for added texture and flavor.
Beyond the practical benefits, there’s an emotional aspect to baking that brings joy and satisfaction. The tactile experience of handling the dough, the anticipation while it rises, and the pride in serving something you’ve crafted with your own hands are all part of the magic. It’s an opportunity to unplug from the fast pace of modern life and engage in a fulfilling and therapeutic culinary activity.
So, roll up your sleeves, mix up some dough, and embrace the transformative experience of homemade bread. As you embark on this flavorful journey, remember that each loaf you bake tells a story and brings a little bit of love into your home. Happy baking!
Print
Easy Whole Grain Artisan Bread recipe
Ingredients
- 3 cups whole grain flour
- 1 ½ cups warm water
- 1 tsp instant yeast
- 1 tsp salt
- Optional: 1 tbsp honey or agave syrup
Instructions
- Mix Dry Ingredients:
- In a large bowl, combine the whole grain flour and salt. Stir until the salt is evenly distributed throughout the flour.
- Prepare Wet Ingredients:
- In a separate bowl, mix the warm water with the instant yeast. If you choose to use honey or agave syrup, add it to this mixture. Stir until the yeast is dissolved.
- Combine and Stir:
- Pour the wet mixture into the bowl with the dry ingredients. Stir until all the ingredients are well combined and a sticky dough forms.
- Let it Rest:
- Cover the bowl with plastic wrap or a cloth and let the dough sit at room temperature for 12-18 hours. This long resting period allows the dough to ferment and develop flavor.
- Preheat the Oven:
- When you’re ready to bake, preheat your oven to 450°F (230°C). Place a Dutch oven inside to heat up along with the oven.
- Shape the Dough:
- Dust a clean surface with flour and gently turn the dough out of the bowl. Shape it into a ball, being careful not to overwork it.
- Bake the Bread:
- Carefully place the dough into the hot Dutch oven. Cover with the lid and bake for 30 minutes. Remove the lid and bake for an additional 15-20 minutes until the bread is golden brown.
- Cool and Slice:
- Let the bread cool on a wire rack before slicing. This ensures the interior sets and the crust remains crisp.
Nutrition
- Serving Size: one normal portion
- Calories: 100
- Sugar: 0.5g
- Fat: 1.5g
- Carbohydrates: 20g
- Fiber: 3g
- Protein: 4g


