

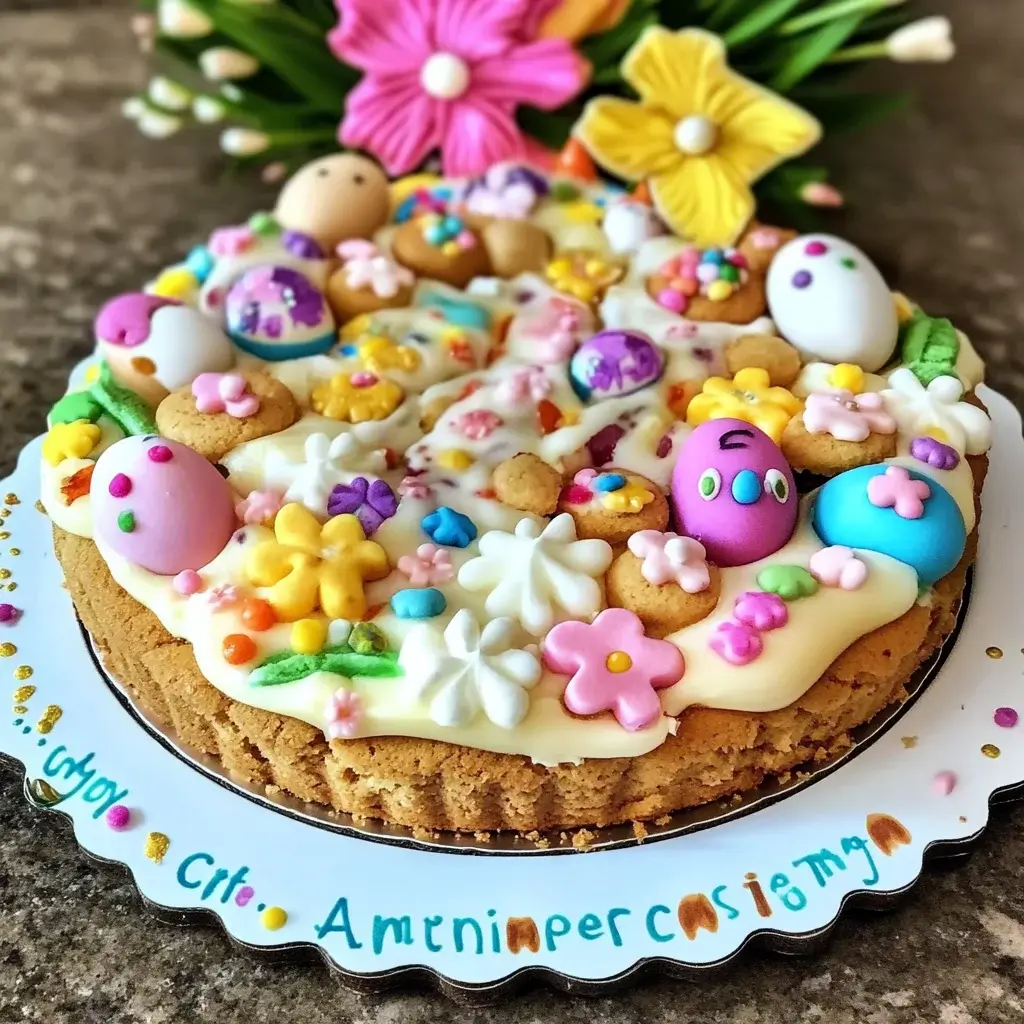
Last Easter, I wanted to bake something a little different, something that would be both impressive and utterly delicious for our family gathering. I stumbled upon the idea of an Easter Cookie Cake, and let me tell you, it was a game-changer. From the moment the giant, golden cookie emerged from the oven, filling the kitchen with a sweet, vanilla aroma, I knew it was going to be a hit. Decorating it became a fun, collaborative activity with the kids, and the final result was a vibrant, festive centerpiece that tasted even better than it looked. Every slice was devoured, and requests for a repeat appearance this year are already pouring in! This Easter Cookie Cake is not just a dessert; it’s a memory-making experience, perfect for sharing joy and sweetness with your loved ones. Get ready to bake up some Easter magic!
Ingredients: Your Easter Cookie Cake Essentials
To create this delightful Easter Cookie Cake, you’ll need a mix of pantry staples and a few festive additions. Here’s a detailed list to ensure you have everything at hand:
For the Giant Cookie Base:
- 2 cups (4 sticks) unsalted butter, softened: Butter is the heart of our cookie cake, providing richness and that melt-in-your-mouth texture. Make sure it’s properly softened – not melted – to cream smoothly with the sugar.
- 2 cups granulated sugar: Granulated sugar adds sweetness and helps create a crisp edge to the cookie cake.
- 1 cup packed light brown sugar: Brown sugar lends a warm, molasses-like flavor and contributes to a chewier texture in the center of the cookie cake.
- 4 large eggs: Eggs bind the ingredients together and add moisture and structure to the cookie cake. Use large eggs for the best consistency.
- 2 teaspoons pure vanilla extract: Vanilla extract enhances the overall flavor profile, adding a touch of warmth and sweetness. Opt for pure vanilla extract for the most authentic taste.
- 6 cups all-purpose flour: All-purpose flour provides the structure for the cookie cake. Measure it accurately using the spoon and level method to avoid dry cookies.
- 2 teaspoons baking soda: Baking soda acts as a leavening agent, helping the cookie cake rise and become light and airy.
- 1 teaspoon salt: Salt balances the sweetness and enhances the flavors of all the other ingredients.
For the Frosting (Classic Buttercream):
- 1 cup (2 sticks) unsalted butter, softened: Just like in the cookie base, softened butter is crucial for creating a smooth and creamy buttercream frosting.
- 4 cups powdered sugar: Powdered sugar, also known as confectioners’ sugar, is the base of our buttercream frosting. It dissolves easily and creates a silky texture. Sift it if it’s lumpy for an extra smooth frosting.
- 1/2 cup milk or heavy cream: Milk or heavy cream adds moisture and thins out the frosting to a spreadable consistency. Heavy cream will result in a richer, more decadent frosting. Adjust the amount to reach your desired consistency.
- 1 teaspoon pure vanilla extract: Vanilla extract complements the sweetness of the frosting and adds a classic buttercream flavor.
For Decoration (Easter Fun!):
- Assorted Easter candies: This is where you can get creative! Think pastel-colored M&M’s, jelly beans, Cadbury Mini Eggs, Peeps (if you’re a fan!), pastel sprinkles, chocolate bunnies, and any other Easter-themed candies that catch your eye.
- Pastel sprinkles: Sprinkles add a touch of whimsy and color. Choose pastel shades to enhance the Easter theme.
- Food coloring (optional): If you want to tint your frosting, gel food coloring is recommended as it provides vibrant color without altering the consistency too much. Pastel shades are perfect for Easter.
- Piping bags and tips (optional): For more intricate decorations, piping bags and tips (like star tips or round tips) can be used to create borders, rosettes, or write “Happy Easter.”
Ingredient Notes and Substitutions:
- Butter: Unsalted butter is preferred in baking as it allows you to control the salt level. If using salted butter, omit the 1 teaspoon of salt in the cookie base recipe.
- Sugar: You can adjust the ratio of granulated sugar to brown sugar slightly based on your preference. More brown sugar will result in a chewier cookie cake.
- Vanilla Extract: Almond extract can be used in combination with or instead of vanilla extract for a different flavor profile. Lemon extract or orange extract can also be lovely for a spring-themed cookie cake.
- Flour: It’s generally not recommended to substitute all-purpose flour in this recipe without adjustments, as it is crucial for the texture. If you need a gluten-free option, you’ll need to use a specifically formulated gluten-free all-purpose flour blend and may need to adjust other ingredients and baking time.
- Milk/Cream: For a dairy-free option, you can use plant-based milk alternatives like almond milk, oat milk, or soy milk in the frosting. For a richer frosting, consider using full-fat coconut cream (the solid part from a chilled can).
- Frosting Variations: Cream cheese frosting is a delicious alternative to classic buttercream. To make cream cheese frosting, substitute half of the butter with softened cream cheese. You can also add lemon zest or juice for a tangy twist. Chocolate frosting is another crowd-pleaser – simply add melted and cooled semi-sweet or dark chocolate to your buttercream.
Instructions: Baking Your Easter Cookie Cake Step-by-Step
Follow these detailed instructions to bake your perfect Easter Cookie Cake:
Step 1: Prepare Your Baking Pan & Preheat the Oven
- Preheat your oven to 350°F (175°C). Accurate oven temperature is key for even baking. Use an oven thermometer if you’re unsure of your oven’s accuracy.
- Prepare your baking pan. You’ll need a large baking sheet, ideally 12×17 inches or larger. Line the baking sheet with parchment paper. This prevents the cookie cake from sticking and makes it easy to lift off after baking. Alternatively, you can grease and flour the baking sheet, but parchment paper is more foolproof.
Step 2: Cream Together Butter and Sugars
- In a large mixing bowl (or the bowl of a stand mixer), combine the softened butter, granulated sugar, and brown sugar.
- Cream together using an electric mixer (handheld or stand mixer) on medium speed until light and fluffy. This process incorporates air into the mixture, which is essential for a tender cookie cake. This should take about 3-5 minutes. Scrape down the sides of the bowl as needed to ensure everything is evenly mixed.
Step 3: Incorporate Eggs and Vanilla
- Add the eggs one at a time, beating well after each addition until fully incorporated. This ensures each egg is properly emulsified into the batter.
- Stir in the vanilla extract. Mix until just combined.
Step 4: Combine Dry Ingredients
- In a separate medium bowl, whisk together the flour, baking soda, and salt. Whisking helps to evenly distribute the leavening agent and salt throughout the flour.
- Gradually add the dry ingredients to the wet ingredients, mixing on low speed until just combined. Be careful not to overmix. Overmixing can develop gluten, resulting in a tough cookie cake. Mix just until the flour disappears into the wet ingredients.
Step 5: Shape and Bake the Cookie Cake
- Turn the dough out onto the prepared baking sheet. The dough will be quite thick.
- Using your hands or a spatula, gently spread the dough evenly across the baking sheet. Aim for a uniform thickness of about ¼ to ½ inch. Don’t worry if it doesn’t reach the exact edges; it will spread slightly during baking. You can create a round or rectangular shape, depending on your preference. For a perfectly round cookie cake, you can trace a large circle (using a plate or cake pan as a guide) on the parchment paper before spreading the dough.
- Bake in the preheated oven for 15-20 minutes, or until the edges are golden brown and the center is just set. The baking time may vary slightly depending on your oven and the thickness of the cookie cake. Keep a close eye on it towards the end of baking to prevent overbaking. Overbaked cookie cakes can be dry.
- Let the cookie cake cool completely on the baking sheet before frosting. Cooling completely is crucial, otherwise, the frosting will melt. This can take about 1-2 hours at room temperature, or you can speed it up by placing it in the refrigerator for about 30-45 minutes.
Step 6: Prepare the Buttercream Frosting
- While the cookie cake is cooling, prepare the buttercream frosting. In a large mixing bowl (or the bowl of a stand mixer), cream together the softened butter until smooth and fluffy.
- Gradually add the powdered sugar, one cup at a time, beating on low speed until incorporated. Start on low speed to prevent the powdered sugar from flying everywhere.
- Add the milk or heavy cream and vanilla extract. Beat on medium speed until the frosting is light, fluffy, and smooth. If the frosting is too thick, add a little more milk or cream, one tablespoon at a time, until you reach your desired consistency. If it’s too thin, add a bit more powdered sugar.
- If desired, tint the frosting with food coloring. Add gel food coloring a drop at a time and mix until you reach your desired pastel shade.
Step 7: Frost and Decorate the Cookie Cake
- Once the cookie cake is completely cool, frost it generously with the buttercream frosting. You can use a spatula for a simple, swirled frosting look, or pipe the frosting using piping bags and tips for more decorative designs.
- Decorate the frosted cookie cake with your assorted Easter candies and sprinkles. Get creative! You can create patterns, spell out “Happy Easter,” or simply scatter the candies and sprinkles for a festive, colorful look. Let the kids help with this part – it’s a fun activity for everyone!
- Gently press the candies and sprinkles into the frosting so they adhere well.
Step 8: Slice and Serve!
- Carefully slice the Easter Cookie Cake into squares or wedges. A large knife or pizza cutter works well.
- Serve and enjoy! This Easter Cookie Cake is best enjoyed fresh but can be stored in an airtight container at room temperature for up to 3 days or in the refrigerator for up to 5 days.
Nutrition Facts: Sweet Treats in Moderation
Please note that the nutrition facts provided below are estimates and can vary based on specific ingredients used, serving size, and frosting/decoration amounts. This is a treat, so enjoy in moderation as part of a balanced diet.
- Servings: Approximately 20-24 servings (depending on slice size)
- Calories per serving (estimated, unfrosted cookie): 350-450 calories (This is a rough estimate for a slice of the cookie base alone, without frosting or decorations. Frosting and candies will significantly increase the calorie count.)
- Key Nutrients (estimated, per serving, unfrosted cookie):
- Fat: 20-25g (primarily from butter)
- Saturated Fat: 12-15g
- Cholesterol: 70-90mg
- Sodium: 150-200mg
- Carbohydrates: 40-50g (primarily from sugar and flour)
- Sugar: 25-35g
- Protein: 3-4g
Important Note: This is a dessert intended for special occasions. The calorie and sugar content are significant. Enjoy a slice as a treat and balance your diet with plenty of fruits, vegetables, and whole grains. Adding frosting and candies will further increase the calorie, sugar, and fat content.
Preparation Time: Plan Your Baking Schedule
- Prep time: 30-40 minutes (includes gathering ingredients, making dough, and frosting)
- Bake time: 15-20 minutes
- Cooling time: 1-2 hours (essential for proper frosting)
- Decoration time: 20-30 minutes (depending on complexity)
- Total time: Approximately 2 hours 5 minutes to 3 hours 30 minutes (including cooling time)
Make-Ahead Tips:
- Cookie Base: The cookie dough can be made ahead of time and stored in the refrigerator for up to 2 days. Bring it to room temperature for about 30 minutes before spreading and baking. You can also bake the cookie base a day ahead and store it, tightly wrapped, at room temperature.
- Frosting: Buttercream frosting can be made 1-2 days in advance and stored in an airtight container in the refrigerator. Let it come to room temperature and re-whip it briefly before using.
- Decoration: While the cookie cake is best decorated closer to serving, you can pre-sort your candies and plan your decorations ahead of time.
How to Serve Your Easter Cookie Cake: Festive Presentation
This Easter Cookie Cake is versatile and can be served in various ways to suit different occasions and preferences. Here are some ideas:
- As a Dessert Centerpiece:
- Place the whole cookie cake on a pretty cake stand or serving platter.
- Surround it with fresh spring flowers like tulips, daffodils, or hyacinths for a beautiful Easter table display.
- Add small bowls of extra Easter candies or sprinkles around the cake for guests to help themselves.
- Individual Slices:
- Pre-slice the cookie cake into squares or wedges for easier serving at a party or gathering.
- Arrange the slices on a platter or serving tray.
- Garnish each slice with a small sprig of mint or a single Easter candy for an elegant touch.
- With Accompaniments:
- Serve alongside a scoop of vanilla ice cream or whipped cream for an extra indulgent treat.
- Offer fresh berries like strawberries, raspberries, or blueberries on the side to complement the sweetness of the cookie cake.
- A glass of cold milk, iced coffee, or a light dessert wine pairs perfectly with this sweet treat.
- For Easter Baskets or Gifts:
- Cut the cookie cake into smaller shapes using cookie cutters (e.g., Easter eggs, bunnies, chicks) after baking and cooling.
- Frost and decorate the individual cookies.
- Wrap them in cellophane bags tied with ribbon to include in Easter baskets or give as homemade gifts.
Additional Tips for Easter Cookie Cake Perfection
Here are five helpful tips to ensure your Easter Cookie Cake turns out absolutely perfect:
- Tip 1: Don’t Overmix the Dough: Overmixing develops gluten in the flour, which can result in a tough cookie cake. Mix the dry ingredients into the wet ingredients just until combined. A few streaks of flour are okay – they will disappear as you spread the dough.
- Tip 2: Chill the Dough (Optional but Recommended): If you find the dough too soft to handle or spread easily, chill it in the refrigerator for 15-20 minutes. Chilling firms up the butter and makes the dough easier to work with. However, don’t chill it for too long, or it will become too hard to spread.
- Tip 3: Bake Until Just Set: Don’t overbake the cookie cake. It should be golden brown around the edges and just set in the center. It will continue to cook slightly as it cools. Overbaking will result in a dry, crumbly cookie cake.
- Tip 4: Cool Completely Before Frosting: Patience is key! Ensure the cookie cake is completely cool before frosting. Frosting a warm cookie cake will cause the frosting to melt and slide off, resulting in a messy and less appealing dessert.
- Tip 5: Get Creative with Decorations! Have fun with the decorations! Don’t be afraid to experiment with different colors, candies, and sprinkles. Involve kids in the decorating process – it’s a wonderful way to create lasting Easter memories. Consider using piping tips for borders, writing “Happy Easter”, or creating floral designs with frosting.
FAQ: Your Easter Cookie Cake Questions Answered
Here are answers to some frequently asked questions about making Easter Cookie Cake:
Q1: Can I make this Easter Cookie Cake ahead of time?
A: Yes, absolutely! The cookie base can be baked a day ahead and stored at room temperature, tightly wrapped. The buttercream frosting can also be made 1-2 days in advance and stored in the refrigerator. Decorate closer to serving for the freshest look.
Q2: Can I use a different frosting recipe?
A: Of course! While the classic buttercream is delicious, you can use cream cheese frosting, chocolate frosting, lemon frosting, or any frosting you prefer. Adjust the consistency as needed to ensure it’s spreadable or pipeable.
Q3: Can I double the recipe to make a larger cookie cake?
A: Yes, you can easily double the recipe. You may need to use a larger baking sheet or bake it in two separate batches. Baking time may need to be slightly adjusted for a larger or thicker cookie cake.
Q4: How should I store leftover Easter Cookie Cake?
A: Store leftover Easter Cookie Cake in an airtight container at room temperature for up to 3 days or in the refrigerator for up to 5 days. Refrigerating may slightly dry out the cookie, but it will keep the frosting fresh for longer. Bring to room temperature before serving for best texture.
Q5: Can I make individual Easter cookies instead of a cookie cake with this recipe?
A: Yes, you can! After making the dough, roll it out to about ¼ inch thickness and use Easter-themed cookie cutters to cut out shapes. Bake at 350°F (175°C) for 8-12 minutes, or until golden brown around the edges. Frost and decorate as desired. Baking time will be shorter for individual cookies, so keep a close eye on them.
This Easter Cookie Cake is more than just a dessert; it’s a canvas for creativity, a centerpiece for celebration, and a delicious way to share the joy of Easter with your loved ones. Happy baking and Happy Easter!
Print
Easter Cookie Cake recipe
Ingredients
For the Giant Cookie Base:
- 2 cups (4 sticks) unsalted butter, softened: Butter is the heart of our cookie cake, providing richness and that melt-in-your-mouth texture. Make sure it’s properly softened – not melted – to cream smoothly with the sugar.
- 2 cups granulated sugar: Granulated sugar adds sweetness and helps create a crisp edge to the cookie cake.
- 1 cup packed light brown sugar: Brown sugar lends a warm, molasses-like flavor and contributes to a chewier texture in the center of the cookie cake.
- 4 large eggs: Eggs bind the ingredients together and add moisture and structure to the cookie cake. Use large eggs for the best consistency.
- 2 teaspoons pure vanilla extract: Vanilla extract enhances the overall flavor profile, adding a touch of warmth and sweetness. Opt for pure vanilla extract for the most authentic taste.
- 6 cups all-purpose flour: All-purpose flour provides the structure for the cookie cake. Measure it accurately using the spoon and level method to avoid dry cookies.
- 2 teaspoons baking soda: Baking soda acts as a leavening agent, helping the cookie cake rise and become light and airy.
- 1 teaspoon salt: Salt balances the sweetness and enhances the flavors of all the other ingredients.
For the Frosting (Classic Buttercream):
- 1 cup (2 sticks) unsalted butter, softened: Just like in the cookie base, softened butter is crucial for creating a smooth and creamy buttercream frosting.
- 4 cups powdered sugar: Powdered sugar, also known as confectioners’ sugar, is the base of our buttercream frosting. It dissolves easily and creates a silky texture. Sift it if it’s lumpy for an extra smooth frosting.
- 1/2 cup milk or heavy cream: Milk or heavy cream adds moisture and thins out the frosting to a spreadable consistency. Heavy cream will result in a richer, more decadent frosting. Adjust the amount to reach your desired consistency.
- 1 teaspoon pure vanilla extract: Vanilla extract complements the sweetness of the frosting and adds a classic buttercream flavor.
For Decoration (Easter Fun!):
- Assorted Easter candies: This is where you can get creative! Think pastel-colored M&M’s, jelly beans, Cadbury Mini Eggs, Peeps (if you’re a fan!), pastel sprinkles, chocolate bunnies, and any other Easter-themed candies that catch your eye.
- Pastel sprinkles: Sprinkles add a touch of whimsy and color. Choose pastel shades to enhance the Easter theme.
- Food coloring (optional): If you want to tint your frosting, gel food coloring is recommended as it provides vibrant color without altering the consistency too much. Pastel shades are perfect for Easter.
- Piping bags and tips (optional): For more intricate decorations, piping bags and tips (like star tips or round tips) can be used to create borders, rosettes, or write “Happy Easter.”
Ingredient Notes and Substitutions:
- Butter: Unsalted butter is preferred in baking as it allows you to control the salt level. If using salted butter, omit the 1 teaspoon of salt in the cookie base recipe.
- Sugar: You can adjust the ratio of granulated sugar to brown sugar slightly based on your preference. More brown sugar will result in a chewier cookie cake.
- Vanilla Extract: Almond extract can be used in combination with or instead of vanilla extract for a different flavor profile. Lemon extract or orange extract can also be lovely for a spring-themed cookie cake.
- Flour: It’s generally not recommended to substitute all-purpose flour in this recipe without adjustments, as it is crucial for the texture. If you need a gluten-free option, you’ll need to use a specifically formulated gluten-free all-purpose flour blend and may need to adjust other ingredients and baking time.
- Milk/Cream: For a dairy-free option, you can use plant-based milk alternatives like almond milk, oat milk, or soy milk in the frosting. For a richer frosting, consider using full-fat coconut cream (the solid part from a chilled can).
- Frosting Variations: Cream cheese frosting is a delicious alternative to classic buttercream. To make cream cheese frosting, substitute half of the butter with softened cream cheese. You can also add lemon zest or juice for a tangy twist. Chocolate frosting is another crowd-pleaser – simply add melted and cooled semi-sweet or dark chocolate to your buttercream.
Instructions
Step 1: Prepare Your Baking Pan & Preheat the Oven
- Preheat your oven to 350°F (175°C). Accurate oven temperature is key for even baking. Use an oven thermometer if you’re unsure of your oven’s accuracy.
- Prepare your baking pan. You’ll need a large baking sheet, ideally 12×17 inches or larger. Line the baking sheet with parchment paper. This prevents the cookie cake from sticking and makes it easy to lift off after baking. Alternatively, you can grease and flour the baking sheet, but parchment paper is more foolproof.
Step 2: Cream Together Butter and Sugars
- In a large mixing bowl (or the bowl of a stand mixer), combine the softened butter, granulated sugar, and brown sugar.
- Cream together using an electric mixer (handheld or stand mixer) on medium speed until light and fluffy. This process incorporates air into the mixture, which is essential for a tender cookie cake. This should take about 3-5 minutes. Scrape down the sides of the bowl as needed to ensure everything is evenly mixed.
Step 3: Incorporate Eggs and Vanilla
- Add the eggs one at a time, beating well after each addition until fully incorporated. This ensures each egg is properly emulsified into the batter.
- Stir in the vanilla extract. Mix until just combined.
Step 4: Combine Dry Ingredients
- In a separate medium bowl, whisk together the flour, baking soda, and salt. Whisking helps to evenly distribute the leavening agent and salt throughout the flour.
- Gradually add the dry ingredients to the wet ingredients, mixing on low speed until just combined. Be careful not to overmix. Overmixing can develop gluten, resulting in a tough cookie cake. Mix just until the flour disappears into the wet ingredients.
Step 5: Shape and Bake the Cookie Cake
- Turn the dough out onto the prepared baking sheet. The dough will be quite thick.
- Using your hands or a spatula, gently spread the dough evenly across the baking sheet. Aim for a uniform thickness of about ¼ to ½ inch. Don’t worry if it doesn’t reach the exact edges; it will spread slightly during baking. You can create a round or rectangular shape, depending on your preference. For a perfectly round cookie cake, you can trace a large circle (using a plate or cake pan as a guide) on the parchment paper before spreading the dough.
- Bake in the preheated oven for 15-20 minutes, or until the edges are golden brown and the center is just set. The baking time may vary slightly depending on your oven and the thickness of the cookie cake. Keep a close eye on it towards the end of baking to prevent overbaking. Overbaked cookie cakes can be dry.
- Let the cookie cake cool completely on the baking sheet before frosting. Cooling completely is crucial, otherwise, the frosting will melt. This can take about 1-2 hours at room temperature, or you can speed it up by placing it in the refrigerator for about 30-45 minutes.
Step 6: Prepare the Buttercream Frosting
- While the cookie cake is cooling, prepare the buttercream frosting. In a large mixing bowl (or the bowl of a stand mixer), cream together the softened butter until smooth and fluffy.
- Gradually add the powdered sugar, one cup at a time, beating on low speed until incorporated. Start on low speed to prevent the powdered sugar from flying everywhere.
- Add the milk or heavy cream and vanilla extract. Beat on medium speed until the frosting is light, fluffy, and smooth. If the frosting is too thick, add a little more milk or cream, one tablespoon at a time, until you reach your desired consistency. If it’s too thin, add a bit more powdered sugar.
- If desired, tint the frosting with food coloring. Add gel food coloring a drop at a time and mix until you reach your desired pastel shade.
Step 7: Frost and Decorate the Cookie Cake
- Once the cookie cake is completely cool, frost it generously with the buttercream frosting. You can use a spatula for a simple, swirled frosting look, or pipe the frosting using piping bags and tips for more decorative designs.
- Decorate the frosted cookie cake with your assorted Easter candies and sprinkles. Get creative! You can create patterns, spell out “Happy Easter,” or simply scatter the candies and sprinkles for a festive, colorful look. Let the kids help with this part – it’s a fun activity for everyone!
- Gently press the candies and sprinkles into the frosting so they adhere well.
Step 8: Slice and Serve!
- Carefully slice the Easter Cookie Cake into squares or wedges. A large knife or pizza cutter works well.
- Serve and enjoy! This Easter Cookie Cake is best enjoyed fresh but can be stored in an airtight container at room temperature for up to 3 days or in the refrigerator for up to 5 days.
Nutrition
- Serving Size: one normal portion
- Calories: 350-450
- Sugar: 25-35g
- Sodium: 150-200mg
- Fat: 20-25g
- Saturated Fat: 12-15g
- Carbohydrates: 40-50g
- Protein: 3-4g
- Cholesterol: 70-90mg


