

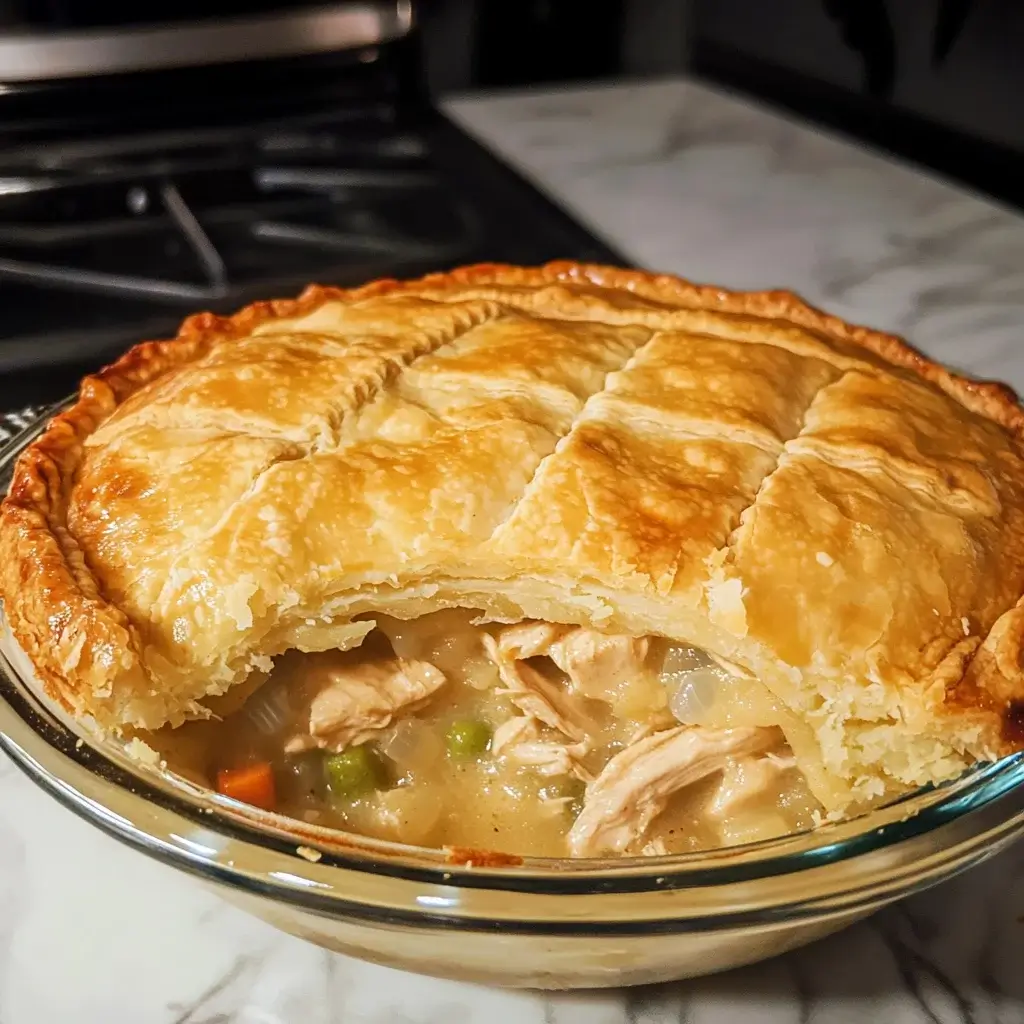
There are few dishes that scream “comfort food” quite like a classic Chicken Pot Pie. And when it boasts a flaky, golden-brown crust on both the bottom and the top? Well, that’s just culinary bliss. I’ll never forget the first time I truly nailed this recipe. It was a chilly autumn evening, the kind that begs for something warm and hearty. The aroma filling the house as it baked – buttery pastry mingling with savory chicken and vegetables – was intoxicating. When I finally pulled that beauty from the oven, its domed top perfectly golden, the edges bubbling slightly, my family gathered around the counter instantly. Cutting into it revealed the creamy, steaming filling packed with tender chicken and colorful veggies, all encased in that gloriously flaky pastry. The verdict was unanimous: absolute perfection. Since then, this Double Crust Chicken Pot Pie has become a treasured family favorite, requested for cozy Sunday dinners, celebrations, and whenever we need a delicious dose of edible comfort. It takes a little time, yes, but the process is deeply rewarding, and the end result is infinitely better than any store-bought version. Let me guide you through creating this ultimate comfort food masterpiece in your own kitchen.
Why This Double Crust Chicken Pot Pie Recipe is Exceptional
In a world of quick meals, taking the time to make a proper Double Crust Chicken Pot Pie feels like a special occasion in itself. Here’s why this particular recipe stands out and deserves a place in your cooking rotation:
- The Ultimate Comfort Food: It’s the culinary equivalent of a warm hug. The combination of creamy, savory filling and rich, flaky pastry is deeply satisfying and evokes feelings of warmth, nostalgia, and home.
- Flaky All-Butter Double Crust: Let’s be honest, the crust makes or breaks a pot pie. This recipe focuses on achieving a truly flaky, tender, and buttery crust – both on the bottom to hold the filling and on top for that perfect golden cap. We use all butter for the best flavor and texture.
- Rich and Creamy Filling: No watery, bland fillings here! We build flavor layers starting with sautéed vegetables, create a velvety smooth sauce with butter, flour, broth, and cream, and load it with tender chicken and sweet peas. It’s thick enough to hold its shape but luxuriously creamy.
- Packed with Flavor: From the properly seasoned filling featuring classic herbs like thyme and parsley to the rich buttery crust, every bite is designed for maximum flavor impact.
- Customizable Core: While we provide a classic base, pot pies are wonderfully adaptable. Use leftover turkey, add different vegetables (mushrooms, potatoes, green beans), or tweak the seasonings to your liking.
- Visually Impressive: A well-made double crust pot pie looks stunning. That golden, potentially lattice-topped or crimped-edge pie emerging from the oven is a showstopper.
- Make-Ahead Friendly: You can prepare components in advance (crust, filling) or even assemble the entire pie and bake it later, making it manageable even for busier schedules.
This isn’t just dinner; it’s an experience – from the mindful process of making the crust to the communal joy of sharing the finished pie.
Ingredients for Double Crust Chicken Pot Pie
Accuracy is key in baking, especially with pastry. For the filling, feel free to adjust seasonings to your taste. This recipe yields one standard 9-inch double-crust pie.
For the All-Butter Double Pie Crust:
- All-Purpose Flour: 2 ½ cups (310g), plus more for dusting
- Salt: 1 teaspoon (6g)
- Unsalted Butter: 1 cup (2 sticks or 226g), very cold and cut into ½-inch cubes
- Ice Water: ½ cup (120ml), potentially up to ¾ cup (180ml) – must be ice cold
For the Creamy Chicken Filling:
- Unsalted Butter: 6 tablespoons (85g)
- Yellow Onion: 1 medium, finely chopped (about 1 cup)
- Carrots: 2 medium, peeled and diced (about ¾ cup)
- Celery: 2 stalks, diced (about ¾ cup)
- All-Purpose Flour: ½ cup (60g)
- Chicken Broth: 2 cups (480ml), low-sodium preferred, warm or room temperature
- Heavy Cream or Whole Milk: 1 cup (240ml), warm or room temperature (Heavy cream makes it richer)
- Salt: 1 ¼ teaspoons (7-8g), or to taste
- Black Pepper: ½ teaspoon freshly ground, or to taste
- Dried Thyme: ½ teaspoon (or 1 ½ teaspoons fresh thyme leaves)
- Cooked Chicken: 3 cups, shredded or cubed (rotisserie chicken or poached chicken breasts work perfectly)
- Frozen Peas: 1 cup (145g) – no need to thaw
- Fresh Parsley: 2 tablespoons, chopped (optional, for freshness)
Optional:
- Egg Wash: 1 large egg beaten with 1 tablespoon of water or milk (for a shiny, golden top crust)
- Diced Potatoes: 1 cup peeled and diced small (par-boil or sauté with other veggies until tender)
- Mushrooms: 8 oz sliced mushrooms, sautéed with the onions
Step-by-Step Instructions for Making Double Crust Chicken Pot Pie
Follow these steps methodically for the best results. Breaking it down into crust, filling, and assembly makes it less daunting.
Part 1: Make the All-Butter Pie Crust
(This can be done up to 2 days ahead and refrigerated, or frozen for longer)
- Combine Dry Ingredients: In a large bowl, whisk together the 2 ½ cups of flour and 1 teaspoon of salt.
- Cut in the Butter: Add the cold butter cubes to the flour mixture. Using a pastry blender, two knives, or your fingertips, quickly cut the butter into the flour until the mixture resembles coarse meal with some pea-sized pieces of butter still visible. Work quickly to keep the butter cold. Large butter pieces = flaky layers.
- Add Ice Water: Sprinkle about ½ cup (120ml) of ice water over the mixture. Using a fork or your hands, gently mix until the dough just starts to come together. Don’t add all the water at once. If it seems too dry, add more ice water, 1 tablespoon at a time, mixing just until the dough holds together when squeezed. Do NOT overmix or knead the dough – this develops gluten and makes the crust tough.
- Divide and Chill: Turn the shaggy dough out onto a lightly floured surface. Gently bring it together into a cohesive mass (don’t knead!). Divide the dough in half and flatten each half into a 1-inch thick disk. Wrap each disk tightly in plastic wrap.
- Refrigerate: Chill the dough disks in the refrigerator for at least 1 hour (or up to 2 days) before rolling. This allows the gluten to relax and the fat to solidify, which is crucial for flakiness and makes the dough easier to handle.
Part 2: Prepare the Creamy Chicken Filling
(This can also be made a day ahead and refrigerated. Reheat gently before assembling or let come closer to room temp.)
- Sauté Aromatics: Melt the 6 tablespoons of butter in a large pot or Dutch oven over medium heat. Add the chopped onion, diced carrots, and diced celery. Cook, stirring occasionally, until the vegetables soften, about 8-10 minutes. (If adding mushrooms or potatoes, add them here and cook until tender/softened).
- Make the Roux: Sprinkle the ½ cup of flour over the cooked vegetables. Stir constantly and cook for 1-2 minutes. This cooks out the raw flour taste and forms a roux, which will thicken the sauce.
- Add Liquids Gradually: Slowly whisk in the warm chicken broth, a little at a time, ensuring there are no lumps. Once all the broth is incorporated and smooth, slowly whisk in the warm heavy cream or milk.
- Simmer and Thicken: Bring the mixture to a gentle simmer, stirring frequently. Reduce the heat to low and continue simmering, stirring often (especially the bottom to prevent scorching), until the sauce has thickened enough to coat the back of a spoon, about 5-8 minutes.
- Season and Add Fillings: Stir in the salt, black pepper, and dried thyme. Taste and adjust seasonings if needed – remember the chicken will add some savoriness, but the crust is plain, so the filling needs to be well-seasoned.
- Fold in Chicken and Peas: Remove the pot from the heat. Gently fold in the cooked chicken and frozen peas. Stir in the fresh parsley, if using.
- Cool Slightly: Set the filling aside to cool for at least 15-20 minutes (or longer if possible). Putting hot filling onto raw pastry can melt the butter and lead to a soggy bottom crust. Ideally, the filling should be lukewarm or room temperature.
Part 3: Assemble and Bake the Pot Pie
- Preheat Oven & Prepare Dish: Preheat your oven to 400°F (200°C). Have a standard 9-inch pie dish ready (glass, ceramic, or metal). You don’t typically need to grease it for a butter crust.
- Roll Bottom Crust: On a lightly floured surface, take one chilled dough disk. Roll it out from the center outwards into a circle about 12-13 inches in diameter and roughly ⅛-inch thick. Rotate the dough occasionally and add minimal flour as needed to prevent sticking.
- Line the Pie Dish: Carefully transfer the rolled-out dough to the pie dish. Gently press it into the bottom and up the sides, ensuring there are no air pockets. Trim the excess dough hanging over the edge, leaving about a ½-inch overhang.
- Add Filling: Pour the slightly cooled chicken filling into the pastry-lined dish, spreading it evenly.
- Roll Top Crust: Roll out the second disk of dough similarly to the first, large enough to cover the top of the pie (about 11-12 inches).
- Place Top Crust: Gently lay the top crust over the filling.
- Trim and Seal: Trim the top crust edge so it matches the overhang of the bottom crust (about ½ inch). Fold the edge of the top crust under the edge of the bottom crust. Press the edges together firmly to seal, then crimp decoratively using your fingers or the tines of a fork.
- Cut Vents: Using a sharp knife, cut several slits (at least 4-5) in the top crust. This allows steam to escape during baking, preventing the filling from bursting through the sides.
- Optional Egg Wash: For a shiny, deep golden crust, brush the top crust evenly with the prepared egg wash. Avoid letting it pool too much around the edges.
- Bake: Place the pie on a baking sheet (to catch any potential drips). Bake in the preheated 400°F (200°C) oven for 20 minutes.
- Reduce Heat & Continue Baking: After 20 minutes, reduce the oven temperature to 375°F (190°C). Continue baking for another 30-40 minutes, or until the crust is deeply golden brown and the filling is bubbling gently through the vents. If the crust edges start browning too quickly, you can shield them with strips of aluminum foil or a pie crust shield.
- Rest Before Serving: This is important! Once baked, carefully remove the pie from the oven and let it rest on a wire rack for at least 15-20 minutes (ideally 30 minutes) before slicing and serving. This allows the creamy filling to set slightly, making it easier to slice neatly.
Nutrition Facts (Estimated)
Nutritional information for homemade dishes is approximate and depends heavily on specific ingredients (e.g., fat content of milk/cream, type of chicken, exact crust thickness) and serving size.
- Servings: This recipe makes one 9-inch pie, typically serving 6-8 people.
- Calories Per Serving (Approximate): 550 – 750 calories per serving (based on 6 servings). This is an estimate for a rich, double-crust pie made with all butter and heavy cream. Using milk instead of cream and leaner chicken can reduce this.
Consider this a hearty, indulgent meal.
Preparation & Cook Time
Planning your time helps ensure a smooth cooking process:
- Crust Preparation & Chilling: 15 minutes active prep + Minimum 1 hour chilling (can be done days ahead)
- Filling Preparation: 30-40 minutes active cooking + 20-30 minutes cooling time
- Assembly: 15-20 minutes
- Baking Time: 50 – 60 minutes
- Resting Time: 15 – 30 minutes (Essential!)
- Total Time (Excluding initial chilling): Approximately 2 hours to 2 hours 30 minutes (with significant hands-off time during baking and resting)
- Total Time (Including 1 hour chilling): Approximately 3 hours to 3 hours 30 minutes
How to Serve Chicken Pot Pie
Chicken pot pie is a satisfying meal on its own, but simple sides can round it out beautifully:
- Keep it Simple: Often, the rich pie is all you need!
- Light Green Salad: A crisp salad with a bright vinaigrette (like lemon or balsamic) cuts through the richness perfectly. Think mixed greens, cucumber, and cherry tomatoes.
- Steamed Green Vegetables: Simple steamed broccoli, green beans, or asparagus add color and freshness without competing with the main dish. A little butter or lemon juice is all they need.
- Cranberry Sauce: The tartness of cranberry sauce (homemade or canned jellied/whole berry) provides a classic and delicious contrast, especially reminiscent of holiday meals.
- Fruit Salad: A light, refreshing fruit salad can be a nice counterpoint for dessert or alongside.
- Avoid Heavy Starches: Since the pie contains crust (and potentially potatoes), generally avoid serving it with other heavy starches like mashed potatoes or dinner rolls, unless you have very hungry eaters!
Tips for Pot Pie Perfection
Elevate your chicken pot pie from good to unforgettable with these tips:
- Cold is Key for Crust: Seriously cold butter and truly ice-cold water are non-negotiable for a flaky pie crust. Handle the dough as little as possible to prevent the butter from melting and to avoid developing too much gluten. If your kitchen is warm, chill your bowl and even your flour beforehand.
- Cool the Filling Completely: This is crucial for preventing a soggy bottom crust. Hot filling will melt the butter in the raw pastry before it can set in the oven. Letting the filling cool to lukewarm or room temperature makes a huge difference.
- Ensure Filling is Thick Enough: The filling should be thick and creamy, not watery. Cook the roux properly (1-2 minutes) and allow the sauce to simmer gently until it noticeably thickens. It will thicken slightly more as it cools and bakes. A thick filling also helps the slices hold their shape.
- Vent Generously: Don’t skimp on the steam vents in the top crust. They are essential for allowing steam to escape, preventing pressure buildup that can cause the filling to ooze out the sides or the crust to become soggy underneath. Make them decorative if you like!
- Bake Until Truly Golden and Bubbly: Don’t pull the pie too early. Look for a deep, even golden brown across the entire top crust, not just pale yellow. You should also see the filling gently bubbling through the vents – this indicates it’s hot all the way through. Baking on a lower rack for the first 20 minutes can help ensure the bottom crust cooks properly.
Frequently Asked Questions (FAQ)
Q1: Can I use leftover cooked chicken or turkey?
A: Absolutely! This recipe is perfect for using leftover roasted chicken or turkey (like after Thanksgiving). Simply shred or dice the cooked meat and add it in Step 6 of the filling instructions. You’ll need about 3 cups. Rotisserie chicken is also a fantastic time-saver.
Q2: Can I use frozen vegetables instead of fresh?
A: Yes, you can substitute frozen mixed vegetables (typically containing carrots, peas, corn, green beans) for the fresh carrots, celery, and peas. Add them directly to the sauce along with the chicken (Step 6 of filling) – they don’t need extensive pre-cooking like the fresh aromatics. You may want to still sauté the onion for its flavor base. Use about 2-3 cups of a frozen mix.
Q3: How can I make this chicken pot pie ahead of time?
A: You have a few options:
* Components: Make the pie dough up to 2 days ahead (refrigerated) or weeks ahead (frozen). Make the filling up to 1 day ahead and store covered in the fridge. Assemble just before baking (let filling warm slightly if very cold).
* Assemble Ahead: Assemble the entire pie (but don’t add egg wash yet), cover tightly with plastic wrap, and refrigerate for up to 24 hours. Add egg wash just before baking. You may need to add 5-10 minutes to the baking time if baking straight from the fridge.
Q4: Can I freeze chicken pot pie?
A: Yes! You can freeze it baked or unbaked.
* Unbaked: Assemble the pie completely in a freezer-safe dish (metal or foil pans work well). Do not add egg wash. Wrap tightly in plastic wrap, then foil. Freeze for up to 3 months. Bake directly from frozen (do not thaw) at 375°F (190°C), adding egg wash before baking if desired. It will likely need 20-30 minutes longer baking time than the recipe states. Cover with foil if browning too quickly.
* Baked: Let the baked pie cool completely. Wrap tightly in plastic wrap, then foil. Freeze for up to 3 months. Reheat individual slices or the whole pie (loosely covered with foil to prevent over-browning) in a 350°F (175°C) oven until heated through.
Q5: My bottom crust was soggy! How do I prevent that?
A: Soggy bottoms are a common pot pie frustration! Here’s how to combat it:
* Cool the Filling: As mentioned in the tips, this is the #1 preventative measure.
* Thicken Filling Adequately: A watery filling will soak the crust. Ensure your sauce is properly thickened.
* Bake on Lower Rack: Start baking the pie on the lower third oven rack for the first 20 minutes to give the bottom crust more direct heat. Then move it to the center rack.
* Use a Metal or Glass Pie Pan: These conduct heat better than some ceramic dishes, helping the bottom crust crisp up.
* Blind Bake (Optional/Advanced): For guaranteed crispness, you can partially blind bake the bottom crust before adding the filling. Line the chilled bottom crust with parchment paper, fill with pie weights or dried beans, bake at 400°F for 15 min, remove weights/paper, bake 5 min more, then cool slightly before adding filling and top crust. This adds extra steps but is very effective.

Double Crust Chicken Pot Pie recipe
Ingredients
For the All-Butter Double Pie Crust:
- All-Purpose Flour: 2 ½ cups (310g), plus more for dusting
- Salt: 1 teaspoon (6g)
- Unsalted Butter: 1 cup (2 sticks or 226g), very cold and cut into ½-inch cubes
- Ice Water: ½ cup (120ml), potentially up to ¾ cup (180ml) – must be ice cold
For the Creamy Chicken Filling:
- Unsalted Butter: 6 tablespoons (85g)
- Yellow Onion: 1 medium, finely chopped (about 1 cup)
- Carrots: 2 medium, peeled and diced (about ¾ cup)
- Celery: 2 stalks, diced (about ¾ cup)
- All-Purpose Flour: ½ cup (60g)
- Chicken Broth: 2 cups (480ml), low-sodium preferred, warm or room temperature
- Heavy Cream or Whole Milk: 1 cup (240ml), warm or room temperature (Heavy cream makes it richer)
- Salt: 1 ¼ teaspoons (7-8g), or to taste
- Black Pepper: ½ teaspoon freshly ground, or to taste
- Dried Thyme: ½ teaspoon (or 1 ½ teaspoons fresh thyme leaves)
- Cooked Chicken: 3 cups, shredded or cubed (rotisserie chicken or poached chicken breasts work perfectly)
- Frozen Peas: 1 cup (145g) – no need to thaw
- Fresh Parsley: 2 tablespoons, chopped (optional, for freshness)
Optional:
- Egg Wash: 1 large egg beaten with 1 tablespoon of water or milk (for a shiny, golden top crust)
- Diced Potatoes: 1 cup peeled and diced small (par-boil or sauté with other veggies until tender)
- Mushrooms: 8 oz sliced mushrooms, sautéed with the onions
Instructions
Part 1: Make the All-Butter Pie Crust
(This can be done up to 2 days ahead and refrigerated, or frozen for longer)
- Combine Dry Ingredients: In a large bowl, whisk together the 2 ½ cups of flour and 1 teaspoon of salt.
- Cut in the Butter: Add the cold butter cubes to the flour mixture. Using a pastry blender, two knives, or your fingertips, quickly cut the butter into the flour until the mixture resembles coarse meal with some pea-sized pieces of butter still visible. Work quickly to keep the butter cold. Large butter pieces = flaky layers.
- Add Ice Water: Sprinkle about ½ cup (120ml) of ice water over the mixture. Using a fork or your hands, gently mix until the dough just starts to come together. Don’t add all the water at once. If it seems too dry, add more ice water, 1 tablespoon at a time, mixing just until the dough holds together when squeezed. Do NOT overmix or knead the dough – this develops gluten and makes the crust tough.
- Divide and Chill: Turn the shaggy dough out onto a lightly floured surface. Gently bring it together into a cohesive mass (don’t knead!). Divide the dough in half and flatten each half into a 1-inch thick disk. Wrap each disk tightly in plastic wrap.
- Refrigerate: Chill the dough disks in the refrigerator for at least 1 hour (or up to 2 days) before rolling. This allows the gluten to relax and the fat to solidify, which is crucial for flakiness and makes the dough easier to handle.
Part 2: Prepare the Creamy Chicken Filling
(This can also be made a day ahead and refrigerated. Reheat gently before assembling or let come closer to room temp.)
- Sauté Aromatics: Melt the 6 tablespoons of butter in a large pot or Dutch oven over medium heat. Add the chopped onion, diced carrots, and diced celery. Cook, stirring occasionally, until the vegetables soften, about 8-10 minutes. (If adding mushrooms or potatoes, add them here and cook until tender/softened).
- Make the Roux: Sprinkle the ½ cup of flour over the cooked vegetables. Stir constantly and cook for 1-2 minutes. This cooks out the raw flour taste and forms a roux, which will thicken the sauce.
- Add Liquids Gradually: Slowly whisk in the warm chicken broth, a little at a time, ensuring there are no lumps. Once all the broth is incorporated and smooth, slowly whisk in the warm heavy cream or milk.
- Simmer and Thicken: Bring the mixture to a gentle simmer, stirring frequently. Reduce the heat to low and continue simmering, stirring often (especially the bottom to prevent scorching), until the sauce has thickened enough to coat the back of a spoon, about 5-8 minutes.
- Season and Add Fillings: Stir in the salt, black pepper, and dried thyme. Taste and adjust seasonings if needed – remember the chicken will add some savoriness, but the crust is plain, so the filling needs to be well-seasoned.
- Fold in Chicken and Peas: Remove the pot from the heat. Gently fold in the cooked chicken and frozen peas. Stir in the fresh parsley, if using.
- Cool Slightly: Set the filling aside to cool for at least 15-20 minutes (or longer if possible). Putting hot filling onto raw pastry can melt the butter and lead to a soggy bottom crust. Ideally, the filling should be lukewarm or room temperature.
Part 3: Assemble and Bake the Pot Pie
- Preheat Oven & Prepare Dish: Preheat your oven to 400°F (200°C). Have a standard 9-inch pie dish ready (glass, ceramic, or metal). You don’t typically need to grease it for a butter crust.
- Roll Bottom Crust: On a lightly floured surface, take one chilled dough disk. Roll it out from the center outwards into a circle about 12-13 inches in diameter and roughly ⅛-inch thick. Rotate the dough occasionally and add minimal flour as needed to prevent sticking.
- Line the Pie Dish: Carefully transfer the rolled-out dough to the pie dish. Gently press it into the bottom and up the sides, ensuring there are no air pockets. Trim the excess dough hanging over the edge, leaving about a ½-inch overhang.
- Add Filling: Pour the slightly cooled chicken filling into the pastry-lined dish, spreading it evenly.
- Roll Top Crust: Roll out the second disk of dough similarly to the first, large enough to cover the top of the pie (about 11-12 inches).
- Place Top Crust: Gently lay the top crust over the filling.
- Trim and Seal: Trim the top crust edge so it matches the overhang of the bottom crust (about ½ inch). Fold the edge of the top crust under the edge of the bottom crust. Press the edges together firmly to seal, then crimp decoratively using your fingers or the tines of a fork.
- Cut Vents: Using a sharp knife, cut several slits (at least 4-5) in the top crust. This allows steam to escape during baking, preventing the filling from bursting through the sides.
- Optional Egg Wash: For a shiny, deep golden crust, brush the top crust evenly with the prepared egg wash. Avoid letting it pool too much around the edges.
- Bake: Place the pie on a baking sheet (to catch any potential drips). Bake in the preheated 400°F (200°C) oven for 20 minutes.
- Reduce Heat & Continue Baking: After 20 minutes, reduce the oven temperature to 375°F (190°C). Continue baking for another 30-40 minutes, or until the crust is deeply golden brown and the filling is bubbling gently through the vents. If the crust edges start browning too quickly, you can shield them with strips of aluminum foil or a pie crust shield.
- Rest Before Serving: This is important! Once baked, carefully remove the pie from the oven and let it rest on a wire rack for at least 15-20 minutes (ideally 30 minutes) before slicing and serving. This allows the creamy filling to set slightly, making it easier to slice neatly.
Nutrition
- Serving Size: one normal portion
- Calories: 550 – 750


