

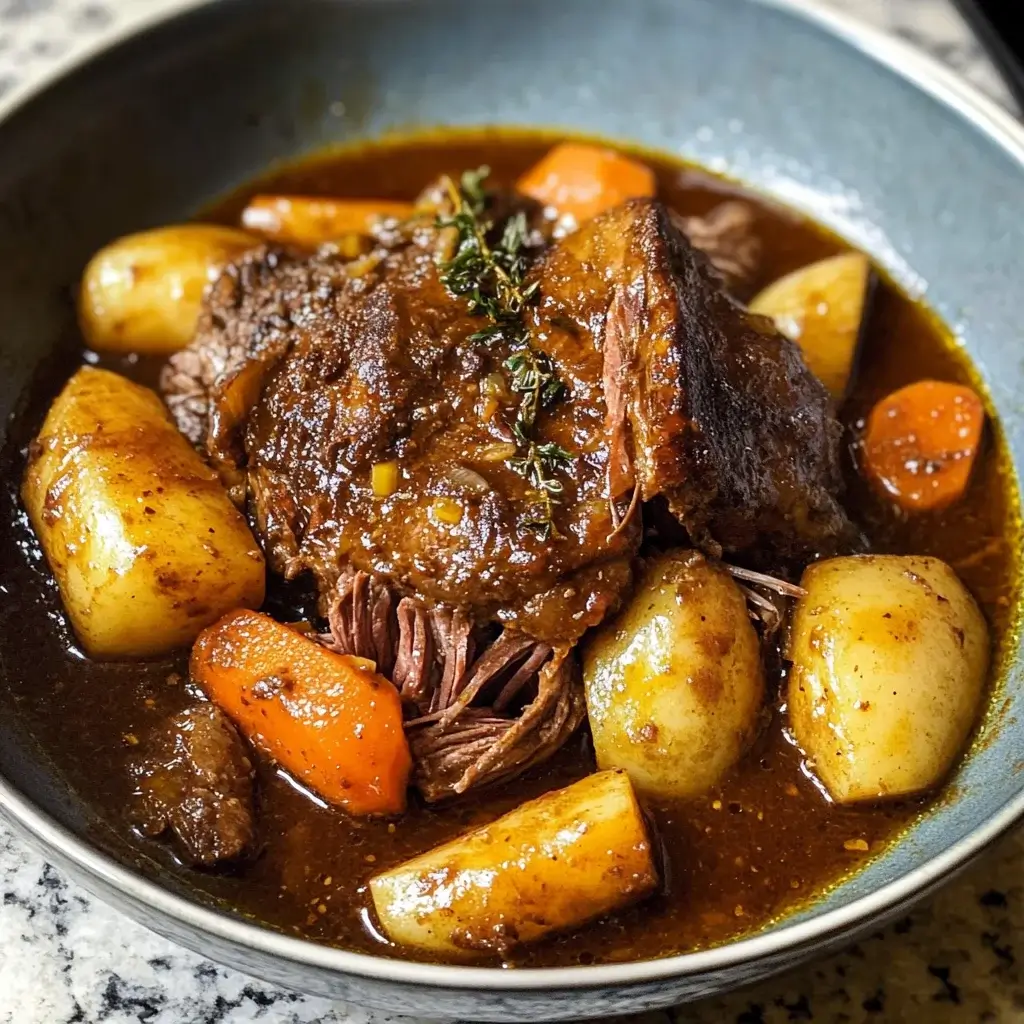
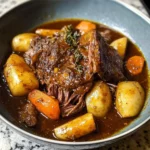
There’s a certain kind of magic that happens when a Classic Pot Roast is slowly braising, its rich, beefy aroma gradually filling every corner of the house. For me, it’s the scent of Sunday afternoons, of family gathered, of comfort and tradition all wrapped up in one delicious, steaming dish. I remember my grandmother’s pot roast, a legendary creation that was always fall-apart tender, swimming in a gravy so flavorful it could have been a meal in itself. She never used a fancy recipe, just intuition and love, but the results were consistently spectacular. Trying to replicate that perfect pot roast felt like a culinary quest for years. This recipe is the culmination of that journey – a classic approach that delivers incredibly tender meat, deeply flavored vegetables, and a luscious gravy that will have everyone reaching for a second helping (and a piece of bread to mop up the plate!). It’s the kind of meal that doesn’t just feed the body, but also warms the soul. And the best part? While it tastes like you’ve slaved away for hours, much of the cooking time is wonderfully hands-off.
Ingredients: The Heart and Soul of Your Pot Roast
Crafting the perfect Classic Pot Roast starts with selecting quality ingredients. Each element contributes to the layers of flavor and the tender, satisfying texture that makes this dish a timeless favorite.
For the Pot Roast:
- Boneless Beef Chuck Roast: 1 (3-4 lb / 1.4-1.8 kg) roast, preferably a well-marbled chuck eye, shoulder roast, or rump roast.
- All-Purpose Flour: ¼ cup (for dredging the beef)
- Kosher Salt: 2 teaspoons (or 1 ½ teaspoons table salt), divided
- Freshly Ground Black Pepper: 1 ½ teaspoons, divided
- Olive Oil or Vegetable Oil: 2-3 tablespoons (or bacon fat for extra richness)
Aromatic Vegetables (Mirepoix & Flavor Base):
- Yellow Onions: 2 large, coarsely chopped or thickly sliced
- Carrots: 3-4 medium, peeled and cut into 1-inch thick pieces (for flavor base, separate from those added later with potatoes if desired)
- Celery Ribs: 2-3, cut into 1-inch thick pieces
- Garlic: 4-6 cloves, smashed or roughly minced
- Tomato Paste: 2 tablespoons
Braising Liquid & Seasonings:
- Dry Red Wine (Optional but Recommended): 1 cup (such as Cabernet Sauvignon, Merlot, or Zinfandel). If omitting, replace with an equal amount of extra beef broth and 1 tablespoon of balsamic or red wine vinegar added at the end.
- Low-Sodium Beef Broth or Stock: 3-4 cups (enough to come about halfway up the roast)
- Worcestershire Sauce: 2 tablespoons
- Fresh Thyme Sprigs: 4-5 (or 1 teaspoon dried thyme)
- Fresh Rosemary Sprigs: 2-3 (or ½ teaspoon dried rosemary, crushed)
- Bay Leaves: 2
Hearty Vegetables (to be added later):
- Potatoes: 1.5 – 2 lbs (about 4-5 medium) Yukon Gold, red potatoes, or Russet potatoes, peeled (or scrubbed well if using thin-skinned varieties) and cut into 1.5 to 2-inch chunks
- Carrots: 3-4 large, peeled and cut into 1.5 to 2-inch chunks (if not adding all with the aromatics)
- Optional: Pearl Onions: 1 cup, peeled (can be added with potatoes and carrots)
For the Gravy (Optional, if needed):
- Cornstarch or All-Purpose Flour: 2 tablespoons (mixed with 3-4 tablespoons cold water to make a slurry)
- Butter (Optional for richness): 1-2 tablespoons
For Garnish (Optional):
- Fresh Parsley: 2-3 tablespoons, chopped
Instructions: Your Guide to Pot Roast Perfection
Patience and a few key techniques are all you need to transform a humble cut of beef into an extraordinary meal.
Step 1: Prepare and Sear the Beef (The Flavor Maximizer)
- Pat Dry & Season: Remove the chuck roast from its packaging and pat it thoroughly dry with paper towels. This is crucial for achieving a good sear.
- Season Generously: In a small bowl, combine the flour, 1 ½ teaspoons of kosher salt, and 1 teaspoon of black pepper. Rub this mixture all over the roast, ensuring all sides are coated.
- Heat Oil: Heat the olive oil (or fat of choice) in a large, heavy-bottomed Dutch oven or oven-safe pot over medium-high heat. The pot should be large enough to hold the roast and vegetables comfortably.
- Sear the Roast: Once the oil is hot and shimmering (but not smoking), carefully place the seasoned roast in the pot. Sear for 4-5 minutes per side, until a deep, rich brown crust forms on all sides, including the ends. Do not overcrowd or move the roast too much while searing. This browning process (Maillard reaction) is essential for developing deep flavor.
- Remove Roast: Once beautifully browned, remove the roast from the pot and set it aside on a clean plate.
Step 2: Build the Aromatic Base
- Sauté Aromatics: To the same pot (there should be rendered beef fat and browned bits), add the chopped onions, 1-inch carrot pieces (if using for flavor base), and celery. If the pot seems too dry, add another tablespoon of oil. Sauté over medium heat for 7-10 minutes, stirring occasionally, until the vegetables are softened and lightly caramelized. Scrape up any browned bits from the bottom of the pot as they cook.
- Add Garlic & Tomato Paste: Stir in the smashed or minced garlic and the tomato paste. Cook for another 1-2 minutes, stirring constantly, until the garlic is fragrant and the tomato paste darkens slightly. This “toasts” the tomato paste and deepens its umami flavor.
Step 3: Deglaze and Create the Braising Liquid
- Deglaze (if using wine): Pour the red wine into the pot. Bring it to a simmer, scraping the bottom of the pot vigorously with a wooden spoon or spatula to loosen all the flavorful browned bits (the “fond”). Let the wine simmer and reduce by about half, about 3-5 minutes. This concentrates its flavor.
- Add Broth & Seasonings: Return the seared roast (and any accumulated juices from the plate) to the pot, nestling it amongst the vegetables. Pour in the beef broth (it should come about halfway up the sides of the roast – don’t submerge it completely). Add the Worcestershire sauce, fresh thyme sprigs, fresh rosemary sprigs, and bay leaves. Sprinkle the remaining ½ teaspoon of kosher salt and ½ teaspoon of black pepper over the roast.
Step 4: The Slow Braise (Oven Method Preferred)
- Bring to Simmer: Bring the liquid in the pot to a gentle simmer on the stovetop.
- Oven Braise: Preheat your oven to 300-325°F (150-160°C). Once the liquid is simmering, cover the Dutch oven tightly with its lid (or with heavy-duty aluminum foil if your lid isn’t tight-fitting).
- Transfer to Oven: Carefully transfer the covered pot to the preheated oven.
- Cook Low and Slow: Braise for 2 hours.
Step 5: Add Hearty Vegetables
- Add Vegetables: After 2 hours of braising, carefully remove the pot from the oven. Arrange the chunked potatoes, carrots (the larger pieces for serving), and pearl onions (if using) around the roast in the braising liquid. If needed, add a little more beef broth to ensure the vegetables are mostly submerged but the roast is not fully covered.
- Continue Braising: Cover the pot again and return it to the oven. Continue to braise for another 1 to 1.5 hours, or until the roast is fork-tender (a fork should easily pierce and twist the meat with little resistance) and the vegetables are cooked through and tender. Total braising time will typically be 3-4 hours, depending on the size and thickness of your roast.
Step 6: Rest the Roast and Make Gravy
- Check for Tenderness: Test the roast. If it’s not easily shreddable with a fork, it needs more time. Cover and return to the oven for another 30 minutes, then check again.
- Rest the Roast: Once tender, carefully remove the roast and the cooked vegetables from the pot to a large serving platter or cutting board. Tent loosely with foil to keep warm. Let the roast rest for at least 15-20 minutes before slicing or shredding. This allows the juices to redistribute, resulting in more tender and flavorful meat.
- Prepare the Gravy: While the roast is resting, prepare the gravy from the remaining braising liquid in the pot.
- Strain (Optional but Recommended): For a smoother gravy, strain the liquid through a fine-mesh sieve into a saucepan or fat separator, pressing on the solids (onion, celery, herb sprigs) to extract all their flavor. Discard the solids.
- Skim Fat: Skim off any excess fat from the surface of the liquid using a spoon or a fat separator.
- Thicken (if needed): Bring the liquid to a simmer over medium heat. Taste and adjust seasoning (salt, pepper) if necessary. If you prefer a thicker gravy:
- Cornstarch Slurry: Whisk together 2 tablespoons of cornstarch with 3-4 tablespoons of cold water until smooth. Slowly whisk the slurry into the simmering liquid. Cook, whisking constantly, for 1-2 minutes until the gravy thickens to your desired consistency.
- Flour Slurry: Do the same with all-purpose flour, though it may need to simmer a bit longer to cook out any raw flour taste.
- Butter (Optional): For extra richness and shine, whisk in 1-2 tablespoons of cold butter at the very end, off the heat, until melted and incorporated.
Step 7: Serve
- Slice or Shred: After resting, slice the pot roast against the grain into thick slices, or shred it into large chunks using two forks.
- Assemble and Serve: Arrange the sliced or shredded pot roast on the platter with the cooked potatoes and carrots. Ladle a generous amount of the hot gravy over the meat and vegetables. Garnish with fresh chopped parsley, if desired. Serve immediately with any remaining gravy on the side.
Nutrition Facts (Estimated)
The nutritional information for Classic Pot Roast can vary significantly based on the specific cut of beef, portion size, amount of fat trimmed, and ingredients used in the gravy. These are general estimates.
- Servings: This recipe typically serves 6-8 people.
- Calories per Serving (approximate): 500-700 calories (this includes a portion of meat, vegetables, and gravy, but not additional sides like bread or extra mashed potatoes).
Estimated Nutritional Highlights (per serving):
- Protein: Very High (primarily from beef) – approximately 40-55g.
- Fat: Moderate to High (from beef, oil, and possibly butter in gravy) – approximately 25-40g. The fat content can be reduced by choosing leaner chuck cuts, trimming visible fat thoroughly, and diligently skimming fat from the braising liquid.
- Saturated Fat: Significant, mainly from the beef.
- Carbohydrates: Moderate (from vegetables, flour for dredging, and thickener for gravy) – approximately 25-35g.
- Fiber: Good source (from vegetables) – approximately 4-6g.
- Sodium: Can be managed by using low-sodium beef broth and adjusting added salt. The estimate here assumes low-sodium broth.
Considerations:
- Trimming Fat: Thoroughly trimming visible fat from the roast before cooking can significantly reduce the overall fat and calorie content.
- Gravy: The amount of fat skimmed and the type/amount of thickener used will impact the gravy’s nutritional profile.
- Portion Control: Being mindful of portion sizes is key.
Classic Pot Roast is a hearty, nutrient-dense meal, rich in protein, B vitamins (especially B12), iron, and zinc from the beef, as well as vitamins and minerals from the vegetables.
Preparation and Cook Time: A Labor of Love (Mostly Hands-Off!)
While “Classic Pot Roast” sounds like an all-day affair, much of the time involved is hands-off braising, allowing you to attend to other things while deliciousness develops.
- Preparation Time: Approximately 30-40 minutes
- Chopping vegetables: 10-15 minutes
- Preparing and searing the roast: 15-20 minutes
- Sautéing aromatics and deglazing: 5-10 minutes
- Cook Time (Braising): Approximately 3-4 hours (depending on roast size and oven temperature)
- Initial braise before adding vegetables: 2 hours
- Braise with vegetables: 1 – 1.5 hours
- Resting & Gravy Making Time: Approximately 20-30 minutes
- Total Time: Approximately 4 to 5 hours
This recipe is perfect for a lazy weekend afternoon when you can let the oven do most of the work, filling your home with irresistible aromas.
How to Serve: Accompanying Your Masterpiece
Serving Classic Pot Roast is all about comfort and soaking up that incredible gravy. Here are some traditional and delightful ways to present your meal:
- The Essential Gravy: Always serve with plenty of the rich, homemade gravy. Have a gravy boat on the table for easy access.
- On its Own: The tender meat and hearty vegetables cooked in the pot (potatoes, carrots) often make it a complete meal in a bowl.
- Classic Pairings for Soaking up Gravy:
- Mashed Potatoes: Creamy mashed potatoes are a classic accompaniment, perfect for catching every drop of gravy.
- Crusty Bread or Dinner Rolls: Essential for mopping up the plate. Sourdough, a good baguette, or soft dinner rolls work wonderfully.
- Egg Noodles: Wide, buttered egg noodles provide a comforting bed for the pot roast and gravy.
- Rice Pilaf or Steamed Rice: A simple rice dish can also be a great base.
- Fresh Contrasts:
- Simple Green Salad: A crisp salad with a tangy vinaigrette can offer a refreshing balance to the richness of the roast.
- Steamed Green Beans or Asparagus: A side of bright green vegetables adds color and a lighter touch.
- Horseradish Sauce: A dollop of creamy or sharp horseradish sauce on the side provides a zesty kick that complements the rich beef.
- Presentation:
- Family Style: Arrange the sliced or shredded roast on a large platter, surrounded by the cooked vegetables, and pour some gravy over the top.
- Individual Plates: Serve individual portions with a generous ladle of gravy.
- Garnish: A sprinkle of fresh chopped parsley adds a touch of color and freshness right before serving.
No matter how you serve it, Classic Pot Roast is a meal that signals warmth, generosity, and satisfying flavor.
Additional Tips for Pot Roast Perfection
Elevate your Classic Pot Roast from great to unforgettable with these tried-and-true tips:
- Choose the Right Cut of Beef: The success of your pot roast hinges on selecting a cut with good marbling and connective tissue. Chuck roast (from the shoulder) is king. Look for chuck eye roast, shoulder steak, blade roast, or seven-bone roast. Brisket (flat cut, trimmed) or bottom round (rump roast) can also be used, but chuck generally yields the most tender and flavorful results due to its collagen content, which breaks down into gelatin during slow cooking, making the meat moist and the gravy rich.
- Don’t Rush the Sear: Achieving a deep, dark brown crust on all sides of the roast (Maillard reaction) is paramount for flavor. Use medium-high heat, don’t overcrowd the pan (sear in batches if your pot is too small for other ingredients to fit later, though for a single roast, it should fit), and resist the urge to move the meat around until a good crust has formed. This step alone adds incredible depth to the final dish.
- Embrace Low and Slow Cooking: Pot roast is not a dish to be hurried. Low oven temperatures (300-325°F or 150-160°C) and a long cooking time are essential for breaking down the tough connective tissues in the beef, rendering it exceptionally tender. If the meat is tough, it likely hasn’t cooked long enough.
- Don’t Drown the Roast: The braising liquid should typically come about halfway up the sides of the roast, not fully submerge it. This allows the top of the roast to brown further and concentrate its flavors, while the bottom simmers gently in the liquid.
- Rest is Best: Always let the cooked pot roast rest for at least 15-20 minutes, tented loosely with foil, before slicing or shredding. This allows the muscle fibers to relax and reabsorb their juices, resulting in a significantly more tender and flavorful roast. Slicing too soon will cause the delicious juices to run out onto the cutting board.
FAQ: Your Pot Roast Questions Answered
Here are answers to some common questions that arise when making a Classic Pot Roast, ensuring you have all the information for a successful outcome.
Q1: Can I make this pot roast in a slow cooker (Crock-Pot)?
- A: Yes, a slow cooker is excellent for pot roast!
- Follow Steps 1-3 (searing the beef, sautéing aromatics, deglazing) on the stovetop in a separate skillet or your slow cooker insert if it’s stovetop safe. Do not skip the searing step, as it’s crucial for flavor.
- Transfer the seared roast, sautéed vegetables, and deglazing liquids to the slow cooker.
- Add the broth (you might need slightly less than for oven braising, aim for it to come about halfway up the roast), Worcestershire sauce, and herbs.
- Cook on LOW for 7-9 hours or on HIGH for 4-5 hours, until the roast is tender.
- Add the potatoes and carrots (and pearl onions, if using) during the last 1.5-2 hours of cooking on LOW, or the last hour on HIGH.
- Once cooked, remove the roast and vegetables, and make the gravy from the slow cooker liquid, thickening it on the stovetop or directly in the slow cooker if it has a sauté function.
Q2: My pot roast is tough. What did I do wrong?
- A: Tough pot roast is usually due to one of two things (or both):
- Not Cooked Long Enough: The most common reason. Tough cuts like chuck roast need long, slow cooking to break down connective tissue (collagen) into tender gelatin. If it’s tough, it probably needs more time. Cover it and continue cooking, checking every 30-45 minutes.
- Cooked at Too High a Temperature: Cooking too quickly or at too high a heat can cause the muscle fibers to seize up and become tough. Low and slow is the mantra.
- Wrong Cut of Meat: Using a lean cut not suited for braising (like sirloin or tenderloin) will result in dry, tough meat.
- Not Resting: Slicing the meat immediately after removing it from the oven can make it seem tougher as juices escape.
Q3: How do I know when the pot roast is truly done?
- A: The “fork-tender” test is your best indicator. The roast is done when you can easily insert a fork into the thickest part and twist it, and the meat readily pulls apart with little to no resistance. It should be exceptionally tender. An internal temperature of around 200-205°F (93-96°C) is usually when the collagen has fully broken down, but the texture test is more reliable than temperature alone for pot roast.
Q4: Can I use different vegetables or add them at different times?
- A: Absolutely! Pot roast is very adaptable.
- Other Root Vegetables: Parsnips, turnips, or rutabagas can be added along with the potatoes and carrots. They generally require a similar cooking time.
- Softer Vegetables: Mushrooms (cremini, button) can be added with the potatoes and carrots or even sautéed with the onions at the beginning. Celery can be added in larger chunks with the potatoes if you want it less broken down than the mirepoix celery.
- Timing: If you prefer your vegetables (especially carrots) to be firmer, you can add them a bit later, perhaps during the last hour of cooking. Potatoes generally need at least an hour to become tender.
Q5: What can I use instead of red wine for deglazing?
- A: If you prefer not to use red wine, you have several good options:
- Extra Beef Broth: Simply use an additional cup of beef broth to deglaze the pan.
- Beef Broth + Acidity: To mimic some of the complexity wine adds, use beef broth for deglazing and then consider adding 1 tablespoon of balsamic vinegar, red wine vinegar, or even a teaspoon of apple cider vinegar to the braising liquid towards the end of cooking or into the gravy.
- Unsweetened Grape or Cranberry Juice: A small amount (e.g., ¼ to ½ cup) can add some fruitiness, but be mindful of the sweetness it might impart.
The primary role of the wine is to add depth, acidity, and help lift the browned bits; these alternatives can help achieve a similar effect.
Classic Pot Roast recipe
Ingredients
For the Pot Roast:
-
- Boneless Beef Chuck Roast: 1 (3-4 lb / 1.4-1.8 kg) roast, preferably a well-marbled chuck eye, shoulder roast, or rump roast.
-
- All-Purpose Flour: ¼ cup (for dredging the beef)
-
- Kosher Salt: 2 teaspoons (or 1 ½ teaspoons table salt), divided
-
- Freshly Ground Black Pepper: 1 ½ teaspoons, divided
-
- Olive Oil or Vegetable Oil: 2-3 tablespoons (or bacon fat for extra richness)
Aromatic Vegetables (Mirepoix & Flavor Base):
-
- Yellow Onions: 2 large, coarsely chopped or thickly sliced
-
- Carrots: 3-4 medium, peeled and cut into 1-inch thick pieces (for flavor base, separate from those added later with potatoes if desired)
-
- Celery Ribs: 2-3, cut into 1-inch thick pieces
-
- Garlic: 4-6 cloves, smashed or roughly minced
-
- Tomato Paste: 2 tablespoons
Braising Liquid & Seasonings:
-
- Dry Red Wine (Optional but Recommended): 1 cup (such as Cabernet Sauvignon, Merlot, or Zinfandel). If omitting, replace with an equal amount of extra beef broth and 1 tablespoon of balsamic or red wine vinegar added at the end.
-
- Low-Sodium Beef Broth or Stock: 3-4 cups (enough to come about halfway up the roast)
-
- Worcestershire Sauce: 2 tablespoons
-
- Fresh Thyme Sprigs: 4-5 (or 1 teaspoon dried thyme)
-
- Fresh Rosemary Sprigs: 2-3 (or ½ teaspoon dried rosemary, crushed)
-
- Bay Leaves: 2
Hearty Vegetables (to be added later):
-
- Potatoes: 1.5 – 2 lbs (about 4-5 medium) Yukon Gold, red potatoes, or Russet potatoes, peeled (or scrubbed well if using thin-skinned varieties) and cut into 1.5 to 2-inch chunks
-
- Carrots: 3-4 large, peeled and cut into 1.5 to 2-inch chunks (if not adding all with the aromatics)
-
- Optional: Pearl Onions: 1 cup, peeled (can be added with potatoes and carrots)
For the Gravy (Optional, if needed):
-
- Cornstarch or All-Purpose Flour: 2 tablespoons (mixed with 3-4 tablespoons cold water to make a slurry)
-
- Butter (Optional for richness): 1-2 tablespoons
For Garnish (Optional):
-
- Fresh Parsley: 2-3 tablespoons, chopped
Instructions
Step 1: Prepare and Sear the Beef (The Flavor Maximizer)
-
- Pat Dry & Season: Remove the chuck roast from its packaging and pat it thoroughly dry with paper towels. This is crucial for achieving a good sear.
-
- Season Generously: In a small bowl, combine the flour, 1 ½ teaspoons of kosher salt, and 1 teaspoon of black pepper. Rub this mixture all over the roast, ensuring all sides are coated.
-
- Heat Oil: Heat the olive oil (or fat of choice) in a large, heavy-bottomed Dutch oven or oven-safe pot over medium-high heat. The pot should be large enough to hold the roast and vegetables comfortably.
-
- Sear the Roast: Once the oil is hot and shimmering (but not smoking), carefully place the seasoned roast in the pot. Sear for 4-5 minutes per side, until a deep, rich brown crust forms on all sides, including the ends. Do not overcrowd or move the roast too much while searing. This browning process (Maillard reaction) is essential for developing deep flavor.
-
- Remove Roast: Once beautifully browned, remove the roast from the pot and set it aside on a clean plate.
Step 2: Build the Aromatic Base
-
- Sauté Aromatics: To the same pot (there should be rendered beef fat and browned bits), add the chopped onions, 1-inch carrot pieces (if using for flavor base), and celery. If the pot seems too dry, add another tablespoon of oil. Sauté over medium heat for 7-10 minutes, stirring occasionally, until the vegetables are softened and lightly caramelized. Scrape up any browned bits from the bottom of the pot as they cook.
-
- Add Garlic & Tomato Paste: Stir in the smashed or minced garlic and the tomato paste. Cook for another 1-2 minutes, stirring constantly, until the garlic is fragrant and the tomato paste darkens slightly. This “toasts” the tomato paste and deepens its umami flavor.
Step 3: Deglaze and Create the Braising Liquid
-
- Deglaze (if using wine): Pour the red wine into the pot. Bring it to a simmer, scraping the bottom of the pot vigorously with a wooden spoon or spatula to loosen all the flavorful browned bits (the “fond”). Let the wine simmer and reduce by about half, about 3-5 minutes. This concentrates its flavor.
-
- Add Broth & Seasonings: Return the seared roast (and any accumulated juices from the plate) to the pot, nestling it amongst the vegetables. Pour in the beef broth (it should come about halfway up the sides of the roast – don’t submerge it completely). Add the Worcestershire sauce, fresh thyme sprigs, fresh rosemary sprigs, and bay leaves. Sprinkle the remaining ½ teaspoon of kosher salt and ½ teaspoon of black pepper over the roast.
Step 4: The Slow Braise (Oven Method Preferred)
-
- Bring to Simmer: Bring the liquid in the pot to a gentle simmer on the stovetop.
-
- Oven Braise: Preheat your oven to 300-325°F (150-160°C). Once the liquid is simmering, cover the Dutch oven tightly with its lid (or with heavy-duty aluminum foil if your lid isn’t tight-fitting).
-
- Transfer to Oven: Carefully transfer the covered pot to the preheated oven.
-
- Cook Low and Slow: Braise for 2 hours.
Step 5: Add Hearty Vegetables
-
- Add Vegetables: After 2 hours of braising, carefully remove the pot from the oven. Arrange the chunked potatoes, carrots (the larger pieces for serving), and pearl onions (if using) around the roast in the braising liquid. If needed, add a little more beef broth to ensure the vegetables are mostly submerged but the roast is not fully covered.
-
- Continue Braising: Cover the pot again and return it to the oven. Continue to braise for another 1 to 1.5 hours, or until the roast is fork-tender (a fork should easily pierce and twist the meat with little resistance) and the vegetables are cooked through and tender. Total braising time will typically be 3-4 hours, depending on the size and thickness of your roast.
Step 6: Rest the Roast and Make Gravy
-
- Check for Tenderness: Test the roast. If it’s not easily shreddable with a fork, it needs more time. Cover and return to the oven for another 30 minutes, then check again.
-
- Rest the Roast: Once tender, carefully remove the roast and the cooked vegetables from the pot to a large serving platter or cutting board. Tent loosely with foil to keep warm. Let the roast rest for at least 15-20 minutes before slicing or shredding. This allows the juices to redistribute, resulting in more tender and flavorful meat.
-
- Prepare the Gravy: While the roast is resting, prepare the gravy from the remaining braising liquid in the pot.
-
- Strain (Optional but Recommended): For a smoother gravy, strain the liquid through a fine-mesh sieve into a saucepan or fat separator, pressing on the solids (onion, celery, herb sprigs) to extract all their flavor. Discard the solids.
-
- Skim Fat: Skim off any excess fat from the surface of the liquid using a spoon or a fat separator.
-
- Thicken (if needed): Bring the liquid to a simmer over medium heat. Taste and adjust seasoning (salt, pepper) if necessary. If you prefer a thicker gravy:
-
- Cornstarch Slurry: Whisk together 2 tablespoons of cornstarch with 3-4 tablespoons of cold water until smooth. Slowly whisk the slurry into the simmering liquid. Cook, whisking constantly, for 1-2 minutes until the gravy thickens to your desired consistency.
-
- Flour Slurry: Do the same with all-purpose flour, though it may need to simmer a bit longer to cook out any raw flour taste.
-
- Butter (Optional): For extra richness and shine, whisk in 1-2 tablespoons of cold butter at the very end, off the heat, until melted and incorporated.
-
- Thicken (if needed): Bring the liquid to a simmer over medium heat. Taste and adjust seasoning (salt, pepper) if necessary. If you prefer a thicker gravy:
-
- Prepare the Gravy: While the roast is resting, prepare the gravy from the remaining braising liquid in the pot.
Step 7: Serve
-
- Slice or Shred: After resting, slice the pot roast against the grain into thick slices, or shred it into large chunks using two forks.
-
- Assemble and Serve: Arrange the sliced or shredded pot roast on the platter with the cooked potatoes and carrots. Ladle a generous amount of the hot gravy over the meat and vegetables. Garnish with fresh chopped parsley, if desired. Serve immediately with any remaining gravy on the side.
Nutrition
- Serving Size: one normal portion
- Calories: 500-700
- Fat: 25-40g
- Carbohydrates: 25-35g.
- Fiber: 4-6g
- Protein: 40-55g.


