

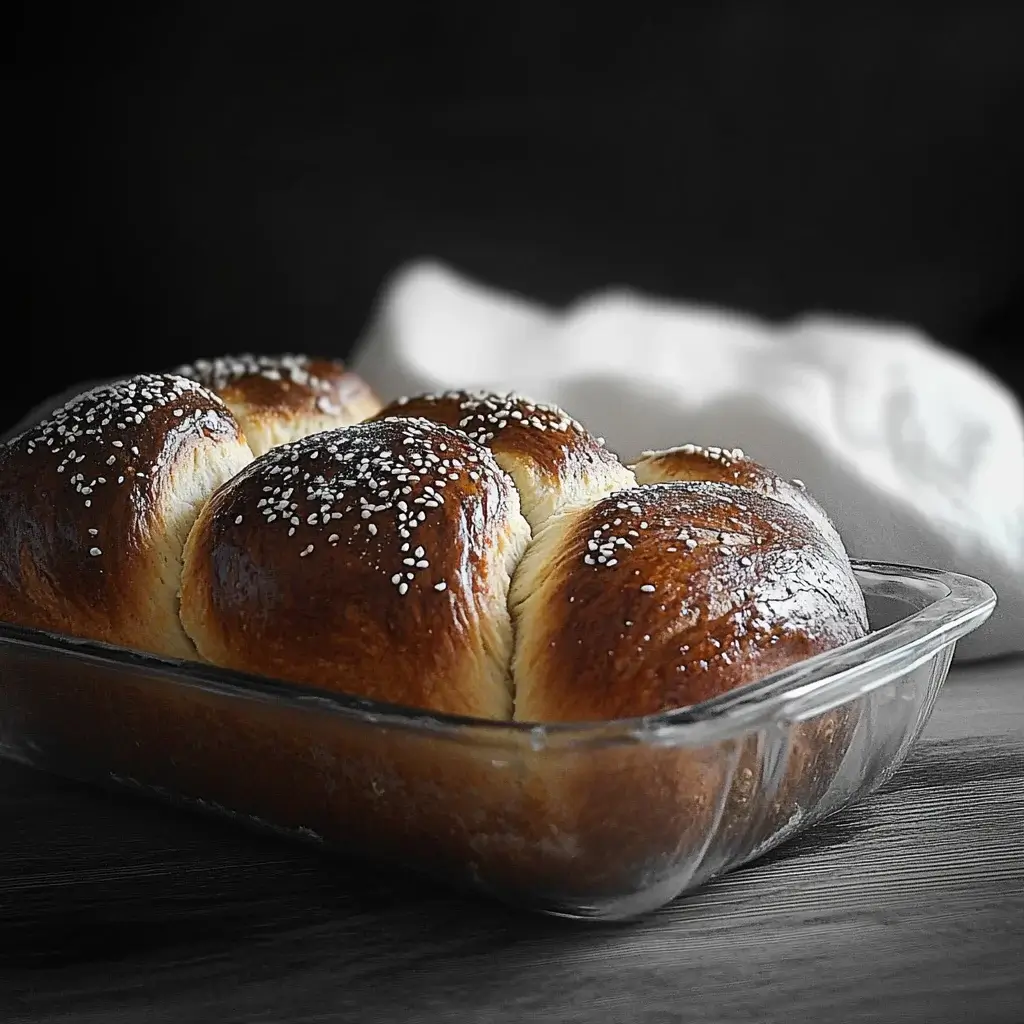
The aroma of freshly baked bread wafting through the house is a universal comfort, but there’s something particularly magical about the scent of challah. For my family, challah isn’t just bread; it’s a symbol of warmth, tradition, and togetherness. Every Friday afternoon, as the sun begins to dip lower, my kitchen transforms into a haven of flour and yeast. The rhythmic kneading, the gentle proofing, and finally, the golden-brown braid emerging from the oven – it’s a ritual we cherish. And the taste? Oh, the taste! Slightly sweet, wonderfully eggy, with a soft, pillowy texture that’s perfect for tearing apart and sharing. Whether dipped in honey, slathered with butter, or simply enjoyed on its own, this homemade challah bread recipe has become a beloved staple in our home, bringing joy and deliciousness to every Shabbat dinner and beyond. If you’re looking to fill your home with the same comforting aroma and create a bread that’s as beautiful as it is delicious, then you’ve come to the right place. Let’s embark on this rewarding journey of baking your very own challah bread!
Ingredients: The Building Blocks of Your Perfect Challah
Crafting the perfect challah bread begins with selecting high-quality ingredients and understanding their role in this delightful recipe. Each component plays a crucial part in achieving the signature texture, flavor, and beautiful golden hue that defines authentic challah. Let’s delve into each ingredient and explore why they are essential for baking a truly exceptional loaf:
- All-Purpose Flour (or Bread Flour): 4 ½ cups (approximately 540 grams). Flour is the backbone of any bread, and for challah, you have a couple of excellent options. All-purpose flour will yield a wonderfully soft and tender challah, perfect for everyday enjoyment. However, for a slightly chewier texture and a bit more structure, bread flour is a fantastic choice due to its higher protein content. This protein develops gluten, which is crucial for the bread’s elasticity and rise. Choosing between all-purpose and bread flour depends on your personal preference for texture; both will create a delicious challah. Ensure your flour is fresh and properly stored for optimal results.
- Active Dry Yeast: 2 ¼ teaspoons (or one ¼-ounce packet). Yeast is the magical ingredient that brings bread to life. It’s a living organism that feeds on sugar and releases carbon dioxide, causing the dough to rise and become light and airy. Active dry yeast needs to be “proofed” or activated in warm water with a touch of sugar before being added to the rest of the ingredients. This step ensures that your yeast is alive and ready to work its magic. Fresh yeast can also be used, but active dry yeast is readily available and reliable for home bakers. Using the correct amount of yeast is vital; too little, and your challah may not rise sufficiently, resulting in a dense loaf. Too much yeast can lead to a rapid rise and potentially a collapse of the gluten structure.
- Granulated Sugar: ¼ cup (50 grams). Sugar in challah serves multiple purposes. Firstly, it feeds the yeast, providing the necessary energy for fermentation and the rising process. Secondly, it adds a subtle sweetness to the bread, which is a characteristic flavor profile of challah. Lastly, sugar contributes to the golden-brown color of the crust during baking through a process called caramelization and the Maillard reaction. While granulated sugar is traditional, you can also experiment with other sweeteners like honey or maple syrup for a slightly different flavor profile, though adjustments to liquid content may be needed.
- Warm Water: ¾ cup (180 ml), lukewarm, about 105-115°F (40-46°C). Warm water is crucial for activating the active dry yeast. The temperature is important; too cold, and the yeast won’t activate; too hot, and it will be killed. Using a thermometer ensures the water is at the ideal temperature range. This warm water also hydrates the flour, initiating the gluten development process. The water should be clean and filtered if your tap water has a strong chlorine taste.
- Large Eggs: 4 large eggs, plus 1 egg for egg wash. Eggs are a signature ingredient in challah bread, contributing significantly to its rich flavor, tender texture, and vibrant yellow color. They add richness, moisture, and protein to the dough, enhancing its structure and elasticity. Using whole eggs in the dough, and an additional egg for the egg wash, creates the classic challah characteristics. Make sure your eggs are fresh and at room temperature for better emulsification and incorporation into the dough. The egg wash, applied before baking, is what gives challah its beautiful glossy sheen and deep golden-brown crust.
- Vegetable Oil (or Canola Oil): ¼ cup (60 ml). Oil in challah adds moisture and tenderness, contributing to a soft crumb and preventing the bread from becoming dry. Vegetable or canola oil are neutral-flavored oils that work well in baking, allowing the other flavors to shine through. You can also use olive oil for a slightly richer flavor, but be mindful that it can impart a subtle olive oil taste. Melted unsalted butter can also be used for an even richer, more decadent challah, though it will slightly alter the texture.
- Salt: 1 ½ teaspoons. Salt is a critical ingredient in bread making, often underestimated. It doesn’t just add flavor; it also controls the yeast activity, strengthens the gluten structure, and enhances the overall texture of the bread. Salt slows down the fermentation process, preventing the dough from rising too quickly and becoming weak. It also tightens the gluten strands, giving the challah structure and chewiness. Using the correct amount of salt is essential; too little, and the bread can be bland and the yeast activity uncontrolled. Too much salt can inhibit yeast activity and result in a dense loaf. Use fine sea salt or table salt, ensuring it’s evenly distributed throughout the dough.
- Optional Toppings: Sesame seeds, poppy seeds, everything bagel seasoning, or coarse sugar. Toppings are optional but highly recommended for adding visual appeal and extra flavor to your challah. Sesame seeds are a classic choice, providing a nutty flavor and delicate crunch. Poppy seeds offer a slightly earthy and nutty taste. Everything bagel seasoning adds a savory and flavorful crust. Coarse sugar adds a touch of sweetness and a beautiful sparkle. Choose your favorite toppings or get creative and experiment with different combinations to personalize your challah.
By carefully selecting and measuring each ingredient, you are setting the stage for baking a truly magnificent challah. Understanding the role of each component empowers you to adjust and adapt the recipe to your preferences while ensuring a delicious and successful outcome every time.
Instructions: Step-by-Step Guide to Baking Perfect Challah
Baking challah is a rewarding process, and while it might seem a bit daunting at first, following these detailed step-by-step instructions will guide you through each stage, ensuring a beautiful and delicious loaf every time. From activating the yeast to the final golden bake, let’s embark on this baking journey together:
- Proof the Yeast: In a large mixing bowl, combine the warm water (105-115°F/40-46°C) and granulated sugar. Sprinkle the active dry yeast over the water and sugar mixture. Let it stand for 5-10 minutes, or until the yeast becomes foamy and bubbly. This step, known as proofing, confirms that your yeast is active and ready to leaven the dough. The foaminess is a sign that the yeast is feeding on the sugar and producing carbon dioxide. If the yeast doesn’t foam, it might be expired or the water temperature was incorrect, and you may need to start with fresh yeast.
- Combine Wet Ingredients: Once the yeast is proofed, add the vegetable oil and 4 large eggs to the bowl with the yeast mixture. Whisk these wet ingredients together until they are well combined. Ensure the eggs are fully incorporated into the yeast mixture, creating a homogenous liquid base for your dough. Using room temperature eggs helps them emulsify more easily with the other ingredients.
- Incorporate Dry Ingredients: In a separate large bowl, whisk together the all-purpose flour (or bread flour) and salt. This step ensures that the salt is evenly distributed throughout the flour. Gradually add the dry ingredients to the wet ingredients, mixing with a wooden spoon or spatula until a shaggy dough forms. Start by adding about half of the flour mixture and mix until combined, then add the remaining flour gradually, mixing until just incorporated. Be careful not to overmix at this stage.
- Knead the Dough: Turn the dough out onto a lightly floured surface. Knead the dough for 8-10 minutes, or until it becomes smooth, elastic, and slightly tacky but not sticky. Kneading is a crucial step in developing the gluten, which gives challah its characteristic texture. Use the heel of your hand to push the dough away from you, fold it in half, and turn it 90 degrees. Repeat this process rhythmically. If the dough is too sticky, add a little flour, one tablespoon at a time. The dough is properly kneaded when it springs back when gently poked and passes the “windowpane test” (you can stretch a small piece of dough into a thin, translucent membrane without it tearing).
- First Rise (Bulk Fermentation): Place the kneaded dough in a lightly oiled bowl, turning to coat all sides. Cover the bowl with plastic wrap or a clean kitchen towel. Let the dough rise in a warm, draft-free place for 1-1.5 hours, or until it has doubled in size. This first rise, also known as bulk fermentation, allows the yeast to further develop flavor and create air pockets within the dough. A warm environment (around 75-80°F/24-27°C) is ideal for proofing. You can place the bowl in a slightly warmed oven (turned off) or a warm corner of your kitchen.
- Punch Down and Divide: Once the dough has doubled in size, gently punch it down to release the air. Turn the dough out onto a lightly floured surface. Divide the dough into 6 equal pieces for a classic 6-strand braid. For a round challah, you might divide it into fewer pieces or keep it whole, depending on the desired shape and size. Accurate division ensures even baking and a visually appealing braid.
- Shape the Strands: Roll each piece of dough into a long rope, about 12-14 inches long and 1 inch thick. Ensure the ropes are relatively even in thickness for a uniform braid. If the dough is resisting being rolled out, let it rest for a few minutes to relax the gluten.
- Braid the Challah: There are various braiding techniques for challah, from simple 3-strand braids to more intricate 6-strand braids and beyond. For a 6-strand braid, pinch the six ropes together at one end. Braid the strands by following a pattern (e.g., starting from the right: strand 6 over 2, strand 1 under 5, strand 3 over 6, strand 2 under 4, strand 5 over 3). Repeat this pattern until you reach the end of the ropes. Pinch the ends together to seal the braid. You can find numerous visual tutorials online for different braiding techniques. Don’t worry if your first braid isn’t perfect; practice makes perfect!
- Second Rise (Proofing): Carefully transfer the braided challah to a baking sheet lined with parchment paper. Cover loosely with plastic wrap or a clean kitchen towel. Let the challah rise again in a warm, draft-free place for 45-60 minutes, or until it has almost doubled in size and looks puffy. This second rise, or proofing, is crucial for achieving a light and airy texture in the final baked bread. The dough should be noticeably softer and more voluminous after the second rise.
- Preheat Oven and Prepare Egg Wash: Preheat your oven to 350°F (175°C). In a small bowl, whisk together the remaining egg with a tablespoon of water to make an egg wash. The egg wash will give the challah a beautiful glossy shine and enhance its golden-brown color during baking.
- Egg Wash and Toppings: Gently brush the entire surface of the proofed challah with the egg wash, ensuring you cover all crevices and braids. If desired, sprinkle your chosen toppings (sesame seeds, poppy seeds, etc.) evenly over the egg-washed challah. Apply the egg wash gently to avoid deflating the proofed dough.
- Bake: Bake the challah in the preheated oven for 30-35 minutes, or until it is golden brown and sounds hollow when tapped on the bottom. The baking time may vary slightly depending on your oven and the size of your challah. Use a toothpick or cake tester inserted into the center to check for doneness; it should come out clean.
- Cool and Enjoy: Once baked, carefully remove the challah from the oven and transfer it to a wire rack to cool completely before slicing and serving. Cooling on a wire rack prevents the bottom of the challah from becoming soggy. While it’s tempting to slice into it right away, allowing it to cool slightly will improve its texture and make it easier to slice.
Following these detailed instructions will empower you to bake a stunning and delicious challah bread that will impress your family and friends. Each step is designed to build upon the previous one, creating a loaf that is both beautiful and flavorful. Enjoy the process and the wonderful aroma that fills your home!
Nutrition Facts: A Delightful Treat in Moderation
Challah bread is a rich and satisfying bread, offering a delightful taste and texture experience. Understanding its nutritional profile can help you enjoy it as part of a balanced diet. Please note that these are approximate values and can vary slightly based on ingredient variations and serving size.
Serving Size: 1 slice (approximately 1/12 of the loaf)
Approximate Nutritional Information per Serving:
- Calories: 220-250 kcal
- Total Fat: 8-10 grams
- Saturated Fat: 1.5-2 grams
- Unsaturated Fat: 6.5-8 grams
- Cholesterol: 50-60 mg
- Sodium: 200-250 mg
- Total Carbohydrates: 30-35 grams
- Dietary Fiber: 1-2 grams
- Sugars: 5-7 grams
- Protein: 5-6 grams
Key Nutritional Highlights:
- Energy Source: Challah is a good source of carbohydrates, providing energy for your body.
- Protein Content: It offers a moderate amount of protein, contributing to satiety and muscle building.
- Fat Content: The fat content comes primarily from eggs and oil, contributing to the bread’s richness and tenderness. A portion of this fat is unsaturated fat, which is considered healthier than saturated fat.
- Sodium: Challah contains sodium, which is essential for bodily functions but should be consumed in moderation as part of a balanced diet.
- Vitamins and Minerals: While not a primary source, challah does contain some vitamins and minerals from eggs and flour, such as B vitamins and iron.
Important Considerations:
- Calorie Density: Challah is relatively calorie-dense due to its richness. Portion control is key when enjoying it as part of a balanced diet.
- Carbohydrate Content: Individuals managing blood sugar levels should be mindful of the carbohydrate content and consider pairing challah with protein and fiber-rich foods.
- Ingredients: The nutritional profile can be influenced by ingredient choices. Using whole wheat flour instead of all-purpose flour can increase fiber content.
In summary, challah bread is a delicious treat that can be enjoyed in moderation. Being aware of its nutritional content allows you to incorporate it into your diet thoughtfully and savor its wonderful taste while making informed choices.
Preparation Time: Planning Your Challah Baking
Baking challah is a process that involves both active and inactive time. Understanding the preparation time can help you plan your baking schedule effectively. Here’s a breakdown of the approximate time involved:
Total Preparation Time: Approximately 3-4 hours
Active Time: Approximately 1 hour – 1 hour 15 minutes
- Yeast Proofing: 5-10 minutes
- Mixing Ingredients: 10-15 minutes
- Kneading: 8-10 minutes
- Dividing and Shaping: 15-20 minutes
- Braiding: 10-15 minutes
- Egg Wash and Toppings: 5 minutes
Inactive Time (Rising/Proofing & Baking): Approximately 2-3 hours
- First Rise (Bulk Fermentation): 1-1.5 hours
- Second Rise (Proofing): 45-60 minutes
- Baking Time: 30-35 minutes
- Cooling Time: (Recommended before slicing) 30 minutes – 1 hour
Time Breakdown Explanation:
- Active Time: This refers to the time you are actively engaged in preparing the dough, kneading, shaping, and braiding. While it might seem like a chunk of time, the active steps are spread out and enjoyable.
- Inactive Time: This is the time when the dough is rising and baking, requiring minimal intervention from you. This time is crucial for the dough to develop flavor and texture. You can use this time to do other tasks while the dough is rising and baking.
Planning Tips:
- Weekend Baking: Challah baking is often a weekend activity, especially for Shabbat preparation. Start in the early afternoon to have fresh challah ready by dinner time.
- Morning Start: If you prefer fresh challah for brunch or lunch, you can start the process in the morning.
- Overnight First Rise (Optional): For a longer fermentation and deeper flavor, you can let the dough rise in the refrigerator overnight for the first rise. Bring it back to room temperature before proceeding with the recipe.
- Time Management: While the total time is several hours, most of it is inactive time. You can easily fit challah baking into your schedule by planning around the rising times.
By understanding the preparation time, you can plan your challah baking session effectively and enjoy the process without feeling rushed. The reward of fresh, homemade challah is well worth the time invested!
How to Serve: Endless Ways to Enjoy Your Challah
Challah bread is incredibly versatile and can be enjoyed in a multitude of ways, from simple and classic to creative and gourmet. Its slightly sweet and eggy flavor profile makes it a perfect companion for both sweet and savory dishes. Here are some delightful ways to serve and savor your homemade challah:
Classic and Simple:
- Freshly Sliced with Butter: The most classic and simplest way to enjoy challah is freshly sliced, still slightly warm, with a generous spread of butter. The rich flavor of the bread pairs perfectly with the creamy butter.
- Toasted with Jam or Honey: Toasting challah slices enhances its texture and brings out its sweetness. Serve toasted slices with your favorite jam, preserves, or a drizzle of honey for a delightful breakfast or snack.
- Dipped in Olive Oil and Balsamic Vinegar: For a savory appetizer, cube challah and serve it with a dipping bowl of high-quality olive oil and balsamic vinegar. The soft bread soaks up the flavorful oil beautifully.
Breakfast and Brunch Delights:
- French Toast: Challah is arguably the best bread for French toast. Its rich, eggy texture soaks up the custard beautifully, resulting in incredibly decadent and flavorful French toast. Experiment with different toppings like fresh berries, maple syrup, or whipped cream.
- Breakfast Sandwiches: Use thick slices of challah to create gourmet breakfast sandwiches. Fill them with scrambled eggs, bacon, sausage, cheese, avocado, and your favorite breakfast toppings.
- Eggs Benedict with Challah Toast: Elevate your Eggs Benedict by serving them on toasted challah slices instead of English muffins. The richer flavor of challah complements the hollandaise sauce and poached eggs perfectly.
Lunch and Dinner Companions:
- Sandwiches and Paninis: Challah makes fantastic sandwiches. Its sturdy yet soft texture holds fillings well. Use it for deli sandwiches, grilled cheese, or paninis. The slightly sweet flavor adds a unique dimension to savory fillings.
- Served with Soups and Stews: Challah’s soft and absorbent texture makes it ideal for soaking up flavorful soups and stews. Serve slices alongside hearty soups like chicken noodle soup, tomato soup, or beef stew.
- Bread Basket for Dinner Parties: Impress your guests by including homemade challah in your bread basket. Its beautiful braided appearance and delicious flavor will be a highlight of the meal.
Sweet Treats and Desserts:
- Bread Pudding: Challah’s rich texture makes it an excellent choice for bread pudding. Use day-old challah to create a classic bread pudding with custard, raisins, and spices.
- Challah Croutons for Salads: Cube leftover challah, toss with olive oil and seasonings, and bake until crispy to make delicious homemade croutons for salads.
- Grilled Challah with Fruit and Mascarpone: Grill slices of challah until slightly charred, then top with grilled or fresh fruit (like peaches or berries) and a dollop of mascarpone cheese for a simple yet elegant dessert.
Holiday and Festive Occasions:
- Shabbat and Jewish Holidays: Challah is traditionally served on Shabbat and Jewish holidays. Its braided shape and symbolic meaning make it a central part of these celebrations.
- Thanksgiving and Holiday Dinners: Challah can be a wonderful addition to Thanksgiving or holiday dinner bread baskets, offering a unique and flavorful alternative to traditional rolls.
No matter how you choose to serve it, challah bread is sure to be a crowd-pleaser. Its versatility and delightful flavor make it a welcome addition to any meal or occasion. Experiment with these serving suggestions and discover your own favorite ways to enjoy this wonderful bread!
Additional Tips for Challah Baking Success
Baking challah can be incredibly rewarding, and with a few helpful tips, you can consistently achieve beautiful and delicious results. Here are five additional tips to elevate your challah baking game:
- Yeast is Key – Handle with Care: Active dry yeast is a living organism, and its activity is crucial for successful bread making. Always check the expiration date of your yeast to ensure it’s fresh. When proofing, make sure the water is lukewarm (105-115°F/40-46°C) – too hot and you’ll kill the yeast, too cold and it won’t activate properly. If your yeast doesn’t foam after 10 minutes of proofing, it’s best to start with a fresh batch. Proper yeast activation is the foundation for a well-risen and airy challah.
- Don’t Rush the Rise – Patience is a Virtue: Allowing the dough to rise fully is essential for developing flavor and texture. Resist the urge to rush the rising process. Both the first rise (bulk fermentation) and the second rise (proofing) are critical. Find a warm, draft-free place for your dough to rise. A slightly warm oven (turned off) with the oven light on, or a warm corner of your kitchen, works well. The dough should approximately double in size during each rise. Patience during the rising stages will be rewarded with a lighter, more flavorful challah.
- Knead Thoroughly for Gluten Development: Kneading is not just about mixing ingredients; it’s about developing gluten, the protein in flour that gives bread its structure and elasticity. Knead the dough for the recommended 8-10 minutes until it becomes smooth, elastic, and slightly tacky. Proper kneading ensures that the gluten strands are properly aligned and strengthened, resulting in a challah with a beautiful texture and rise. The windowpane test (stretching a small piece of dough thin without tearing) is a good indicator of sufficient kneading.
- Braiding Techniques – Practice Makes Perfect: Braiding challah can seem intricate, but with practice, it becomes easier and even enjoyable. Start with a simple 3-strand braid and gradually move to more complex braids like 4-strand or 6-strand. Watch video tutorials online to visualize different braiding techniques. Don’t be discouraged if your first braid isn’t perfect; each attempt will improve your skill. Consistent strand thickness and even tension during braiding contribute to a visually appealing and evenly baked challah.
- Egg Wash for Shine and Color – Don’t Skip It: The egg wash is not just for aesthetics; it contributes to both the beautiful golden-brown color and the glossy shine of challah. Use a whole egg whisked with a tablespoon of water for the egg wash. Apply it gently but thoroughly over the entire surface of the proofed challah just before baking. Ensure you cover all crevices and braids for an even and appealing finish. For a deeper golden color, you can add a pinch of sugar to the egg wash.
By incorporating these tips into your challah baking routine, you’ll enhance your technique and consistently bake challah that is not only delicious but also visually stunning. Happy baking!
FAQ: Your Challah Bread Questions Answered
Baking challah can bring up various questions, especially for beginners. Here are answers to five frequently asked questions to help you navigate the challah baking process with confidence:
Q1: My challah is dense and didn’t rise much. What went wrong?
A: Several factors can contribute to a dense challah. The most common culprits are:
- Inactive Yeast: Ensure your yeast is fresh and properly proofed. If it didn’t foam during proofing, it might be inactive.
- Water Temperature: Water that is too hot or too cold during proofing can hinder yeast activity. Use lukewarm water (105-115°F/40-46°C).
- Insufficient Kneading: Kneading develops gluten, which is essential for rise. Knead for the full 8-10 minutes until the dough is smooth and elastic.
- Cold Rising Environment: Yeast activity slows down in cold temperatures. Ensure your dough is rising in a warm, draft-free place.
- Too Much Flour: Adding too much flour can make the dough dense and inhibit rise. Measure flour accurately and add only as much as needed to form a workable dough.
Q2: Can I make challah ahead of time and freeze it?
A: Yes, challah freezes beautifully! To freeze baked challah:
- Cool Completely: Allow the challah to cool completely after baking.
- Wrap Tightly: Wrap the challah tightly in plastic wrap, then in aluminum foil, or place it in a freezer-safe bag. This prevents freezer burn.
- Freeze: Freeze for up to 2-3 months.
- Thaw: Thaw at room temperature for several hours or overnight.
- Reheat (Optional): To refresh, you can reheat the thawed challah in a 300°F (150°C) oven for 10-15 minutes until warmed through.
Freezing challah is a great way to have freshly baked bread on hand whenever you need it.
Q3: Can I make challah dough the day before and bake it the next day?
A: Yes, you can prepare challah dough ahead of time for a delayed bake. Here’s how:
- First Rise: Allow the dough to undergo its first rise as instructed in the recipe.
- Refrigerate: After the first rise, punch down the dough, wrap it tightly in plastic wrap, and refrigerate it overnight (or up to 24 hours).
- Second Rise and Bake: The next day, remove the dough from the refrigerator and let it come to room temperature for about 1-2 hours. Proceed with dividing, shaping, braiding, second rise, and baking as per the recipe instructions.
Refrigerating the dough slows down the fermentation process and can enhance the flavor of the challah.
Q4: Can I use honey or maple syrup instead of sugar in challah?
A: Yes, you can substitute honey or maple syrup for granulated sugar, but with slight adjustments:
- Liquid Adjustment: Honey and maple syrup are liquid sweeteners. Reduce the amount of water in the recipe by a tablespoon or two to compensate for the added liquid.
- Flavor Profile: Honey will impart a distinct honey flavor, while maple syrup will add a subtle maple flavor. Choose based on your preference.
- Yeast Activation: Ensure the honey or maple syrup is dissolved in the warm water along with the yeast for proper activation.
Experimenting with different sweeteners can add unique flavor notes to your challah.
Q5: My challah braid is uneven and messy. How can I improve it?
A: Improving your challah braiding takes practice. Here are tips for a neater braid:
- Even Strands: Ensure your dough strands are of uniform thickness and length before braiding.
- Consistent Tension: Maintain consistent tension while braiding. Avoid pulling too tightly or too loosely.
- Practice: Watch video tutorials and practice braiding techniques. Start with simpler braids and gradually move to more complex ones.
- Pinch Ends Securely: Pinch the ends of the braid tightly to prevent unraveling during baking.
- Embrace Imperfection: Homemade challah is beautiful even with slight imperfections. Don’t strive for absolute perfection; enjoy the process and the delicious result.
By addressing these common questions, you’ll be better equipped to troubleshoot any challenges and bake perfect challah every time. Happy baking and enjoy your delicious homemade bread!
Print
Challah Bread recipe
Ingredients
- All-Purpose Flour (or Bread Flour): 4 ½ cups (approximately 540 grams). Flour is the backbone of any bread, and for challah, you have a couple of excellent options. All-purpose flour will yield a wonderfully soft and tender challah, perfect for everyday enjoyment. However, for a slightly chewier texture and a bit more structure, bread flour is a fantastic choice due to its higher protein content. This protein develops gluten, which is crucial for the bread’s elasticity and rise. Choosing between all-purpose and bread flour depends on your personal preference for texture; both will create a delicious challah. Ensure your flour is fresh and properly stored for optimal results.
- Active Dry Yeast: 2 ¼ teaspoons (or one ¼-ounce packet). Yeast is the magical ingredient that brings bread to life. It’s a living organism that feeds on sugar and releases carbon dioxide, causing the dough to rise and become light and airy. Active dry yeast needs to be “proofed” or activated in warm water with a touch of sugar before being added to the rest of the ingredients. This step ensures that your yeast is alive and ready to work its magic. Fresh yeast can also be used, but active dry yeast is readily available and reliable for home bakers. Using the correct amount of yeast is vital; too little, and your challah may not rise sufficiently, resulting in a dense loaf. Too much yeast can lead to a rapid rise and potentially a collapse of the gluten structure.
- Granulated Sugar: ¼ cup (50 grams). Sugar in challah serves multiple purposes. Firstly, it feeds the yeast, providing the necessary energy for fermentation and the rising process. Secondly, it adds a subtle sweetness to the bread, which is a characteristic flavor profile of challah. Lastly, sugar contributes to the golden-brown color of the crust during baking through a process called caramelization and the Maillard reaction. While granulated sugar is traditional, you can also experiment with other sweeteners like honey or maple syrup for a slightly different flavor profile, though adjustments to liquid content may be needed.
- Warm Water: ¾ cup (180 ml), lukewarm, about 105-115°F (40-46°C). Warm water is crucial for activating the active dry yeast. The temperature is important; too cold, and the yeast won’t activate; too hot, and it will be killed. Using a thermometer ensures the water is at the ideal temperature range. This warm water also hydrates the flour, initiating the gluten development process. The water should be clean and filtered if your tap water has a strong chlorine taste.
- Large Eggs: 4 large eggs, plus 1 egg for egg wash. Eggs are a signature ingredient in challah bread, contributing significantly to its rich flavor, tender texture, and vibrant yellow color. They add richness, moisture, and protein to the dough, enhancing its structure and elasticity. Using whole eggs in the dough, and an additional egg for the egg wash, creates the classic challah characteristics. Make sure your eggs are fresh and at room temperature for better emulsification and incorporation into the dough. The egg wash, applied before baking, is what gives challah its beautiful glossy sheen and deep golden-brown crust.
- Vegetable Oil (or Canola Oil): ¼ cup (60 ml). Oil in challah adds moisture and tenderness, contributing to a soft crumb and preventing the bread from becoming dry. Vegetable or canola oil are neutral-flavored oils that work well in baking, allowing the other flavors to shine through. You can also use olive oil for a slightly richer flavor, but be mindful that it can impart a subtle olive oil taste. Melted unsalted butter can also be used for an even richer, more decadent challah, though it will slightly alter the texture.
- Salt: 1 ½ teaspoons. Salt is a critical ingredient in bread making, often underestimated. It doesn’t just add flavor; it also controls the yeast activity, strengthens the gluten structure, and enhances the overall texture of the bread. Salt slows down the fermentation process, preventing the dough from rising too quickly and becoming weak. It also tightens the gluten strands, giving the challah structure and chewiness. Using the correct amount of salt is essential; too little, and the bread can be bland and the yeast activity uncontrolled. Too much salt can inhibit yeast activity and result in a dense loaf. Use fine sea salt or table salt, ensuring it’s evenly distributed throughout the dough.
- Optional Toppings: Sesame seeds, poppy seeds, everything bagel seasoning, or coarse sugar. Toppings are optional but highly recommended for adding visual appeal and extra flavor to your challah. Sesame seeds are a classic choice, providing a nutty flavor and delicate crunch. Poppy seeds offer a slightly earthy and nutty taste. Everything bagel seasoning adds a savory and flavorful crust. Coarse sugar adds a touch of sweetness and a beautiful sparkle. Choose your favorite toppings or get creative and experiment with different combinations to personalize your challah.
Instructions
- Proof the Yeast: In a large mixing bowl, combine the warm water (105-115°F/40-46°C) and granulated sugar. Sprinkle the active dry yeast over the water and sugar mixture. Let it stand for 5-10 minutes, or until the yeast becomes foamy and bubbly. This step, known as proofing, confirms that your yeast is active and ready to leaven the dough. The foaminess is a sign that the yeast is feeding on the sugar and producing carbon dioxide. If the yeast doesn’t foam, it might be expired or the water temperature was incorrect, and you may need to start with fresh yeast.
- Combine Wet Ingredients: Once the yeast is proofed, add the vegetable oil and 4 large eggs to the bowl with the yeast mixture. Whisk these wet ingredients together until they are well combined. Ensure the eggs are fully incorporated into the yeast mixture, creating a homogenous liquid base for your dough. Using room temperature eggs helps them emulsify more easily with the other ingredients.
- Incorporate Dry Ingredients: In a separate large bowl, whisk together the all-purpose flour (or bread flour) and salt. This step ensures that the salt is evenly distributed throughout the flour. Gradually add the dry ingredients to the wet ingredients, mixing with a wooden spoon or spatula until a shaggy dough forms. Start by adding about half of the flour mixture and mix until combined, then add the remaining flour gradually, mixing until just incorporated. Be careful not to overmix at this stage.
- Knead the Dough: Turn the dough out onto a lightly floured surface. Knead the dough for 8-10 minutes, or until it becomes smooth, elastic, and slightly tacky but not sticky. Kneading is a crucial step in developing the gluten, which gives challah its characteristic texture. Use the heel of your hand to push the dough away from you, fold it in half, and turn it 90 degrees. Repeat this process rhythmically. If the dough is too sticky, add a little flour, one tablespoon at a time. The dough is properly kneaded when it springs back when gently poked and passes the “windowpane test” (you can stretch a small piece of dough into a thin, translucent membrane without it tearing).
- First Rise (Bulk Fermentation): Place the kneaded dough in a lightly oiled bowl, turning to coat all sides. Cover the bowl with plastic wrap or a clean kitchen towel. Let the dough rise in a warm, draft-free place for 1-1.5 hours, or until it has doubled in size. This first rise, also known as bulk fermentation, allows the yeast to further develop flavor and create air pockets within the dough. A warm environment (around 75-80°F/24-27°C) is ideal for proofing. You can place the bowl in a slightly warmed oven (turned off) or a warm corner of your kitchen.
- Punch Down and Divide: Once the dough has doubled in size, gently punch it down to release the air. Turn the dough out onto a lightly floured surface. Divide the dough into 6 equal pieces for a classic 6-strand braid. For a round challah, you might divide it into fewer pieces or keep it whole, depending on the desired shape and size. Accurate division ensures even baking and a visually appealing braid.
- Shape the Strands: Roll each piece of dough into a long rope, about 12-14 inches long and 1 inch thick. Ensure the ropes are relatively even in thickness for a uniform braid. If the dough is resisting being rolled out, let it rest for a few minutes to relax the gluten.
- Braid the Challah: There are various braiding techniques for challah, from simple 3-strand braids to more intricate 6-strand braids and beyond. For a 6-strand braid, pinch the six ropes together at one end. Braid the strands by following a pattern (e.g., starting from the right: strand 6 over 2, strand 1 under 5, strand 3 over 6, strand 2 under 4, strand 5 over 3). Repeat this pattern until you reach the end of the ropes. Pinch the ends together to seal the braid. You can find numerous visual tutorials online for different braiding techniques. Don’t worry if your first braid isn’t perfect; practice makes perfect!
- Second Rise (Proofing): Carefully transfer the braided challah to a baking sheet lined with parchment paper. Cover loosely with plastic wrap or a clean kitchen towel. Let the challah rise again in a warm, draft-free place for 45-60 minutes, or until it has almost doubled in size and looks puffy. This second rise, or proofing, is crucial for achieving a light and airy texture in the final baked bread. The dough should be noticeably softer and more voluminous after the second rise.
- Preheat Oven and Prepare Egg Wash: Preheat your oven to 350°F (175°C). In a small bowl, whisk together the remaining egg with a tablespoon of water to make an egg wash. The egg wash will give the challah a beautiful glossy shine and enhance its golden-brown color during baking.
- Egg Wash and Toppings: Gently brush the entire surface of the proofed challah with the egg wash, ensuring you cover all crevices and braids. If desired, sprinkle your chosen toppings (sesame seeds, poppy seeds, etc.) evenly over the egg-washed challah. Apply the egg wash gently to avoid deflating the proofed dough.
- Bake: Bake the challah in the preheated oven for 30-35 minutes, or until it is golden brown and sounds hollow when tapped on the bottom. The baking time may vary slightly depending on your oven and the size of your challah. Use a toothpick or cake tester inserted into the center to check for doneness; it should come out clean.
- Cool and Enjoy: Once baked, carefully remove the challah from the oven and transfer it to a wire rack to cool completely before slicing and serving. Cooling on a wire rack prevents the bottom of the challah from becoming soggy. While it’s tempting to slice into it right away, allowing it to cool slightly will improve its texture and make it easier to slice.
Nutrition
- Serving Size: one normal portion
- Calories: 220-250 kcal
- Sugar: 5-7 grams
- Sodium: 200-250 mg
- Fat: 8-10 grams
- Saturated Fat: 1.5-2 grams
- Unsaturated Fat: 6.5-8 grams
- Carbohydrates: 30-35 grams
- Fiber: 1-2 grams
- Protein: 5-6 grams
- Cholesterol: 50-60 mg


