

Let me tell you, mornings in my house can be… chaotic. Trying to get everyone fed and out the door on time often feels like a Herculean task. Pancakes are a weekend staple, a treat that usually brings smiles, but during the week? They seemed relegated to the “too much effort” category. That was until I stumbled upon the idea of cereal pancakes. Intrigued and frankly, a little desperate to inject some fun into our weekday breakfasts, I decided to give it a whirl. The result? Pure breakfast magic. The kids went absolutely bonkers for them! The crispy, slightly sweet cereal embedded in fluffy pancakes was a textural and flavor sensation they hadn’t experienced before. Even my usually pancake-skeptical husband devoured a stack. These weren’t just pancakes; they were an adventure in a breakfast bite. The best part? They are surprisingly easy to make. Since that first experiment, cereal pancakes have become a regular fixture in our breakfast rotation. They are quick, customizable, and consistently elicit cheers from the entire family. If you’re looking for a way to jazz up your pancake game and bring a little breakfast excitement to your table, look no further. This cereal pancake recipe is about to become your new morning hero.
Ingredients
This recipe is wonderfully versatile, allowing you to use your favorite pancake mix and cereal. Here’s what you’ll need to create a batch of delightful cereal pancakes:
- For the Pancakes:
- 2 cups Pancake Mix (store-bought or homemade – see notes below for homemade option)
- 1 ½ cups Milk (dairy or non-dairy alternatives like almond, soy, or oat milk work well)
- 2 Large Eggs
- 2 tablespoons Melted Butter (unsalted, plus extra for greasing the griddle)
- 1 teaspoon Vanilla Extract (optional, but enhances the flavor)
- Pinch of Salt (if using unsalted pancake mix or homemade mix)
- For the Cereal Crunch:
- 2 cups Cereal of your choice (see recommendations below)
- Optional: 1 tablespoon Sugar (for lightly sweetened cereals or if you prefer extra sweetness)
- Optional: ½ teaspoon Cinnamon (for a warm, spiced flavor, especially good with cinnamon cereals)
Detailed Ingredient Breakdown and Considerations:
- Pancake Mix: Using a store-bought pancake mix is incredibly convenient and speeds up the process, especially on busy mornings. Look for a good quality mix that you enjoy the taste of. Alternatively, if you prefer to make your own pancake mix from scratch, you can easily do so. A simple homemade pancake mix consists of flour, baking powder, sugar, and salt. Using a homemade mix allows you to control the ingredients and sweetness levels.
- Milk: Whole milk will result in richer, slightly denser pancakes. However, you can easily substitute with lower-fat milk or non-dairy alternatives. Almond milk, soy milk, and oat milk all work well and impart slightly different flavors. Oat milk, in particular, can add a subtle creaminess.
- Eggs: Eggs are crucial for binding the ingredients and adding richness and structure to the pancakes. They contribute to the fluffy texture and help the pancakes hold their shape. Large eggs are standard for most recipes.
- Melted Butter: Melted butter adds flavor and moisture to the pancakes. Unsalted butter is recommended so you can control the overall saltiness. You can substitute with melted coconut oil for a dairy-free and slightly coconutty flavor, or use a neutral oil like canola or vegetable oil if preferred, although butter contributes a richer taste.
- Vanilla Extract: Vanilla extract is optional but highly recommended. It enhances the overall flavor profile of the pancakes, adding a subtle warmth and sweetness that complements both the pancake batter and the cereal. Use pure vanilla extract for the best flavor.
- Salt: A pinch of salt is important, especially if you are using an unsalted pancake mix or making your batter from scratch. Salt balances the sweetness and enhances the other flavors.
- Cereal: This is where the fun begins! The choice of cereal is entirely up to your personal preference and desired flavor profile. Consider these options:
- Sweet Cereals: Frosted Flakes, Fruit Loops, Captain Crunch, Cocoa Puffs, Lucky Charms, Cinnamon Toast Crunch – these add sweetness and distinct flavors. Frosted Flakes provide a wonderful crispiness and subtle sweetness, while Fruit Loops and Lucky Charms bring vibrant colors and fruity notes. Cinnamon Toast Crunch adds a warm cinnamon spice.
- Crunchy and Nutty Cereals: Granola (choose varieties without large clumps for easier pancake incorporation), Grape-Nuts (adds a unique nutty crunch), Chex cereals (Rice Chex, Corn Chex, Wheat Chex – offer a satisfying crispness and less sweetness, allowing the pancake flavor to shine through). Granola can add a delightful textural element, while Grape-Nuts provide a dense, nutty crunch. Chex cereals are great for those who prefer a less sweet pancake with a satisfying crispness.
- Whole Grain Cereals: Shredded Wheat (crumbled), Bran Flakes (crumbled) – for a slightly healthier and more textured pancake. These options add fiber and a more wholesome flavor.
- Sugar (Optional for Cereal): If you are using a less sweet cereal like Grape-Nuts or Chex, or if you simply prefer a sweeter pancake, you can lightly sweeten the crushed cereal with a tablespoon of sugar. This is entirely optional and depends on your taste preferences.
- Cinnamon (Optional for Cereal): Cinnamon adds a warm, comforting spice, particularly delicious with cinnamon-flavored cereals like Cinnamon Toast Crunch or even with plain cereals for a touch of warmth.
Instructions
Making cereal pancakes is surprisingly simple and follows the basic steps of making regular pancakes with an extra step to incorporate the cereal. Follow these instructions for perfectly delicious cereal pancakes:
Step 1: Prepare the Cereal
- Cereal Selection: Choose your desired cereal. For best results, avoid cereals that get soggy quickly in milk, as they might lose their crispness in the pancake batter. Crispier cereals generally work best.
- Crushing the Cereal (Optional but Recommended): For smaller cereals like Fruit Loops or Cocoa Puffs, you might not need to crush them. However, for larger cereals like Frosted Flakes or granola, lightly crushing them will make them easier to incorporate into the batter and ensure they distribute more evenly in the pancakes. You can crush the cereal by placing it in a resealable plastic bag and gently rolling over it with a rolling pin or the bottom of a heavy pan. You want to break them down slightly but not turn them into powder. You should still have some discernible pieces for texture.
- Optional Sweetening and Spicing: If desired, in a small bowl, toss the crushed or uncrushed cereal with the optional sugar and cinnamon. This step is particularly recommended if you are using less sweet cereals or want to enhance the flavor of your chosen cereal. Set the prepared cereal aside.
Step 2: Prepare the Pancake Batter
- Combine Dry Ingredients (If making homemade batter): If you’re making pancakes from scratch, in a large bowl, whisk together your dry ingredients: flour, baking powder, sugar (if using), and salt. If using a store-bought mix, skip this step.
- Combine Wet Ingredients: In a separate bowl, whisk together the milk, eggs, melted butter, and vanilla extract (if using). Ensure the eggs are well beaten and the wet ingredients are thoroughly combined.
- Combine Wet and Dry Ingredients: Gradually pour the wet ingredients into the dry ingredients (or into the pancake mix if using a store-bought mix). Whisk gently until just combined. Do not overmix. Overmixing can develop the gluten in the flour, resulting in tough pancakes. A few lumps in the batter are perfectly fine. The batter should be smooth but not overly thin. It should be pourable but have some body.
- Rest the Batter (Optional but Recommended): Let the batter rest for 5-10 minutes. This allows the gluten to relax and the baking powder to activate, resulting in fluffier pancakes. While the batter rests, you can prepare your griddle or pan.
Step 3: Cook the Cereal Pancakes
- Heat the Griddle or Pan: Preheat a lightly oiled griddle or large non-stick skillet over medium heat. The pan is ready when a drop of water sizzles and evaporates quickly when sprinkled on the surface. If the pan is too hot, the pancakes will burn on the outside before cooking through. If it’s not hot enough, they will be flat and pale.
- Pour the Batter: Once the griddle is hot, pour ¼ cup of batter per pancake onto the hot griddle. Leave some space between each pancake to allow for spreading.
- Sprinkle with Cereal: Immediately after pouring the batter, sprinkle a generous amount of the prepared cereal over the top of each pancake. Gently press the cereal into the batter with your fingertips or the back of a spoon to ensure it adheres to the pancake as it cooks. The sooner you add the cereal, the better it will stick to the batter.
- Cook the First Side: Cook for 2-3 minutes per side, or until bubbles start to form on the surface of the pancake and the edges look set. The bottom should be golden brown.
- Flip the Pancakes: Carefully flip the pancakes using a spatula.
- Cook the Second Side: Cook for another 2-3 minutes, or until the second side is golden brown and the pancakes are cooked through. Gently press down on the pancakes with the spatula; they should spring back slightly when done.
- Keep Warm (Optional): If you are making a large batch, you can keep the cooked pancakes warm in a preheated oven (200°F or 95°C) on a baking sheet while you cook the remaining batter. This prevents them from getting cold while you finish cooking.
Step 4: Serve and Enjoy!
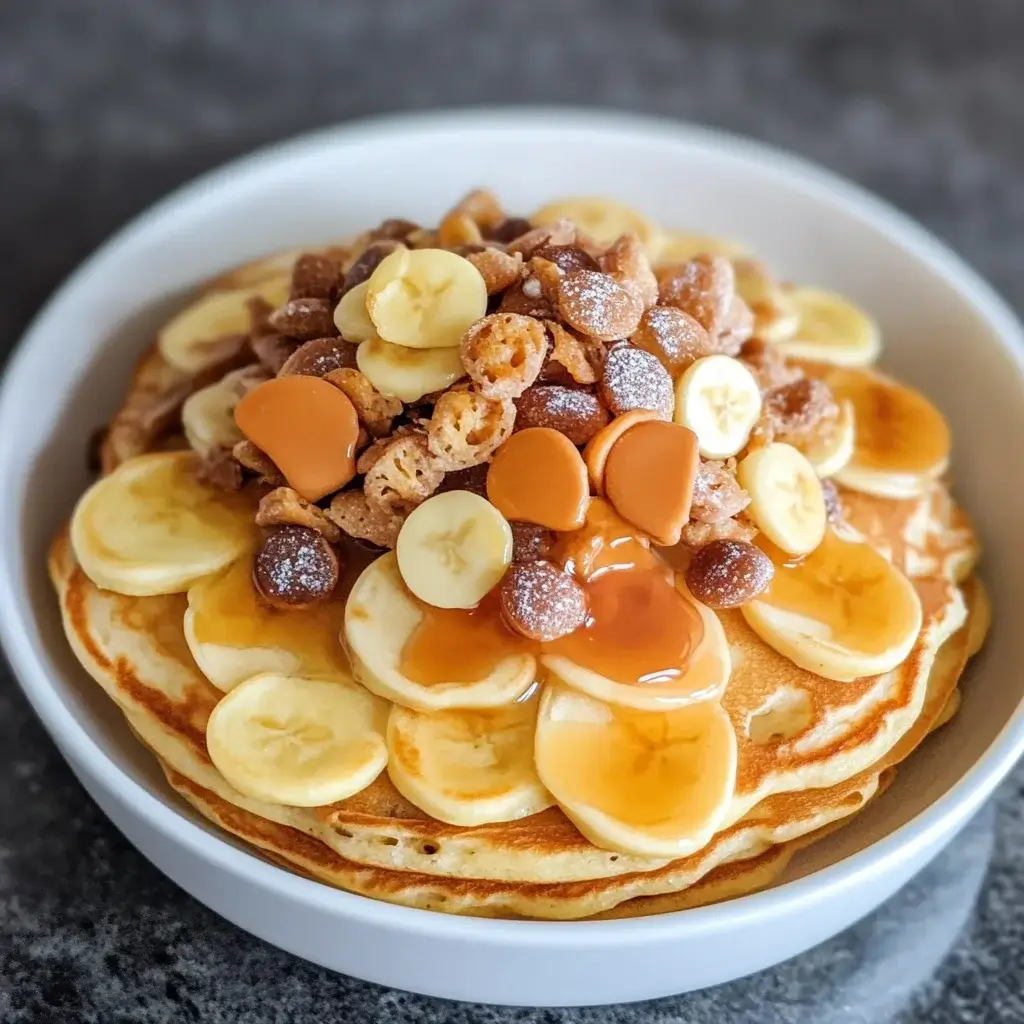
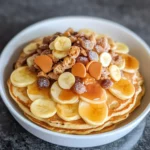
- Stack and Serve: Stack the cereal pancakes on plates and serve immediately while they are warm and the cereal is still crispy.
- Add Toppings: Serve with your favorite pancake toppings (see “How to Serve” section below for ideas).
- Enjoy! Indulge in the delightful combination of fluffy pancakes and crunchy cereal!
Nutrition Facts (Estimated)
- Servings: Approximately 8-10 pancakes (depending on size)
- Serving Size: 2 pancakes
- Approximate Calories per Serving (based on store-bought pancake mix and Frosted Flakes, without toppings): 350-450 calories (This is an estimate and can vary significantly based on the specific pancake mix, cereal type, milk, and toppings used.)
Important Note: Nutritional information is an estimate and can vary greatly depending on the specific ingredients used, brands, and serving sizes. For more precise nutritional information, refer to the nutritional labels of the specific ingredients you use and adjust calculations accordingly. Adding toppings like syrup, butter, whipped cream, or fruit will significantly increase the calorie count.
Preparation Time
- Prep Time: 10-15 minutes (includes gathering ingredients, preparing batter, and crushing cereal if needed)
- Cook Time: 20-25 minutes (cooking pancakes in batches)
- Total Time: 30-40 minutes
How to Serve Cereal Pancakes
Cereal pancakes are delicious on their own, but they are even better with a variety of toppings and accompaniments. Here are some serving suggestions to elevate your cereal pancake experience:
- Classic Toppings:
- Maple Syrup: The quintessential pancake topping. Choose pure maple syrup for the best flavor.
- Butter: A pat of butter melting on a stack of warm pancakes is always a welcome addition.
- Powdered Sugar: A simple dusting of powdered sugar adds a touch of sweetness and elegance.
- Fruity Delights:
- Fresh Berries: Strawberries, blueberries, raspberries, and blackberries add freshness, sweetness, and antioxidants.
- Sliced Bananas: A classic pairing with pancakes, bananas offer natural sweetness and creaminess.
- Fruit Compote or Jam: Homemade or store-bought fruit compotes or jams provide a burst of fruity flavor. Try berry compote, apple butter, or peach jam.
- Whipped Cream and Fruit: Combine whipped cream with fresh fruit for a decadent and visually appealing topping.
- Sweet and Indulgent:
- Chocolate Syrup or Chocolate Chips: For chocolate lovers, drizzle chocolate syrup or sprinkle chocolate chips over the pancakes.
- Caramel Sauce: A rich caramel sauce adds a buttery sweetness.
- Peanut Butter or Nutella: Spread peanut butter or Nutella for a creamy and nutty topping.
- Ice Cream or Yogurt: Add a scoop of vanilla ice cream or a dollop of Greek yogurt for a cool and creamy element.
- Crunchy and Textural:
- Chopped Nuts: Toasted pecans, walnuts, almonds, or hazelnuts add a delightful crunch and nutty flavor.
- Extra Cereal Crumble: Sprinkle extra crushed cereal on top for an extra layer of crunch and amplified cereal flavor.
- Savory Twists (for less sweet cereal pancakes):
- Fried Egg and Bacon: For a breakfast-for-dinner option, top cereal pancakes made with less sweet cereal (like Chex) with a fried egg and crispy bacon.
- Savory Syrups: Experiment with savory syrups like balsamic glaze or a drizzle of chili oil for a unique twist.
Additional Tips for Perfect Cereal Pancakes
- Don’t Overmix the Batter: Overmixing develops gluten, leading to tough pancakes. Mix just until the wet and dry ingredients are combined. A few lumps are okay.
- Use the Right Heat: Medium heat is ideal for cooking pancakes. If the heat is too high, the pancakes will burn on the outside before cooking through. If it’s too low, they will be flat and pale. Test the heat by sprinkling a few drops of water on the griddle; it should sizzle and evaporate quickly.
- Add Cereal Immediately: Sprinkle the cereal onto the batter as soon as you pour it onto the griddle. This helps the cereal adhere to the pancake and cook into it rather than just sitting on top. Gently press the cereal into the batter.
- Don’t Flip Too Early: Wait until bubbles form on the surface and the edges look set before flipping the pancakes. Flipping too early can cause the pancakes to stick and tear.
- Keep Pancakes Warm: If making a large batch, preheat your oven to 200°F (95°C) and keep cooked pancakes warm on a baking sheet in the oven until ready to serve. This will prevent them from getting cold and soggy while you finish cooking the rest.
FAQ Section: Your Cereal Pancake Questions Answered
Q1: Can I use any type of cereal for these pancakes?
A: Yes, you can use almost any type of cereal! However, for best results, choose cereals that are relatively crispy and don’t get soggy too quickly in milk. Crispy rice cereals, cornflakes, frosted flakes, and even granola work exceptionally well. Avoid overly delicate cereals that might disintegrate in the batter. Experiment with your favorites to find your perfect cereal pancake combination!
Q2: Can I make these pancakes gluten-free?
A: Absolutely! To make gluten-free cereal pancakes, simply use a gluten-free pancake mix instead of traditional pancake mix. Many excellent gluten-free pancake mixes are available in supermarkets. For the cereal, choose a gluten-free cereal option. Rice Chex, some granolas made with gluten-free oats, and certain corn-based cereals are often gluten-free. Always double-check the ingredient labels of both the pancake mix and the cereal to ensure they are certified gluten-free if you have strict dietary requirements.
Q3: Can I prepare the pancake batter in advance?
A: While pancake batter is best used immediately after mixing, you can prepare it up to an hour or two in advance and keep it refrigerated. However, keep in mind that the baking powder will start to lose its leavening power over time, so the pancakes might not be as fluffy if the batter sits for too long. If you are preparing the batter ahead, whisk it gently again just before cooking to redistribute the ingredients. It is not recommended to leave pancake batter at room temperature for extended periods.
Q4: How do I prevent the cereal from burning when cooking the pancakes?
A: The key is to cook the pancakes over medium heat and not too high of a temperature. If your griddle or pan is too hot, the cereal can burn before the pancake is cooked through. Monitor the heat and adjust as needed. If you notice the cereal is browning too quickly, lower the heat slightly. Also, ensure you are using a lightly oiled or non-stick griddle or pan to prevent sticking and burning.
Q5: Can I store leftover cereal pancakes and reheat them?
A: Yes, you can store leftover cereal pancakes in an airtight container in the refrigerator for up to 2-3 days. To reheat them, you can use several methods:
- Microwave: Reheating in the microwave is the quickest method. Microwave on medium power for 15-30 seconds per pancake, or until heated through. Microwaving might make them slightly softer and less crispy.
- Toaster: For a crispier reheat, you can toast the pancakes in a toaster or toaster oven on a low setting. Keep a close eye on them to prevent burning, especially the cereal.
- Oven: Reheat in a preheated oven at 350°F (175°C) for about 5-10 minutes, or until heated through. This method helps maintain some crispness.
- Skillet/Griddle: You can also reheat them in a lightly oiled skillet or on a griddle over medium-low heat for a few minutes per side until warmed through and slightly crispy again
Cereal Pancakes Recipe
Ingredients
- For the Pancakes:
- 2 cups Pancake Mix (store-bought or homemade – see notes below for homemade option)
- 1 ½ cups Milk (dairy or non-dairy alternatives like almond, soy, or oat milk work well)
- 2 Large Eggs
- 2 tablespoons Melted Butter (unsalted, plus extra for greasing the griddle)
- 1 teaspoon Vanilla Extract (optional, but enhances the flavor)
- Pinch of Salt (if using unsalted pancake mix or homemade mix)
- For the Cereal Crunch:
- 2 cups Cereal of your choice (see recommendations below)
- Optional: 1 tablespoon Sugar (for lightly sweetened cereals or if you prefer extra sweetness)
- Optional: ½ teaspoon Cinnamon (for a warm, spiced flavor, especially good with cinnamon cereals)
Detailed Ingredient Breakdown and Considerations:
- Pancake Mix: Using a store-bought pancake mix is incredibly convenient and speeds up the process, especially on busy mornings. Look for a good quality mix that you enjoy the taste of. Alternatively, if you prefer to make your own pancake mix from scratch, you can easily do so. A simple homemade pancake mix consists of flour, baking powder, sugar, and salt. Using a homemade mix allows you to control the ingredients and sweetness levels.
- Milk: Whole milk will result in richer, slightly denser pancakes. However, you can easily substitute with lower-fat milk or non-dairy alternatives. Almond milk, soy milk, and oat milk all work well and impart slightly different flavors. Oat milk, in particular, can add a subtle creaminess.
- Eggs: Eggs are crucial for binding the ingredients and adding richness and structure to the pancakes. They contribute to the fluffy texture and help the pancakes hold their shape. Large eggs are standard for most recipes.
- Melted Butter: Melted butter adds flavor and moisture to the pancakes. Unsalted butter is recommended so you can control the overall saltiness. You can substitute with melted coconut oil for a dairy-free and slightly coconutty flavor, or use a neutral oil like canola or vegetable oil if preferred, although butter contributes a richer taste.
- Vanilla Extract: Vanilla extract is optional but highly recommended. It enhances the overall flavor profile of the pancakes, adding a subtle warmth and sweetness that complements both the pancake batter and the cereal. Use pure vanilla extract for the best flavor.
- Salt: A pinch of salt is important, especially if you are using an unsalted pancake mix or making your batter from scratch. Salt balances the sweetness and enhances the other flavors.
- Cereal: This is where the fun begins! The choice of cereal is entirely up to your personal preference and desired flavor profile. Consider these options:
- Sweet Cereals: Frosted Flakes, Fruit Loops, Captain Crunch, Cocoa Puffs, Lucky Charms, Cinnamon Toast Crunch – these add sweetness and distinct flavors. Frosted Flakes provide a wonderful crispiness and subtle sweetness, while Fruit Loops and Lucky Charms bring vibrant colors and fruity notes. Cinnamon Toast Crunch adds a warm cinnamon spice.
- Crunchy and Nutty Cereals: Granola (choose varieties without large clumps for easier pancake incorporation), Grape-Nuts (adds a unique nutty crunch), Chex cereals (Rice Chex, Corn Chex, Wheat Chex – offer a satisfying crispness and less sweetness, allowing the pancake flavor to shine through). Granola can add a delightful textural element, while Grape-Nuts provide a dense, nutty crunch. Chex cereals are great for those who prefer a less sweet pancake with a satisfying crispness.
- Whole Grain Cereals: Shredded Wheat (crumbled), Bran Flakes (crumbled) – for a slightly healthier and more textured pancake. These options add fiber and a more wholesome flavor.
- Sugar (Optional for Cereal): If you are using a less sweet cereal like Grape-Nuts or Chex, or if you simply prefer a sweeter pancake, you can lightly sweeten the crushed cereal with a tablespoon of sugar. This is entirely optional and depends on your taste preferences.
- Cinnamon (Optional for Cereal): Cinnamon adds a warm, comforting spice, particularly delicious with cinnamon-flavored cereals like Cinnamon Toast Crunch or even with plain cereals for a touch of warmth.
Instructions
Step 1: Prepare the Cereal
- Cereal Selection: Choose your desired cereal. For best results, avoid cereals that get soggy quickly in milk, as they might lose their crispness in the pancake batter. Crispier cereals generally work best.
- Crushing the Cereal (Optional but Recommended): For smaller cereals like Fruit Loops or Cocoa Puffs, you might not need to crush them. However, for larger cereals like Frosted Flakes or granola, lightly crushing them will make them easier to incorporate into the batter and ensure they distribute more evenly in the pancakes. You can crush the cereal by placing it in a resealable plastic bag and gently rolling over it with a rolling pin or the bottom of a heavy pan. You want to break them down slightly but not turn them into powder. You should still have some discernible pieces for texture.
- Optional Sweetening and Spicing: If desired, in a small bowl, toss the crushed or uncrushed cereal with the optional sugar and cinnamon. This step is particularly recommended if you are using less sweet cereals or want to enhance the flavor of your chosen cereal. Set the prepared cereal aside.
Step 2: Prepare the Pancake Batter
- Combine Dry Ingredients (If making homemade batter): If you’re making pancakes from scratch, in a large bowl, whisk together your dry ingredients: flour, baking powder, sugar (if using), and salt. If using a store-bought mix, skip this step.
- Combine Wet Ingredients: In a separate bowl, whisk together the milk, eggs, melted butter, and vanilla extract (if using). Ensure the eggs are well beaten and the wet ingredients are thoroughly combined.
- Combine Wet and Dry Ingredients: Gradually pour the wet ingredients into the dry ingredients (or into the pancake mix if using a store-bought mix). Whisk gently until just combined. Do not overmix. Overmixing can develop the gluten in the flour, resulting in tough pancakes. A few lumps in the batter are perfectly fine. The batter should be smooth but not overly thin. It should be pourable but have some body.
- Rest the Batter (Optional but Recommended): Let the batter rest for 5-10 minutes. This allows the gluten to relax and the baking powder to activate, resulting in fluffier pancakes. While the batter rests, you can prepare your griddle or pan.
Step 3: Cook the Cereal Pancakes
- Heat the Griddle or Pan: Preheat a lightly oiled griddle or large non-stick skillet over medium heat. The pan is ready when a drop of water sizzles and evaporates quickly when sprinkled on the surface. If the pan is too hot, the pancakes will burn on the outside before cooking through. If it’s not hot enough, they will be flat and pale.
- Pour the Batter: Once the griddle is hot, pour ¼ cup of batter per pancake onto the hot griddle. Leave some space between each pancake to allow for spreading.
- Sprinkle with Cereal: Immediately after pouring the batter, sprinkle a generous amount of the prepared cereal over the top of each pancake. Gently press the cereal into the batter with your fingertips or the back of a spoon to ensure it adheres to the pancake as it cooks. The sooner you add the cereal, the better it will stick to the batter.
- Cook the First Side: Cook for 2-3 minutes per side, or until bubbles start to form on the surface of the pancake and the edges look set. The bottom should be golden brown.
- Flip the Pancakes: Carefully flip the pancakes using a spatula.
- Cook the Second Side: Cook for another 2-3 minutes, or until the second side is golden brown and the pancakes are cooked through. Gently press down on the pancakes with the spatula; they should spring back slightly when done.
- Keep Warm (Optional): If you are making a large batch, you can keep the cooked pancakes warm in a preheated oven (200°F or 95°C) on a baking sheet while you cook the remaining batter. This prevents them from getting cold while you finish cooking.
Step 4: Serve and Enjoy!
- Stack and Serve: Stack the cereal pancakes on plates and serve immediately while they are warm and the cereal is still crispy.
- Add Toppings: Serve with your favorite pancake toppings (see “How to Serve” section below for ideas).
- Enjoy! Indulge in the delightful combination of fluffy pancakes and crunchy cereal!
Nutrition
- Serving Size: one normal portion
- Calories: 350-450


