

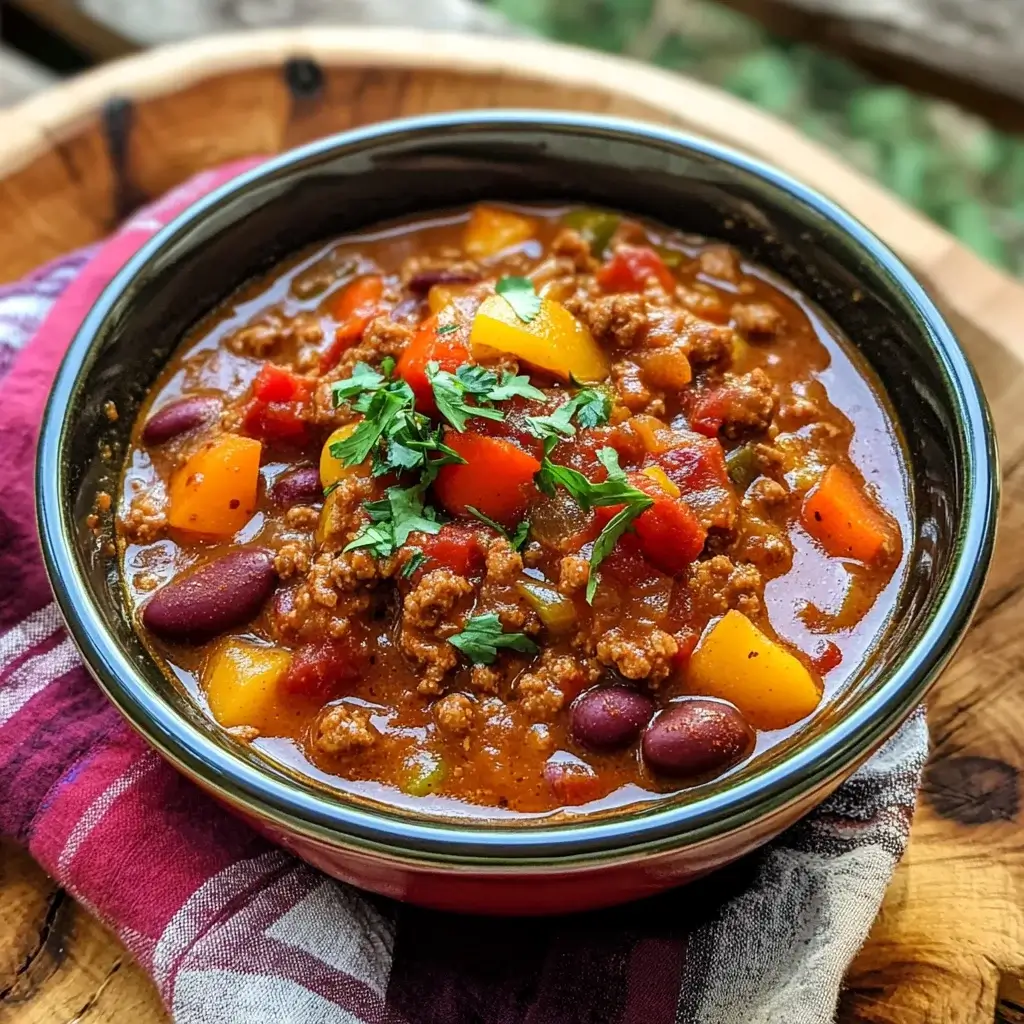
There are some meals that just define an experience, and for our family, this Campfire Chili recipe is unequivocally one of them. I still remember the first time I decided to tackle chili over an open flame during a crisp autumn camping trip. The kids were skeptical, used to the convenience of our kitchen stove. But as the aroma of browning beef, simmering spices, and smoky undertones began to drift through the woods, mingling with the scent of pine and damp earth, even the most screen-addicted teenager put down their device. Watching the rich, dark chili bubble away in the cast iron Dutch oven, under a canopy of stars, was magical. And the taste? Unbelievable. The smokiness from the fire infused every bite, elevating it beyond any stovetop chili I’d ever made. It wasn’t just a meal; it was an event, a bonding experience. That night, huddled around the fire, scooping hearty spoonfuls into our mugs, with crusty bread for dipping, became a core memory. Now, no camping trip is complete without it, and even friends who join us specifically request “that amazing campfire chili.” It’s hearty, deeply flavorful, and carries the soul of the outdoors in every spoonful.
Ingredients for the Ultimate Campfire Chili
This recipe is designed to serve a hungry group of 6-8 people, perfect for a family camping trip or a gathering with friends around the fire pit. The key is quality ingredients and embracing the rustic cooking process.
- For the Chili Base:
- 2 lbs Ground Beef (80/20 chuck is ideal for flavor and moisture)
- 1 lb Bulk Spicy Italian Sausage (optional, but adds amazing depth) or Chorizo
- 2 large Yellow Onions, chopped
- 4-6 cloves Garlic, minced
- 2 Green Bell Peppers, chopped
- 2 Red Bell Peppers, chopped
- 2-3 Jalapeño Peppers, minced (seeds removed for less heat, or keep some for a kick)
- 2 (28 oz) cans Crushed Tomatoes
- 1 (15 oz) can Diced Tomatoes, undrained
- 1 (15 oz) can Tomato Sauce
- 2 (15 oz) cans Kidney Beans, rinsed and drained
- 1 (15 oz) can Black Beans, rinsed and drained
- 1 (15 oz) can Pinto Beans, rinsed and drained
- 1 (6 oz) can Tomato Paste
- 1 cup Beef Broth (low sodium preferred)
- 1/4 cup Apple Cider Vinegar (for a touch of tang)
- 2 tablespoons Olive Oil or Bacon Grease (for sautéing)
- Spices & Flavor Boosters:
- 1/4 cup Chili Powder (use a good quality blend)
- 2 tablespoons Smoked Paprika (essential for that smoky depth)
- 1 tablespoon Ground Cumin
- 1 tablespoon Dried Oregano
- 1 teaspoon Cayenne Pepper (adjust to your heat preference)
- 1 teaspoon Cocoa Powder (unsweetened, for richness and depth – trust me!)
- 1 teaspoon Ground Black Pepper
- 2 teaspoons Salt (or to taste)
- 1-2 Bay Leaves
- Optional: 1 small can (4 oz) diced green chilies
- Optional: 1-2 tablespoons brown sugar or maple syrup (to balance acidity)
- Optional: A splash of dark beer or strong coffee (for complexity)
Step-by-Step Campfire Chili Instructions
Cooking over a campfire requires patience and attention to heat management. A cast iron Dutch oven (at least 6-8 quarts) with a tight-fitting lid is your best friend here.
- Prepare Your Fire:
- Start your campfire well in advance. You want a good bed of hot coals, not roaring flames directly under your pot. Aim for medium, consistent heat. You can achieve this by letting the fire burn down a bit or by raking coals to one side.
- Set up a sturdy campfire grill grate over the coals, or use a tripod with a chain to hang your Dutch oven. Ensure it’s stable.
- Sauté Aromatics & Brown Meat:
- Place the Dutch oven over the coals to preheat. Add the olive oil or bacon grease.
- Once hot, add the chopped onions and bell peppers. Sauté for 5-7 minutes until they begin to soften, stirring occasionally.
- Add the minced garlic and jalapeños (if using) and cook for another 1-2 minutes until fragrant. Be careful not to burn the garlic.
- Push the vegetables to the side of the pot. Add the ground beef and Italian sausage (if using) to the Dutch oven. Break it up with a sturdy spoon. Cook until browned, stirring frequently to ensure even cooking. This step is crucial for developing deep flavor.
- If there’s excessive grease, carefully tilt the pot (away from the fire!) and spoon some out. A little fat is good for flavor, though.
- Build the Flavor Base:
- Stir in the tomato paste and cook for 2-3 minutes, stirring constantly. This “toasts” the tomato paste and deepens its flavor.
- Add all the spices: chili powder, smoked paprika, cumin, oregano, cayenne pepper, cocoa powder, salt, and black pepper. Stir well to coat the meat and vegetables, and cook for another 1-2 minutes until the spices are fragrant. This blooms the spices and intensifies their aroma.
- Add Liquids and Beans:
- Pour in the crushed tomatoes, diced tomatoes (undrained), and tomato sauce.
- Add the rinsed and drained kidney beans, black beans, and pinto beans.
- Stir in the beef broth and apple cider vinegar. If using, add the optional diced green chilies, brown sugar/maple syrup, and dark beer/coffee now.
- Add the bay leaves.
- Stir everything together thoroughly until well combined.
- Simmer to Perfection:
- Bring the chili to a gentle simmer. This is where fire management is key. You may need to adjust the pot’s position over the coals or add/remove coals to maintain a low, steady heat. You don’t want a rolling boil, just a gentle “blurp, blurp.”
- Once simmering, cover the Dutch oven with its lid. If your lid has a rim, you can place a few hot coals on top for more even heat distribution, Dutch oven style.
- Let the chili simmer for at least 1.5 to 2 hours, stirring every 20-30 minutes. The longer it simmers, the more the flavors will meld and deepen. If it gets too thick, add a little more beef broth or water.
- Taste the chili after about an hour and adjust seasonings if needed. You might want more salt, spice, or a touch more sweetness.
- Rest and Serve:
- Once the chili has reached your desired consistency and flavor, carefully remove the Dutch oven from the fire. Be extremely cautious as it will be very hot.
- Let the chili rest for at least 15-20 minutes before serving. This allows the flavors to meld even further and cools it down slightly.
- Remove the bay leaves before serving.
Nutrition Facts (Approximate)
- Servings: This recipe yields approximately 8 generous servings.
- Calories per serving: Approximately 550-650 calories.
Please note that these are estimates. Actual nutritional values can vary based on specific ingredient choices (e.g., fat content of meat, brands of canned goods) and exact serving sizes. This chili is packed with protein and fiber, making it a satisfying and relatively nutritious campfire meal.
Preparation and Cook Time
Understanding the time commitment is crucial for planning your campfire cooking adventure.
- Preparation Time: 30-40 minutes (chopping vegetables, opening cans, measuring spices). This can be significantly reduced if you prep ingredients at home before your trip.
- Cook Time: 2 to 3 hours
- Sautéing and Browning: 20-30 minutes
- Simmering: 1.5 to 2.5 hours (longer is often better for flavor development)
- Rest Time: 15-20 minutes (essential!)
Total Time: Approximately 2 hours 45 minutes to 3 hours 55 minutes.
This isn’t a quick meal, but the process is part of the charm of campfire cooking. Enjoy the journey, the aroma, and the anticipation!
How to Serve Your Delicious Campfire Chili
Serving campfire chili is all about embracing the rustic, communal vibe. Here are some fantastic ways to present and enjoy your creation:
- Classic Bowl or Mug:
- Ladle generously into sturdy enamel mugs or deep bowls. This is the quintessential way to enjoy chili around a fire.
- Toppings Bar Extravaganza: Set up a toppings bar so everyone can customize their bowl. This is always a hit!
- Cheese: Shredded cheddar, Monterey Jack, or a Mexican blend.
- Dairy/Creaminess: Sour cream or plain Greek yogurt. A dollop cools the heat and adds richness.
- Freshness & Crunch:
- Chopped fresh cilantro
- Diced green onions or chives
- Diced red onion (for a sharper bite)
- Crushed tortilla chips or Fritos for texture
- Heat & Zest:
- Pickled jalapeños
- Your favorite hot sauce
- A squeeze of fresh lime juice
- Avocado: Diced or sliced fresh avocado.
- With Hearty Sides:
- Cornbread: A non-negotiable for many! Bake it in a skillet over the fire or bring pre-made wedges. The sweetness complements the chili beautifully.
- Crusty Bread or Rolls: Perfect for dipping and mopping up every last bit of chili.
- Rice: Serve over a bed of white or brown rice to make it an even more substantial meal.
- Baked Potatoes: Split open a campfire-baked potato and ladle chili over the top – a meal in itself!
- Simple Green Salad: A light, crisp salad with a vinaigrette can offer a refreshing contrast to the rich chili.
- Creative Serving Ideas:
- Chili Cheese Fries: If you happen to have fries (perhaps cooked in another Dutch oven with oil), this chili makes an epic topping.
- Chili Dogs: An American classic, elevated by homemade campfire chili.
- “Walking Tacos” or “Frito Pie”: Serve directly into individual bags of Fritos, topped with chili and your favorite fixings. Super fun and minimal cleanup!
Remember the ambiance! Eating by the glow of the campfire, under the stars, enhances the flavor of any meal, especially one as comforting as this chili.
Additional Tips for Campfire Chili Perfection
- Master Your Fire: This is the most crucial tip for any campfire cooking. You need consistent, manageable heat.
- Use seasoned hardwood: It burns hotter and longer, creating better coals than softwoods.
- Control the heat: Don’t place your Dutch oven directly in roaring flames. Rake coals under the pot. If it’s too hot, remove some coals or raise the pot. If it’s too cool, add more pre-heated coals (not fresh wood directly underneath).
- Patience: It takes time to build a good coal bed. Don’t rush this step.
- Dutch Oven Know-How:
- Pre-seasoned cast iron is best: It distributes heat evenly and retains it well.
- Lid is key: A tight-fitting lid traps steam and flavor. If your lid has a rim, you can place hot coals on top for baking-like heat distribution, especially good for simmering chili.
- Cleaning: Clean your Dutch oven promptly. Hot water and a scraper are usually sufficient. Dry thoroughly and apply a thin coat of oil to prevent rust.
- Prep Ahead & Simplify:
- Chop vegetables at home: Store them in airtight containers or zip-top bags.
- Measure spices into a small container: Pre-mix your chili powder, cumin, paprika, etc., at home.
- Pre-cook bacon (if using for grease/flavor): Crumble it and bring it along.
- This saves immense time and effort at the campsite, allowing you to enjoy the cooking process more.
- Taste and Adjust Throughout:
- Don’t wait until the very end to taste. Sample the chili (carefully!) after it’s been simmering for about an hour. Does it need more salt? More spice? A touch of sweetness to balance acidity? Adjusting as you go leads to a much better final product. Remember that flavors intensify as it simmers.
- Don’t Be Afraid to Experiment (Within Reason):
- Different meats: Ground turkey, venison, or a mix can be great.
- Vegetarian version: Use extra beans, lentils, sweet potatoes, and hearty mushrooms for a delicious vegetarian campfire chili. Increase vegetable broth.
- Spice level: Tailor the heat to your group’s preference by adjusting cayenne, jalapeños, or adding chipotle powder for a smokier heat.
- Secret ingredients: Some people swear by a dash of cinnamon, a square of dark chocolate, or even a splash of bourbon. Find what you love!
Frequently Asked Questions (FAQ) about Campfire Chili
- Q: Can I make this campfire chili vegetarian or vegan?
- A: Absolutely! To make it vegetarian, omit the ground beef and sausage. Increase the variety and quantity of beans (e.g., add cannellini or black-eyed peas). You can also add hearty vegetables like diced sweet potatoes, butternut squash, corn, or mushrooms (cremini or portobello work well for a “meaty” texture). Use vegetable broth instead of beef broth. For a vegan version, ensure all your canned goods and spice blends are vegan-friendly and skip any dairy toppings like cheese or sour cream, opting for vegan alternatives or avocado. The cocoa powder and smoked paprika will still lend a wonderful depth.
- Q: What if I don’t have a Dutch oven? Can I still make chili over a campfire?
- A: While a Dutch oven is ideal for its heat retention and even cooking, you can use other heavy-bottomed, lidded pots suitable for direct heat. A large stainless steel stockpot with a thick base could work, but you’ll need to be much more diligent about stirring to prevent scorching and managing the heat very carefully, as it won’t distribute heat as evenly as cast iron. Avoid thin aluminum pots as they will likely lead to burnt chili. Ensure any pot you use has heat-resistant handles or use appropriate tools to move it.
- Q: How do I best manage the fire for cooking chili for a long period?
- A: The key is a sustained bed of coals, not direct flames. Start your fire well in advance (1-2 hours) to allow wood to burn down into glowing embers. Continuously feed the side of your main fire with new logs, and as they burn down, rake the fresh coals towards your cooking area. This creates a consistent supply. A campfire grill grate that allows you to adjust the height of the pot above the coals is very helpful. Alternatively, a tripod system offers good control. You’re aiming for a medium-low heat for simmering, so you’ll need to periodically add or remove coals from under the pot.
- Q: Can I prepare parts of this recipe at home to save time at the campsite?
- A: Yes, and it’s highly recommended!
- Chop all vegetables: Onions, bell peppers, garlic, jalapeños can be chopped and stored in airtight containers.
- Pre-mix spices: Combine all your dry spices in a small bag or container.
- Brown the meat: You could even brown the ground beef and sausage at home, drain the fat, cool it, and store it in a cooler until ready to use. This significantly cuts down on cooking time and grease disposal at the campsite.
- Open cans (carefully): If you’re careful and have a way to secure them, you could open cans, but it’s generally safer to do this at the site. Rinsing beans can also be done on-site.
- A: Yes, and it’s highly recommended!
- Q: What’s the best way to store and reheat leftover campfire chili?
- A: If you have leftovers (a big “if” with this recipe!), allow the chili to cool down as much as possible. Transfer it to airtight containers. If you’re camping, store these containers in a cooler with plenty of ice or ice packs, ensuring the temperature stays below 40°F (4°C).
- Reheating at the campsite: You can reheat it gently in the Dutch oven over a low fire or on a camp stove. Stir frequently to prevent sticking.
- Reheating at home: Reheat on the stovetop over medium-low heat, or in the microwave. Chili flavors often improve the next day, so leftovers are a treat! Properly stored, it should last 3-4 days in the refrigerator.
- A: If you have leftovers (a big “if” with this recipe!), allow the chili to cool down as much as possible. Transfer it to airtight containers. If you’re camping, store these containers in a cooler with plenty of ice or ice packs, ensuring the temperature stays below 40°F (4°C).
This Campfire Chili isn’t just food; it’s an experience. The crackling fire, the camaraderie, and the incredible, smoky aroma all contribute to a dish that will warm you from the inside out and create lasting memories. Enjoy the process, and happy camping!
Print
Campfire Chili Recipe
Ingredients
-
- For the Chili Base:
-
- 2 lbs Ground Beef (80/20 chuck is ideal for flavor and moisture)
-
- 1 lb Bulk Spicy Italian Sausage (optional, but adds amazing depth) or Chorizo
-
- 2 large Yellow Onions, chopped
-
- 4–6 cloves Garlic, minced
-
- 2 Green Bell Peppers, chopped
-
- 2 Red Bell Peppers, chopped
-
- 2–3 Jalapeño Peppers, minced (seeds removed for less heat, or keep some for a kick)
-
- 2 (28 oz) cans Crushed Tomatoes
-
- 1 (15 oz) can Diced Tomatoes, undrained
-
- 1 (15 oz) can Tomato Sauce
-
- 2 (15 oz) cans Kidney Beans, rinsed and drained
-
- 1 (15 oz) can Black Beans, rinsed and drained
-
- 1 (15 oz) can Pinto Beans, rinsed and drained
-
- 1 (6 oz) can Tomato Paste
-
- 1 cup Beef Broth (low sodium preferred)
-
- 1/4 cup Apple Cider Vinegar (for a touch of tang)
-
- 2 tablespoons Olive Oil or Bacon Grease (for sautéing)
-
- For the Chili Base:
-
- Spices & Flavor Boosters:
-
- 1/4 cup Chili Powder (use a good quality blend)
-
- 2 tablespoons Smoked Paprika (essential for that smoky depth)
-
- 1 tablespoon Ground Cumin
-
- 1 tablespoon Dried Oregano
-
- 1 teaspoon Cayenne Pepper (adjust to your heat preference)
-
- 1 teaspoon Cocoa Powder (unsweetened, for richness and depth – trust me!)
-
- 1 teaspoon Ground Black Pepper
-
- 2 teaspoons Salt (or to taste)
-
- 1–2 Bay Leaves
-
- Optional: 1 small can (4 oz) diced green chilies
-
- Optional: 1-2 tablespoons brown sugar or maple syrup (to balance acidity)
-
- Optional: A splash of dark beer or strong coffee (for complexity)
-
- Spices & Flavor Boosters:
Instructions
-
- Prepare Your Fire:
-
- Start your campfire well in advance. You want a good bed of hot coals, not roaring flames directly under your pot. Aim for medium, consistent heat. You can achieve this by letting the fire burn down a bit or by raking coals to one side.
-
- Set up a sturdy campfire grill grate over the coals, or use a tripod with a chain to hang your Dutch oven. Ensure it’s stable.
-
- Prepare Your Fire:
-
- Sauté Aromatics & Brown Meat:
-
- Place the Dutch oven over the coals to preheat. Add the olive oil or bacon grease.
-
- Once hot, add the chopped onions and bell peppers. Sauté for 5-7 minutes until they begin to soften, stirring occasionally.
-
- Add the minced garlic and jalapeños (if using) and cook for another 1-2 minutes until fragrant. Be careful not to burn the garlic.
-
- Push the vegetables to the side of the pot. Add the ground beef and Italian sausage (if using) to the Dutch oven. Break it up with a sturdy spoon. Cook until browned, stirring frequently to ensure even cooking. This step is crucial for developing deep flavor.
-
- If there’s excessive grease, carefully tilt the pot (away from the fire!) and spoon some out. A little fat is good for flavor, though.
-
- Sauté Aromatics & Brown Meat:
-
- Build the Flavor Base:
-
- Stir in the tomato paste and cook for 2-3 minutes, stirring constantly. This “toasts” the tomato paste and deepens its flavor.
-
- Add all the spices: chili powder, smoked paprika, cumin, oregano, cayenne pepper, cocoa powder, salt, and black pepper. Stir well to coat the meat and vegetables, and cook for another 1-2 minutes until the spices are fragrant. This blooms the spices and intensifies their aroma.
-
- Build the Flavor Base:
-
- Add Liquids and Beans:
-
- Pour in the crushed tomatoes, diced tomatoes (undrained), and tomato sauce.
-
- Add the rinsed and drained kidney beans, black beans, and pinto beans.
-
- Stir in the beef broth and apple cider vinegar. If using, add the optional diced green chilies, brown sugar/maple syrup, and dark beer/coffee now.
-
- Add the bay leaves.
-
- Stir everything together thoroughly until well combined.
-
- Add Liquids and Beans:
-
- Simmer to Perfection:
-
- Bring the chili to a gentle simmer. This is where fire management is key. You may need to adjust the pot’s position over the coals or add/remove coals to maintain a low, steady heat. You don’t want a rolling boil, just a gentle “blurp, blurp.”
-
- Once simmering, cover the Dutch oven with its lid. If your lid has a rim, you can place a few hot coals on top for more even heat distribution, Dutch oven style.
-
- Let the chili simmer for at least 1.5 to 2 hours, stirring every 20-30 minutes. The longer it simmers, the more the flavors will meld and deepen. If it gets too thick, add a little more beef broth or water.
-
- Taste the chili after about an hour and adjust seasonings if needed. You might want more salt, spice, or a touch more sweetness.
-
- Simmer to Perfection:
-
- Rest and Serve:
-
- Once the chili has reached your desired consistency and flavor, carefully remove the Dutch oven from the fire. Be extremely cautious as it will be very hot.
-
- Let the chili rest for at least 15-20 minutes before serving. This allows the flavors to meld even further and cools it down slightly.
-
- Remove the bay leaves before serving.
-
- Rest and Serve:
Nutrition
- Serving Size: one normal portion
- Calories: 550-650


