

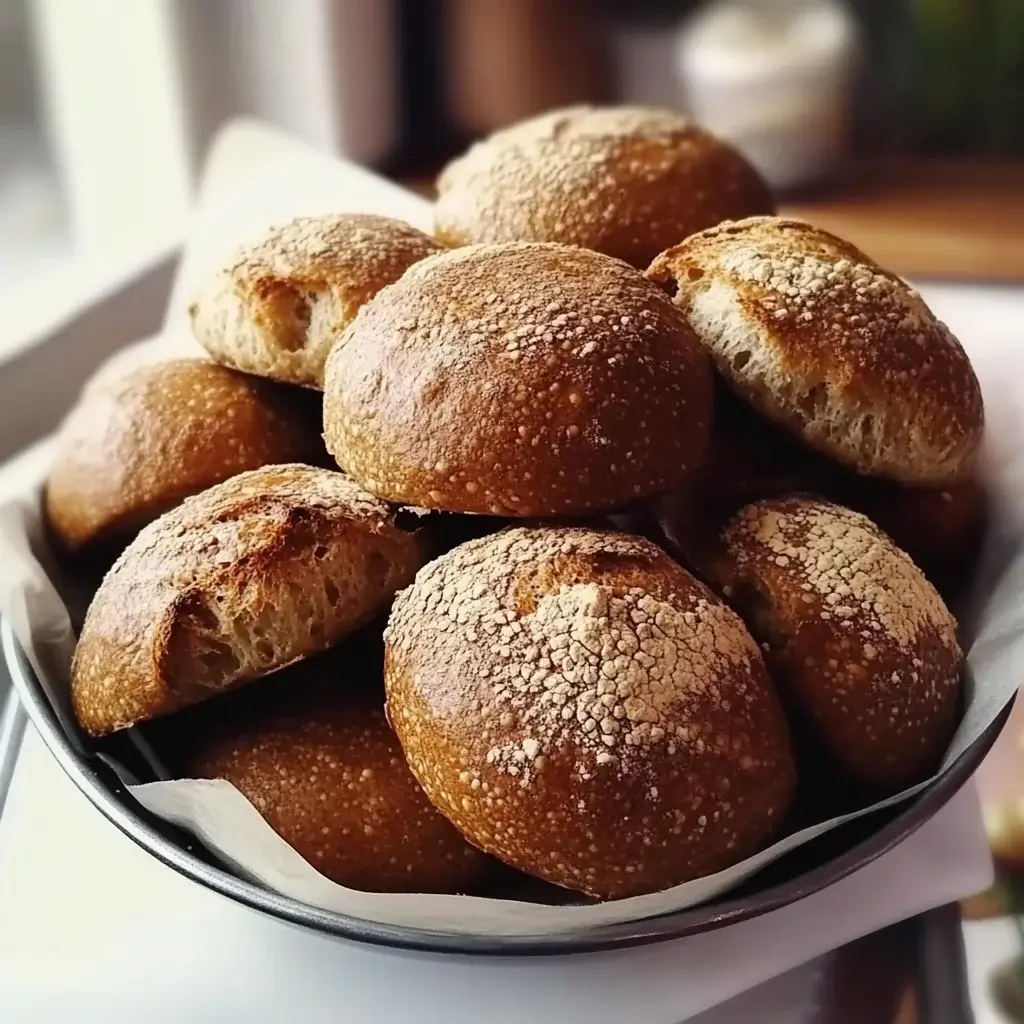
There’s something incredibly comforting about the aroma of freshly baked bread wafting through the house, and when it’s these homemade Brown Bread Rolls, that comfort level skyrockets. I remember the first time I decided to tackle these; I was a bit intimidated by yeast, as many home bakers are. But this recipe, with its straightforward steps and wholesome ingredients, quickly became a family favourite. The kids, who usually turn their noses up at anything “brown,” devour these rolls with an enthusiasm that still surprises me. They love them warm from the oven, slathered with butter that melts into pools of golden goodness, or used to mop up the last bits of soup on a chilly evening. The slightly sweet, nutty flavour from the whole wheat and molasses, combined with a soft, yielding crumb, makes them utterly irresistible. They’re not just bread; they’re little bundles of joy that bring everyone to the table, sparking conversations and creating memories. Making these brown bread rolls has become a weekend ritual, a simple pleasure that yields delicious results every single time, proving that homemade goodness is always worth the effort.
The Allure of Homemade Brown Bread Rolls: More Than Just a Side Dish
In a world of quick fixes and store-bought convenience, taking the time to bake from scratch can feel like a luxurious act of self-care and nourishment. Homemade brown bread rolls, with their hearty texture and rich, slightly sweet flavour, stand as a testament to this. Unlike their often overly processed white counterparts, these rolls bring a depth of character to your table, offering not just sustenance but a truly satisfying eating experience.
The magic begins with simple, wholesome ingredients. Whole wheat flour, the star of the show, lends a rustic charm and a nutritional punch. A touch of molasses or dark brown sugar deepens the colour and imparts a subtle caramel sweetness that complements the earthy notes of the grain. The yeast, that tiny living organism, works its quiet wonders, transforming a humble mixture into an airy, light dough, ready to be shaped into perfect little portions.
Baking these rolls is a sensory journey. The feel of the dough coming together, soft and pliable under your hands as you knead it, is therapeutic. The anticipation builds as the dough proofs, doubling in size, a visible promise of the deliciousness to come. And then, the aroma – oh, the aroma! As they bake, your kitchen fills with a warm, inviting scent that’s universally comforting, a signal that something wonderful is happening.
These brown bread rolls are incredibly versatile. They are the perfect accompaniment to a hearty stew or a comforting soup, ideal for soaking up every last drop of flavourful broth. They make fantastic mini sandwiches or sliders, holding up well to various fillings. Served warm with a pat of butter and a drizzle of honey, they transform a simple breakfast or snack into a special treat. Whether you’re hosting a dinner party or enjoying a quiet family meal, these rolls add a touch of homemade elegance and warmth that store-bought options simply can’t replicate. Embrace the process, enjoy the wholesome goodness, and share the joy of these delightful brown bread rolls.
Complete Ingredients with Amounts: Your Pantry Checklist for Perfect Brown Bread Rolls
Before you embark on your baking adventure, let’s gather all the necessary components. Precision in baking is key, so measuring your ingredients accurately will set you up for success. These amounts will yield approximately 12-15 delicious rolls.
- For the Yeast Activation:
- Warm Water: 1/2 cup (120ml), (around 105-115°F or 40-46°C – lukewarm to the touch)
- Active Dry Yeast: 2 ¼ teaspoons (1 standard packet or 7g)
- Granulated Sugar (or Honey): 1 teaspoon (to feed the yeast)
- For the Dough:
- Whole Wheat Flour: 2 cups (approx. 240g) – plus more for dusting
- All-Purpose Flour (or Bread Flour): 1 ½ cups (approx. 180g) – this helps with a softer texture
- Warm Milk: 1 cup (240ml), (can be dairy or a neutral-flavored plant-based milk, warmed to a similar temperature as the water)
- Unsalted Butter: ¼ cup (57g), melted and slightly cooled (or neutral oil like canola or light olive oil)
- Molasses (Unsulphured): ¼ cup (60ml) – for that classic brown bread flavour and colour (can substitute with dark brown sugar, packed, but molasses is preferred for authenticity)
- Salt: 1 ½ teaspoons
- Large Egg: 1 (optional, for a richer dough and golden crust – use in the dough or as an egg wash)
- For Finishing (Optional):
- Egg Wash: 1 egg beaten with 1 tablespoon of water or milk (for a shiny, golden-brown crust)
- Rolled Oats or Seeds (like sesame, poppy, or flax): For topping, if desired
A Note on Flours: The combination of whole wheat and all-purpose flour provides a good balance of flavour, nutrition, and texture. Using only whole wheat flour can result in denser rolls. Bread flour can be substituted for all-purpose flour for a chewier texture due to its higher protein content. Ensure your flours are fresh for the best results.
Instructions: Crafting Your Brown Bread Rolls from Scratch
Follow these steps carefully, and you’ll be rewarded with bakery-quality brown bread rolls. Baking is a science, but it’s also an art, so enjoy the process!
Step 1: Activate the Yeast (Proofing)
- In a small bowl, combine the warm water (ensure it’s not too hot, or it will kill the yeast) and the 1 teaspoon of granulated sugar or honey.
- Sprinkle the active dry yeast over the water.
- Let it sit undisturbed for 5-10 minutes. You should see it become foamy or bubbly on the surface. This indicates the yeast is alive and active. If it doesn’t foam, your yeast may be old, or the water might have been too hot/cold; you’ll need to start over with fresh yeast.
Step 2: Combine Wet Ingredients
- In a large mixing bowl (or the bowl of your stand mixer), combine the warm milk, melted butter, and molasses.
- If using an egg in the dough, lightly whisk it and add it to this mixture.
- Stir well to ensure the molasses is fully incorporated.
Step 3: Combine Dry Ingredients and Start Mixing
- In a separate medium bowl, whisk together the whole wheat flour, all-purpose (or bread) flour, and salt. This helps distribute the salt evenly.
- Once the yeast mixture is foamy, pour it into the large bowl with the wet ingredients (milk, butter, molasses mixture). Stir to combine.
- Gradually add the dry flour mixture to the wet ingredients, about one cup at a time. Mix with a wooden spoon or the dough hook attachment of your stand mixer on low speed until a shaggy dough begins to form. You may not need all the flour, or you might need a little extra, depending on humidity and flour type. The dough should start to pull away from the sides of the bowl but will still be slightly sticky.
Step 4: Kneading the Dough
- By Hand: Turn the dough out onto a lightly floured surface. Knead for 8-10 minutes. To knead, fold the dough over itself and push it away from you with the heel of your hand. Rotate the dough a quarter turn and repeat. The dough should become smooth, elastic, and less sticky. Add a little flour to your hands and the surface as needed to prevent sticking, but avoid adding too much, which can make the rolls tough.
- With a Stand Mixer: Using the dough hook attachment, knead on medium-low speed for 6-8 minutes. The dough should clear the sides of the bowl and become smooth and elastic. It will still be slightly tacky to the touch.
Step 5: First Rise (Bulk Fermentation)
- Lightly grease a large, clean bowl with a little oil or cooking spray.
- Form the kneaded dough into a ball and place it in the greased bowl, turning it once to coat the entire surface with oil. This prevents a dry crust from forming.
- Cover the bowl tightly with plastic wrap or a clean, damp kitchen towel.
- Place the bowl in a warm, draft-free place to rise for 1 to 1.5 hours, or until the dough has doubled in size. The ideal temperature is around 75-80°F (24-27°C). A slightly cooler environment will mean a longer rise time.
Step 6: Shaping the Rolls
- Once the dough has doubled, gently punch it down to release the air.
- Turn the dough out onto a lightly floured surface.
- Divide the dough into 12 or 15 equal pieces (depending on your desired roll size). You can use a kitchen scale for precision.
- To shape each roll, take a piece of dough, flatten it slightly, then pull the edges towards the center and pinch them together to form a seam. Turn the dough over (seam-side down) and cup your hand over it. Roll it on the counter in a circular motion to create a smooth, round ball.
- Place the shaped rolls onto a baking sheet lined with parchment paper or lightly greased. Arrange them about 1-2 inches apart if you want them to bake individually, or closer together if you prefer pull-apart style rolls.
Step 7: Second Rise (Proofing the Rolls)
- Loosely cover the baking sheet with plastic wrap (lightly greased on the side facing the rolls to prevent sticking) or a clean, dry kitchen towel.
- Let the rolls rise in a warm, draft-free place for another 30-45 minutes, or until they have visibly puffed up and nearly doubled in size. They should look soft and airy.
Step 8: Preheating and Baking
- About 20 minutes before the second rise is complete, preheat your oven to 375°F (190°C). Position an oven rack in the center of the oven.
- If using an egg wash for a shiny crust, gently brush the tops of the risen rolls with the beaten egg mixture. If desired, sprinkle with rolled oats or seeds at this point.
- Bake for 15-20 minutes, or until the rolls are golden brown on top and sound hollow when tapped on the bottom. An internal temperature of 190-200°F (88-93°C) on an instant-read thermometer also indicates they are done.
- If the rolls start to brown too quickly, you can loosely tent them with aluminum foil.
Step 9: Cooling
- Carefully transfer the baked rolls from the baking sheet to a wire cooling rack.
- If you like a softer crust, you can brush the tops with a little melted butter while they are still hot.
- Let them cool for at least 10-15 minutes before serving. They are delicious warm!
Enjoy your fresh, homemade brown bread rolls!
Nutrition Facts (Servings and Calories per Serving)
Understanding the nutritional profile of what we eat is increasingly important. Please note that these are estimates and can vary based on the specific ingredients used (e.g., type of milk, exact brands of flour and molasses) and the final size of your rolls.
- Servings: This recipe typically yields 12 to 15 rolls.
- Estimated Calories per Serving (1 roll, assuming 12 rolls per batch): Approximately 180-220 calories.
Breakdown (Approximate per roll):
- Fat: 5-7g (primarily from butter)
- Saturated Fat: 2-3g
- Cholesterol: 15-25mg (if using egg in the dough)
- Sodium: 250-300mg
- Carbohydrates: 30-35g
- Fiber: 3-4g (thanks to the whole wheat flour)
- Sugar: 6-8g (from molasses/sugar and naturally in flour/milk)
- Protein: 4-6g
These rolls offer a good source of dietary fiber due to the whole wheat content, which aids in digestion and can contribute to a feeling of fullness. Molasses also provides some minerals like iron, calcium, and magnesium, though in modest amounts per roll. Compared to standard white rolls, these brown bread rolls generally offer more fiber and a slightly richer nutrient profile. Enjoy them as part of a balanced diet.
Preparation Time: Planning Your Baking Day
Baking bread is a process that involves both active work and patient waiting. Here’s a breakdown to help you plan your time effectively:
- Active Preparation Time:
- Yeast Activation: 5-10 minutes
- Mixing Ingredients: 10-15 minutes
- Kneading: 8-10 minutes (by hand) or 6-8 minutes (stand mixer)
- Shaping Rolls: 15-20 minutes
- Total Active Time: Approximately 40 – 55 minutes
- Inactive Time (Rising & Baking):
- First Rise (Bulk Fermentation): 1 hour to 1.5 hours
- Second Rise (Proofing Shaped Rolls): 30-45 minutes
- Baking Time: 15-20 minutes
- Total Inactive Time: Approximately 1 hour 45 minutes to 2 hours 35 minutes
- Total Overall Time:
- From start to finish, expect the entire process to take approximately 2 hours 25 minutes to 3 hours 30 minutes.
Key Considerations:
- Temperature: The rising times are highly dependent on the ambient temperature of your kitchen. A warmer room will speed up the process, while a cooler room will slow it down.
- Flexibility: While the timings are a good guide, always look for visual cues (dough doubled in size, rolls puffed up) rather than strictly adhering to the clock.
- Multitasking: During the rising times, you can easily work on other kitchen tasks or simply relax.
Planning ahead ensures that your bread-making experience is enjoyable and stress-free. The delicious reward at the end makes every minute worth it!
How to Serve: Elevating Your Brown Bread Rolls
These versatile brown bread rolls are more than just a side; they can be the star or a perfect supporting act in many culinary scenarios. Here are some delightful ways to serve and enjoy them:
- Classic & Simple:
- Warm with Butter: The ultimate comfort. Serve them fresh from the oven or gently reheated, with a generous pat of good-quality salted or unsalted butter.
- With Jam or Honey: For a sweeter touch, pair with your favorite fruit jam, marmalade, or a drizzle of local honey. This makes for a lovely breakfast or tea-time treat.
- Cream Cheese: A dollop of plain or herbed cream cheese adds a tangy richness.
- Alongside Soups, Stews, and Salads:
- Soup Dippers: Perfect for soaking up hearty lentil soup, creamy tomato soup, beef stew, or a flavourful chili. Their robust texture holds up well.
- Salad Companion: Serve alongside a large, fresh garden salad or a Caesar salad for a complete and satisfying light meal.
- With Casseroles: A great accompaniment to baked pasta dishes, shepherd’s pie, or any comforting casserole.
- For Mini Sandwiches or Sliders:
- Lunchbox Heroes: Slice them horizontally and fill with deli meats (turkey, ham, roast beef), cheese (cheddar, Swiss, provolone), and a bit of lettuce or tomato for perfect mini sandwiches.
- Party Sliders: Ideal for pulled pork, beef brisket, or even mini veggie burgers. Their slight sweetness complements savory fillings beautifully.
- Breakfast Sandwiches: Fill with a scrambled egg, a slice of bacon or sausage, and a slice of cheese for a hearty start to the day.
- As Part of a Bread Basket:
- Dinner Parties: Include them in a mixed bread basket with other varieties for an impressive offering to guests.
- Holiday Meals: A wonderful addition to Thanksgiving, Christmas, or Easter dinner spreads.
- Creative Uses:
- Garlic Bread Bites: Slice, brush with garlic butter, sprinkle with Parmesan, and toast until golden.
- Croutons: If you have any leftover (unlikely!), cut them into cubes, toss with olive oil and herbs, and bake until crisp for homemade croutons.
- Bread Pudding Base: Stale rolls can be transformed into a delicious, rustic bread pudding.
- Serving Temperature:
- Warm: For the best flavour and texture, serve them warm. You can reheat them in a low oven (around 300°F or 150°C) for 5-7 minutes or briefly in a microwave.
- Room Temperature: They are also delicious at room temperature, especially within a few hours of baking.
No matter how you choose to serve them, these homemade brown bread rolls are sure to be a hit, adding a touch of wholesome goodness to any meal.
Additional Tips: Mastering Your Brown Bread Rolls
To ensure your brown bread rolls turn out perfectly every time, here are five additional tips that can make a significant difference:
- Flour Power – Measure Correctly & Know Your Flours:
- Measuring Flour: The most common mistake in baking is adding too much flour, leading to dense, dry bread. For accuracy, use the “spoon and level” method: fluff up the flour in its container, lightly spoon it into your measuring cup until it’s overflowing, then level off the excess with a straight edge. Avoid scooping directly from the bag, as this compacts the flour. Alternatively, use a kitchen scale for the most precise measurements (see gram conversions in the ingredient list).
- Understanding Flours: Whole wheat flour absorbs more liquid than all-purpose flour. The ratio in this recipe is balanced for softness, but if you decide to use 100% whole wheat, you might need to slightly increase the liquid or expect a denser roll. Bread flour has higher protein, which develops more gluten, leading to a chewier roll.
- Yeast Health is Wealth:
- Check Expiry Dates: Always use fresh yeast. Check the expiration date on the package.
- Proper Water Temperature: Yeast is a living organism. Water that’s too hot (above 120°F/49°C) will kill it, and water that’s too cold won’t activate it sufficiently. Lukewarm (105-115°F or 40-46°C) is ideal – it should feel comfortably warm on your wrist.
- Don’t Skip Proofing the Yeast: The initial 5-10 minute wait to see if your yeast mixture foams is crucial. It’s your insurance policy that the yeast is active and your bread will rise.
- The “Windowpane Test” for Kneading:
- Proper kneading develops gluten, which gives bread its structure and elasticity. To check if your dough is sufficiently kneaded, perform the windowpane test. Take a small piece of dough and gently stretch it between your fingers. If you can stretch it thin enough to see light through it without it tearing easily (like a windowpane), the gluten is well-developed. If it tears quickly, it needs more kneading. This is more reliable than just timing your kneading.
- Create a Cozy Environment for Rising:
- Yeast thrives in warmth. If your kitchen is cool, find or create a warm spot for your dough to rise. Options include:
- Inside an oven that’s turned off but has the oven light on (the light generates a little warmth).
- On top of your refrigerator (where it’s often slightly warmer).
- In a microwave next to a cup of recently boiled water (the steam creates warmth and humidity).
- Avoid drafty areas, as temperature fluctuations can hinder the rise.
- Yeast thrives in warmth. If your kitchen is cool, find or create a warm spot for your dough to rise. Options include:
- Don’t Overbake – Know the Signs of Doneness:
- Overbaking is a common culprit for dry rolls. Start checking for doneness at the lower end of the recommended baking time.
- Visual Cue: Rolls should be a deep golden brown on top.
- Sound Cue: Gently tap the bottom of a roll. If it sounds hollow, it’s likely done.
- Temperature Check (Most Accurate): The most reliable way to check for doneness is with an instant-read food thermometer. The internal temperature of the rolls should be between 190-200°F (88-93°C). This ensures they are cooked through without drying out.
By keeping these tips in mind, you’ll enhance your baking skills and consistently produce soft, flavourful, and perfectly textured brown bread rolls.
FAQ Section: Your Brown Bread Roll Queries Answered
Here are answers to some frequently asked questions about making these delicious brown bread rolls:
Q1: Can I use only whole wheat flour for this recipe?
- A: Yes, you can use 100% whole wheat flour, but be aware that the rolls will likely be denser and have a more robust, nuttier flavour. Whole wheat flour absorbs more liquid, so you might need to add an extra tablespoon or two of warm water or milk to achieve the right dough consistency (soft and slightly tacky, but not overly sticky). The crumb will also be a bit heavier. For a lighter texture while still maximizing whole grains, you could try white whole wheat flour, which is milled from a different variety of wheat and has a milder flavour and softer texture than traditional red whole wheat flour.
Q2: My dough didn’t rise! What went wrong?
- A: Several factors can cause dough not to rise:
- Inactive Yeast: Your yeast might be old or expired. Always check the date and proof it in warm water with a little sugar to ensure it’s active (it should get foamy).
- Water Temperature: Water that’s too hot (above 115-120°F or 46-49°C) can kill the yeast. Water that’s too cold won’t activate it properly.
- Not Enough Time: Dough might need more time to rise, especially in a cool environment. Be patient and look for the dough to double in size.
- Too Much Salt or Sugar: While some sugar feeds yeast, too much can hinder its activity. Salt also controls yeast, so ensure accurate measurements.
- Dough Too Stiff: If too much flour was added, the dough might be too stiff for the yeast to effectively create air pockets.
Q3: How can I store leftover brown bread rolls, and for how long?
- A:
- Room Temperature: Store completely cooled rolls in an airtight container or a zip-top bag at room temperature for up to 2-3 days. They are best enjoyed fresh.
- Freezing (Recommended for longer storage): For longer storage, freezing is the best option. Once completely cooled, wrap the rolls individually in plastic wrap, then place them in a freezer-safe bag or container. They can be frozen for up to 2-3 months.
- Reheating: To reheat, thaw frozen rolls at room temperature or in the microwave on a low setting. Then, warm them in an oven at 300-325°F (150-160°C) for 5-10 minutes until heated through, or briefly in the microwave.
Q4: Can I make the dough ahead of time?
- A: Yes, you can make the dough ahead and let it do its first rise slowly in the refrigerator. After kneading, place the dough in a lightly oiled bowl, cover it tightly with plastic wrap, and refrigerate for 8-24 hours. This slow, cold fermentation can even enhance the flavour. When ready to bake, remove the dough from the fridge, punch it down gently, and let it sit at room temperature for about 30-60 minutes to warm up slightly before shaping. Then proceed with shaping, the second rise (which might take a bit longer as the dough is cold), and baking as directed.
Q5: Can I substitute the molasses? What if I don’t have any?
- A: Molasses gives these rolls their characteristic dark colour and rich, slightly tangy-sweet flavour. If you don’t have unsulphured molasses:
- Best Substitute: Dark brown sugar (packed) can be used, though the flavour will be slightly less intense and more caramel-like. Use an equal amount (¼ cup).
- Other Options: Maple syrup or honey can also be used, but they will significantly change the flavour profile, making the rolls sweeter and less “traditionally” brown bread-like. You might also get a slightly lighter colour.
- Treacle: If you’re in a region where treacle is common (like the UK), black treacle is very similar to molasses and can be a good substitute.
For the most authentic taste and appearance of classic brown bread rolls, unsulphured molasses is highly recommended.
Brown Bread Rolls recipe
Ingredients
-
- For the Yeast Activation:
-
- Warm Water: 1/2 cup (120ml), (around 105-115°F or 40-46°C – lukewarm to the touch)
-
- Active Dry Yeast: 2 ¼ teaspoons (1 standard packet or 7g)
-
- Granulated Sugar (or Honey): 1 teaspoon (to feed the yeast)
-
- For the Yeast Activation:
-
- For the Dough:
-
- Whole Wheat Flour: 2 cups (approx. 240g) – plus more for dusting
-
- All-Purpose Flour (or Bread Flour): 1 ½ cups (approx. 180g) – this helps with a softer texture
-
- Warm Milk: 1 cup (240ml), (can be dairy or a neutral-flavored plant-based milk, warmed to a similar temperature as the water)
-
- Unsalted Butter: ¼ cup (57g), melted and slightly cooled (or neutral oil like canola or light olive oil)
-
- Molasses (Unsulphured): ¼ cup (60ml) – for that classic brown bread flavour and colour (can substitute with dark brown sugar, packed, but molasses is preferred for authenticity)
-
- Salt: 1 ½ teaspoons
-
- Large Egg: 1 (optional, for a richer dough and golden crust – use in the dough or as an egg wash)
-
- For the Dough:
-
- For Finishing (Optional):
-
- Egg Wash: 1 egg beaten with 1 tablespoon of water or milk (for a shiny, golden-brown crust)
-
- Rolled Oats or Seeds (like sesame, poppy, or flax): For topping, if desired
-
- For Finishing (Optional):
A Note on Flours: The combination of whole wheat and all-purpose flour provides a good balance of flavour, nutrition, and texture. Using only whole wheat flour can result in denser rolls. Bread flour can be substituted for all-purpose flour for a chewier texture due to its higher protein content. Ensure your flours are fresh for the best results.
Instructions
Step 1: Activate the Yeast (Proofing)
-
- In a small bowl, combine the warm water (ensure it’s not too hot, or it will kill the yeast) and the 1 teaspoon of granulated sugar or honey.
-
- Sprinkle the active dry yeast over the water.
-
- Let it sit undisturbed for 5-10 minutes. You should see it become foamy or bubbly on the surface. This indicates the yeast is alive and active. If it doesn’t foam, your yeast may be old, or the water might have been too hot/cold; you’ll need to start over with fresh yeast.
Step 2: Combine Wet Ingredients
-
- In a large mixing bowl (or the bowl of your stand mixer), combine the warm milk, melted butter, and molasses.
-
- If using an egg in the dough, lightly whisk it and add it to this mixture.
-
- Stir well to ensure the molasses is fully incorporated.
Step 3: Combine Dry Ingredients and Start Mixing
-
- In a separate medium bowl, whisk together the whole wheat flour, all-purpose (or bread) flour, and salt. This helps distribute the salt evenly.
-
- Once the yeast mixture is foamy, pour it into the large bowl with the wet ingredients (milk, butter, molasses mixture). Stir to combine.
-
- Gradually add the dry flour mixture to the wet ingredients, about one cup at a time. Mix with a wooden spoon or the dough hook attachment of your stand mixer on low speed until a shaggy dough begins to form. You may not need all the flour, or you might need a little extra, depending on humidity and flour type. The dough should start to pull away from the sides of the bowl but will still be slightly sticky.
Step 4: Kneading the Dough
-
- By Hand: Turn the dough out onto a lightly floured surface. Knead for 8-10 minutes. To knead, fold the dough over itself and push it away from you with the heel of your hand. Rotate the dough a quarter turn and repeat. The dough should become smooth, elastic, and less sticky. Add a little flour to your hands and the surface as needed to prevent sticking, but avoid adding too much, which can make the rolls tough.
-
- With a Stand Mixer: Using the dough hook attachment, knead on medium-low speed for 6-8 minutes. The dough should clear the sides of the bowl and become smooth and elastic. It will still be slightly tacky to the touch.
Step 5: First Rise (Bulk Fermentation)
-
- Lightly grease a large, clean bowl with a little oil or cooking spray.
-
- Form the kneaded dough into a ball and place it in the greased bowl, turning it once to coat the entire surface with oil. This prevents a dry crust from forming.
-
- Cover the bowl tightly with plastic wrap or a clean, damp kitchen towel.
-
- Place the bowl in a warm, draft-free place to rise for 1 to 1.5 hours, or until the dough has doubled in size. The ideal temperature is around 75-80°F (24-27°C). A slightly cooler environment will mean a longer rise time.
Step 6: Shaping the Rolls
-
- Once the dough has doubled, gently punch it down to release the air.
-
- Turn the dough out onto a lightly floured surface.
-
- Divide the dough into 12 or 15 equal pieces (depending on your desired roll size). You can use a kitchen scale for precision.
-
- To shape each roll, take a piece of dough, flatten it slightly, then pull the edges towards the center and pinch them together to form a seam. Turn the dough over (seam-side down) and cup your hand over it. Roll it on the counter in a circular motion to create a smooth, round ball.
-
- Place the shaped rolls onto a baking sheet lined with parchment paper or lightly greased. Arrange them about 1-2 inches apart if you want them to bake individually, or closer together if you prefer pull-apart style rolls.
Step 7: Second Rise (Proofing the Rolls)
-
- Loosely cover the baking sheet with plastic wrap (lightly greased on the side facing the rolls to prevent sticking) or a clean, dry kitchen towel.
-
- Let the rolls rise in a warm, draft-free place for another 30-45 minutes, or until they have visibly puffed up and nearly doubled in size. They should look soft and airy.
Step 8: Preheating and Baking
-
- About 20 minutes before the second rise is complete, preheat your oven to 375°F (190°C). Position an oven rack in the center of the oven.
-
- If using an egg wash for a shiny crust, gently brush the tops of the risen rolls with the beaten egg mixture. If desired, sprinkle with rolled oats or seeds at this point.
-
- Bake for 15-20 minutes, or until the rolls are golden brown on top and sound hollow when tapped on the bottom. An internal temperature of 190-200°F (88-93°C) on an instant-read thermometer also indicates they are done.
-
- If the rolls start to brown too quickly, you can loosely tent them with aluminum foil.
Step 9: Cooling
-
- Carefully transfer the baked rolls from the baking sheet to a wire cooling rack.
-
- If you like a softer crust, you can brush the tops with a little melted butter while they are still hot.
-
- Let them cool for at least 10-15 minutes before serving. They are delicious warm!
Nutrition
- Serving Size: one normal portion
- Calories: 180-220


