

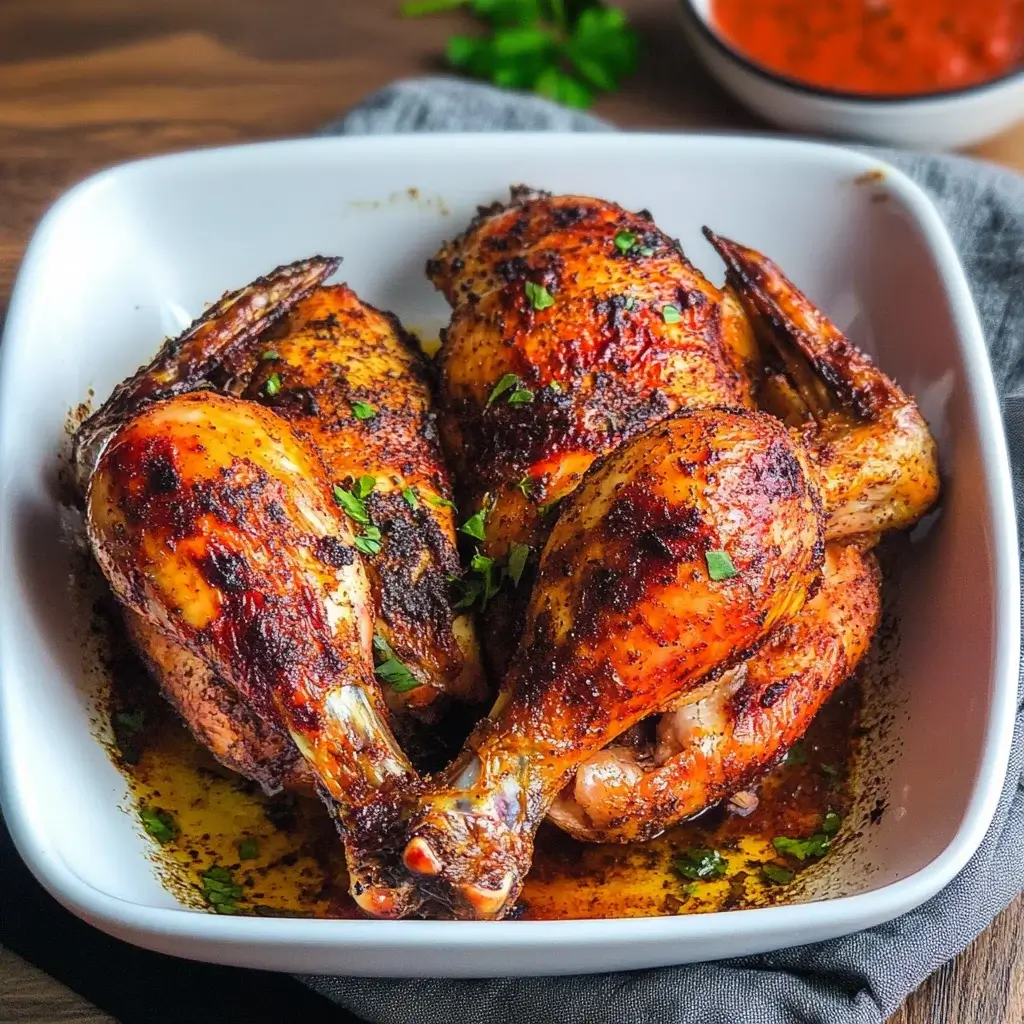
Air fryer recipes have become a staple in our household, and for good reason. Weeknight dinners need to be quick, easy, and, most importantly, delicious. When I stumbled upon the idea of air fryer spatchcock chicken, I was intrigued but slightly skeptical. Could an air fryer truly deliver a juicy, evenly cooked, and crispy whole chicken? Let me tell you, the results were phenomenal. The first time I made this, the aroma alone had everyone gathered in the kitchen, practically drooling. What emerged from the air fryer was a golden-brown, perfectly cooked bird that rivaled rotisserie chicken from the store, but tasted infinitely fresher and more flavorful. The skin was unbelievably crispy – a satisfying crackle with every bite – while the meat remained incredibly moist and tender. Even my picky eaters devoured it! This Air Fryer Spatchcock Chicken recipe has now become a regular feature on our dinner table, and I’m excited to share the magic with you. Prepare to be amazed at how simple and rewarding it is to cook a whole chicken to absolute perfection in your air fryer.
Ingredients for Air Fryer Spatchcock Chicken
To create this incredibly flavorful and perfectly cooked Air Fryer Spatchcock Chicken, you’ll need a few key ingredients. The beauty of this recipe lies in its simplicity and the ability to customize the seasoning to your liking. Here’s what you’ll need to gather:
- 1 Whole Chicken (3-4 pounds): Opt for a chicken that comfortably fits in your air fryer basket or on the tray. A 3 to 4-pound chicken is generally ideal for most standard-sized air fryers. Ensure it’s fully thawed if frozen.
- 2 Tablespoons Olive Oil (or Avocado Oil): Olive oil or avocado oil are excellent choices for their neutral flavor and high smoke points, which are crucial for air frying at higher temperatures. These oils help to promote crispy skin and even browning.
- 2 Tablespoons Lemon Juice (Freshly Squeezed): Fresh lemon juice adds a bright, zesty flavor that complements the chicken beautifully. It also helps to tenderize the meat and enhance the overall taste profile.
- 2 Cloves Garlic (Minced): Garlic is a flavor powerhouse! Minced garlic infuses the chicken with a savory, aromatic depth. For a more intense garlic flavor, you can even use roasted garlic paste.
- 1 Tablespoon Paprika (Smoked or Sweet): Paprika provides a beautiful color and a subtle smoky or sweet flavor depending on the type you choose. Smoked paprika will add a deeper, campfire-like note, while sweet paprika will offer a milder, slightly fruity sweetness.
- 1 Tablespoon Dried Herbs (Italian Blend, Rosemary, Thyme, or Oregano): A blend of Italian herbs, or using a single herb like rosemary, thyme, or oregano, adds an herbaceous and earthy dimension to the chicken. Choose your favorite or experiment with different combinations. Fresh herbs can also be used, just double the quantity.
- 1 Teaspoon Onion Powder: Onion powder provides a subtle, savory background flavor that enhances the overall seasoning blend.
- 1 Teaspoon Salt (or to taste): Salt is crucial for seasoning the chicken properly and enhancing its natural flavors. Use kosher salt or sea salt for the best results. Adjust to your taste preferences.
- 1/2 Teaspoon Black Pepper (Freshly Ground): Freshly ground black pepper adds a pungent bite and enhances the other spices. Adjust to your spice preference.
- Optional: Red Pepper Flakes (for a touch of heat): If you enjoy a little spice, a pinch of red pepper flakes will add a pleasant warmth to the chicken without overpowering the other flavors.
- Optional: Fresh Parsley or other herbs for garnish (after cooking): Fresh parsley, cilantro, or chives can be sprinkled over the cooked chicken for a pop of color and freshness before serving.
Ingredient Notes & Substitutions:
- Chicken Size: While 3-4 pounds is ideal, you can adjust cooking time slightly for larger or smaller chickens. Always use a meat thermometer to ensure the chicken is cooked to a safe internal temperature.
- Oil Options: Besides olive oil and avocado oil, you can also use melted coconut oil (refined for neutral flavor) or even clarified butter (ghee).
- Herb Variations: Feel free to experiment with other dried herbs like poultry seasoning, sage, or marjoram. For a Mediterranean twist, consider using oregano, basil, and mint. For a more robust flavor profile, try rosemary and thyme.
- Spice Level: Adjust the amount of paprika and red pepper flakes to control the spice level. For a completely mild version, omit the red pepper flakes and use sweet paprika. For more heat, add cayenne pepper or chili powder.
- Lemon Alternatives: If you don’t have lemon, you can use lime juice or apple cider vinegar for a similar tangy note.
- Garlic Alternatives: Garlic powder can be used in a pinch, but fresh garlic provides a much more vibrant flavor. You can also use roasted garlic for a sweeter, mellower garlic taste.
By using these simple yet flavorful ingredients, you’ll create an Air Fryer Spatchcock Chicken that is bursting with taste and perfectly cooked every time.
Instructions: How to Make Air Fryer Spatchcock Chicken
Spatchcocking a chicken might sound intimidating, but it’s actually a straightforward technique that significantly reduces cooking time and ensures even cooking, especially in an air fryer. Follow these step-by-step instructions to create a perfectly spatchcocked and air-fried chicken:
Step 1: Prepare the Chicken for Spatchcocking
- Safety First: Ensure your work surface is clean and sanitized. Wash your hands thoroughly before and after handling raw chicken.
- Remove Giblets: Remove the chicken from its packaging and check the cavity for any giblets (neck, gizzards, liver, heart). These are usually found in a small bag. Discard or save for making stock.
- Pat Dry: Pat the chicken thoroughly dry with paper towels, both inside and out. This is crucial for achieving crispy skin. Excess moisture will steam the chicken instead of allowing it to crisp up.
- Position the Chicken: Place the chicken breast-side down on a cutting board with the legs facing you.
Step 2: Spatchcocking the Chicken (Removing the Backbone)
- Locate the Backbone: Feel for the backbone running along the center of the chicken. It’s the spine of the chicken.
- Cut Along One Side of the Backbone: Using sharp kitchen shears (poultry shears are ideal, but strong kitchen shears will work), start at the tail end of the chicken and cut along one side of the backbone, from the tail to the neck. Cut through the ribs as you go. You may need to apply some pressure.
- Cut Along the Other Side of the Backbone: Repeat the process on the other side of the backbone. You should now have removed the entire backbone. You can save the backbone for making chicken stock.
- Open the Chicken: Open the chicken like a book. You will see the breastbone.
- Flatten the Chicken (Optional but Recommended): To help the chicken lay flatter, you can make a small incision in the cartilage of the breastbone (the ridge in the center). Then, press firmly on the breastbone to flatten the chicken. You might hear a slight crack – this is normal.
Step 3: Season the Spatchcocked Chicken
- Prepare the Seasoning Mix: In a small bowl, combine olive oil, lemon juice, minced garlic, paprika, dried herbs (Italian blend, rosemary, thyme, or oregano), onion powder, salt, and black pepper. Mix well to create a marinade/rub.
- Season Under the Skin (Optional but Enhances Flavor): Gently loosen the skin of the chicken from the breast meat and thighs, being careful not to tear it completely. Spoon some of the seasoning mixture under the skin, directly onto the meat. This will infuse flavor directly into the chicken and help keep the meat moist.
- Season the Entire Chicken: Rub the remaining seasoning mixture all over the outside of the chicken, ensuring you coat every part, including the underside and inside cavity. Massage the seasoning into the chicken.
- Marinate (Optional but Recommended for Deeper Flavor): For the best flavor, allow the chicken to marinate in the refrigerator for at least 30 minutes, or up to 4 hours. This allows the flavors to penetrate the chicken and tenderize the meat. If you are short on time, you can skip marinating and proceed directly to air frying.
Step 4: Air Fry the Spatchcock Chicken
- Preheat Air Fryer: Preheat your air fryer to 380°F (190°C). Preheating is important for even cooking and crispy skin.
- Place Chicken in Air Fryer: Place the spatchcocked chicken, skin-side up, in the air fryer basket or on the air fryer tray. Ensure it fits in a single layer without overcrowding. If your air fryer is smaller, you may need to cut the chicken in half or cook it in two batches.
- Air Fry: Air fry for 40-50 minutes, or until the internal temperature reaches 165°F (74°C) in the thickest part of the thigh, away from the bone. Cooking time will vary depending on the size of your chicken and your specific air fryer model.
- Check for Doneness: Use a meat thermometer to check the internal temperature. Insert the thermometer into the thickest part of the thigh, avoiding the bone. The chicken is done when it reaches 165°F (74°C). The juices should run clear when pierced with a fork, but a thermometer is the most reliable way to check for doneness.
- Crisp the Skin (If Needed): If the skin is not as crispy as you’d like after cooking, you can increase the air fryer temperature to 400°F (200°C) for the last 2-3 minutes of cooking. Watch carefully to prevent burning.
- Rest the Chicken: Once cooked, remove the chicken from the air fryer and let it rest on a cutting board for 10-15 minutes before carving. Resting allows the juices to redistribute throughout the chicken, resulting in a more moist and tender bird. Tent loosely with foil while resting.
Step 5: Carve and Serve
- Carve the Chicken: After resting, carve the chicken into serving pieces. You can separate the thighs, drumsticks, wings, and breast meat.
- Garnish (Optional): Garnish with fresh parsley or other fresh herbs for a pop of color and freshness.
- Serve: Serve immediately and enjoy your incredibly delicious and perfectly cooked Air Fryer Spatchcock Chicken!
Following these detailed instructions will guide you through each step of making this fantastic air fryer recipe, ensuring a delicious and satisfying meal every time.
Nutrition Facts: Air Fryer Spatchcock Chicken
(Estimated Nutrition Facts – may vary based on chicken size, ingredients, and serving size)
Servings: Approximately 4-6 servings
Serving Size: 1/4 to 1/6 of the chicken (depending on size)
Estimated Nutrition per Serving (per 1/6 of the chicken, skin-on):
- Calories: 450-550
- Protein: 50-60 grams
- Fat: 25-35 grams
- Saturated Fat: 7-10 grams
- Unsaturated Fat: 15-25 grams
- Cholesterol: 200-250 mg
- Sodium: 400-600 mg (depending on salt added)
- Carbohydrates: 2-3 grams
- Fiber: 0 grams
- Sugar: 1-2 grams
Important Notes on Nutrition:
- These are estimated values and can vary depending on the specific ingredients used, the size of the chicken, and the portion size.
- Nutritional values are calculated for chicken with skin on. Removing the skin will significantly reduce the fat and calorie content.
- Air frying uses significantly less oil compared to deep frying or pan-frying, making it a healthier cooking method.
- Chicken is a lean source of protein and essential nutrients like niacin, selenium, and vitamin B6.
- To get a more accurate nutritional breakdown, you can use online nutritional calculators and input the specific ingredients and serving sizes you use.
This Air Fryer Spatchcock Chicken is not only delicious but also a relatively healthy option, especially when compared to other methods of cooking whole chicken. It’s a great source of protein and can be part of a balanced diet.
Preparation Time
The beauty of Air Fryer Spatchcock Chicken is its relatively quick preparation and cooking time. Here’s a breakdown of the time involved:
- Prep Time: 20-25 minutes
- This includes:
- Preparing the chicken (rinsing, patting dry, removing giblets): 5 minutes
- Spatchcocking the chicken (removing the backbone): 10 minutes
- Preparing the seasoning mix: 5 minutes
- Seasoning the chicken: 5 minutes
- This includes:
- Marination Time (Optional but Recommended): 30 minutes to 4 hours (or longer for deeper flavor)
- While marinating is optional, it significantly enhances the flavor and tenderness of the chicken. Even a short 30-minute marination period makes a difference.
- Air Fry Time: 40-50 minutes
- This depends on the size of your chicken and your air fryer model. Always use a meat thermometer to ensure the chicken is cooked to a safe internal temperature of 165°F (74°C).
- Resting Time: 10-15 minutes
- Resting is crucial for juicy and tender chicken. Don’t skip this step!
Total Time (Without Marinating): Approximately 1 hour 10 minutes – 1 hour 30 minutes
Total Time (With Marinating): Approximately 1 hour 40 minutes – 5 hours 30 minutes (depending on marinating time)
Time-Saving Tips:
- Pre-mince Garlic: Use pre-minced garlic from a jar to save a few minutes on prep.
- Pre-mixed Herb Blends: Use a pre-mixed Italian herb blend or poultry seasoning to simplify the seasoning process.
- Skip Marinating (If Short on Time): While marinating is recommended, you can still achieve delicious results without it if you’re pressed for time. Just ensure the chicken is thoroughly seasoned.
- Sharp Kitchen Shears: Using sharp kitchen shears will make spatchcocking the chicken much easier and faster.
Even with marinating, this Air Fryer Spatchcock Chicken is a relatively quick and easy meal to prepare, especially compared to roasting a whole chicken in a conventional oven, which can take significantly longer. It’s perfect for weeknight dinners when you want a flavorful and impressive meal without spending hours in the kitchen.
How to Serve Air Fryer Spatchcock Chicken
Air Fryer Spatchcock Chicken is incredibly versatile and pairs well with a wide variety of side dishes and accompaniments. Here are some delicious ways to serve it:
Classic Sides:
- Roasted Vegetables:
- Roasted Potatoes: Crispy roasted potatoes are a perfect match for chicken. Toss them with olive oil, herbs, and garlic before roasting.
- Roasted Carrots: Sweet and tender roasted carrots, perhaps glazed with honey or maple syrup, complement the savory chicken beautifully.
- Roasted Broccoli or Asparagus: Quickly roasted broccoli or asparagus with a sprinkle of Parmesan cheese or lemon zest add a healthy and flavorful element.
- Roasted Brussels Sprouts: Crispy Brussels sprouts, especially when roasted with bacon or balsamic glaze, provide a delightful contrast to the chicken.
- Mashed Potatoes or Creamy Polenta: Smooth and creamy mashed potatoes or polenta are perfect for soaking up the delicious chicken juices and gravy (if you choose to make one).
- Rice or Quinoa: Serve with fluffy white rice, brown rice, or quinoa for a simple and satisfying side. Consider adding herbs or lemon zest to the rice for extra flavor.
- Salads:
- Garden Salad: A fresh garden salad with mixed greens, tomatoes, cucumbers, and a light vinaigrette provides a refreshing contrast to the richness of the chicken.
- Caesar Salad: A classic Caesar salad with crisp romaine lettuce, croutons, Parmesan cheese, and creamy Caesar dressing is always a crowd-pleaser.
- Potato Salad or Coleslaw: For a more casual meal, serve with potato salad, coleslaw, or macaroni salad.
Sauces and Dips:
- Gravy: Classic chicken gravy made with chicken broth and pan drippings (if any from the air fryer, though often minimal) is a comforting and traditional accompaniment.
- Lemon-Herb Sauce: Whisk together olive oil, lemon juice, chopped fresh herbs (parsley, thyme, rosemary), and garlic for a bright and flavorful sauce.
- Garlic Aioli: Creamy garlic aioli adds a rich and savory element.
- Chimichurri Sauce: A vibrant and herbaceous chimichurri sauce made with parsley, cilantro, garlic, vinegar, and olive oil provides a zesty and fresh flavor.
- BBQ Sauce: For a more casual and smoky flavor profile, serve with your favorite BBQ sauce.
Complete Meal Ideas:
- Chicken and Veggie Bowls: Serve the carved chicken over a bed of quinoa or rice with roasted vegetables, avocado, and a drizzle of lemon-herb sauce or tahini dressing.
- Chicken Sandwiches or Wraps: Shred leftover chicken and use it to make delicious sandwiches or wraps with your favorite toppings like lettuce, tomato, avocado, and mayonnaise or aioli.
- Chicken Tacos or Fajitas: Shred the chicken and use it as filling for tacos or fajitas. Serve with tortillas, salsa, guacamole, sour cream, and your favorite taco toppings.
Serving Suggestions for Different Occasions:
- Weeknight Dinner: Keep it simple with roasted potatoes and a green salad for a quick and easy meal.
- Weekend Family Meal: Serve with mashed potatoes, roasted vegetables, gravy, and dinner rolls for a more elaborate and comforting family dinner.
- Potluck or Gathering: Air Fryer Spatchcock Chicken is a fantastic dish to bring to a potluck or gathering. It’s impressive, flavorful, and travels well. Serve it alongside a big salad and some bread.
No matter how you choose to serve it, Air Fryer Spatchcock Chicken is sure to be a hit. Its versatility and delicious flavor make it a perfect centerpiece for any meal.
Additional Tips for Perfect Air Fryer Spatchcock Chicken
To ensure your Air Fryer Spatchcock Chicken turns out perfectly juicy, crispy, and flavorful every time, here are five additional tips:
- Ensure Chicken is Fully Thawed and Pat Dry: Starting with a fully thawed chicken is crucial for even cooking. If the chicken is even partially frozen, it will cook unevenly and may not reach a safe internal temperature in the allotted time. Patting the chicken thoroughly dry with paper towels, both inside and out, is equally important. Dry skin crisps up beautifully in the air fryer, while moisture will lead to steaming and soggy skin.
- Don’t Overcrowd the Air Fryer: Overcrowding the air fryer basket or tray will prevent proper air circulation, leading to uneven cooking and less crispy skin. Ensure the chicken is placed in a single layer with some space around it for air to circulate. If your air fryer is smaller, you may need to cut the chicken in half or cook it in two batches. Cooking in batches, if necessary, is better than overcrowding.
- Use a Meat Thermometer for Accuracy: Relying solely on cooking time is not always accurate, as air fryers can vary in temperature and cooking power. The most reliable way to ensure your chicken is cooked to perfection and safe to eat is to use a meat thermometer. Insert the thermometer into the thickest part of the thigh, away from the bone, and ensure it reaches an internal temperature of 165°F (74°C). This will guarantee juicy and safely cooked chicken every time.
- Rest the Chicken After Cooking: Resist the temptation to carve and serve the chicken immediately after it comes out of the air fryer. Resting the chicken for 10-15 minutes is essential for allowing the juices to redistribute throughout the meat. This results in a significantly more moist and tender chicken. Tent the chicken loosely with foil while it rests to keep it warm.
- Experiment with Seasoning and Marinades: While the basic seasoning in this recipe is delicious, don’t be afraid to experiment and customize the flavors to your liking. Try different herb combinations, spice blends, or marinades. Consider using a dry rub for extra crispy skin or a wet marinade for deeper flavor penetration. Some flavor variations to try:
- Lemon-Herb: Increase the lemon juice and fresh herbs like rosemary, thyme, and oregano.
- Spicy Cajun: Add Cajun seasoning, cayenne pepper, and smoked paprika for a fiery kick.
- Mediterranean: Use oregano, basil, mint, and lemon zest for a fresh and vibrant flavor.
- Asian-Inspired: Marinate in soy sauce, ginger, garlic, and sesame oil for an Asian-inspired twist.
By following these additional tips, you’ll be well on your way to mastering Air Fryer Spatchcock Chicken and creating consistently delicious and impressive meals.
Frequently Asked Questions (FAQ) About Air Fryer Spatchcock Chicken
Here are some frequently asked questions to help you troubleshoot and perfect your Air Fryer Spatchcock Chicken:
Q1: Why Spatchcock the Chicken? What are the Benefits?
A: Spatchcocking, or butterflying, a chicken involves removing the backbone and flattening the bird. This technique offers several key benefits:
- Faster Cooking: Flattening the chicken exposes more surface area, allowing it to cook much faster than a whole, unstuffed chicken.
- Even Cooking: Spatchcocking ensures the chicken cooks more evenly, preventing the breast meat from drying out while the thighs and legs are still cooking.
- Crispier Skin: The flattened shape promotes better air circulation around the chicken, resulting in all-over crispy skin.
- Easier Carving: A spatchcocked chicken is flatter and easier to carve compared to a whole roasted chicken.
Q2: Can I Use a Larger or Smaller Chicken? How Do I Adjust Cooking Time?
A: Yes, you can use chickens of different sizes. However, you’ll need to adjust the cooking time accordingly. A smaller chicken (2-3 pounds) will cook faster, while a larger chicken (4-5 pounds) will require more time. Always use a meat thermometer to ensure the chicken reaches an internal temperature of 165°F (74°C) in the thickest part of the thigh. Start checking the temperature around 35-40 minutes for a smaller chicken and increase the cooking time as needed. Add 5-10 minutes for each additional pound of chicken as a general guideline, but always rely on the thermometer.
Q3: My Chicken Skin Isn’t Crispy Enough. What Can I Do?
A: If your chicken skin isn’t as crispy as you’d like, here are a few tips:
- Ensure Chicken is Dry: Make absolutely sure the chicken is patted thoroughly dry before seasoning and air frying. Moisture is the enemy of crispy skin.
- Sufficient Oil: While air frying uses less oil, a little oil is still necessary to promote crisping. Ensure the chicken is lightly coated with oil.
- High Heat at the End: For the last 2-3 minutes of cooking, increase the air fryer temperature to 400°F (200°C). Watch carefully to prevent burning.
- Don’t Overcrowd: Ensure proper air circulation by not overcrowding the air fryer.
- Skin Side Up: Always air fry the chicken skin-side up initially to allow the skin to render and crisp.
Q4: Can I Marinate the Chicken Overnight?
A: Yes, you can marinate the chicken overnight for even deeper flavor. In fact, marinating for longer periods (up to 12 hours) can enhance the flavor and tenderness of the chicken even more. If marinating overnight, ensure the chicken is stored in a covered container in the refrigerator.
Q5: Is it Safe to Cook Chicken in an Air Fryer?
A: Yes, it is absolutely safe to cook chicken in an air fryer, as long as you follow proper food safety guidelines and ensure the chicken reaches a safe internal temperature of 165°F (74°C). Air frying cooks food by circulating hot air, which is a safe and effective cooking method. Always use a meat thermometer to confirm doneness and practice good hygiene when handling raw chicken, such as washing hands and sanitizing surfaces.
Print
Air Fryer Spatchcock Chicken recipe
Ingredients
- 1 Whole Chicken (3–4 pounds): Opt for a chicken that comfortably fits in your air fryer basket or on the tray. A 3 to 4-pound chicken is generally ideal for most standard-sized air fryers. Ensure it’s fully thawed if frozen.
- 2 Tablespoons Olive Oil (or Avocado Oil): Olive oil or avocado oil are excellent choices for their neutral flavor and high smoke points, which are crucial for air frying at higher temperatures. These oils help to promote crispy skin and even browning.
- 2 Tablespoons Lemon Juice (Freshly Squeezed): Fresh lemon juice adds a bright, zesty flavor that complements the chicken beautifully. It also helps to tenderize the meat and enhance the overall taste profile.
- 2 Cloves Garlic (Minced): Garlic is a flavor powerhouse! Minced garlic infuses the chicken with a savory, aromatic depth. For a more intense garlic flavor, you can even use roasted garlic paste.
- 1 Tablespoon Paprika (Smoked or Sweet): Paprika provides a beautiful color and a subtle smoky or sweet flavor depending on the type you choose. Smoked paprika will add a deeper, campfire-like note, while sweet paprika will offer a milder, slightly fruity sweetness.
- 1 Tablespoon Dried Herbs (Italian Blend, Rosemary, Thyme, or Oregano): A blend of Italian herbs, or using a single herb like rosemary, thyme, or oregano, adds an herbaceous and earthy dimension to the chicken. Choose your favorite or experiment with different combinations. Fresh herbs can also be used, just double the quantity.
- 1 Teaspoon Onion Powder: Onion powder provides a subtle, savory background flavor that enhances the overall seasoning blend.
- 1 Teaspoon Salt (or to taste): Salt is crucial for seasoning the chicken properly and enhancing its natural flavors. Use kosher salt or sea salt for the best results. Adjust to your taste preferences.
- 1/2 Teaspoon Black Pepper (Freshly Ground): Freshly ground black pepper adds a pungent bite and enhances the other spices. Adjust to your spice preference.
- Optional: Red Pepper Flakes (for a touch of heat): If you enjoy a little spice, a pinch of red pepper flakes will add a pleasant warmth to the chicken without overpowering the other flavors.
- Optional: Fresh Parsley or other herbs for garnish (after cooking): Fresh parsley, cilantro, or chives can be sprinkled over the cooked chicken for a pop of color and freshness before serving.
Instructions
Step 1: Prepare the Chicken for Spatchcocking
- Safety First: Ensure your work surface is clean and sanitized. Wash your hands thoroughly before and after handling raw chicken.
- Remove Giblets: Remove the chicken from its packaging and check the cavity for any giblets (neck, gizzards, liver, heart). These are usually found in a small bag. Discard or save for making stock.
- Pat Dry: Pat the chicken thoroughly dry with paper towels, both inside and out. This is crucial for achieving crispy skin. Excess moisture will steam the chicken instead of allowing it to crisp up.
- Position the Chicken: Place the chicken breast-side down on a cutting board with the legs facing you.
Step 2: Spatchcocking the Chicken (Removing the Backbone)
- Locate the Backbone: Feel for the backbone running along the center of the chicken. It’s the spine of the chicken.
- Cut Along One Side of the Backbone: Using sharp kitchen shears (poultry shears are ideal, but strong kitchen shears will work), start at the tail end of the chicken and cut along one side of the backbone, from the tail to the neck. Cut through the ribs as you go. You may need to apply some pressure.
- Cut Along the Other Side of the Backbone: Repeat the process on the other side of the backbone. You should now have removed the entire backbone. You can save the backbone for making chicken stock.
- Open the Chicken: Open the chicken like a book. You will see the breastbone.
- Flatten the Chicken (Optional but Recommended): To help the chicken lay flatter, you can make a small incision in the cartilage of the breastbone (the ridge in the center). Then, press firmly on the breastbone to flatten the chicken. You might hear a slight crack – this is normal.
Step 3: Season the Spatchcocked Chicken
- Prepare the Seasoning Mix: In a small bowl, combine olive oil, lemon juice, minced garlic, paprika, dried herbs (Italian blend, rosemary, thyme, or oregano), onion powder, salt, and black pepper. Mix well to create a marinade/rub.
- Season Under the Skin (Optional but Enhances Flavor): Gently loosen the skin of the chicken from the breast meat and thighs, being careful not to tear it completely. Spoon some of the seasoning mixture under the skin, directly onto the meat. This will infuse flavor directly into the chicken and help keep the meat moist.
- Season the Entire Chicken: Rub the remaining seasoning mixture all over the outside of the chicken, ensuring you coat every part, including the underside and inside cavity. Massage the seasoning into the chicken.
- Marinate (Optional but Recommended for Deeper Flavor): For the best flavor, allow the chicken to marinate in the refrigerator for at least 30 minutes, or up to 4 hours. This allows the flavors to penetrate the chicken and tenderize the meat. If you are short on time, you can skip marinating and proceed directly to air frying.
Step 4: Air Fry the Spatchcock Chicken
- Preheat Air Fryer: Preheat your air fryer to 380°F (190°C). Preheating is important for even cooking and crispy skin.
- Place Chicken in Air Fryer: Place the spatchcocked chicken, skin-side up, in the air fryer basket or on the air fryer tray. Ensure it fits in a single layer without overcrowding. If your air fryer is smaller, you may need to cut the chicken in half or cook it in two batches.
- Air Fry: Air fry for 40-50 minutes, or until the internal temperature reaches 165°F (74°C) in the thickest part of the thigh, away from the bone. Cooking time will vary depending on the size of your chicken and your specific air fryer model.
- Check for Doneness: Use a meat thermometer to check the internal temperature. Insert the thermometer into the thickest part of the thigh, avoiding the bone. The chicken is done when it reaches 165°F (74°C). The juices should run clear when pierced with a fork, but a thermometer is the most reliable way to check for doneness.
- Crisp the Skin (If Needed): If the skin is not as crispy as you’d like after cooking, you can increase the air fryer temperature to 400°F (200°C) for the last 2-3 minutes of cooking. Watch carefully to prevent burning.
- Rest the Chicken: Once cooked, remove the chicken from the air fryer and let it rest on a cutting board for 10-15 minutes before carving. Resting allows the juices to redistribute throughout the chicken, resulting in a more moist and tender bird. Tent loosely with foil while resting.
Step 5: Carve and Serve
- Carve the Chicken: After resting, carve the chicken into serving pieces. You can separate the thighs, drumsticks, wings, and breast meat.
- Garnish (Optional): Garnish with fresh parsley or other fresh herbs for a pop of color and freshness.
- Serve: Serve immediately and enjoy your incredibly delicious and perfectly cooked Air Fryer Spatchcock Chicken!
Nutrition
- Serving Size: one normal portion
- Calories: 450-550
- Sugar: 1-2 grams
- Sodium: 400-600 mg
- Fat: 25-35 grams
- Saturated Fat: 7-10 grams
- Unsaturated Fat: 15-25 grams
- Carbohydrates: 2-3 grams
- Protein: 50-60 grams
- Cholesterol: 200-250 mg


